Air Fryer Garlic Cheese Bread
In just 15 minutes, you can make the most delicious cheesy, garlicky Air Fryer Garlic Cheese Bread! Simple, scrumptious, and easy to make!
The Easiest, Cheesiest Garlic Bread Recipe
Making garlic cheese bread in the Air Fryer is a quick and easy way to enjoy a delicious snack or side dish. This simple recipe requires just a few ingredients (and maybe one surprising ingredient) and you can have it ready in under 15 minutes! No oven needed! With its crispy exterior, gooey cheese center, and garlicky flavor, this cheesy garlic bread is everyone’s favorite!


This was very easy and so delicious! The mayonnaise really makes all the difference here! It made it even more creamy! I will never make it another way again – thanks Brandie!
– Melody
Frequently Asked Questions:
Make sure you choose a thicker slice of bread. I used Italian bread but you can use French bread. I wouldn’t use something thin like a sandwich sliced bread because you need something substantial to hold the cheese.
I used mozzarella because it’s a the classic cheese to use for garlic cheese bread. You can swap it out with cheddar cheese, Monterey Jack, or any other good melting cheese you enjoy.
Additionally, I used quite a bit of cheese for this cheesy bread. We love it cheesy but you can absolutely lessen the amount to fit your preferences!
While this is an easy thing to use since most people have it in their cupboards, you can easily swap it out for fresh minced garlic or jarred garlic in its place.
I know it is nice to have stuff done for dinner ahead of time and it’s even nice if you can make an extra batch to freeze for later. With this recipe, you can do both!
You can make these earlier in the day and then reheat in the air fryer when ready to serve. You can also make a second and third batch to freeze for later. To do this, let them cool, then cover with plastic wrap or aluminum foil before freezing for up to 3 months.
I tested this recipe in a 6 quart basket Air Fryer. This is the style that a majority of Americans own. If you have a different style then you’ll need to adjust the cooking time based on your own knowledge of your particular air fryer. It’s impossible for me to test a recipe on every possible style and brand of air fryer on the market.
Just be sure to leave enough room around your bread slices so the hot air can circulate and melt the cheese on the bread evenly. If you overcrowd the basket, the bread won’t bake evenly and cheese won’t melt evenly either.
Did you forget to pull out the butter for it to soften? Don’t worry, you’re in good company! I’d be lying if I said I don’t forget quite often. Here are a few things you can do to soften butter a but more quickly:
– Fill a glass with boiling water and let it sit for a few minutes. Dump the water out and place it upside down over a standing stick of butter (on a plate) to help it soften faster.
– Roll or pound the butter in between two sheets of parchment paper (seems odd but works!)
– Cube or grate the butter. By cutting it into smaller pieces it will soften faster.
Surprisingly, it doesn’t. It is held on by the butter on the bread and because mayonnaise is added to the cheese, it helps hold it down. I recommend this for cheese toast as well. Swipe a bit of butter on the bread before adding a slice of cheese. It will keep it on as it toasts in the air fryer.
We used a whole loaf of bread for this recipe. There are normally 12 slices of bread in a loaf. Generally a serving size is 2 slices of bread, so this recipe has 6 servings. If you think one slice is enough, this could serve more.
You can enjoy these cheesy garlic bread slices with any of these delicious pasta recipes:
– Easy Baked Ziti
– Ultimate Chicken Spaghetti
– Tuscan Chicken Pasta
– Lemon Chicken Pasta
– Pizza Pasta Bake
or you can just dip them into your favorite marinara sauce!
No problem. This can be made in the oven. See my recipe here for instructions.
If you have leftovers, wait for them to cool. Then wrap them in aluminum foil and place in the fridge for 3-4 days. To reheat, pop the bread slices back in the Air Fryer for 2-3 minutes.

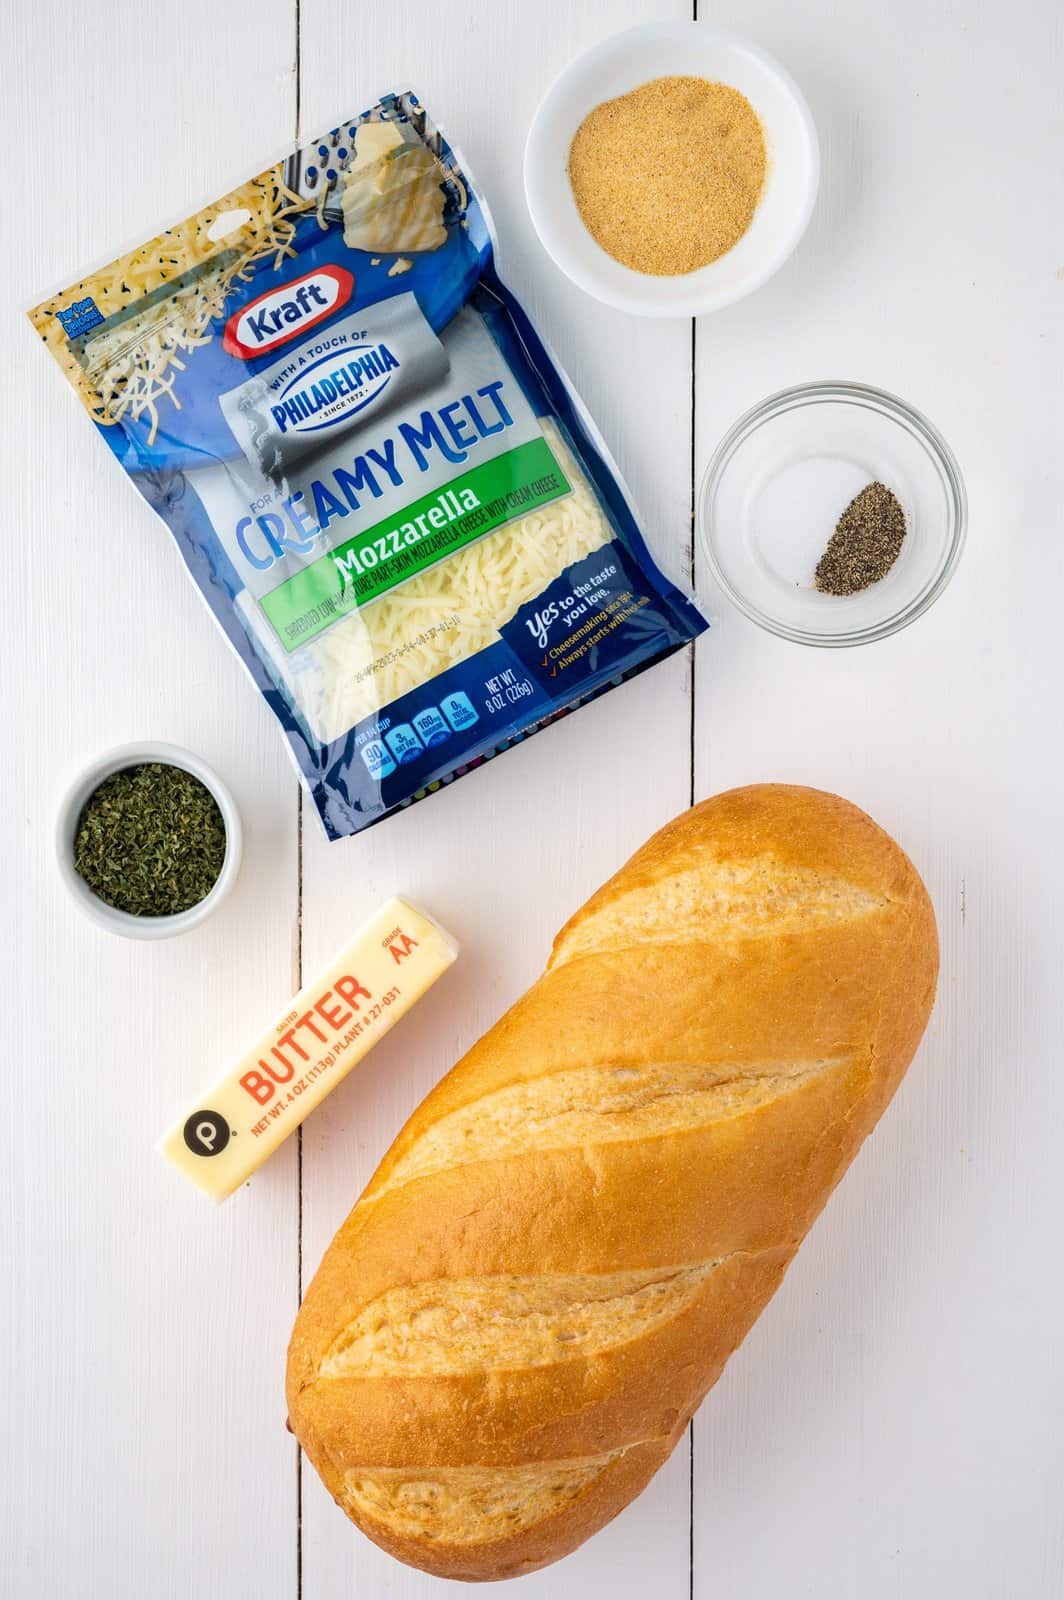
Ingredients Needed: (See Recipe Card Below For The Full Recipe)
- Italian bread or French baguette – sometimes you can find them pre-sliced, just make sure they aren’t sliced too thin.
- salted butter – you want real butter here for best results. You could use margarine if that is all you have but you’ll get better results with butter. Forgot to take the butter out to soften up? See my tips on How to Soften Butter Quickly.
- garlic powder – you can use fresh garlic here (about 3 garlic cloves.)
- salt and pepper – these are completely optional seasonings.
- mayonnaise – I know this sounds like a very weird ingredient but you don’t taste it as a separate ingredient, it adds amazing creaminess.
- Kraft creamy melt shredded mozzarella cheese – I think this melts the best but use what you have!
- dried parsley – this is optional, it just adds nice color.
How To Make Air Fryer Garlic Cheese Bread:
Slice the loaf of bread into slices about 2” thick. In a bowl mix the softened butter with the garlic powder, salt and pepper

Generously spread the garlic butter mixture onto each slice of bread. In a bowl, combine shredded mozzarella with mayonnaise. It will be a little clumpy, that’s ok. Evenly distribute the mozzarella mixture onto each slice of bread and sprinkle each with dried parsley.

Place the bread into the Air fryer and cook for 3-4 minutes at 350F degrees or until cheese has melted and the bread looks toasted (note: this can take a little longer in some air fryer so check that the cheese is fully melted and the bread is toasted). This will need to be done in batches.

Serve with marinara sauce for dipping (optional)

Craving More Air Fryer Recipes?
Originally published: February 2023
Updated and republished: December 2025

Air Fryer Garlic Cheese Bread
Ingredients
- 1 loaf Italian bread or French baguette (I used Italian)
- ½ cup (1 stick) salted butter, softened to room temperature (not melted)
- 1 Tablespoon garlic powder (or 3 cloves garlic, minced)
- ½ teaspoon salt (optional)
- ½ teaspoon pepper (optional)
- 2 cups Kraft Creamy Melt Shredded Mozzarella cheese (8 ounce bag)
- ¼ cup mayonnaise
- 1 Tablespoon dried parsley flakes (for garnish, optional)
For serving:
- marinara sauce (optional)
Instructions
- Slice 1 loaf Italian bread or French baguette into slices about 2” thick.

- In a bowl mix 1/2 cup (1 stick) salted butter, softened to room temperature, 1 Tablespoon garlic powder, ½ teaspoon salt (If using) and ½ teaspoon pepper (if using).
- In a bowl, combine 2 cups Kraft Creamy Melt Shredded Mozzarella cheese with 1/4 cup mayonnaise. It will be a little clumpy, that's okay.

- Generously spread the garlic butter mixture onto each slice of bread.
- Evenly distribute the mozzarella cheese mixture onto each piece of bread and sprinkle each with dried parsley flakes.
- Place the bread into the air fryer and cook for 3-4 minutes at 350F degrees (or until cheese has melted and bread is toasted.) This will need to be done in batches. (note: this can take a little longer in some air fryers so check that the cheese is fully melted and the bread is toasted)
- Serve with marinara sauce, for dipping (optional.)


Video

Notes
- Please refer to my FAQ’s (Frequently Asked Questions) and ingredient list above for other substitutions or for the answers to the most common questions.
- You can easily double this recipe if you are using a really large loaf or two loaves.
- This roughly makes about 12 slices of garlic cheese bread (so estimate 2 slices per person.)
- I used a 6 quart basket air fryer for this recipe. There are many different types of air fryers out there and many of them may cook differently than what I used so please use your own personal knowledge of your air fryer to judge how long to cook it for in yours.
Nutrition
Nutritional Disclaimer
“The Country Cook” is not a dietician or nutritionist, and any nutritional information shared is an estimate. If calorie count and other nutritional values are important to you, we recommend running the ingredients through whichever online nutritional calculator you prefer. Calories and other nutritional values can vary quite a bit depending on which brands were used.


Your blog is my go-to for recipes. I know I can always trust them and you write out the instructions and ingredients perfectly! Thank you for another winner!
Delicious!
This was very easy and so delicious! I took your advice in the notes section of the recipe card about adding the mayonnaise and wowsers! It made it even more creamy! I will never make it another way again – thanks Brandie!
Love hearing that so much Melody! That mayonnaise is a game changer but folks always think I’m nuts when I say I add it to cheese bread – ha! Thank you so much for taking the time to come back and comment!