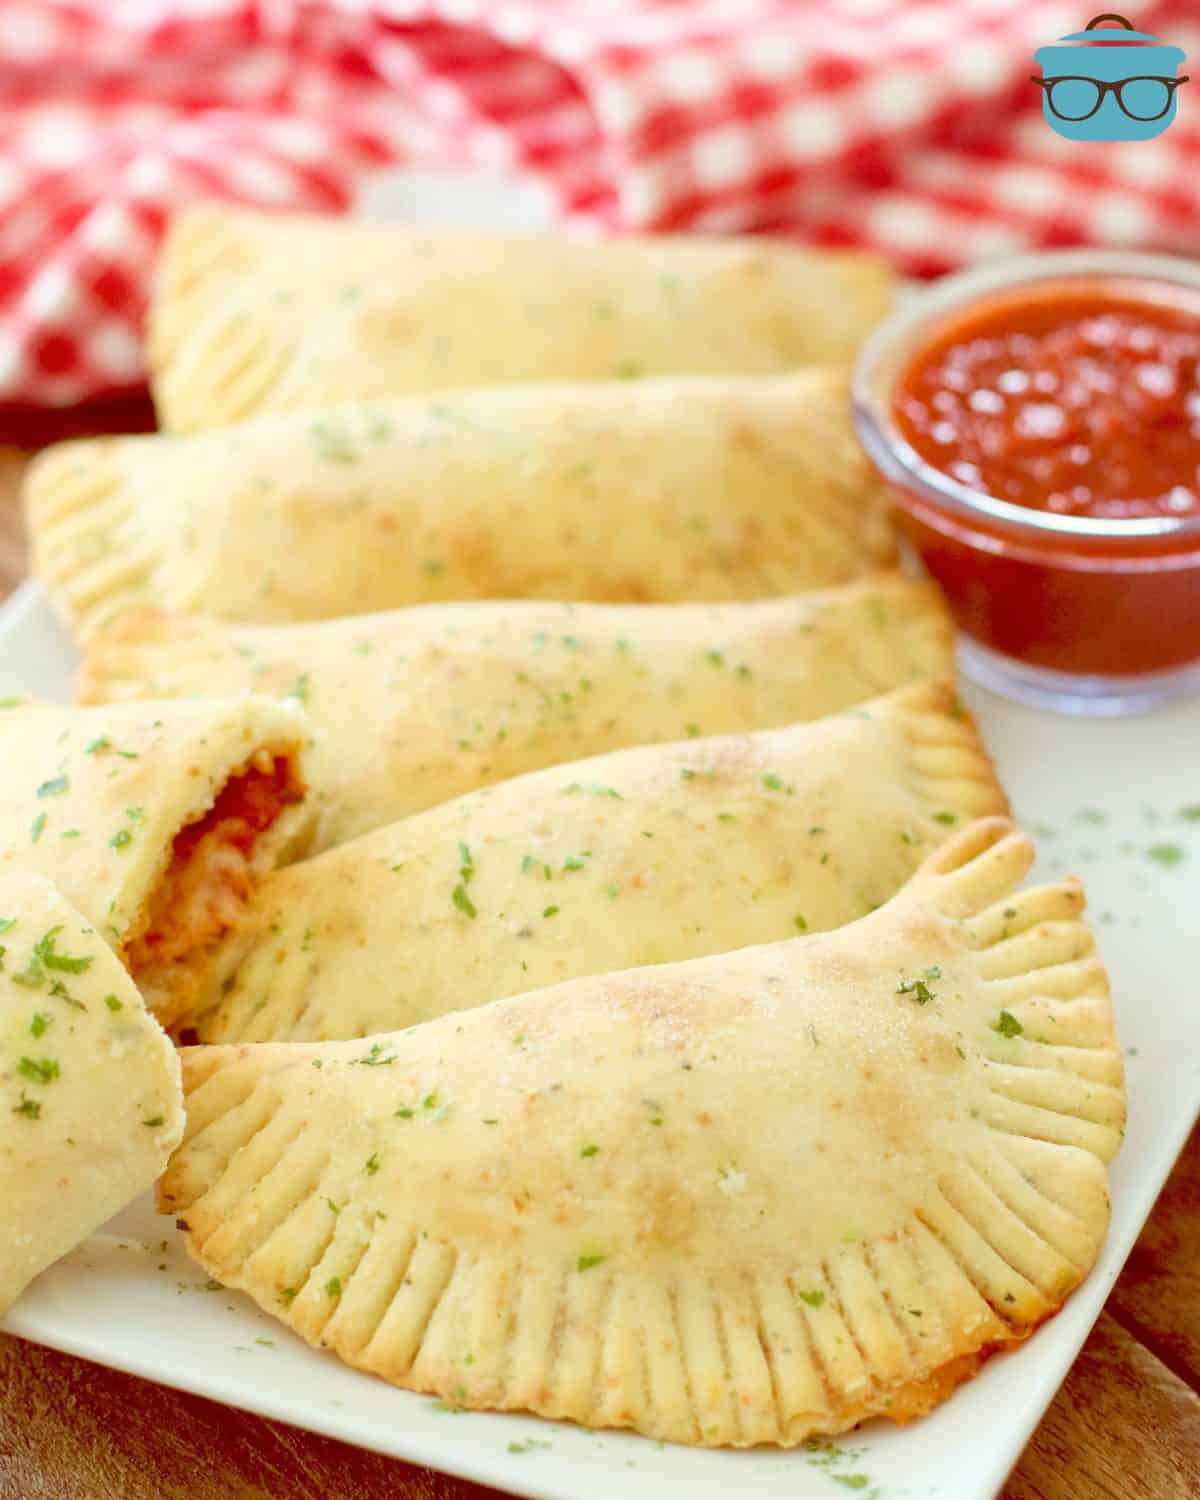
Homemade Pepperoni Pizza Pockets
Homemade Pizza Pockets are made from a simple homemade pizza dough recipe filled with sauce, pepperoni, sausage and cheese. So good!
KID-FRIENDLY SNACK OR DINNER
In my quest to get my head back into the ‘back-to-school’ routine, I got a headstart on making a bunch of after-school snacks that can be frozen and reheated. Of course, I like them own lunch too! This time, I set about making my own homemade pizza pockets. Honestly, I was kinda impressed at how well they turned out!
HOMEMADE HOT POCKETS
So I took my homemade pizza dough recipe and tweaked it a bit. Did you know that adding eggs to dough makes it softer? That’s why when you are making a pie crust, you just add oil or butter. That keeps it flaky and butter-y. But when you want a soft and fluffy-type of dough, you need to add eggs.
CAN I FREEZE THE PIZZA POCKETS?
Yes! The best way to do this is to make a whole bunch of these at a time. If you are gonna make a mess, you might as well get yourself stocked up for the next couple of months. Do it on a day where you can spend a couple of hours getting them all made. Then pack them into freezer-safe zip bags. Don’t pack too many into one bag. Allow them to cool after cooking, then pack 5 or 6 into one gallon-size bag. These are so incredibly good that they don’t have to just be an after-school snack. They could be eaten for dinner on those busy weeknights. They heat up in the microwave (from frozen) in about a minute!
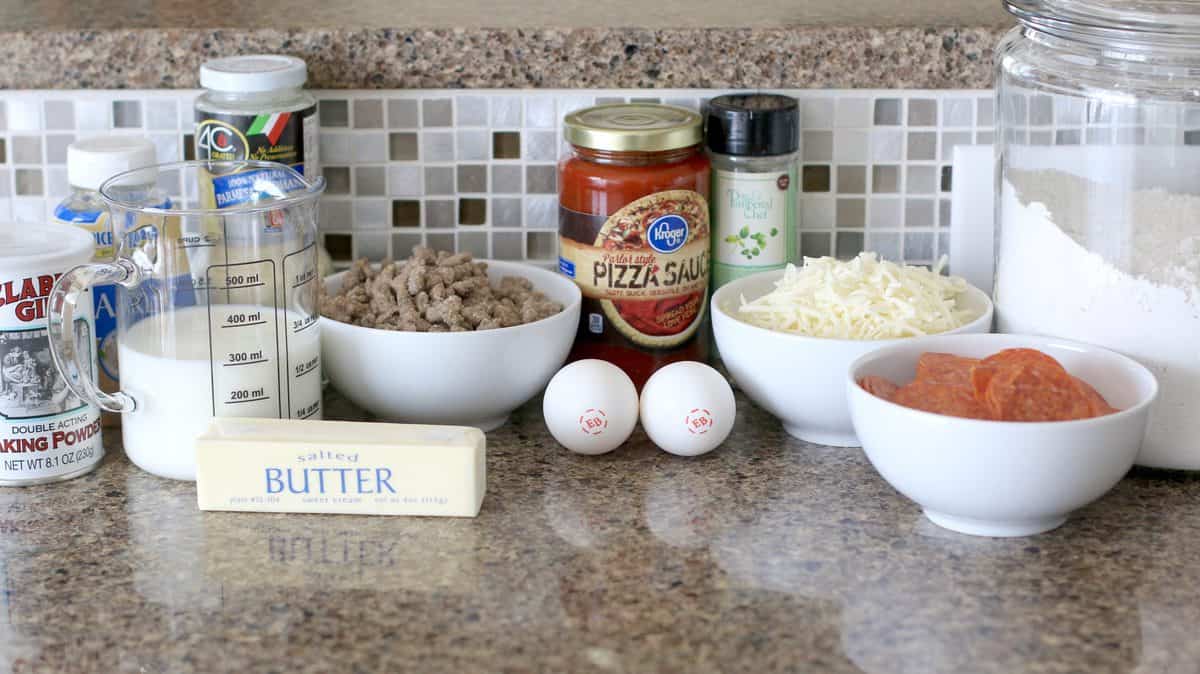
INGREDIENTS NEEDED: (FULL RECIPE AT THE BOTTOM OF THE POST)
- eggs
- milk
- minced garlic
- all-purpose flour
- grated parmesan cheese
- salt
- baking powder
- Italian Seasoning
- salted butter
- pizza sauce
- shredded mozzarella cheese
- pepperoni slices
- crumbled cooked sausage
HOW TO MAKE HOMEMADE PIZZA POCKETS
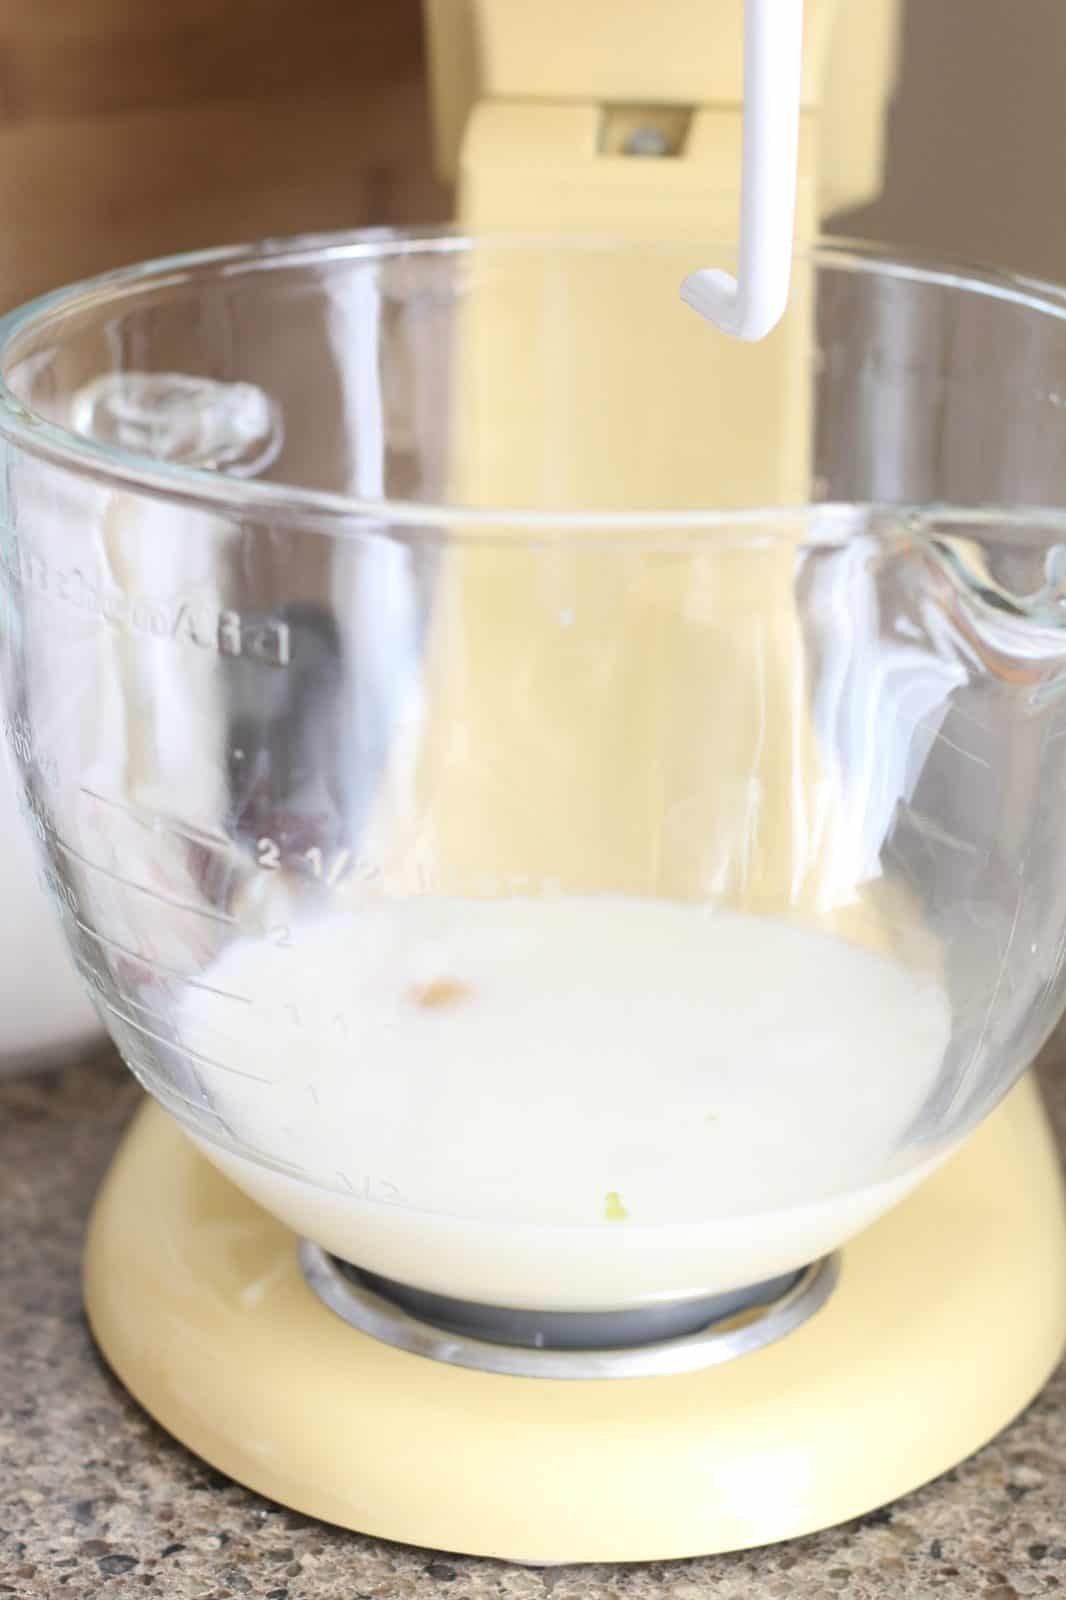
Preheat oven to 450f degrees. Spray two baking sheets with nonstick cooking spray (or line with parchment paper.) In a bowl, whisk together eggs, milk and garlic.
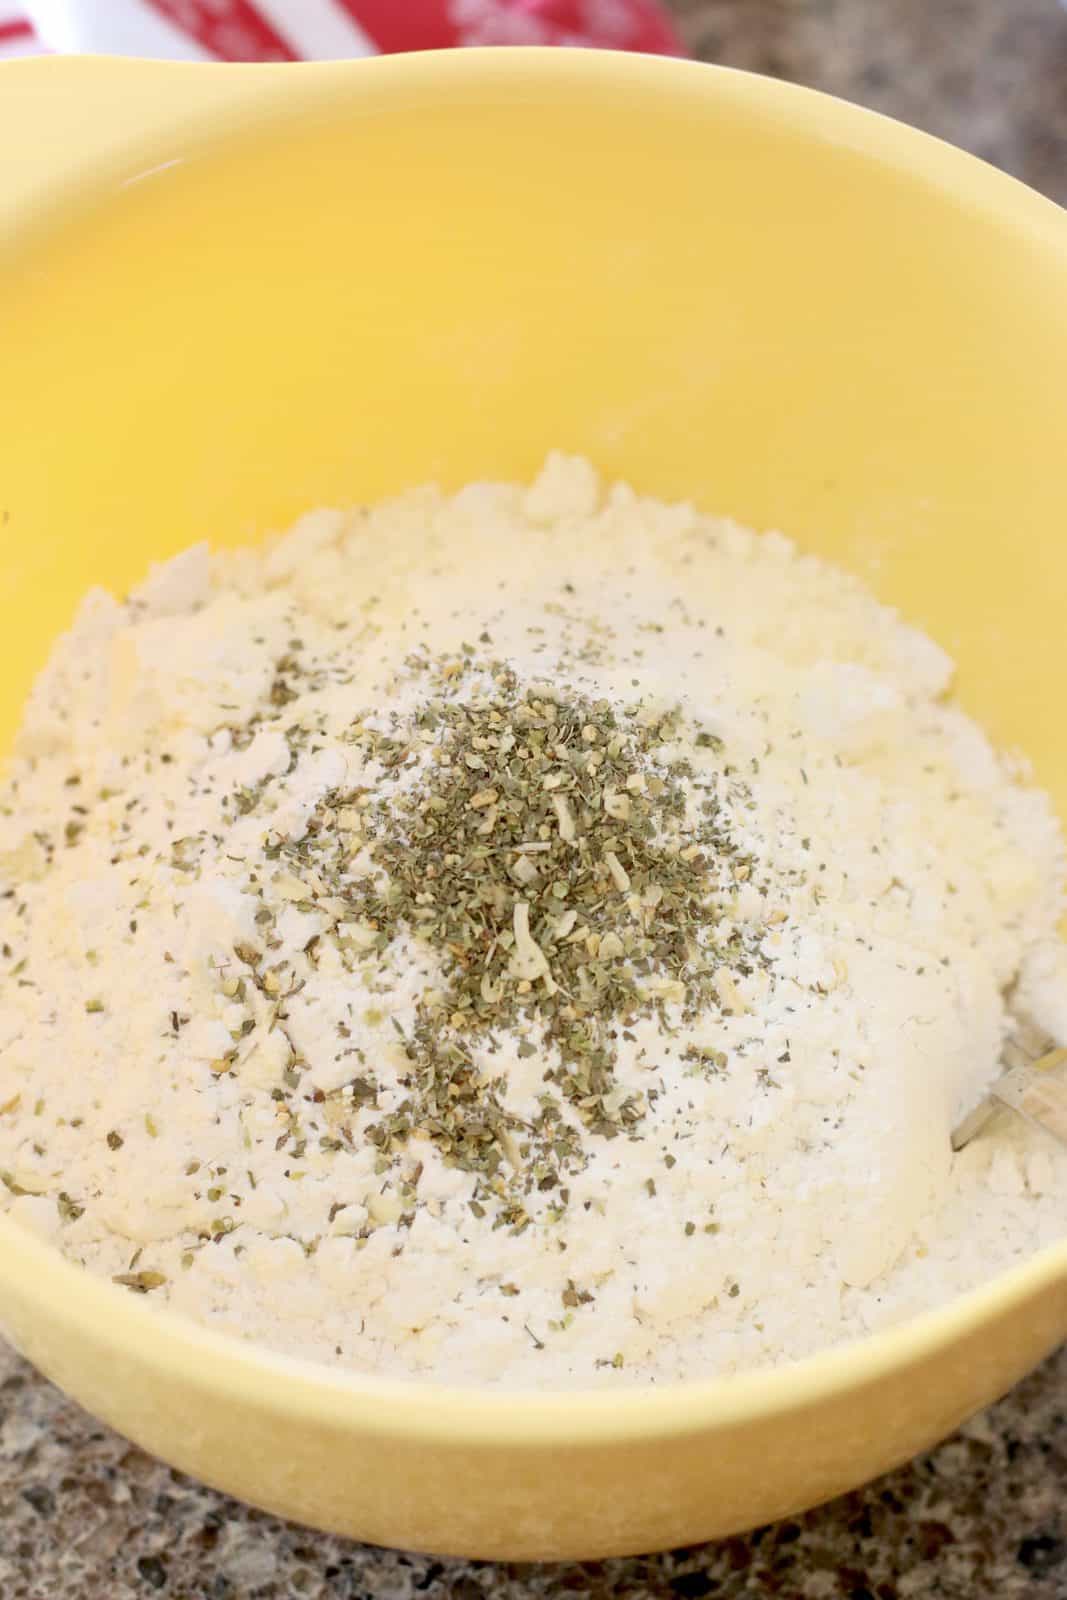
In a separate bowl, combine flour, parmesan cheese, salt, baking powder and Italian seasoning.
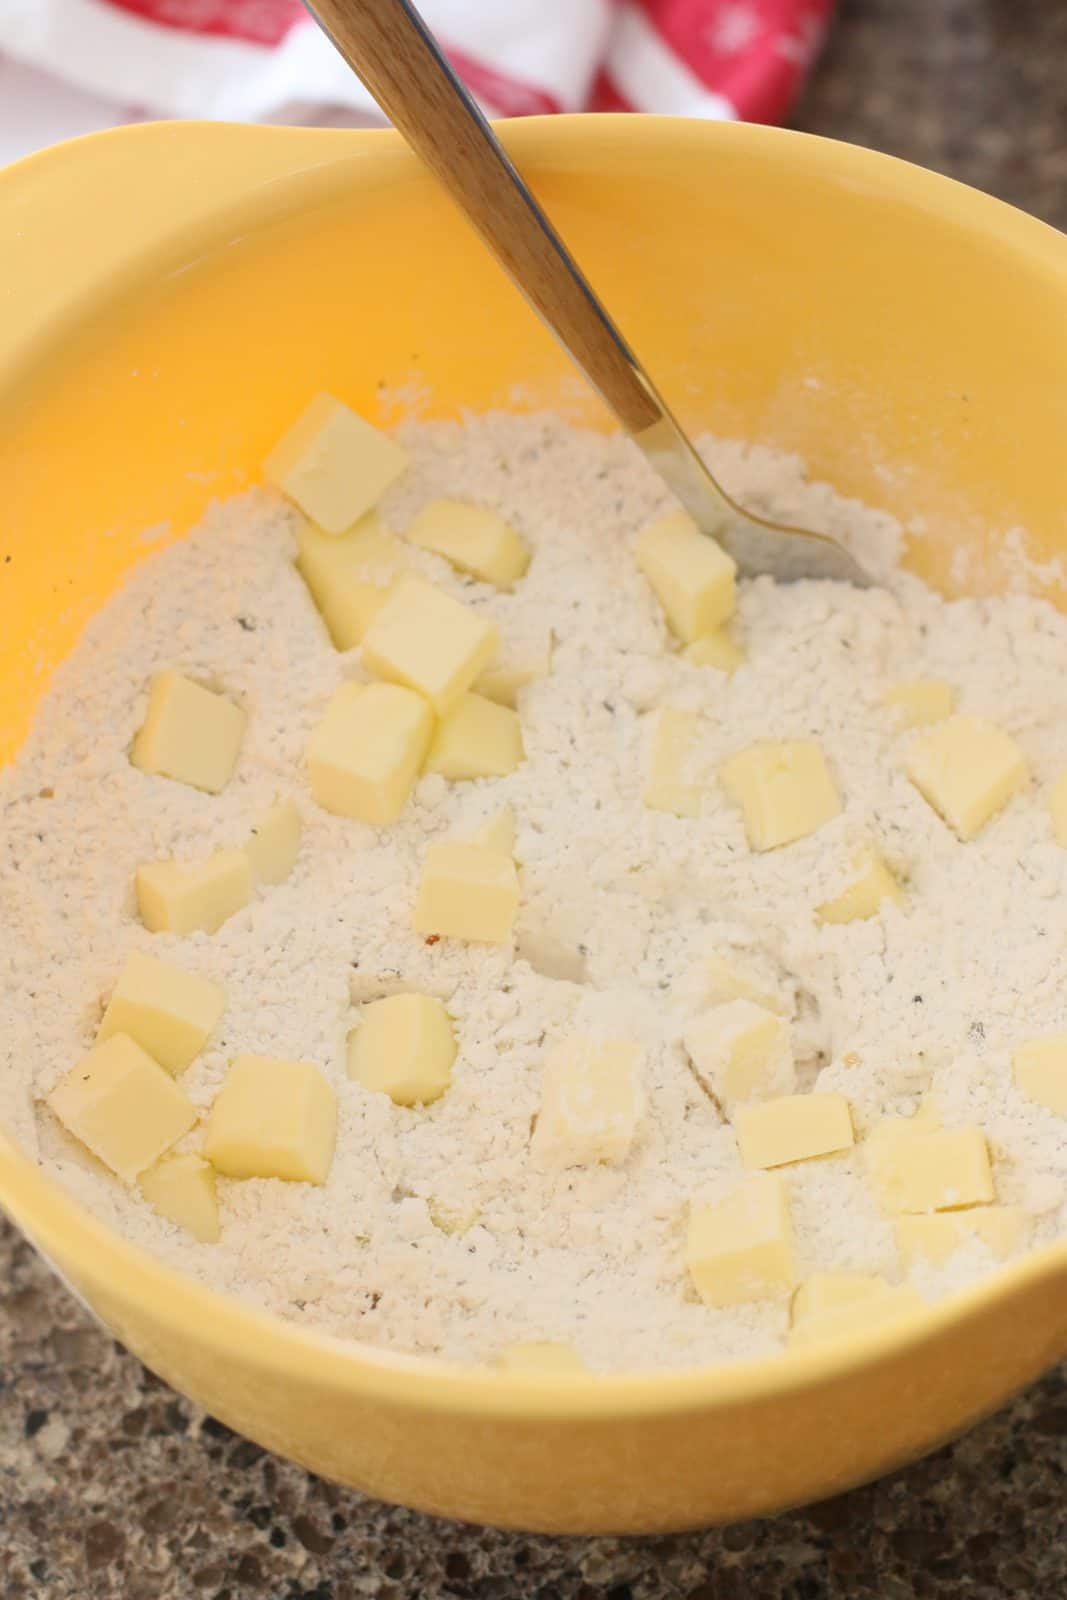
Using a fork or a pastry blender, begin cutting in the cubed butter into the flour mixture until no large clumps remain.
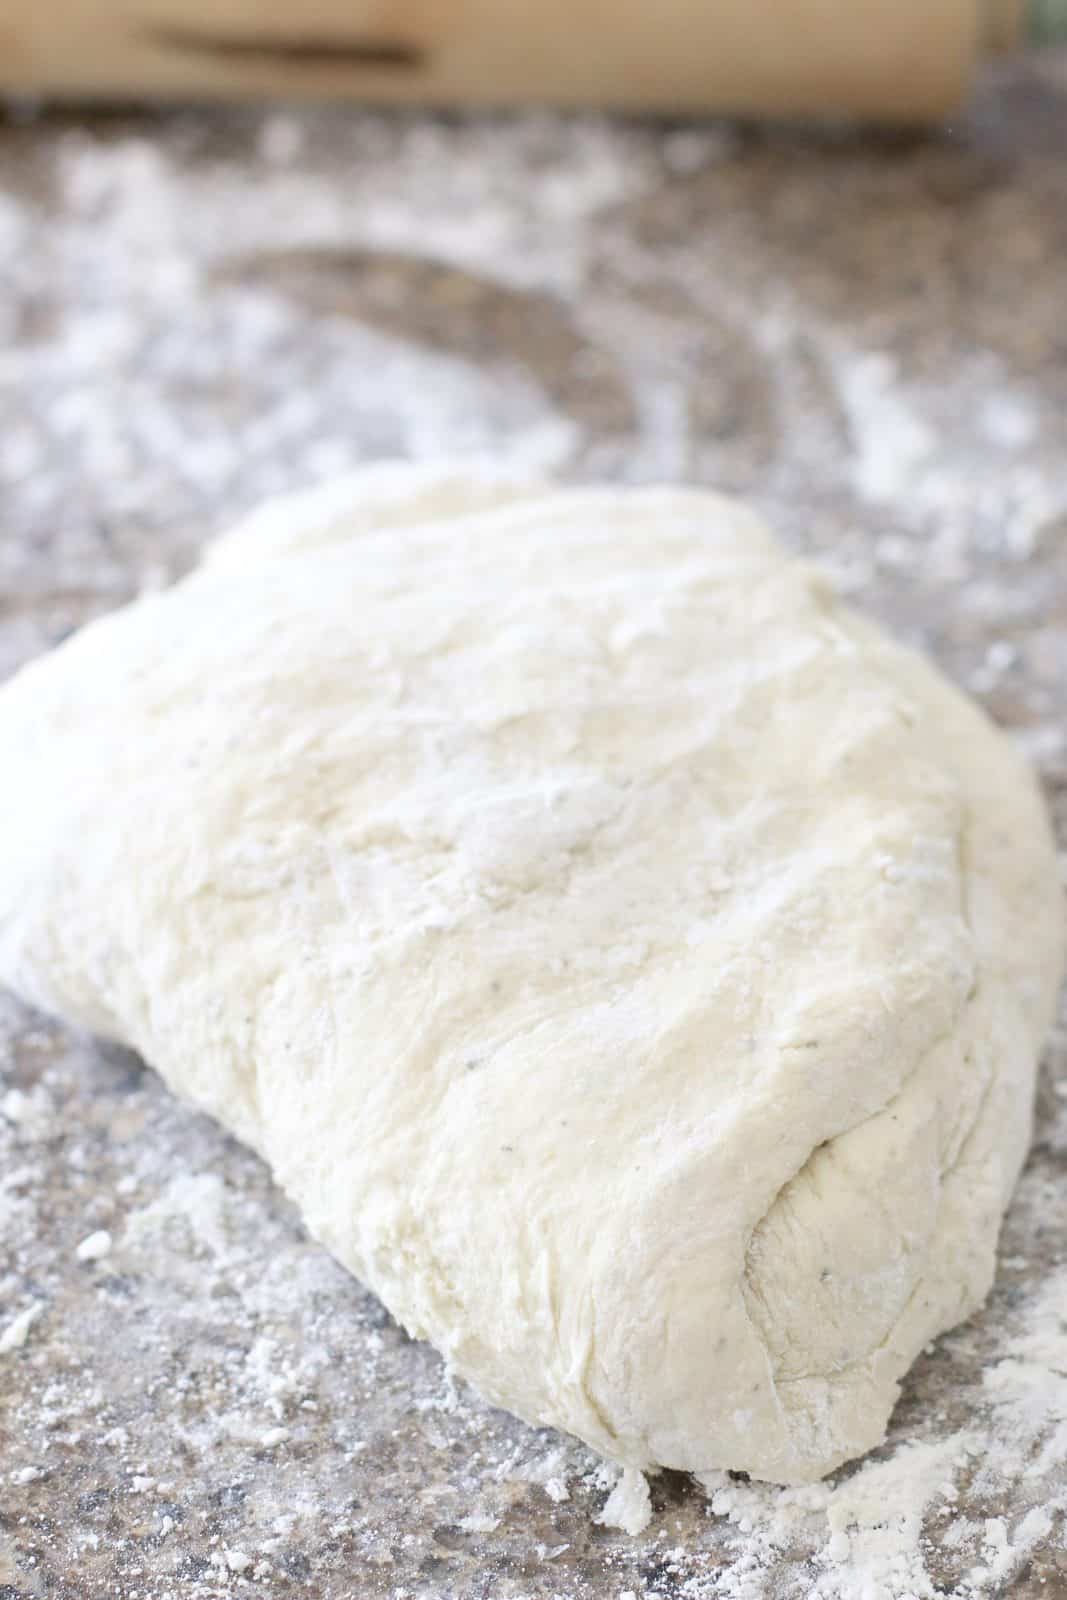
Stir the egg mixture into the flour mixture. Mix until dough comes together into a loose ball. To make this easier, use an electric mixture with a dough attachment. Dump the dough ball onto a large, floured countertop.
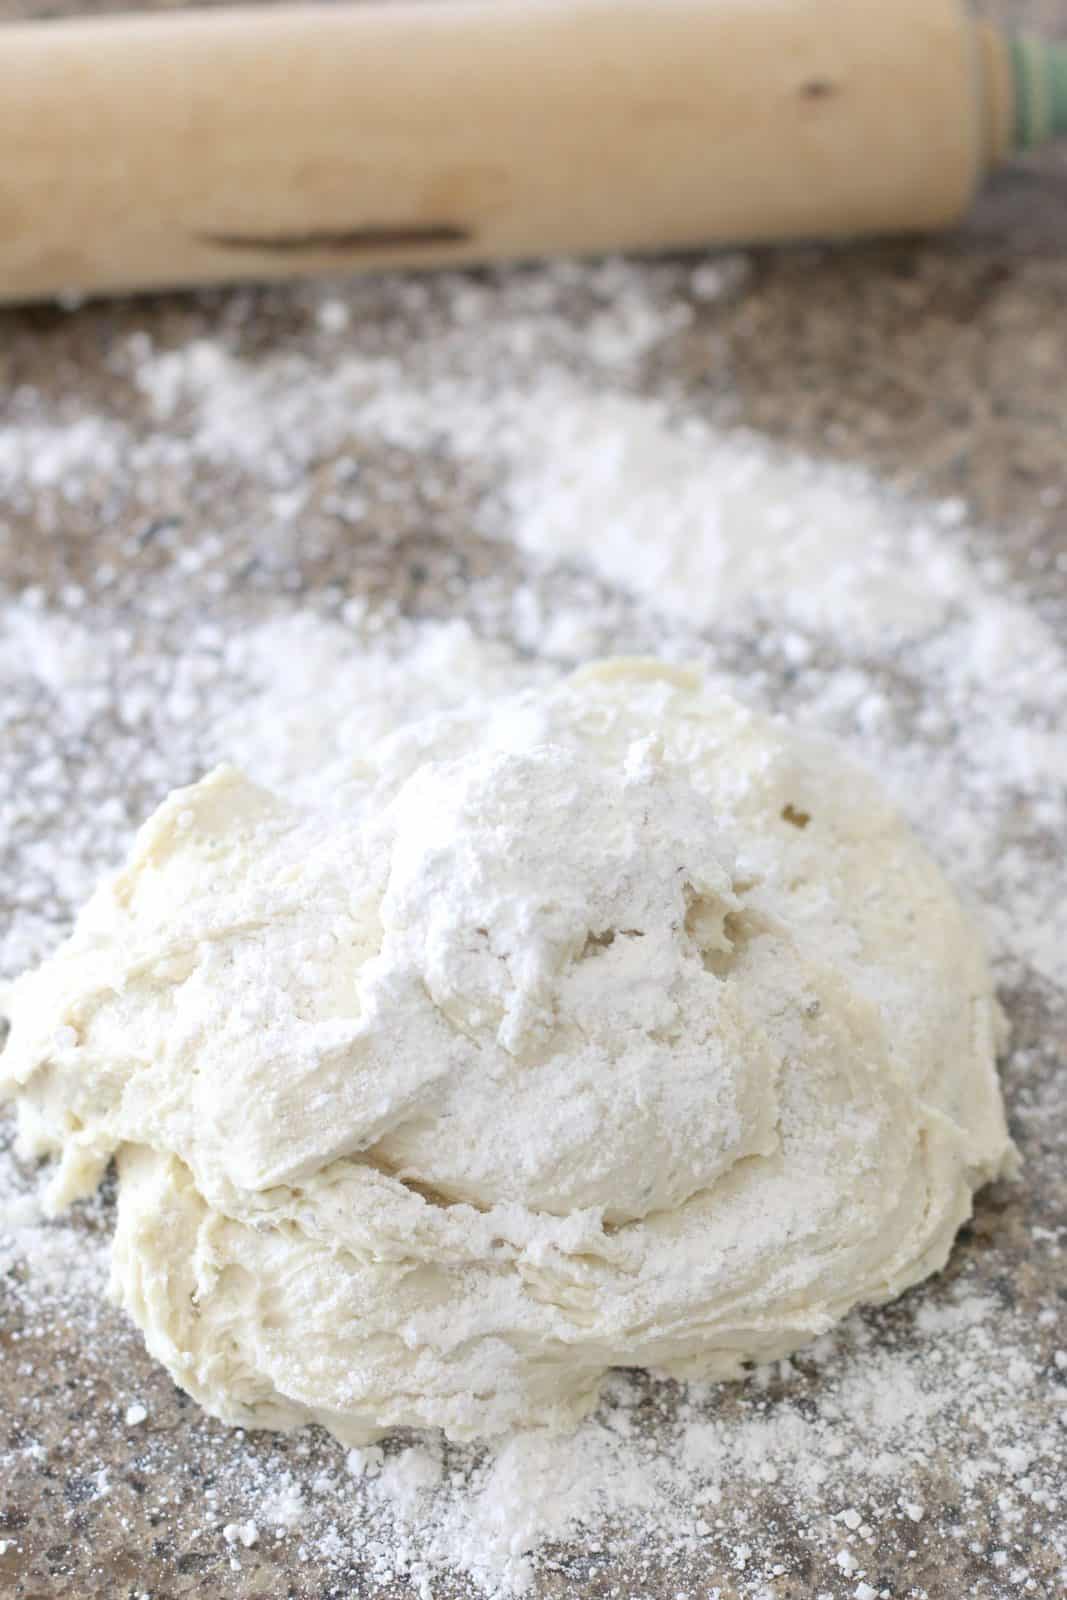
Knead the dough ten times (turning it over onto itself and turning 90 degrees.) Add additional flour as necessary to keep it from sticking.
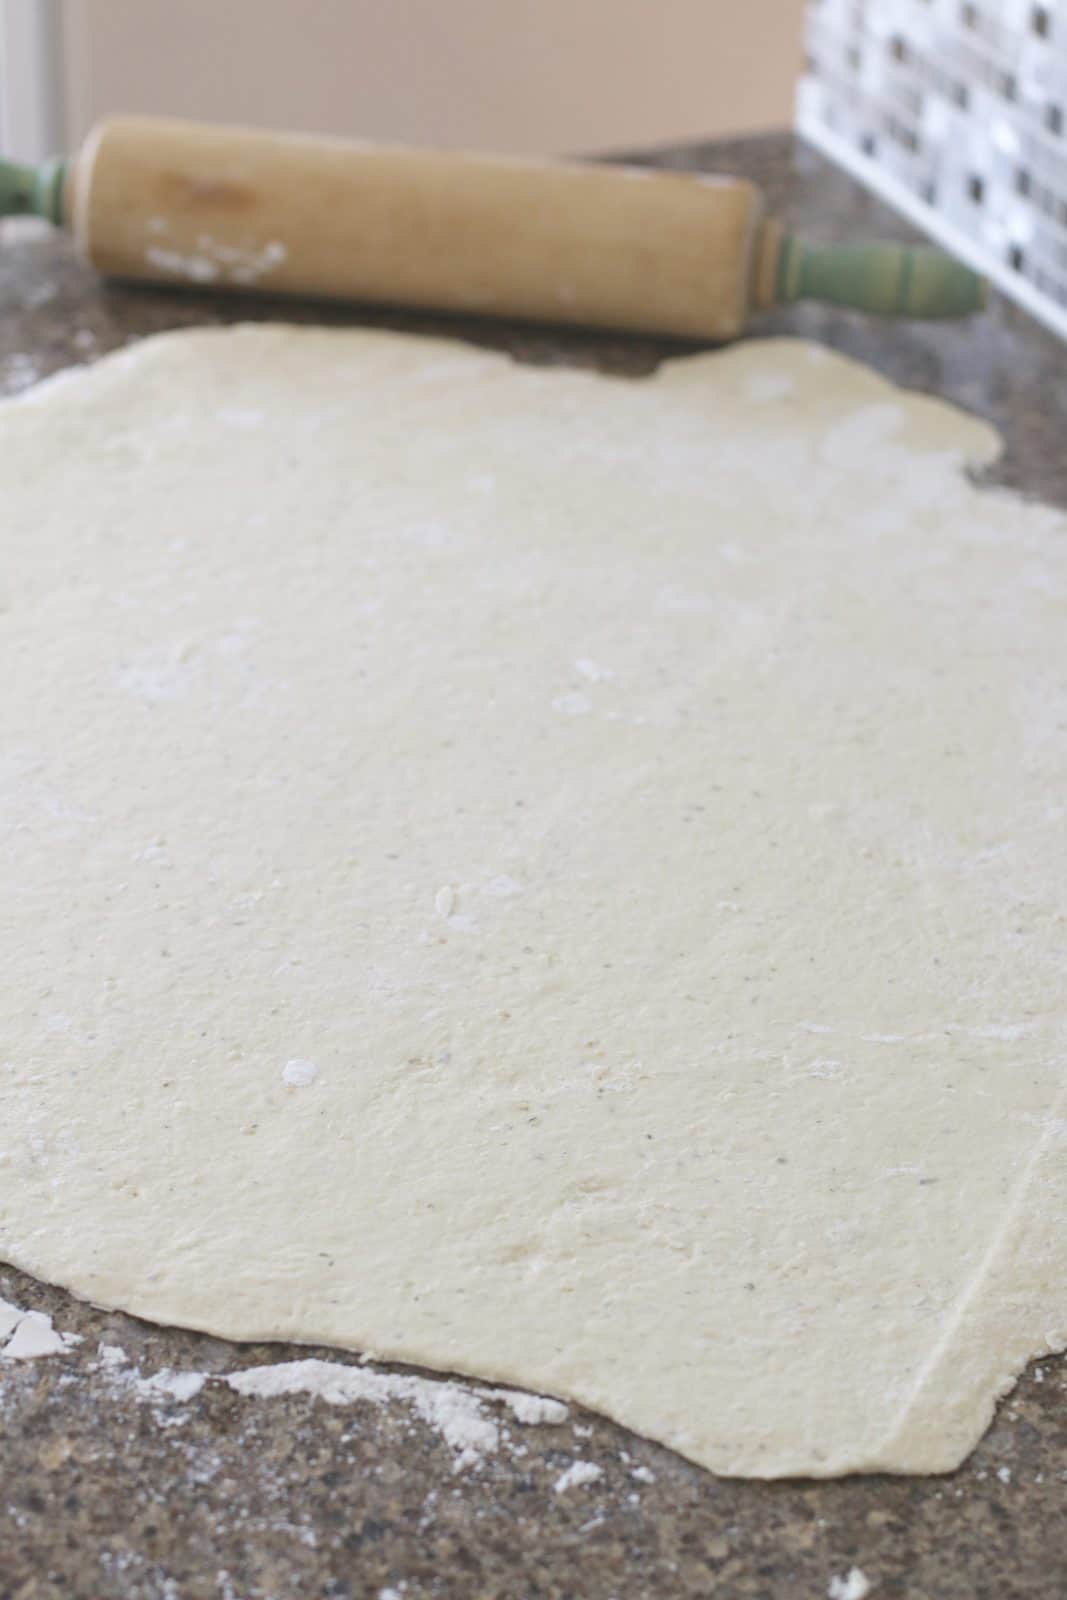
Using a rolling pin, roll out dough to ½-inch thickness.
Take a 3-inch biscuit cutter (or similar size glass or bowl), cut out all the dough into circles.
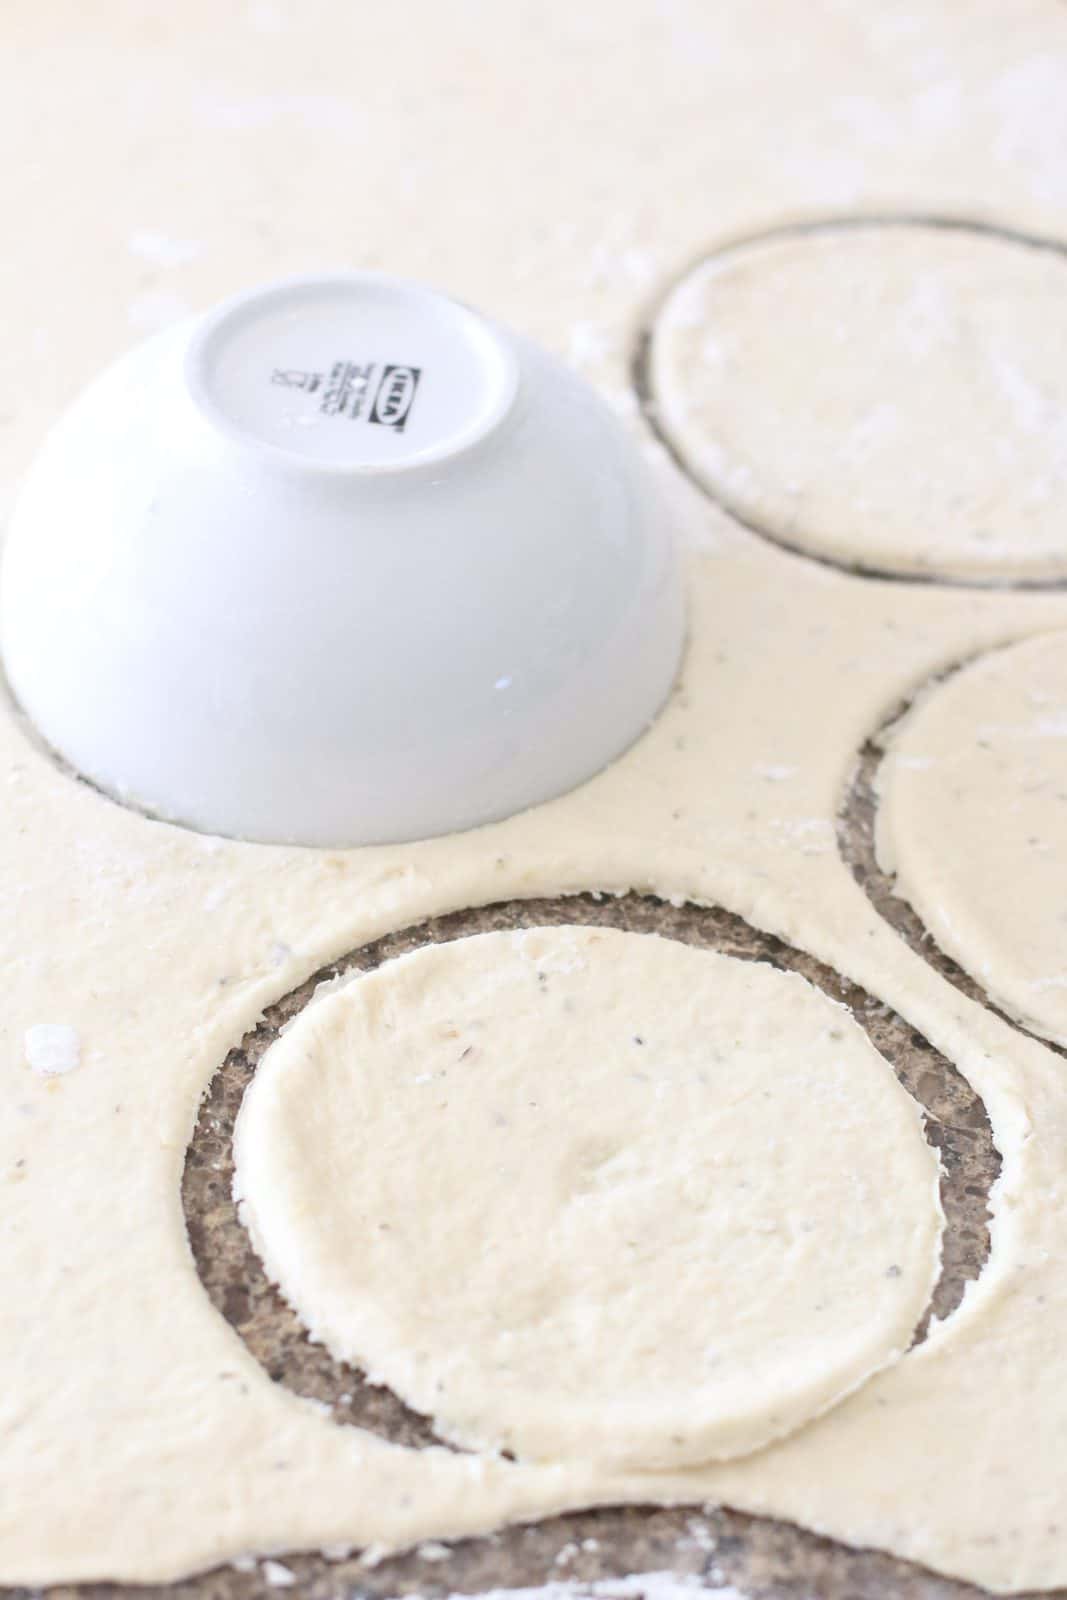
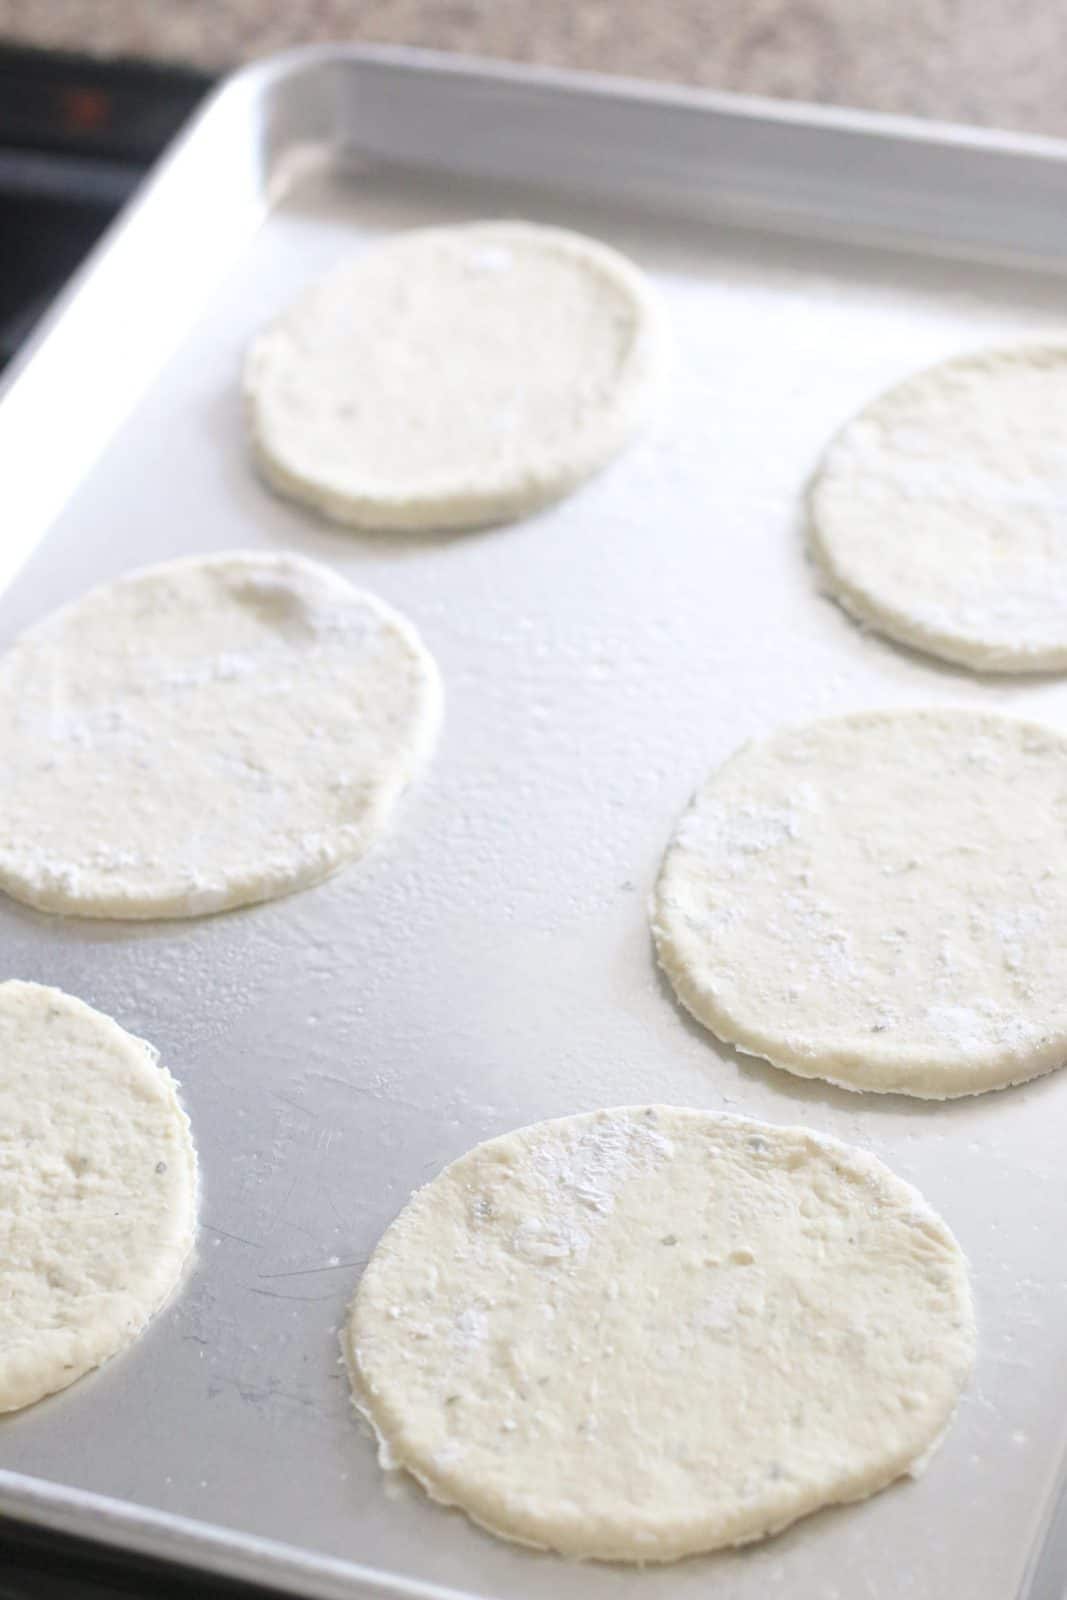
After cutting out the circles, press them down or roll them out some more to make them large enough to hold the all the fillings. Note: this dough does stretch pretty easily too which you may need to do to close it up over the fillings. Place the crust circles on prepared baking sheets.
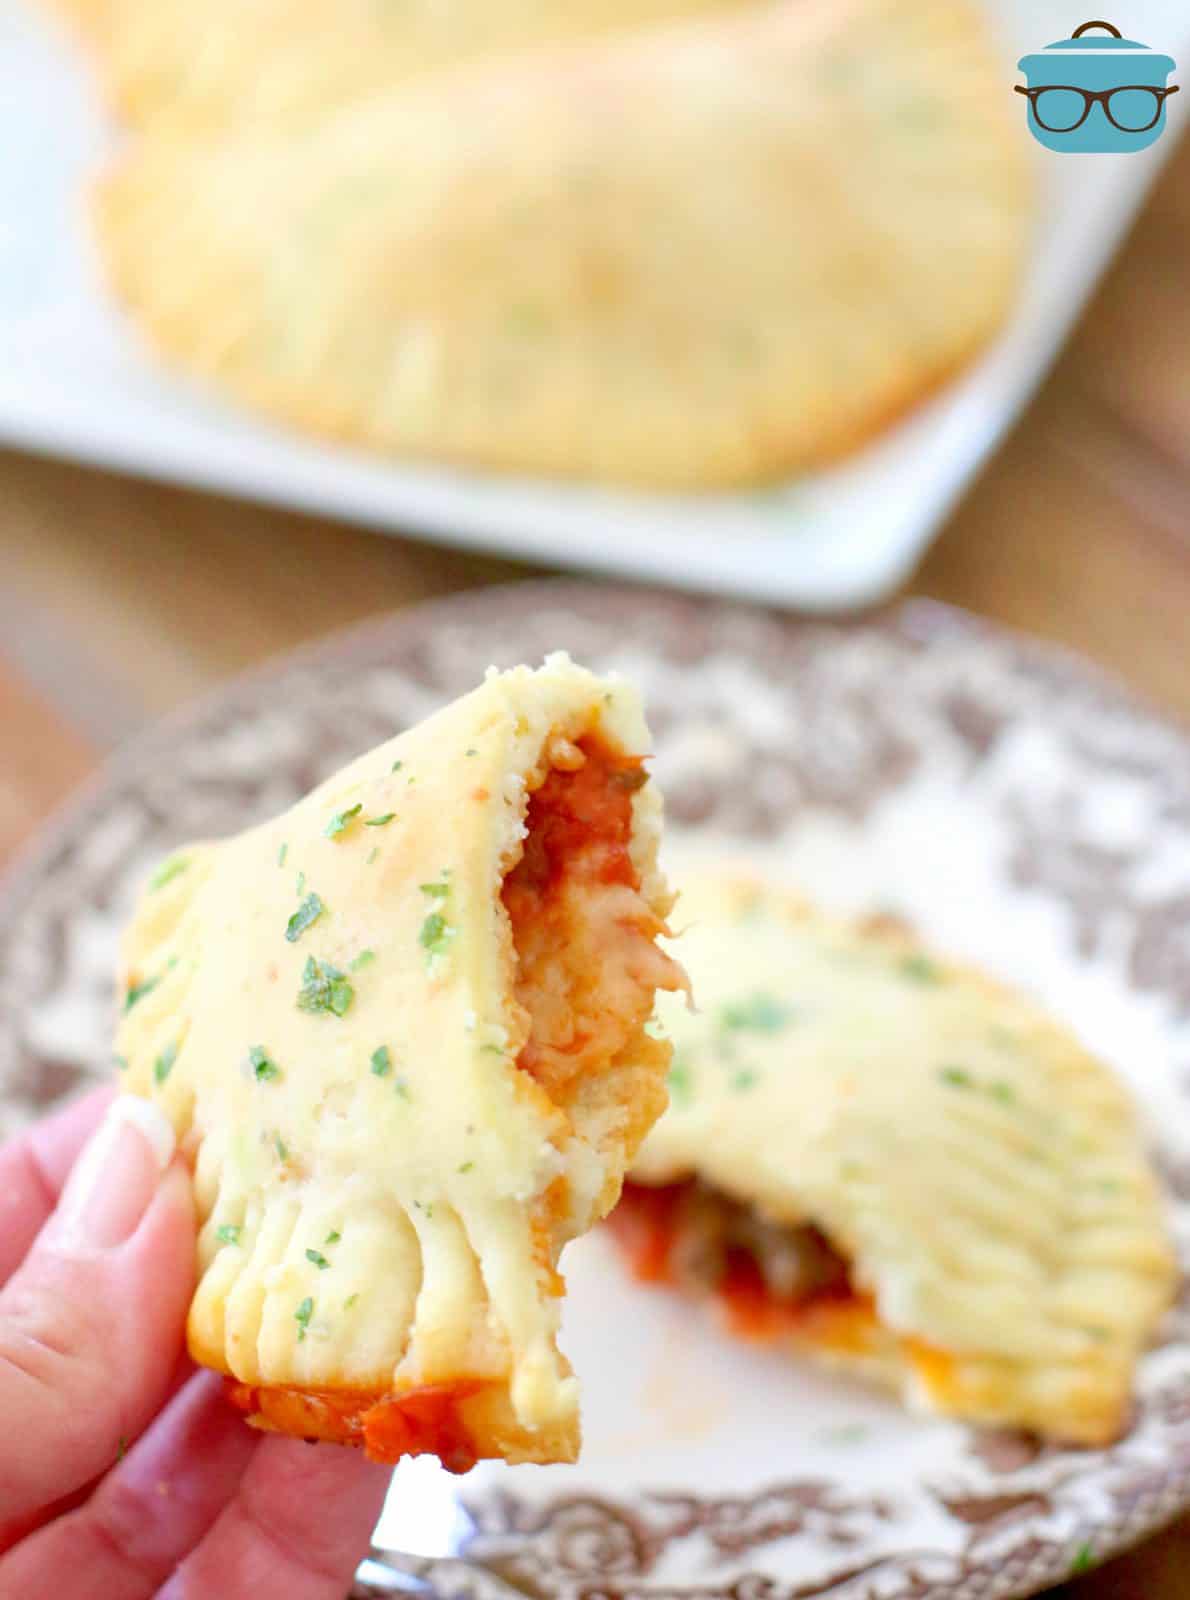
Spoon about a tablespoon of pizza sauce onto the middle of the dough circles. Then add a tablespoon of shredded cheese, a slice of pepperoni and a tablespoon of crumbled sausage.

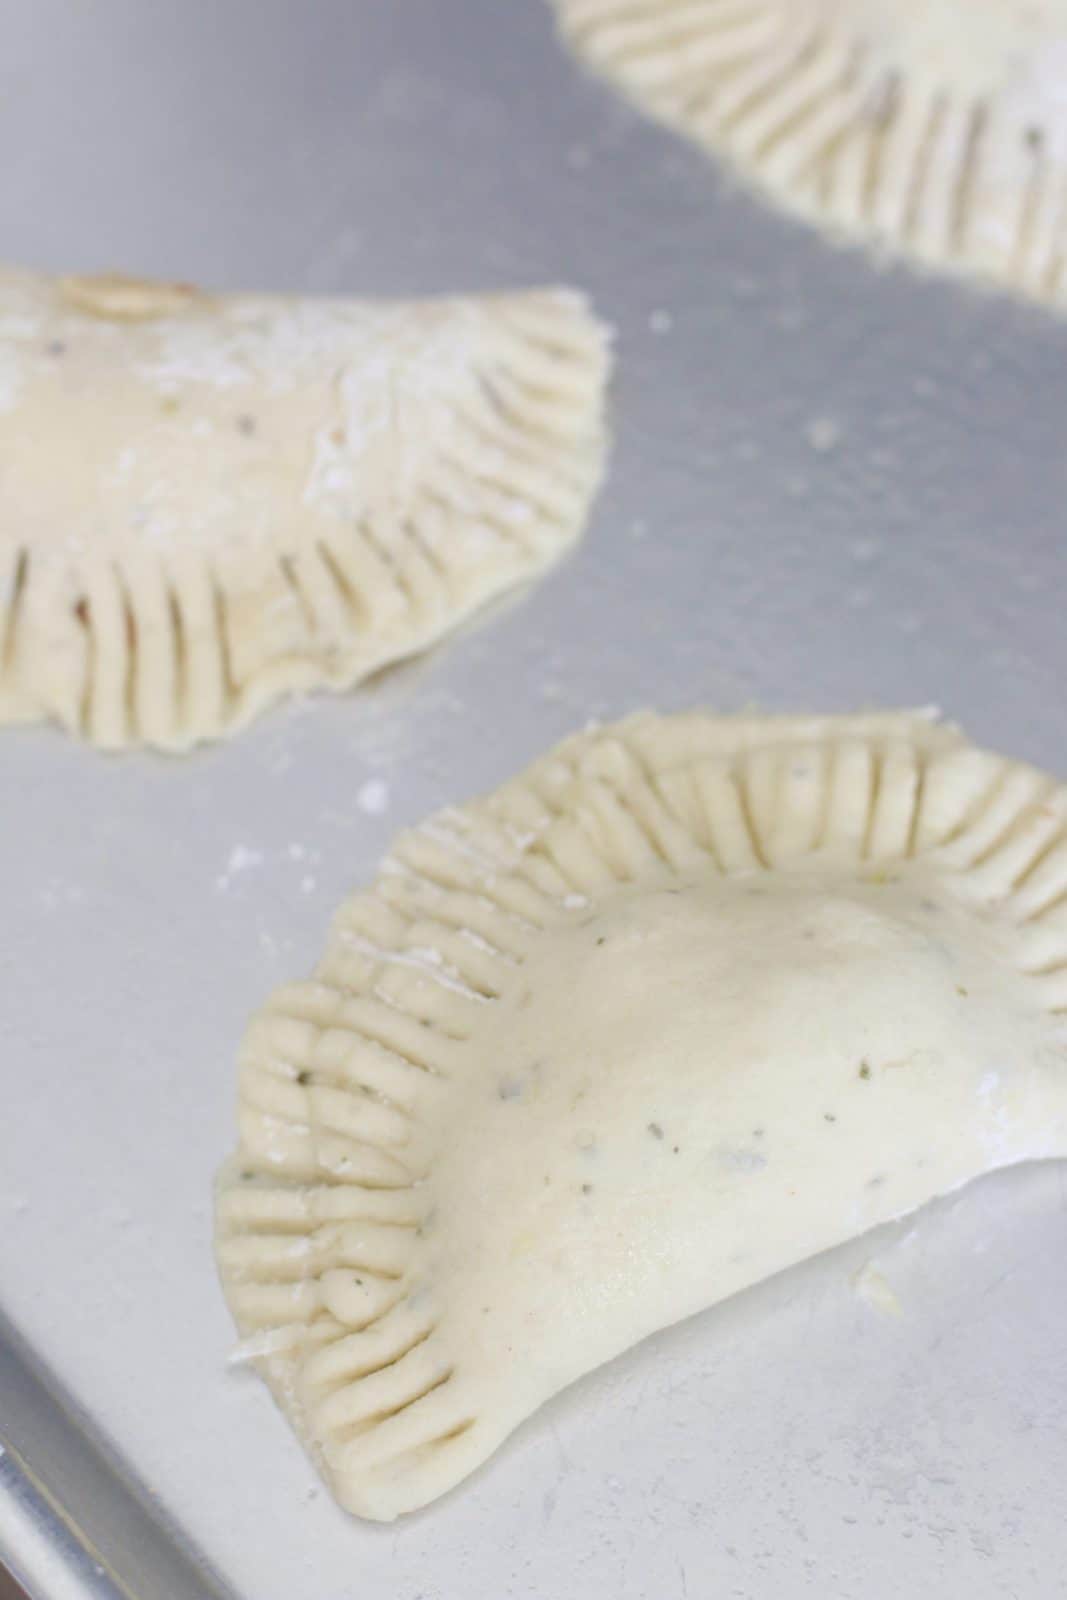
Carefully fold the crust in half and press together the edges. Take a fork and go around the edges to make sure they seal closed.
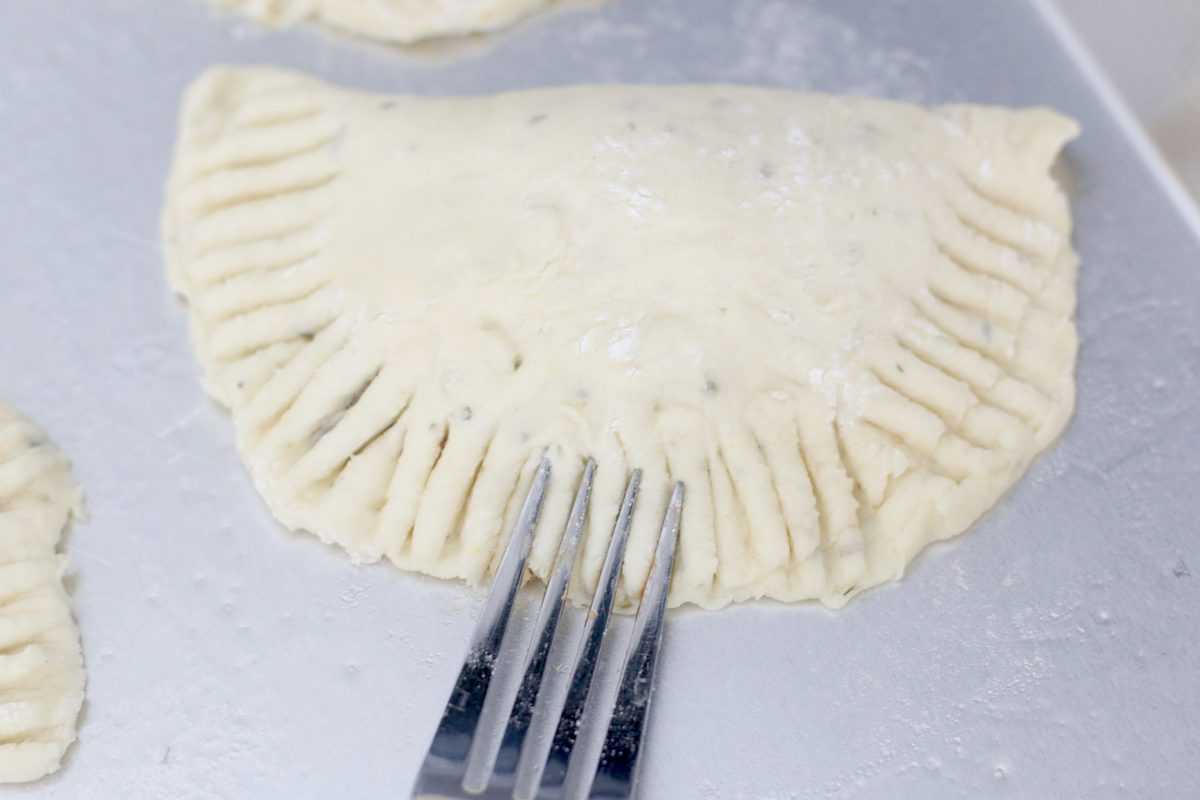
If necessary, dab a little water on your fingers to help seal the edges closed.
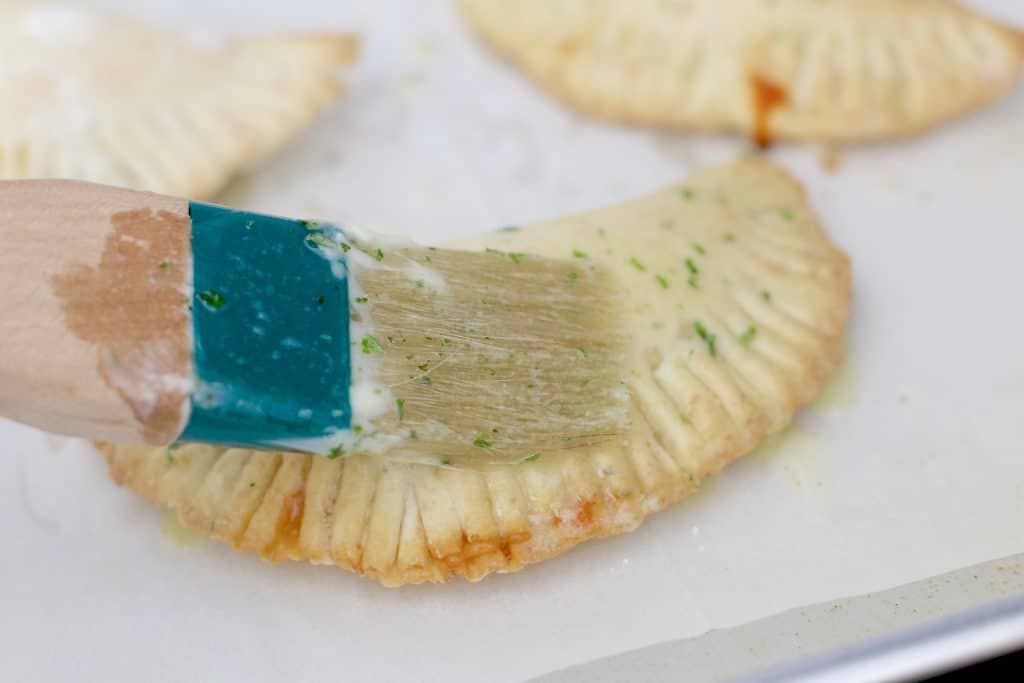
Bake at 450f degrees for 13-15 minutes until crust is lightly browned. Continue until all pizza pockets are made. Brush tops of warm pizza pockets with melted butter and dried parsley.
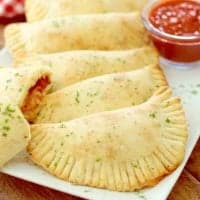
Serve with warmed pizza sauce for dipping.

CRAVING MORE RECIPES?
- Pizza Sauce
- Pizza Dip
- Cheesy Pepperoni Pizza Bread
- Pepperoni and Sausage Stromboli
- Pizza Pasta Bake
- Pizza Kabobs
- Baked Spaghetti
- Bubble Up Pizza
- Pepperoni Chicken
- Homemade Spaghettios
Homemade Pizza Pockets
Ingredients
For the dough:
- 2 eggs
- ¾ cup milk
- ½ teaspoon minced garlic
- 3 cups all-purpose flour
- ½ cup grated parmesan cheese
- ½ teaspoon salt
- 1 ½ Tablespoons baking powder
- 1 teaspoon Italian seasoning
- ½ cup cold salted butter (1 stick), cubed
For the filling:
- 14 ounce jar pizza sauce
- 1 ½ cups shredded mozzarella cheese
- 18 slices pepperoni
- 1 cup cooked and crumbled sausage
Optional crust topping:
- ½ cup salted butter (1 stick), melted
- 1 Tablespoon dried parsley
Instructions
- Preheat oven to 450F degrees. Spray two baking sheets with nonstick cooking spray (or line with parchment paper.)
- In a small bowl, whisk together eggs, milk and garlic.
- In a separate larger bowl, combine flour, parmesan cheese, salt, baking powder and Italian seasoning.
- Using a fork or a pastry blender, begin cutting in the cubed butter into the flour mixture until no large clumps remain.
- Stir the egg mixture into the flour mixture.
- Mix until dough comes together into a loose ball. Note: to make this easier, you could use an electric mixture with a dough attachment.
- Dump the dough ball onto a large, floured countertop.
- Knead the dough ten times (turning it over onto itself and turning 90 degrees each time). Add additional flour as necessary to keep it from sticking.
- Using a rolling pin, roll out dough to about ½-inch thickness.
- Take a 3-inch biscuit cutter (or similar size glass or bowl), cut out all the dough into circles.
- After cutting out the circles, press them down or roll them out some more to make them large enough to hold the all the fillings. Note: this dough does stretch pretty easily too which you may need to do to close it up over the fillings.
- Place the crust circles on prepared baking sheets.
- Spoon a tablespoon of pizza sauce onto the middle of the dough circles.
- Then add a tablespoon of shredded cheese, a slice of pepperoni and a tablespoon of crumbled sausage.
- Carefully fold the crust in half and press together the edges.
- Take a fork and go around the edges to make sure they seal closed. If necessary, add a bit of water to the seals with your finger to help them stay sealed.
- Bake at 450f degrees for 13-15 minutes until crust is lightly browned. Continue until all pizza pockets are made.
- Optional: Brush tops of warm pizza pockets with melted butter and sprinkle with dried parsley.
Notes
- Serve with warmed pizza sauce for dipping. This can be frozen after cooking and reheated in the microwave as needed.
Nutrition
Nutritional Disclaimer
“The Country Cook” is not a dietician or nutritionist, and any nutritional information shared is an estimate. If calorie count and other nutritional values are important to you, we recommend running the ingredients through whichever online nutritional calculator you prefer. Calories and other nutritional values can vary quite a bit depending on which brands were used.

")


So many good recipes, Thanks for sharing!
Hi, thank you for the lovely recipe. I doubled it and boy are they delicious! I got more than the recipe said but I’m not complaining. The egg wash does help cut down on leaking. I used to make these using my sourdough pizza dough but the final result was too doughy and chewy to my taste. This is nice and tender.
This makes me so happy to hear! Thanks so much for taking the time to come back and comment!
Okay, I’ve made these now and they were sooo good! The crust was soft and tender, like store bought pizza pockets except way better! It was step number 14 that was confusing me before. You actually have to roll out the dough circles to be much wider and thinner, not just “press them down slightly”. They turn out to be the size you expect then.
Bonjour, j’ai enfin trouvé une bonne recette de pâte pour les pizzas pochettes après des années de recherche. Merci.
Can you make these and then freeze BEFORE baking? I want to make ahead for a kids birthday party, and bake them in the oven before serving. Have you ever tried that? Thanks!
Do you brush the pizza pockets with melted butter and parsley before or after baking? Would it make a difference?
Hey Stephanie! If you add the melted butter before baking, they’ll just be a bit more golden brown. 🙂
My son absolutely loved these. Gave them two thumbs up and wolfed down his pocket. I don’t know why, but my attempt only made 9 pockets instead of 18, and they were tiny compared with the picture. I checked to make sure the dough was rolled to 1/2″ thick, and it all looked fine. But anyhow (shrug), it doesn’t matter because the pockets fit perfect in his heated lunchbox. Tomorrow’s lunch!
Hi Amy! Thank you so much for coming back to leave a comment! I think I actually messed up on the number of servings on the printable recipe so you are correct in how many it made. I’ll get that updated! So happy your son liked them!
can you use canned biscuits for the dough instead?
Decided to try this recipe in hopes that they would actually stay sealed, but to no avail! What am I doing wrong!? Every recipe of pizza pockets I try to turn into pizza tacos, even when I seal them as instructed with dough. Any ideas?
I sealed mine with a whisked egg and a pastry brush, and then pinched them down with a fork. None came open.
This recipe is delicious!!! I have made multiple versions of this. I made “deluxe” version with 3/8 c finely diced mushrooms sautéed, 3/8 c finely diced green pepper softened, and 1/4 c finely diced onion softened (then mixed) in place of the 1 tbsp crumbled sausage. I also chose to dice the pepperoni too. Important to sauté or soften to remove some moisture so it doesn’t make the dough soggy!! Then as opposed to 1 piece of pepperoni per pocket, I put 1 tbsp of diced. I just finished making pepperoni, mush and green pepper ones, and ham and pineapple ones and they turned out delic!! I just made sure I drained the crushed pineapple super well and the dough turned out perfect!!!
I have made several batches for my nephews and they think I am the best auntie now more than ever!!
This look delicious! We’re a small family of 3 and we’re really busy, just wondering if there’s a way to freeze them and just cook them on an as needed basis? Thank you!
Haha! Just went back and re read and saw the from frozen instructions! Missed it the first go around!
Glad you got it! 🙂
Can these be frozen afterwards to take out for lunches or dinner in a pinch??? Please advise
Love, Love, Love them they are a big hit with the kids,Thanks!!
Just about the time I think, "No more recipes, got enough!!" then here come these pizza pockets. They look good and maybe even not too difficult or too time consuming. Guess I better just stay put and stay tuned in…..Thanks!
Ha Ha! Love it! I say the exact same thing to myself all the time. Thanks for being here!
These look great and now that you have mastered these you can begin to dream up other fillings. I like to use leftovers for these. My favorite is shredded chicken, chopped broccoli, and mushrooms with your choice of condensed cream soup for the sauce or if you prefer just a nice white sauce,. Ham and cheese with your choice of veggies such as bell pepper, onion ,mushrooms. Spinach, mushrooms, feta cheese or just cream cheese. Roast beef with swiss cheese and a little mustard or horseradish is delicious. You can let your imagination run wild! It is important that you saute the veggies in butter to soften them a bit and so your dough does not get soggy from the veggies losing water. Keep the pieces of all of it fairly small and uniform so they get hot by the time the dough is golden brown.
Mmmm….those ALL sound AMAZING! Thank you!
Can't wait to try these. I'm sure my family will love them!
So sweet – sure hope they become a new family fave!
What a fun idea! You have to be the most popular mama around!
Carlee – LOL! I have my moments. Other times I am pulling out a bag of doughnuts. It's a balance. 😉