Red Velvet Cake Balls
These rich Red Velvet Cake Balls are not only easy to make but they will become an instant favorite! It combines the flavors of red velvet cake with cream cheese frosting all in one!
FESTIVE CAKE BALLS
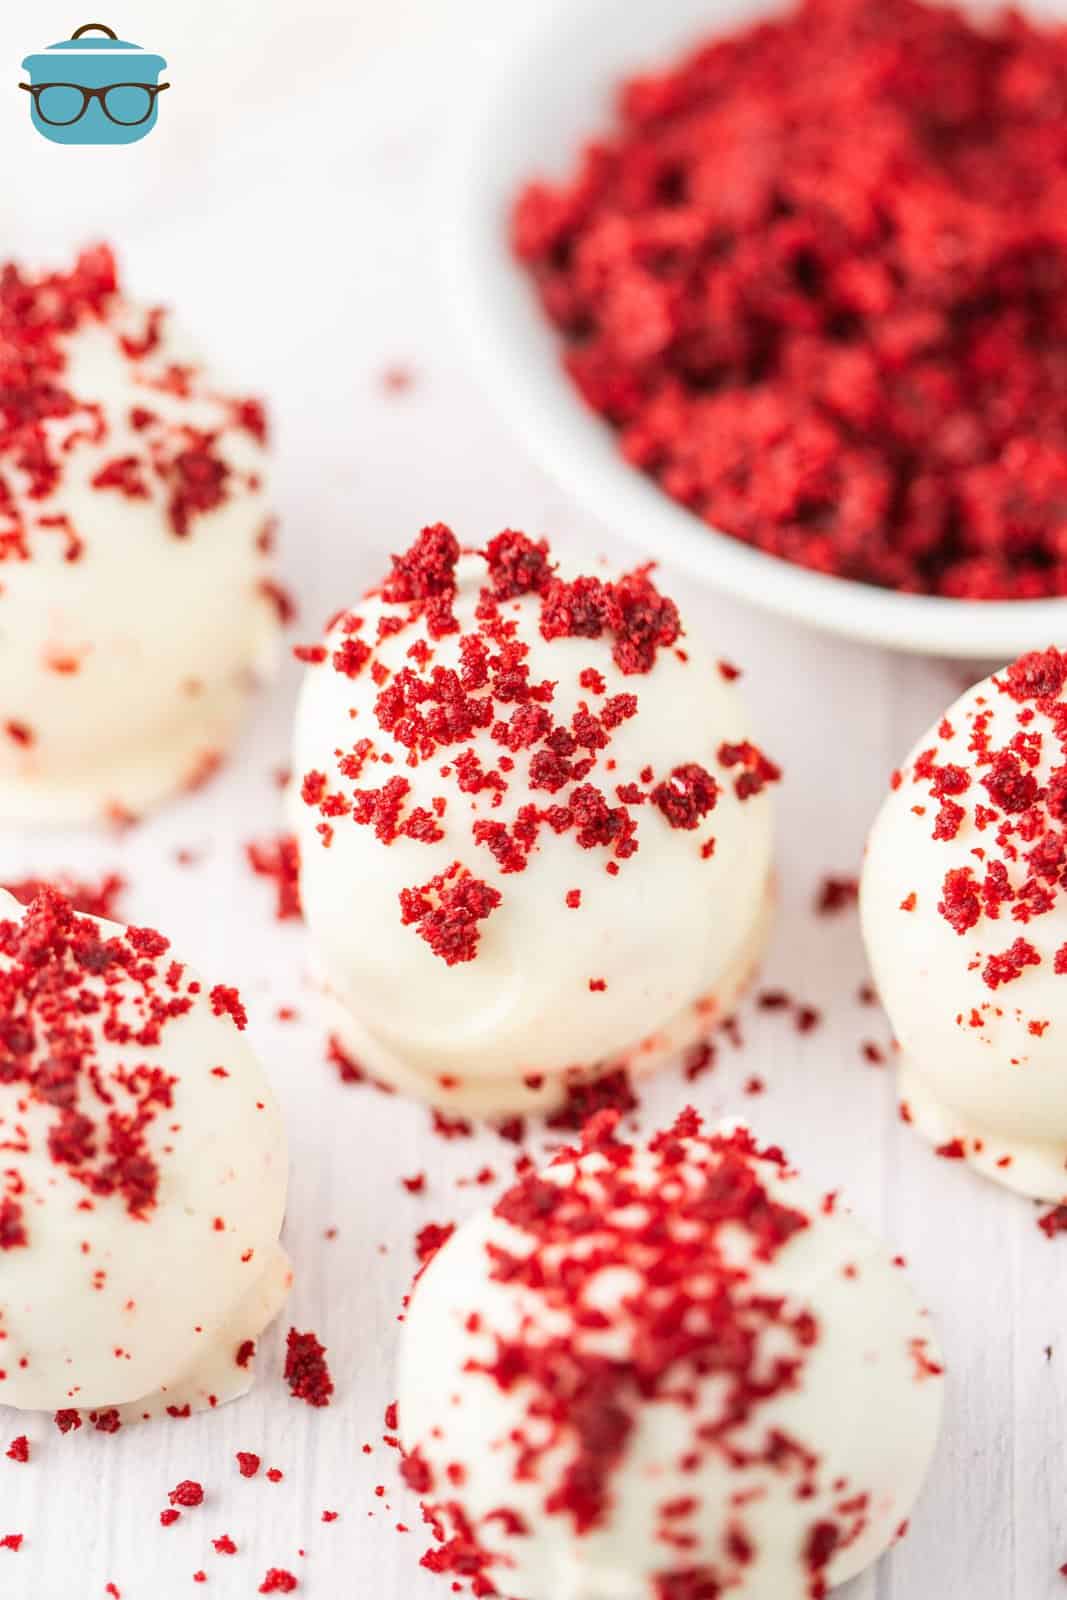
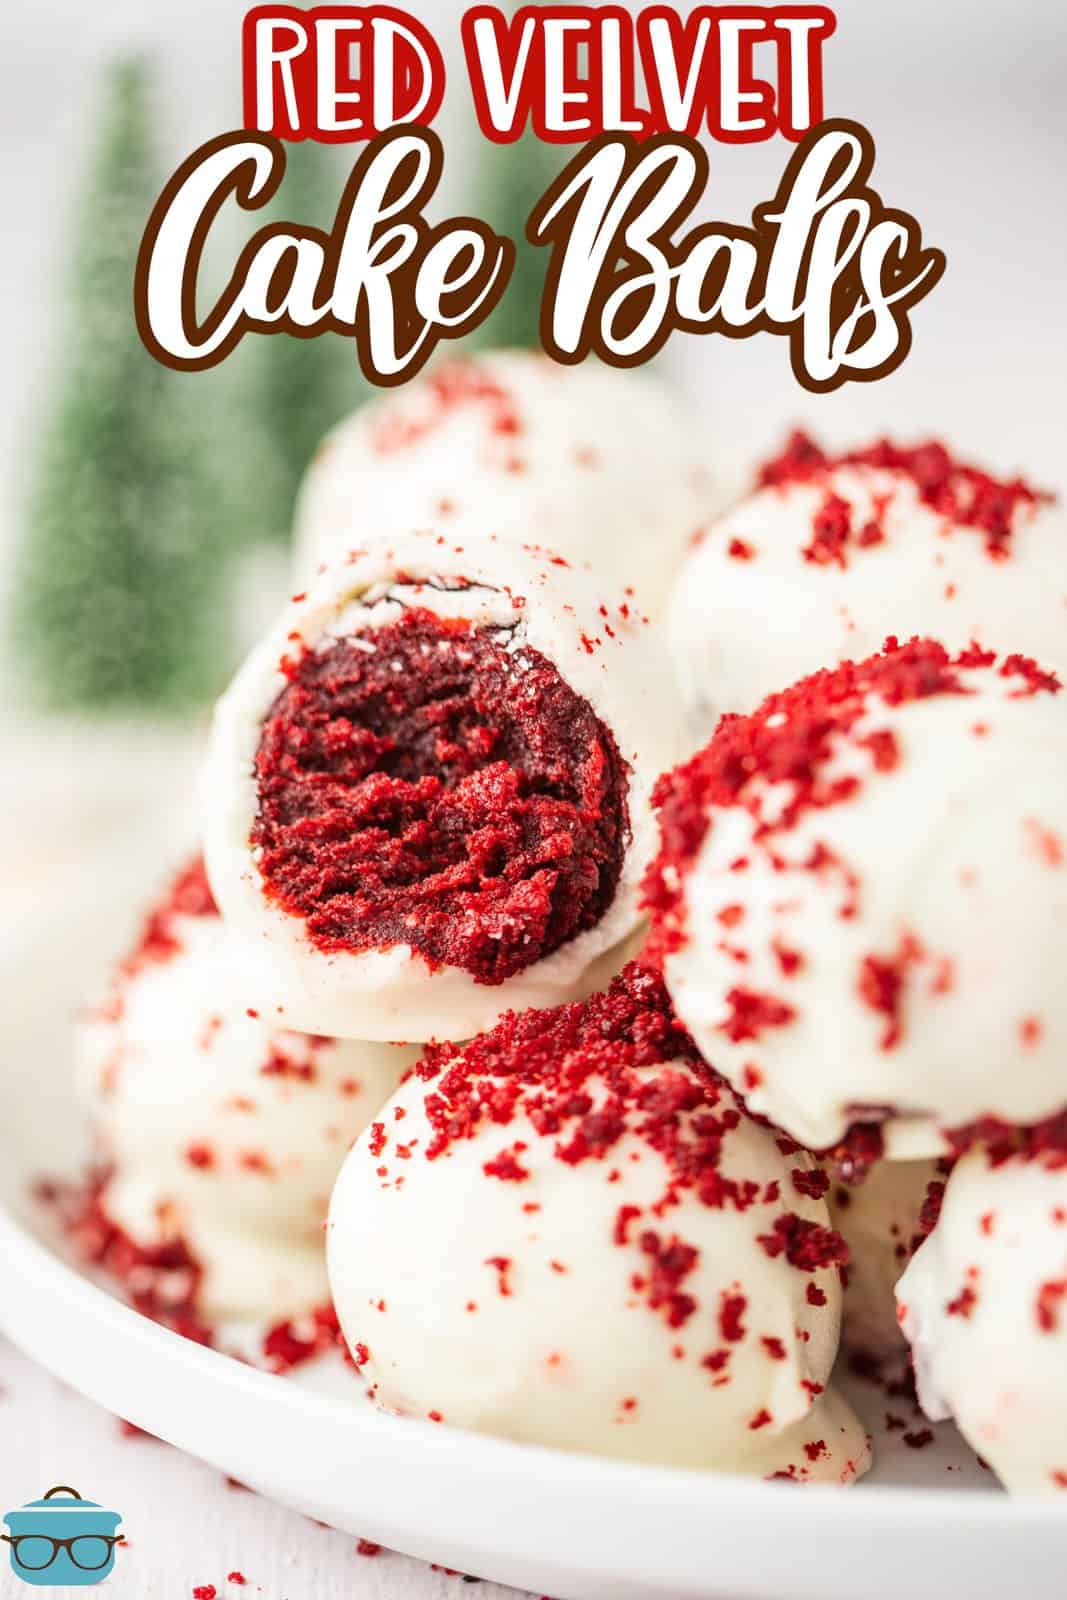
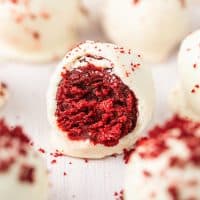
If you’ve never made cake balls, now is the time. They are so, so easy to make and I promise they will be eaten faster than you can make them! These Red Velvet Cake Balls are the perfect addition to any dessert spread. With their signature bright red color and vanilla coating, they look beautiful served on a platter or as part of a festive holiday display. All you need is a box of red velvet cake mix, cream cheese frosting, and a few other ingredients to craft the perfect cake balls!
FREQUENTLY ASKED QUESTIONS:
It’s important to work in batches because the vanilla coating hardens up pretty quickly (unless you are using a double boiler or have an extra set of hands helping you.) It’s just easier to heat up half of it and be able to coat the cake balls as you’re ready. Then heat the rest of the coating and use on the rest of the cake balls.
That stand mixer was given to me and it is ridiculously expensive. Honestly, it isn’t any better than any other stand mixer. It just looks cool since you get an overhead view. However, if you want to check it out, they do carry it on Amazon (paid affiliate link). I did find another version on Amazon (paid affiliate link) that is similar but about half the price.
Chilling the cake balls in step 7 is crucial so they don’t just fall apart when you go to dip them in the coating.
No, I give directions below in the recipe card on how to make it from scratch.
These cake balls last up to 3 days if stored in the refrigerator in a container. But I can guarantee they won’t last that long!
Yes, you can. I recommend flash freezing them so they don’t stick together. Store them in a freezer safe container and they’ll keep for up to 3 months. Here is a tutorial on how to flash freeze food.
INGREDIENTS NEEDED: (SEE RECIPE CARD BELOW FOR THE FULL RECIPE)
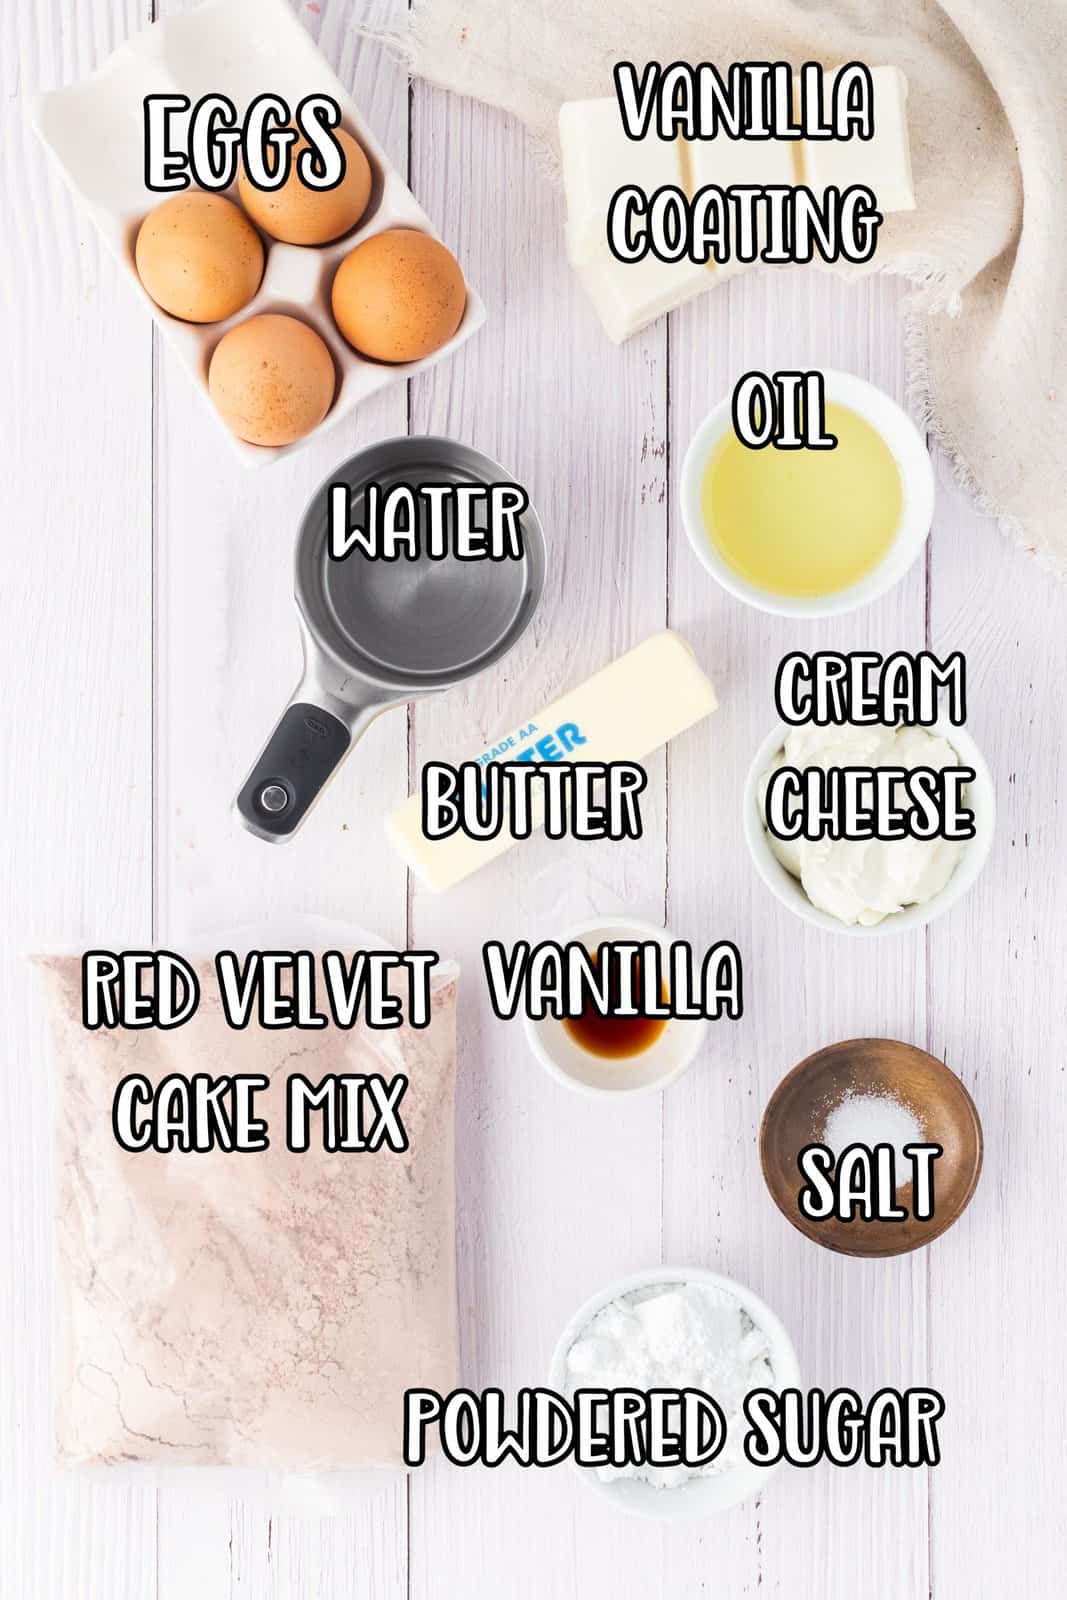
- red velvet cake mix – my favorite brand of cake mix is Duncan Hines. I can’t always find it in stock but I think it’s the best.
- eggs, oil and water – you will be following the directions on the back of your brand of cake mix with the amounts to use to prepare the cake.
- store-bought cream cheese frosting – if you don’t like cream cheese frosting, you can use vanilla.
- vanilla candy coating – depending on the brand, it may be called almond bark.
HOW TO MAKE RED VELVET CAKE BALLS
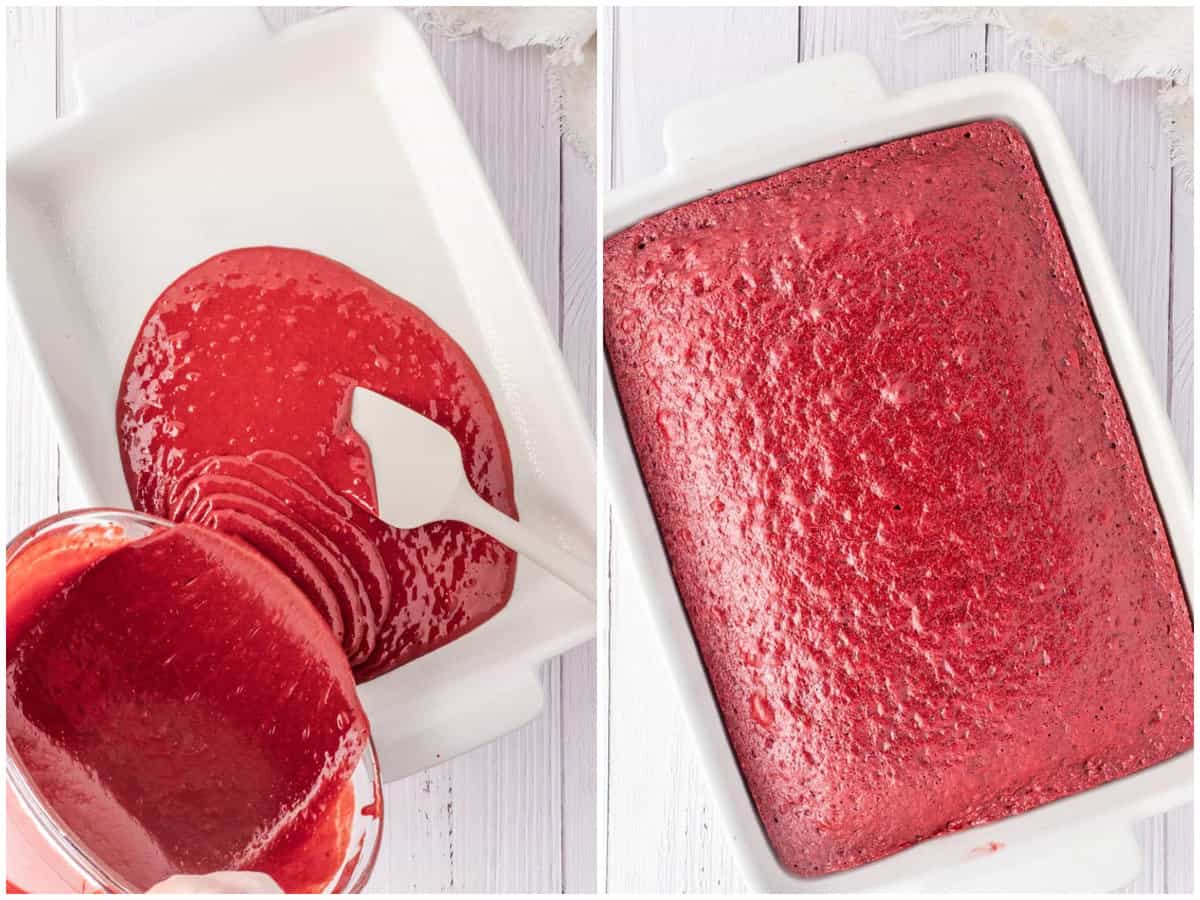
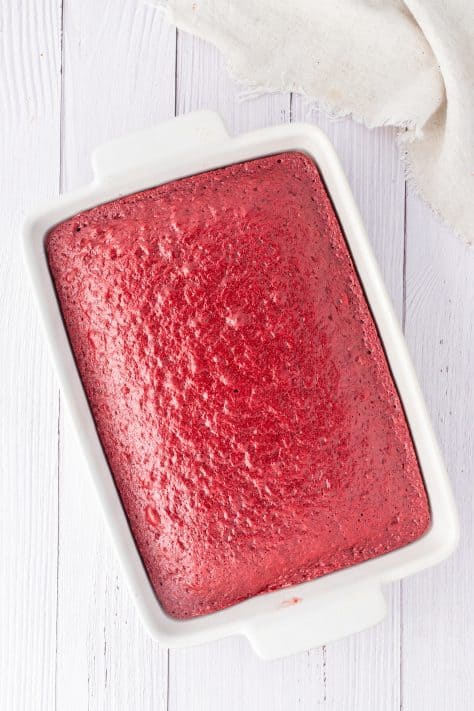
Preheat oven to 350°F. Spray 9×13-inch baking dish with nonstick spray. Prepare and bake the red velvet cake mix according to the directions on the box.
Set the cake aside and allow to cool.
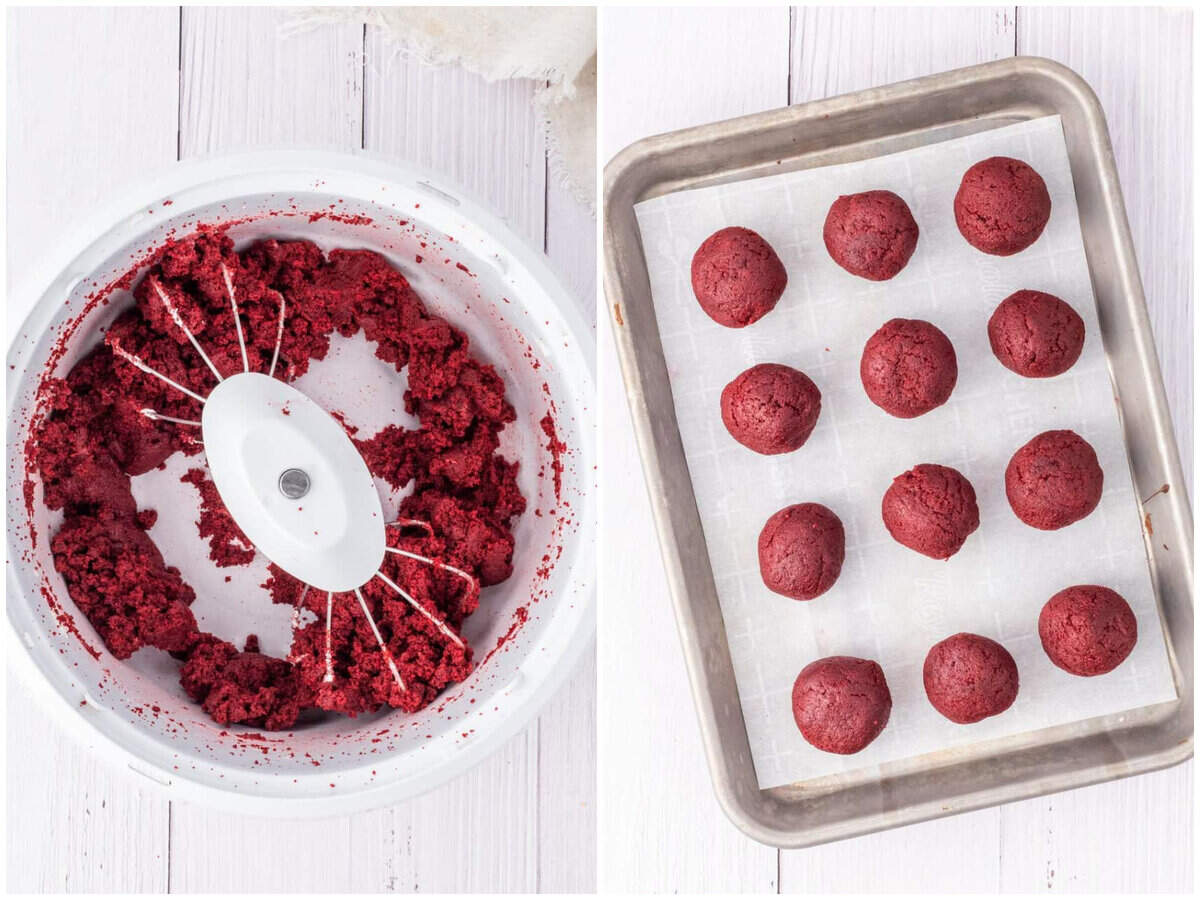
Crumble the cooled cake by hand (reserve a couple Tablespoons for sprinkling on the cake balls later.) Add most of the frosting to the cake crumbles. Note: since cake mixes are smaller than they used to be, I think using the whole tub of frosting is now too much. So put most of it in there and mix by hand or with an electric mixer. You want the cake ball mixture to be soft enough to roll into a ball without being crumbly. Add more if necessary.
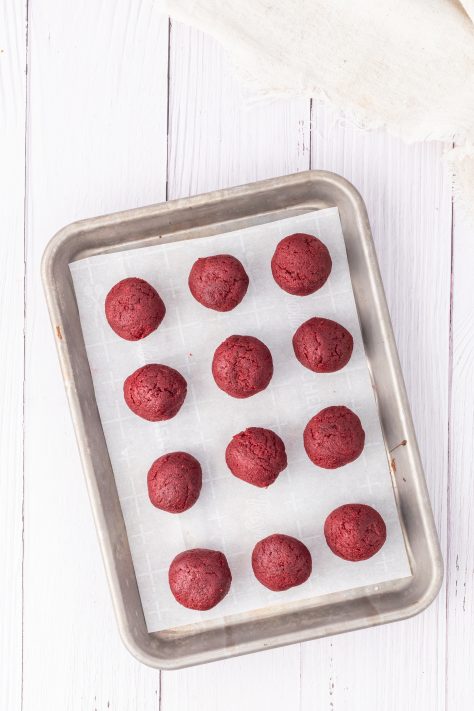
Use a cookie scoop or melon baller to scoop uniform amounts of the batter. Roll the balls between your palms to get them round. Place cookie balls on parchment paper or foil on a cookie sheet, and put them back in the refrigerator while you prepare the coating.
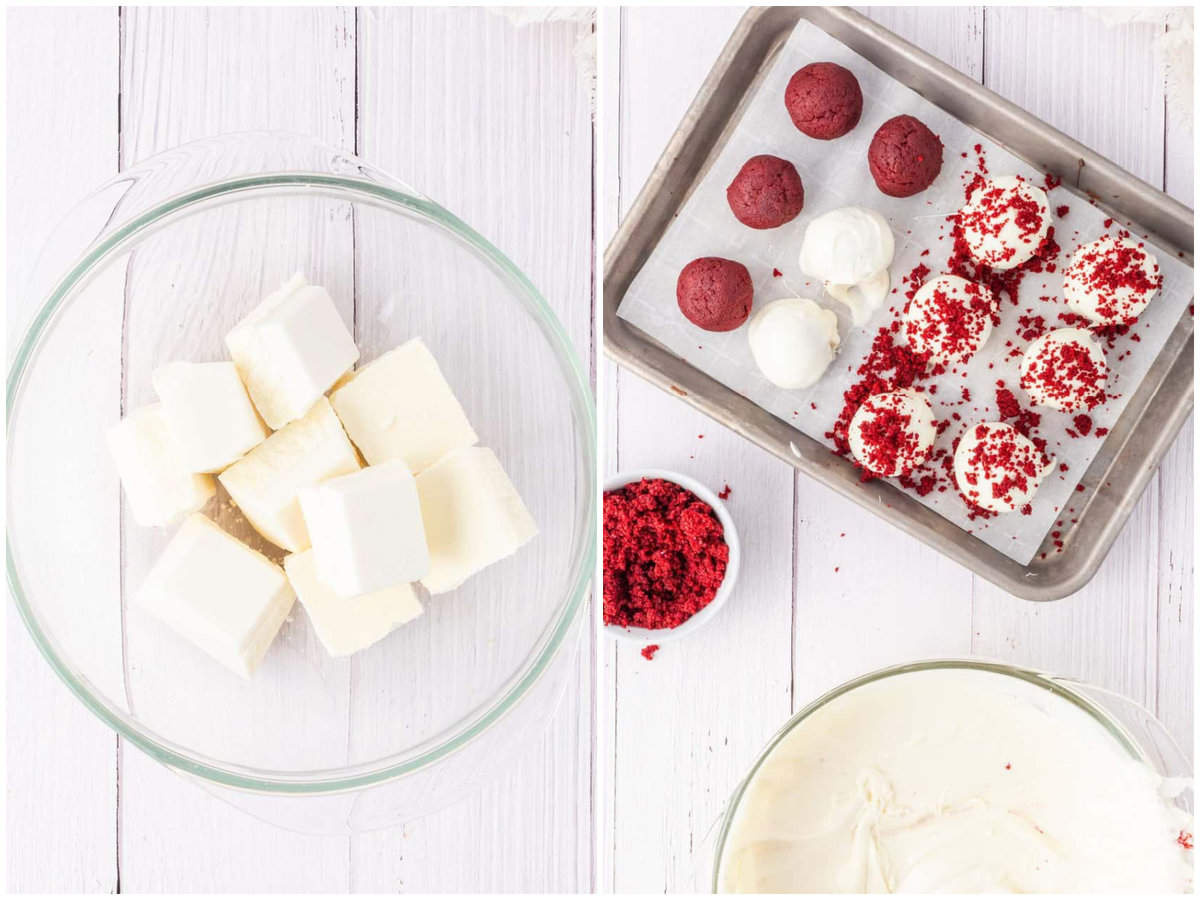
Place half of the vanilla candy coating in a microwave-safe bowl, and microwave in 30 second bursts, stirring each time. This should only require 1 or 2 minutes.
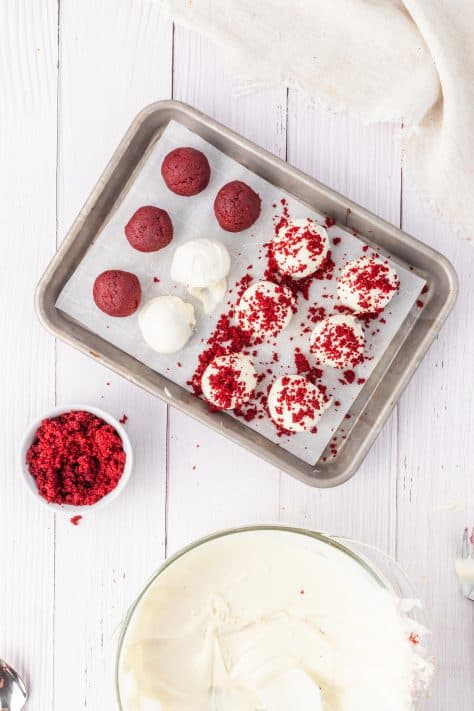
When the coating is ready, use a fork or dipping tools to dip the cake balls in the coating one at a time, dragging the bottom of the fork against the lip of the bowl to remove excess coating. Place the cake balls back on the parchment paper, and while the coating is still soft, sprinkle the tops with reserved cake crumbs. Repeat the process with the remaining vanilla coating and cake balls until completed.
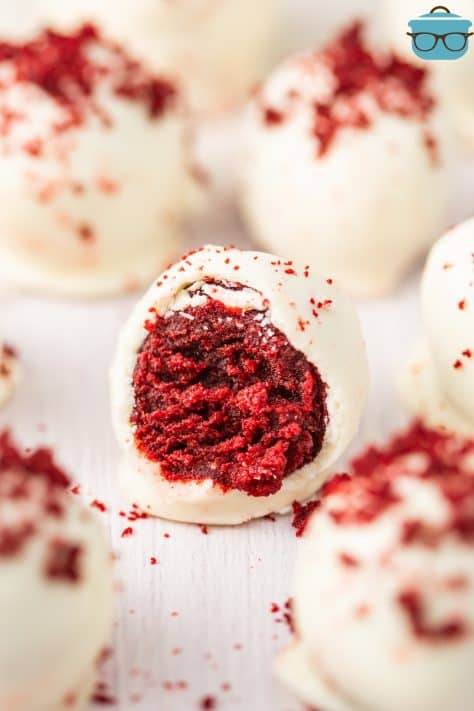
When all of the cake balls are dipped and sprinkled, return the tray to the refrigerator to set the coating for 15 minutes. Serve at room temperature for the best taste and texture.

CRAVING MORE RECIPES?
Red Velvet Cake Balls
Ingredients
- 1 box red velvet cake mix
- ingredients needed to make cake: eggs, oil and water
- 1 tub cream cheese frosting (or make it homemade, see below)
- 24 ounces vanilla candy coating (also called almond bark)
Optional homemade cream cheese frosting: (see notes below for directions)
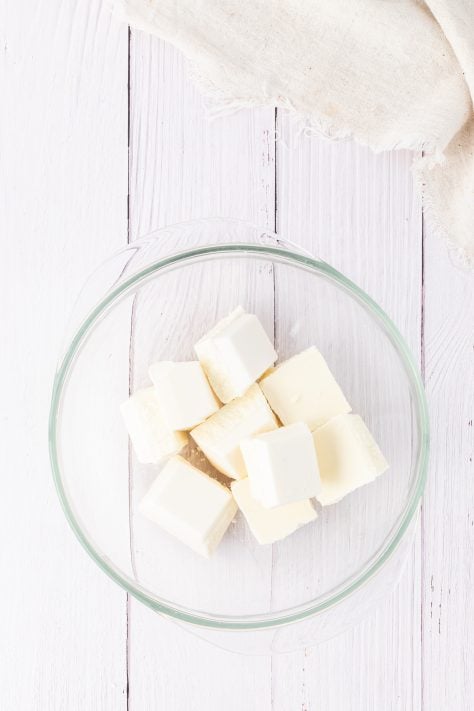
- 4 Tablespoons unsalted butter room temperature
- 4 ounces (½ block) cream cheese room temperature
- 2 cups powdered sugar adjust for consistency
- ¼ teaspoon salt
- 1 teaspoon vanilla extract
Instructions
- Preheat oven to 350°F. Spray 9×13-inch baking dish with nonstick spray.
- Prepare and bake the red velvet cake mix according to the directions on the box. Set the cake aside and allow to cool.

- Crumble the cooled cake by hand (reserve a couple Tablespoons for sprinkling on the cake balls later.) Add most of the frosting to the cake crumbles. Note: since cake mixes are smaller than they used to be, I think using the whole tub of frosting is now too much. So put most of it in there and mix by hand or with an electric mixer. You want the cake mixture to be soft enough to roll into a ball without being crumbly. Add more frosting if necessary.
- Use a cookie scoop or melon baller to scoop uniform amounts of the cake ball mixture. Roll the balls between your palms to get them round.
- Place cookie balls on parchment paper (or aluminum foil) lined cookie sheet, and put them in the refrigerator while you prepare the coating.
- Place half of the vanilla candy coating in a microwave-safe bowl, and microwave in 30 second bursts, stirring each time. This should only require 1 or 2 minutes max.
- When the coating is ready, use a fork or to dip the cake balls in the coating, one at a time, dragging the bottom of the fork against the lip of the bowl to remove excess coating.
- Place the cake balls back on the parchment paper, and while the coating is still soft, sprinkle the tops with reserved cake crumbs. Repeat the process with the remaining vanilla coating and cake balls until completed.
- When all of the cake balls are dipped and sprinkled, return the tray to the refrigerator to set the coating for 15 minutes. Serve at room temperature for the best taste and texture.

Notes
- Please refer to my FAQ’s (Frequently Asked Questions) and ingredient list above for other substitutions or for the answers to the most common questions.
- To make your own homemade cream cheese frosting instead of using store-bought: Blend the butter and cream cheese together in a mixing bowl. Add powdered sugar, a cup at a time, and add in the salt and vanilla. Continue to add powdered sugar and mix until you get the consistency you desire. It should be a little on the thick side. Continue with the recipe.
- If you prefer to make your own homemade red velvet cake from scratch, it will work with this recipe as well.
Nutrition
Nutritional Disclaimer
“The Country Cook” is not a dietician or nutritionist, and any nutritional information shared is an estimate. If calorie count and other nutritional values are important to you, we recommend running the ingredients through whichever online nutritional calculator you prefer. Calories and other nutritional values can vary quite a bit depending on which brands were used.


