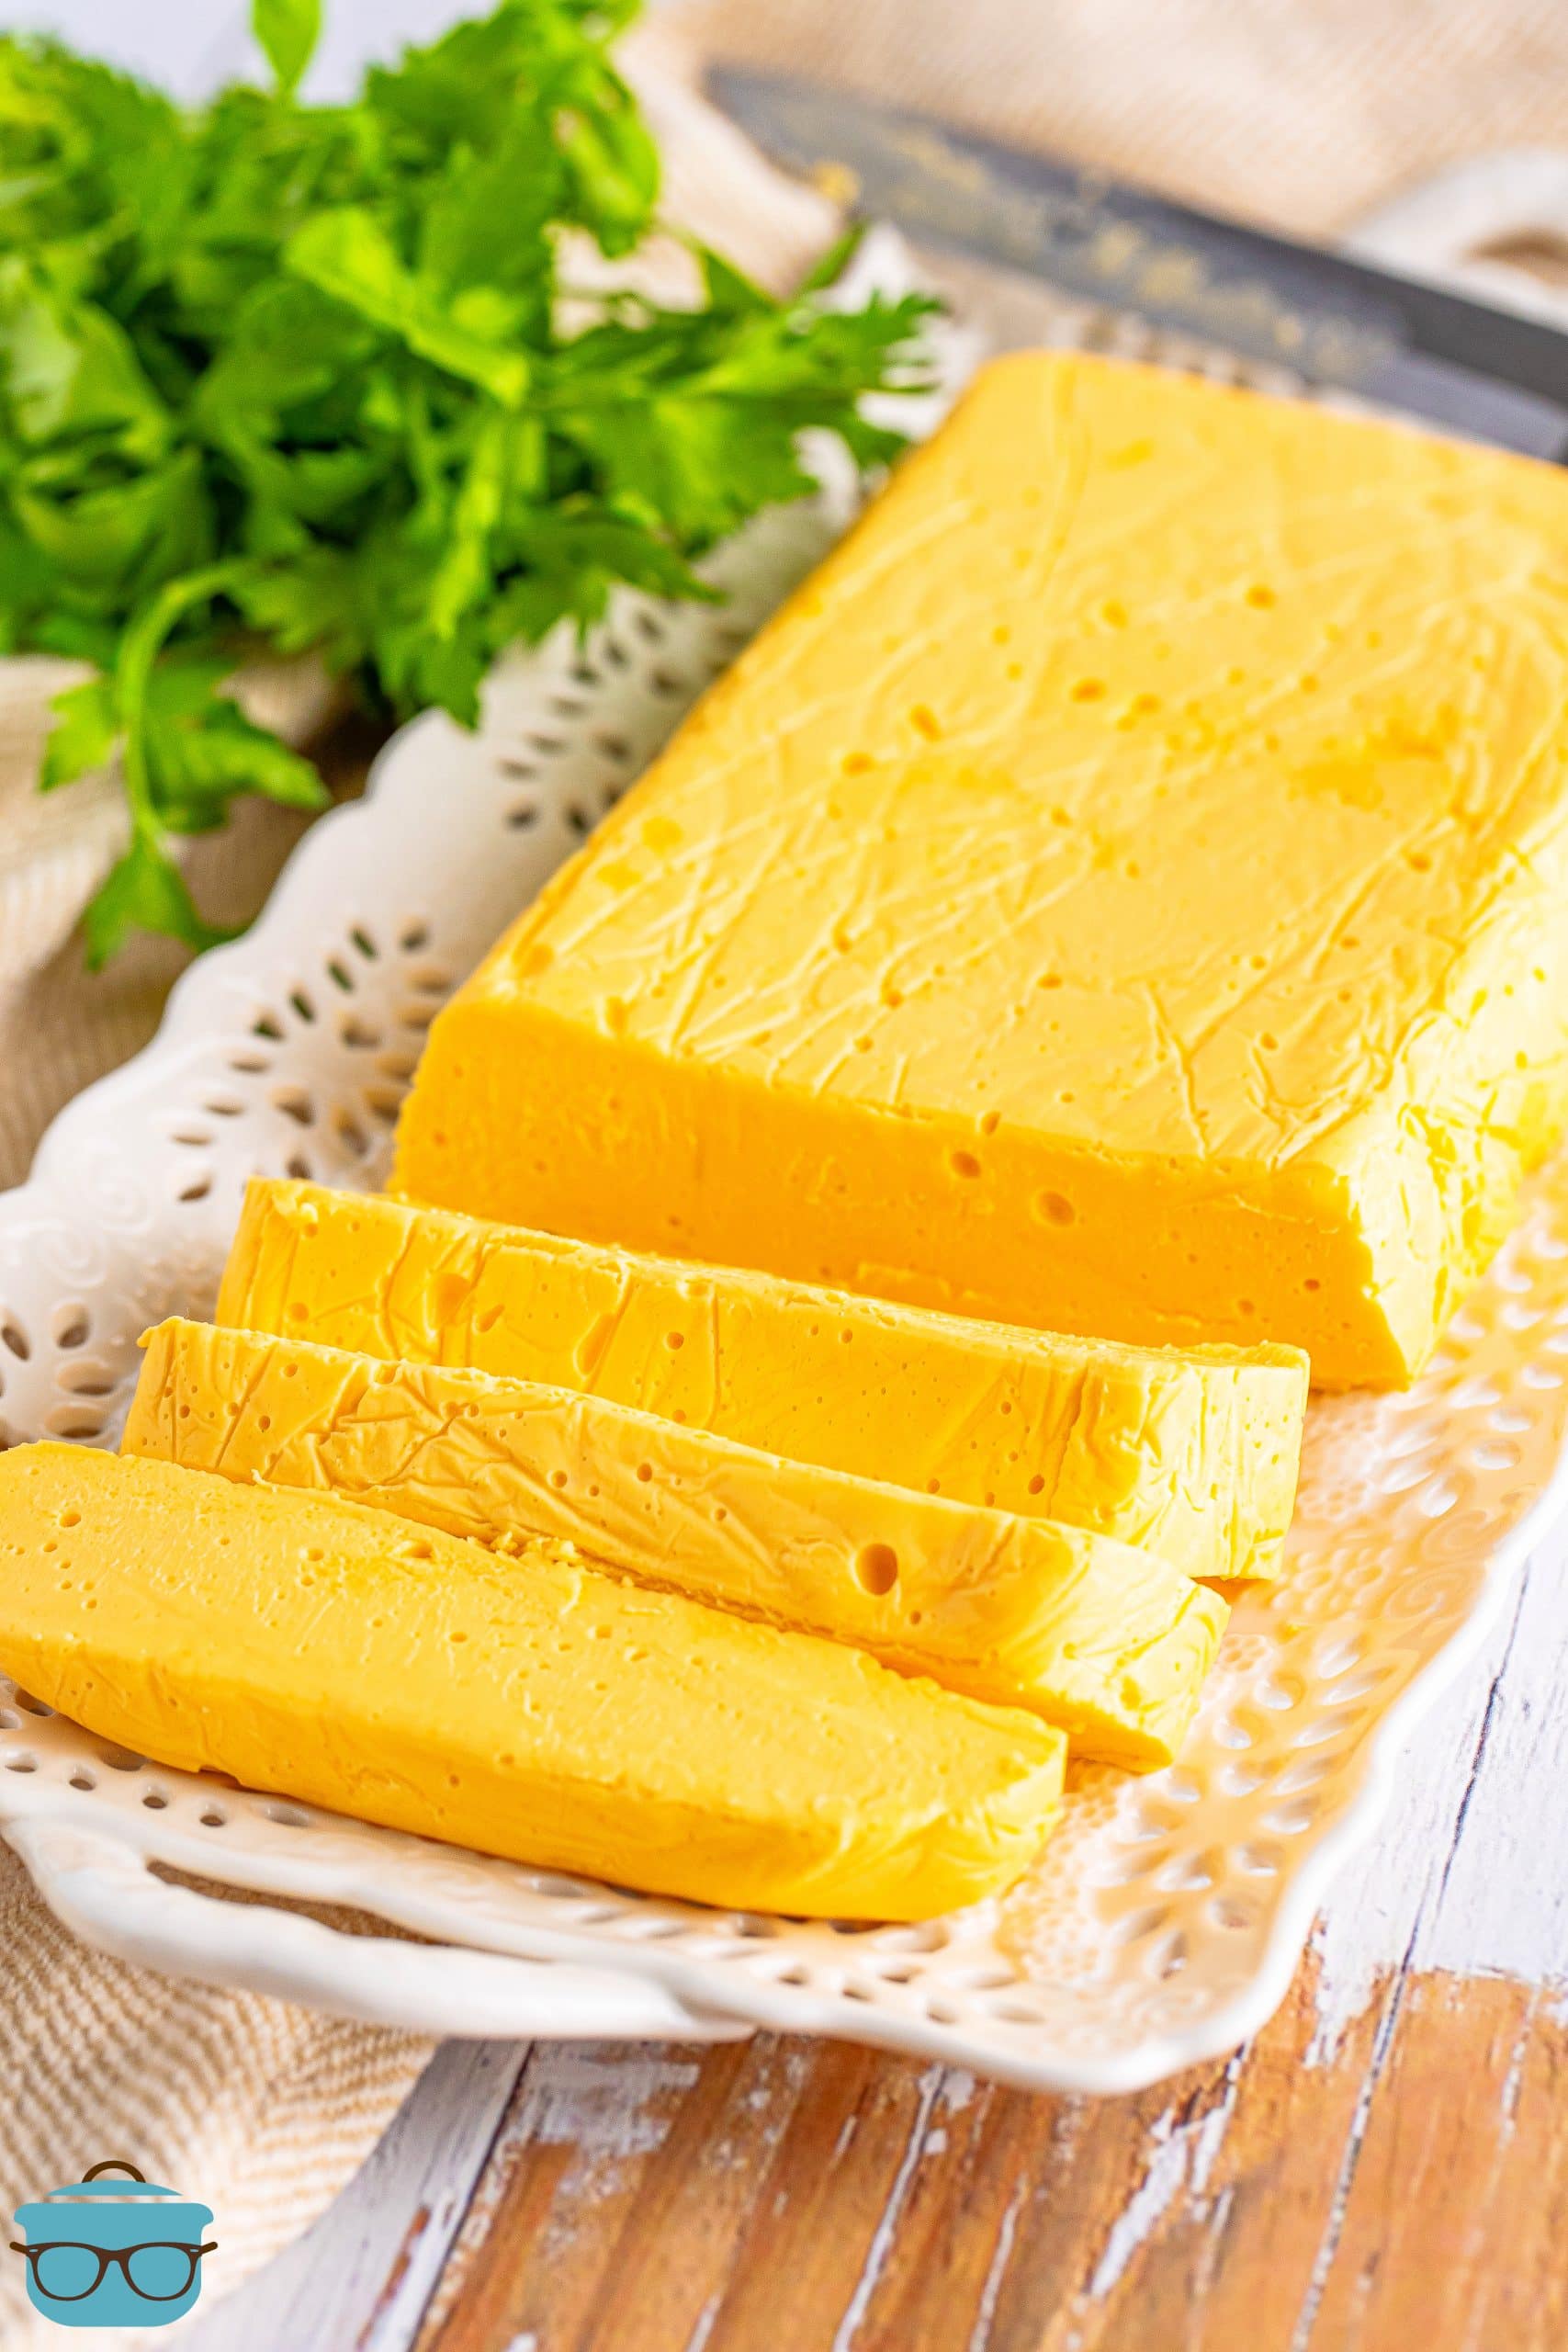
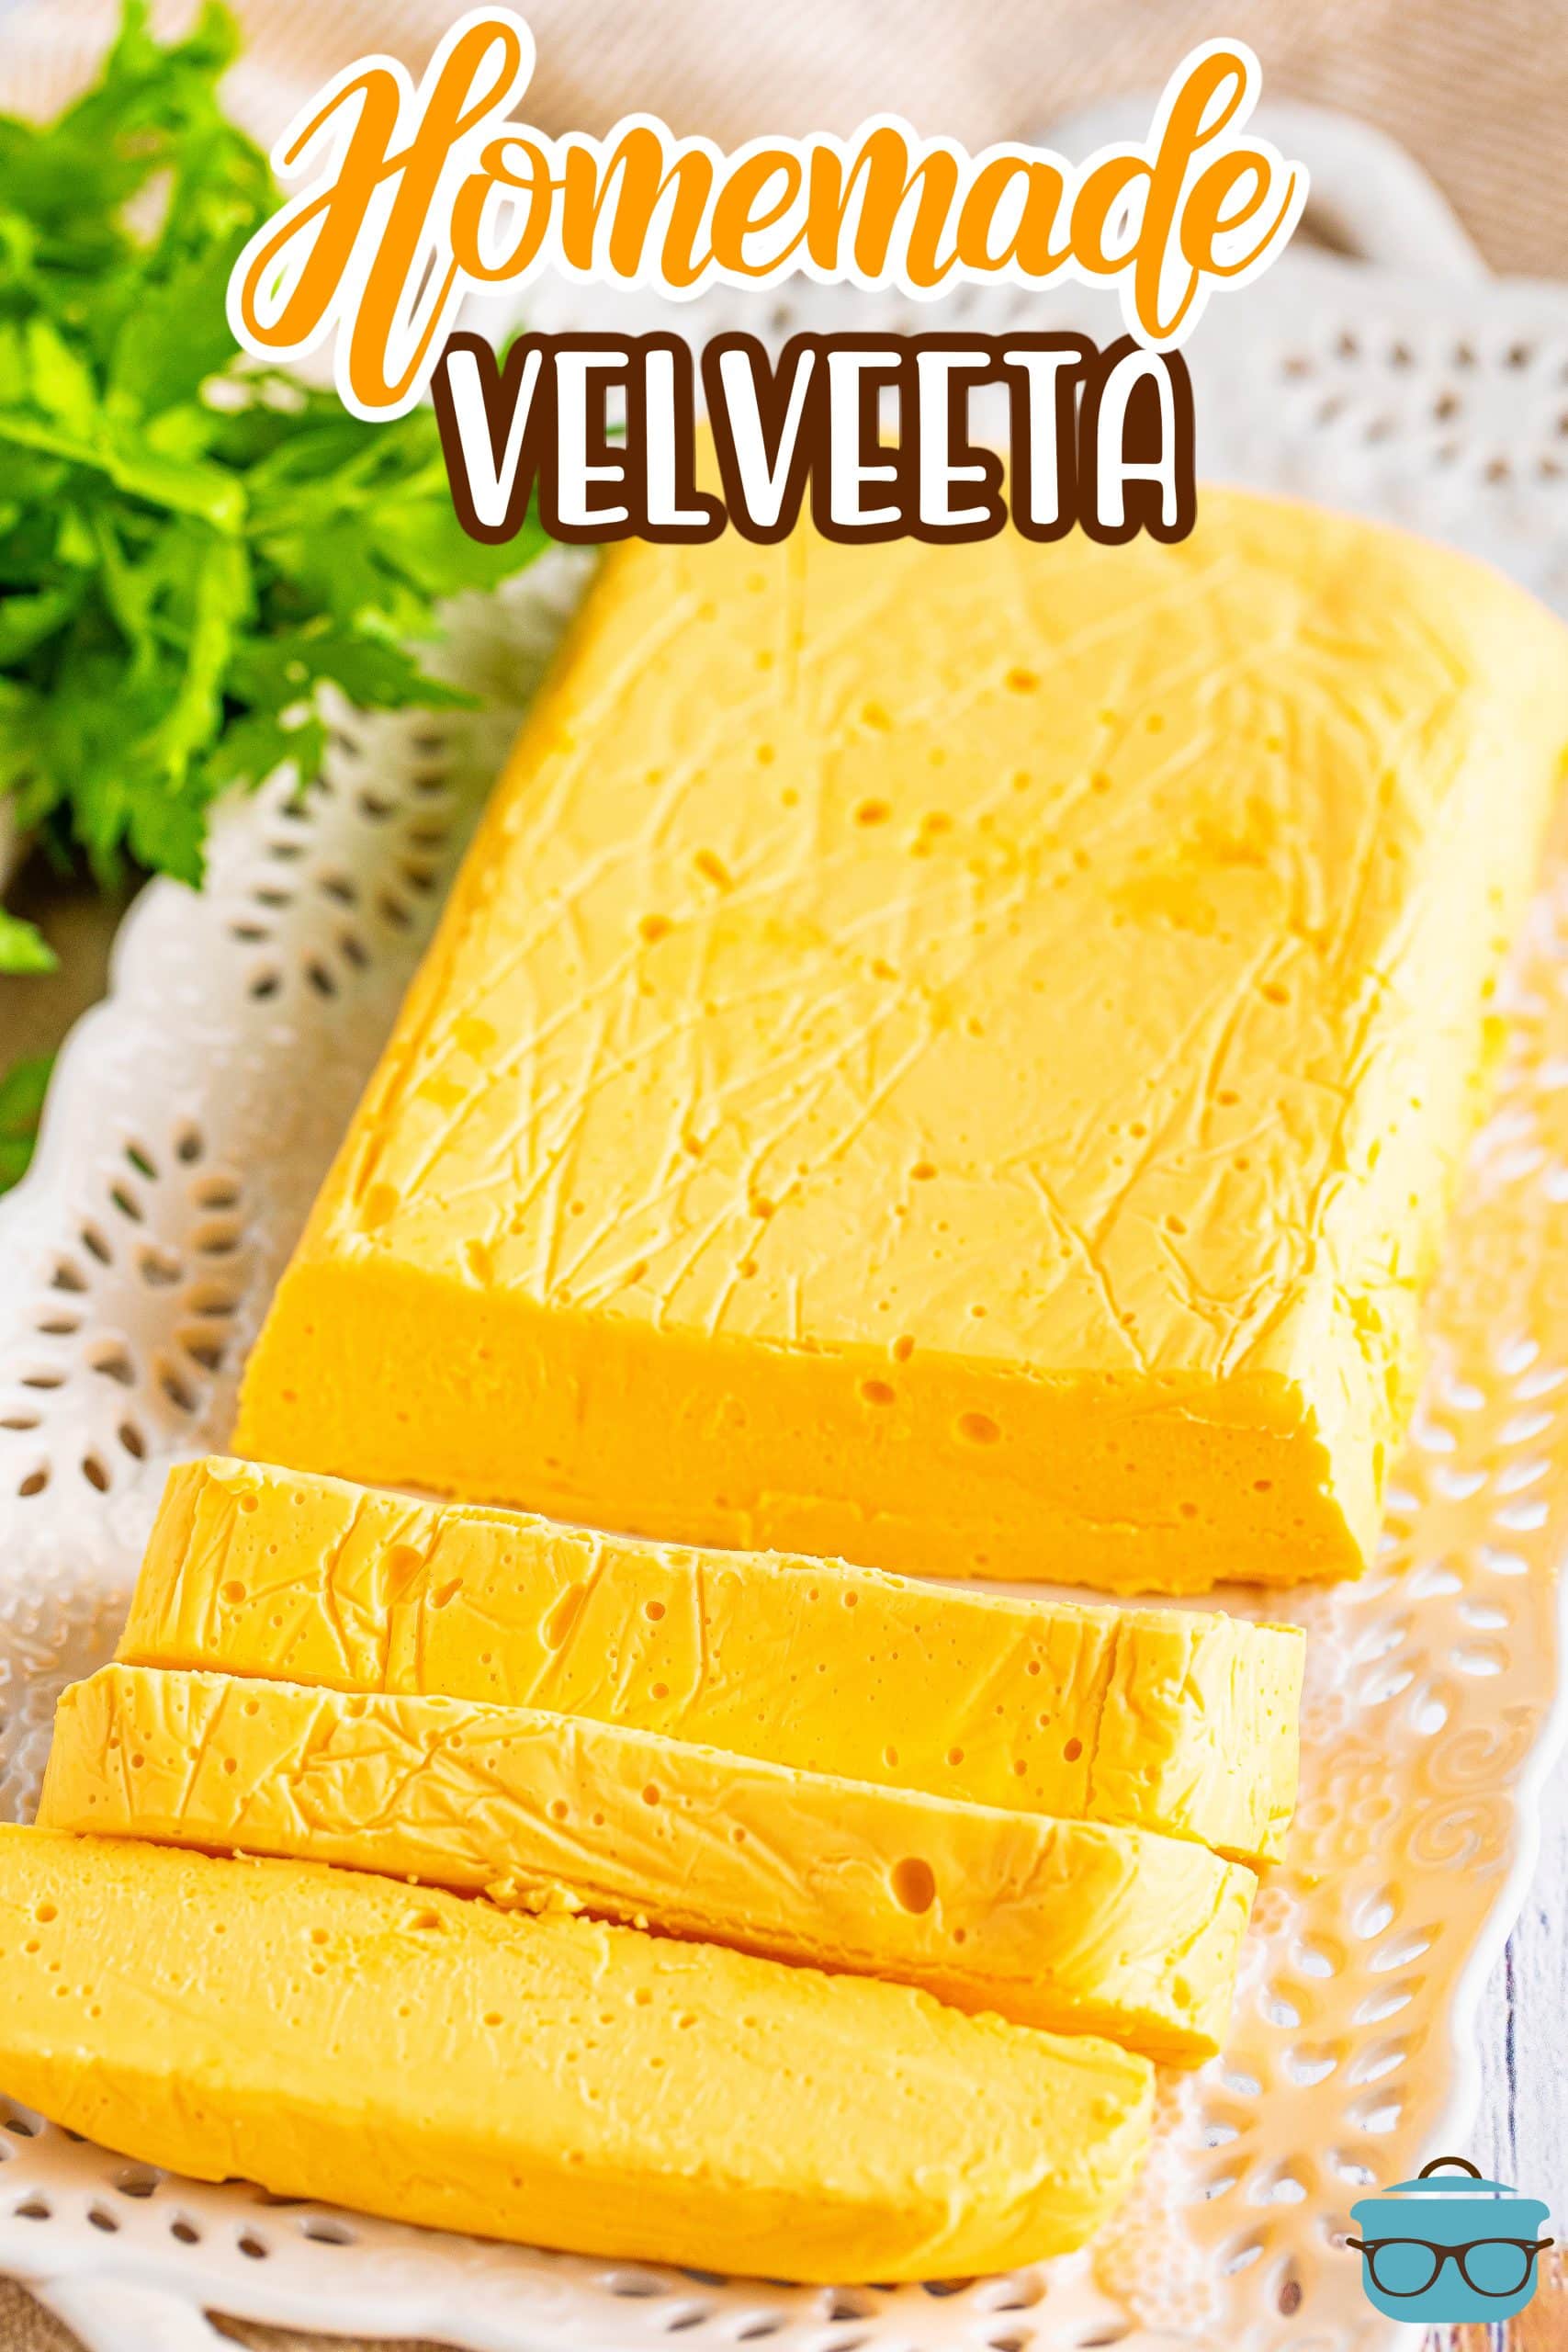
Homemade Velveeta
You only need 6 ingredients to make an easy block of this creamy, melty Homemade Velveeta. It looks and tastes just like store-bought, but better!
EASY CHEESY MELTY VELVEETA RECIPE
Making your own Homemade Velveeta has never been so easy! I am not sharing this recipe because there is anything wrong with the store bought Velveeta. I love it and use it all the time! This is just an alternative for those who have the time and energy to try it out from scratch or for those who need to pay close attention to ingredients because of dietary concerns. So please don’t let this post make you feel guilty about buying store bought. This is just a fun and delicious alternative that tastes so good and works great in so many recipes!
FREQUENTLY ASKED QUESTIONS (FAQ’S):
Powdered milk is what gives this block of Velveeta its smooth and rich velvety texture like the original loaf of Velveeta. Some recipes will tell you to use liquid milk, but I have found that the liquid milk won’t give you the same texture or taste that the powdered version will. You can usually find powdered milk in the grocery store in the baking aisle near evaporated and sweetened condensed milk. Many times you will find it on a bottom shelf.
Nope. Don’t swap it out. Cornstarch is what you want to use over flour because it has twice the thickening powder when compared to flour and that is what we want here.
Just about any cheesy recipe would be good. It makes amazing grilled cheese sandwiches (see image below)! Here are a few recipes where I use Velveeta:
No Boil Mac and Cheese
Taco Spaghetti
Cheeseburger Soup
Slow Cooker Hamburger Potato Soup
Velveeta Fudge
Velveeta blocks are sold in 8 ounces and 16 ounces. This recipe makes 16 ounces. If you want to split this in half so it is easier to use in recipes that only call for an 8 ounce block, you can do that. I would probably just make the whole block then cut it in half and wrap the block you’re not using (also put it into a covered container) and store it for later. I am sure you could just make it in two smaller pans but I’m not sure exactly what size pan you would use – perhaps two mini loaf pans.
The trick is making sure it is processed long enough so it is completely smooth. Pouring the hot water into the food processor is a little scary but if you (very) slowly do it a little at a time you’ll be fine.
Sure! You can use this process for any flavor of cheddar you like! I think White Cheddar would also be a good loaf to use for some recipes – just make sure it is freshly shredded.
You bet. This would be fun to add your favorite seasonings, this is a great base recipe to work from. I think a taco flavored Velveeta cheese would be amazing!
Keep your block of cheese covered and refrigerated for up to 2 weeks, or keep it wrapped and stored tightly in the freezer for up to 3 months.
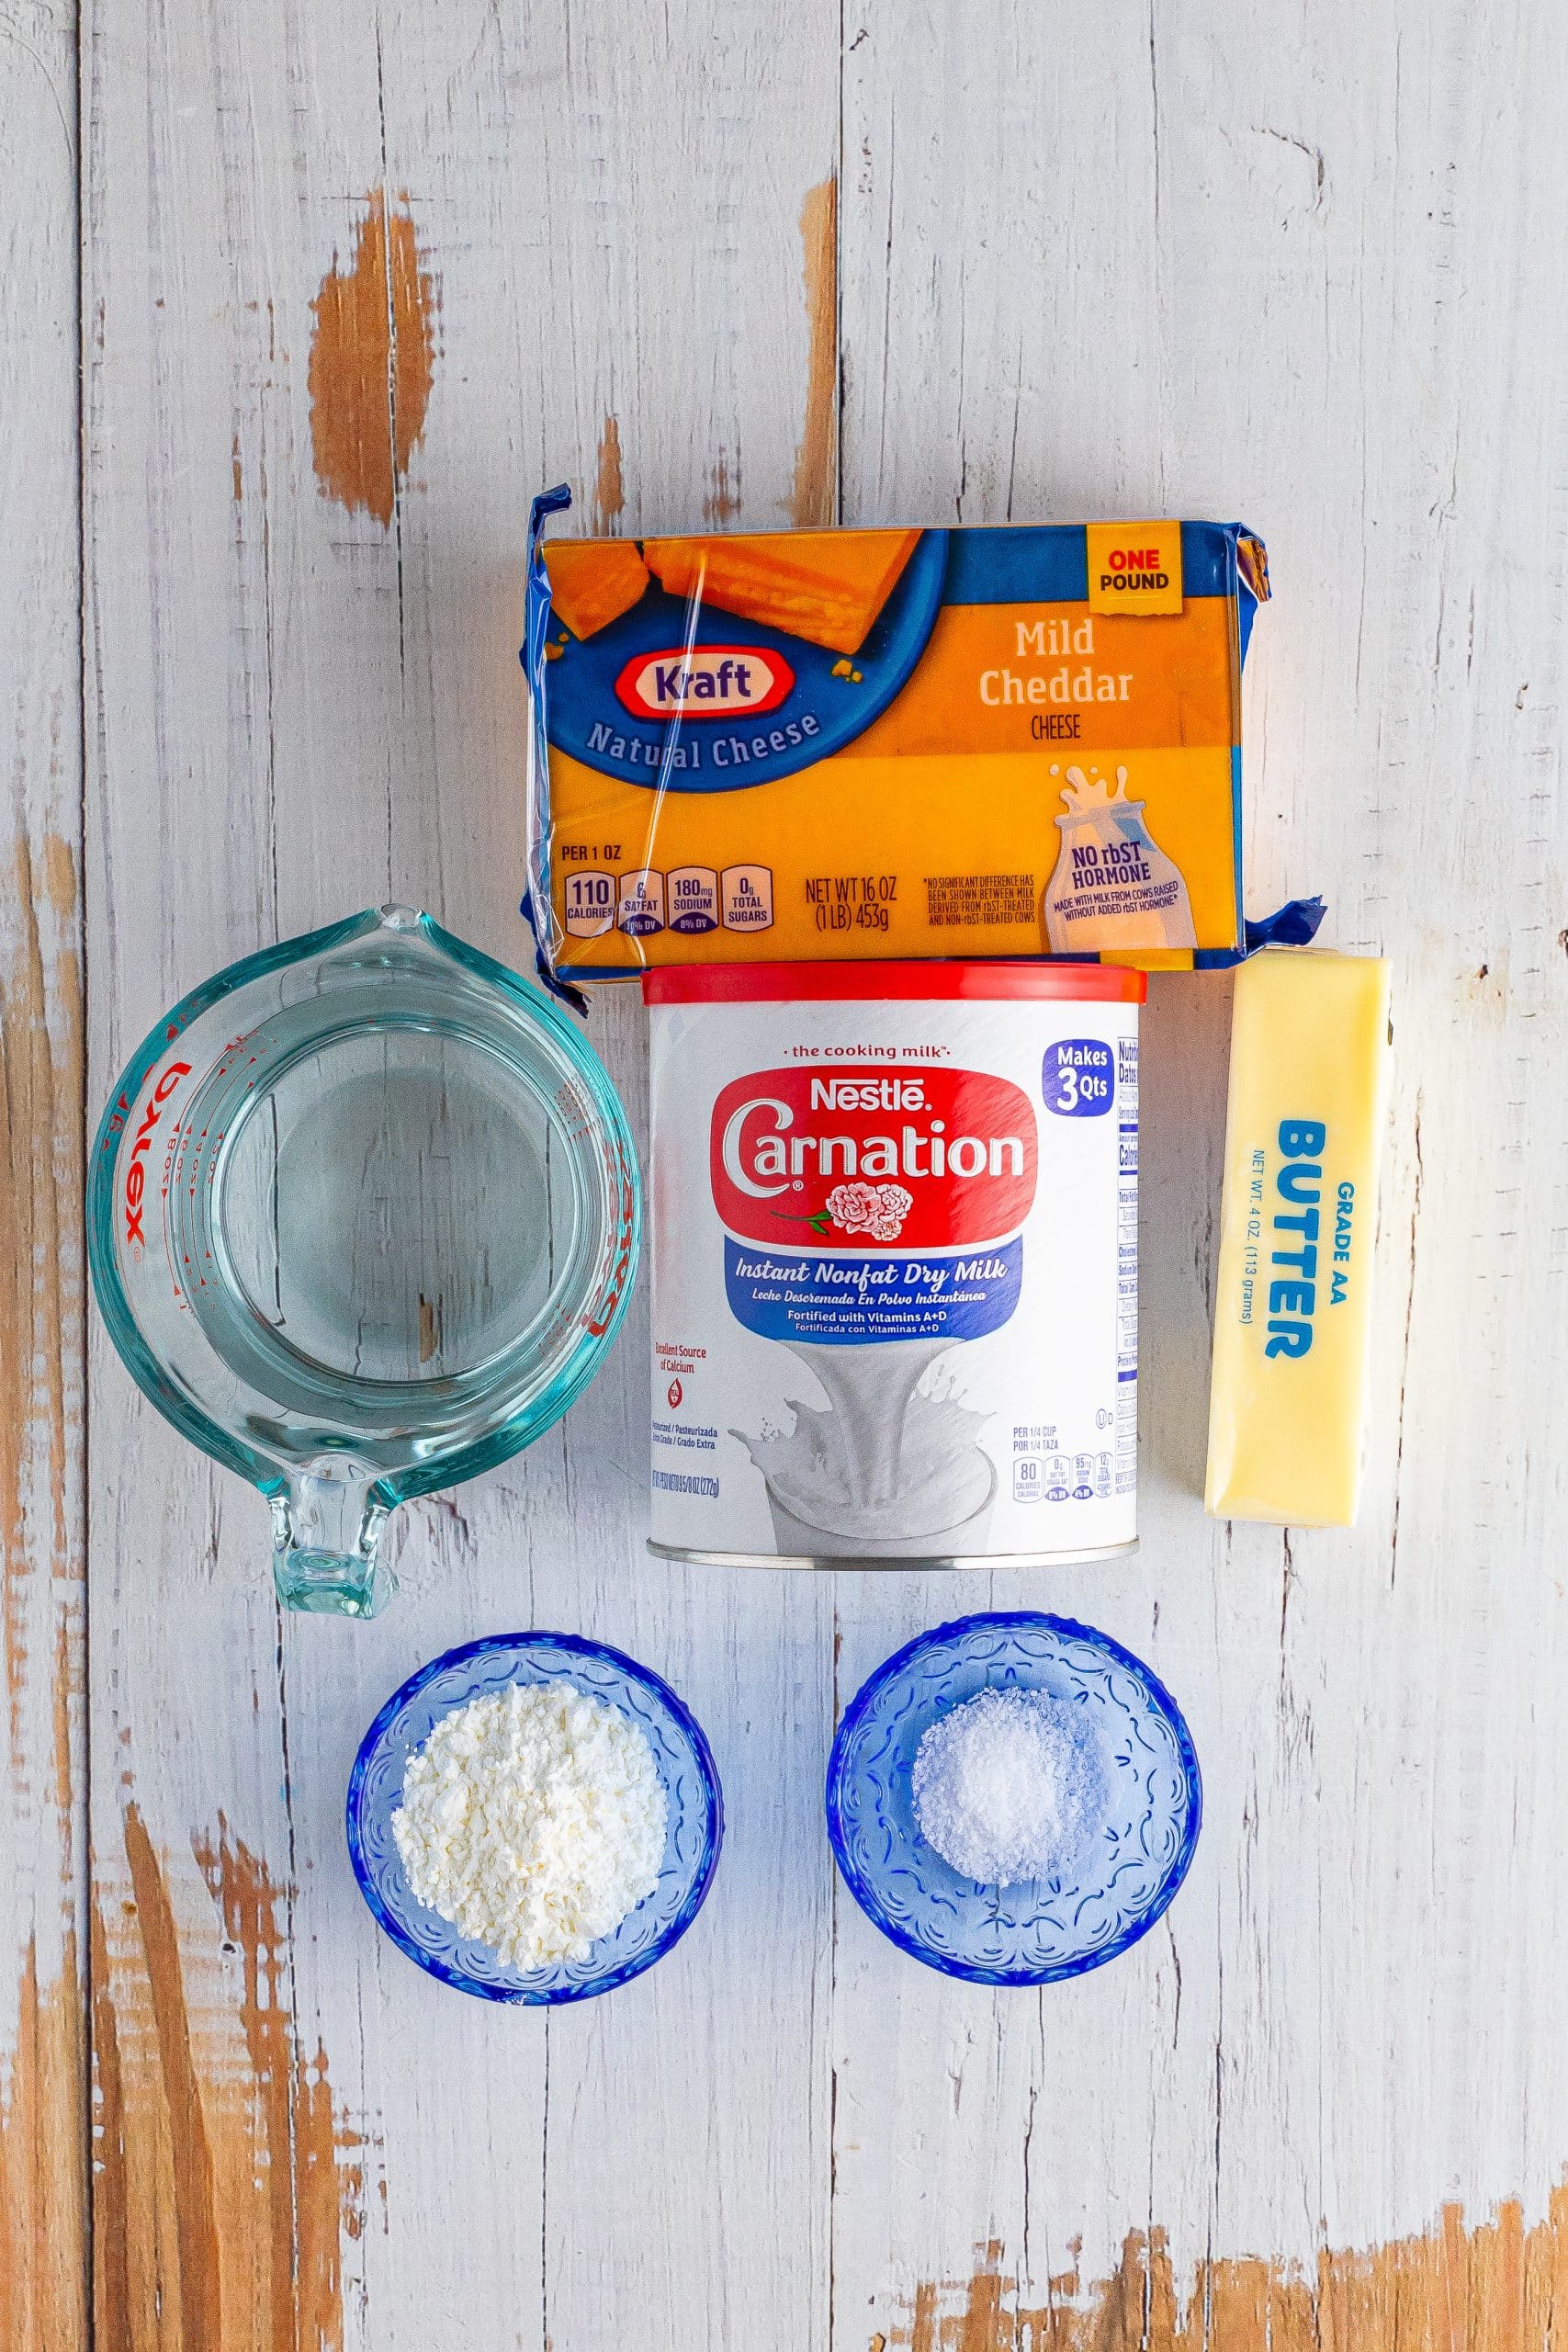
INGREDIENTS NEEDED: (SEE RECIPE CARD BELOW FOR THE FULL RECIPE)
- mild cheddar cheese – don’t try to skip this and use the pre-shredded cheese. Your loaf won’t turn out right. There’s an anti caking agent (which is perfectly safe to eat by the way) in the bagged cheese that just won’t let your loaf get the right texture.
- nonfat milk powder – see my ingredient image below so you know what to look for. Some brands sell it in boxes. You will usually find it near the evaporated milk and sweetened condensed milk in the grocery store. Many times it is on the bottom shelf. Please do not substitute any ingredients I have on this list. It has to be made exactly with these ingredients for best results.
- cornstarch – do not try to swap this out for any other substitute like flour or unflavored gelatin like you may see in other recipes. Cornstarch works the best. I’ve tested it all – don’t substitute.
- salt – there is very, very little salt in this entire recipe but the great thing about making your own is you can adjust the salt levels to your preference or leave it out altogether if you need it totally salt free.
- salted butter – it needs to be real butter not margarine. Blue Bonnet won’t work here.
HOW TO MAKE HOMEMADE VELVEETA
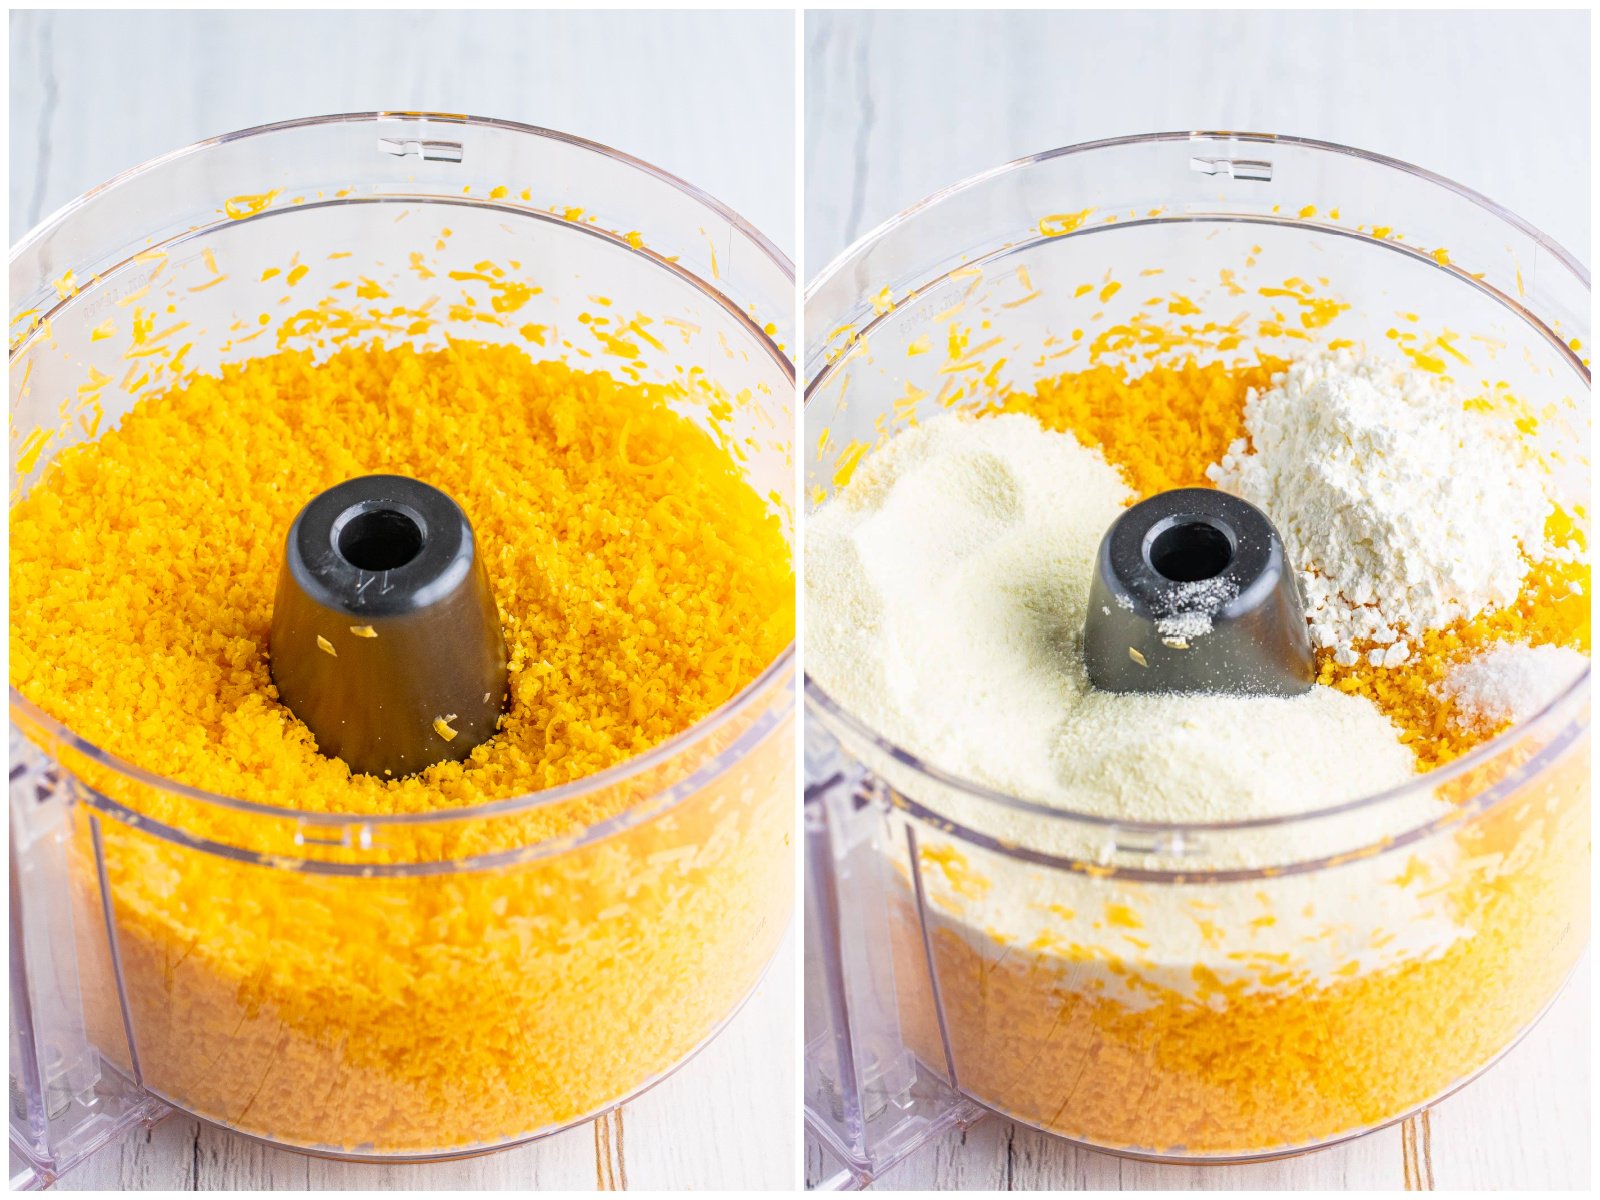
Line a 9×5-inch loaf pan (or whatever size mold you want) with a couple of pieces of plastic wrap and set aside. Very finely grate the cheese and place it into a food processor.
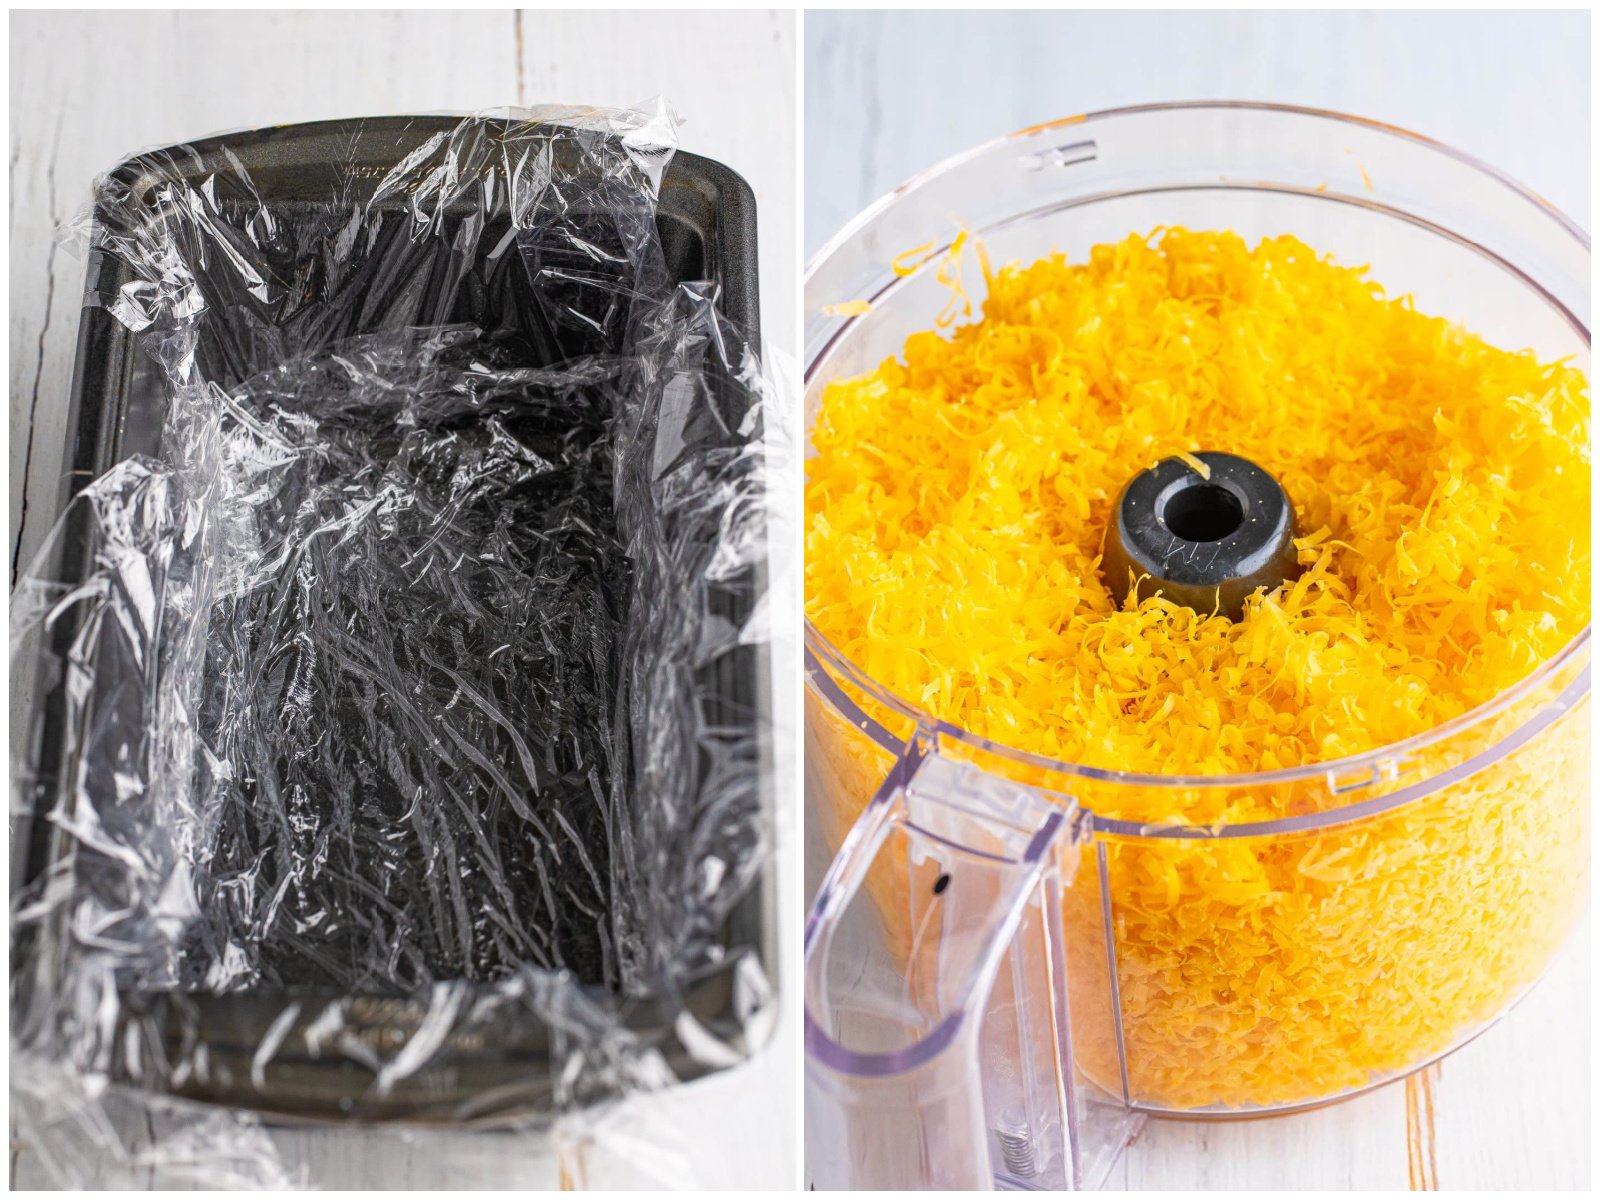
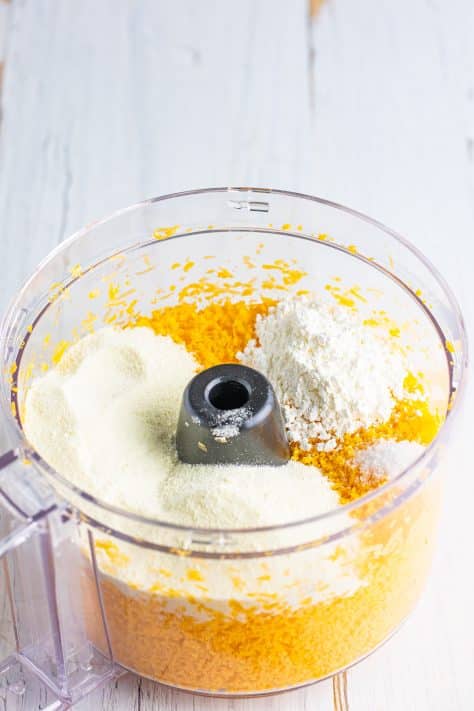
Pulse a few times to break it up even more. Then add the milk powder, cornstarch, and salt. Pulse again until well mixed.
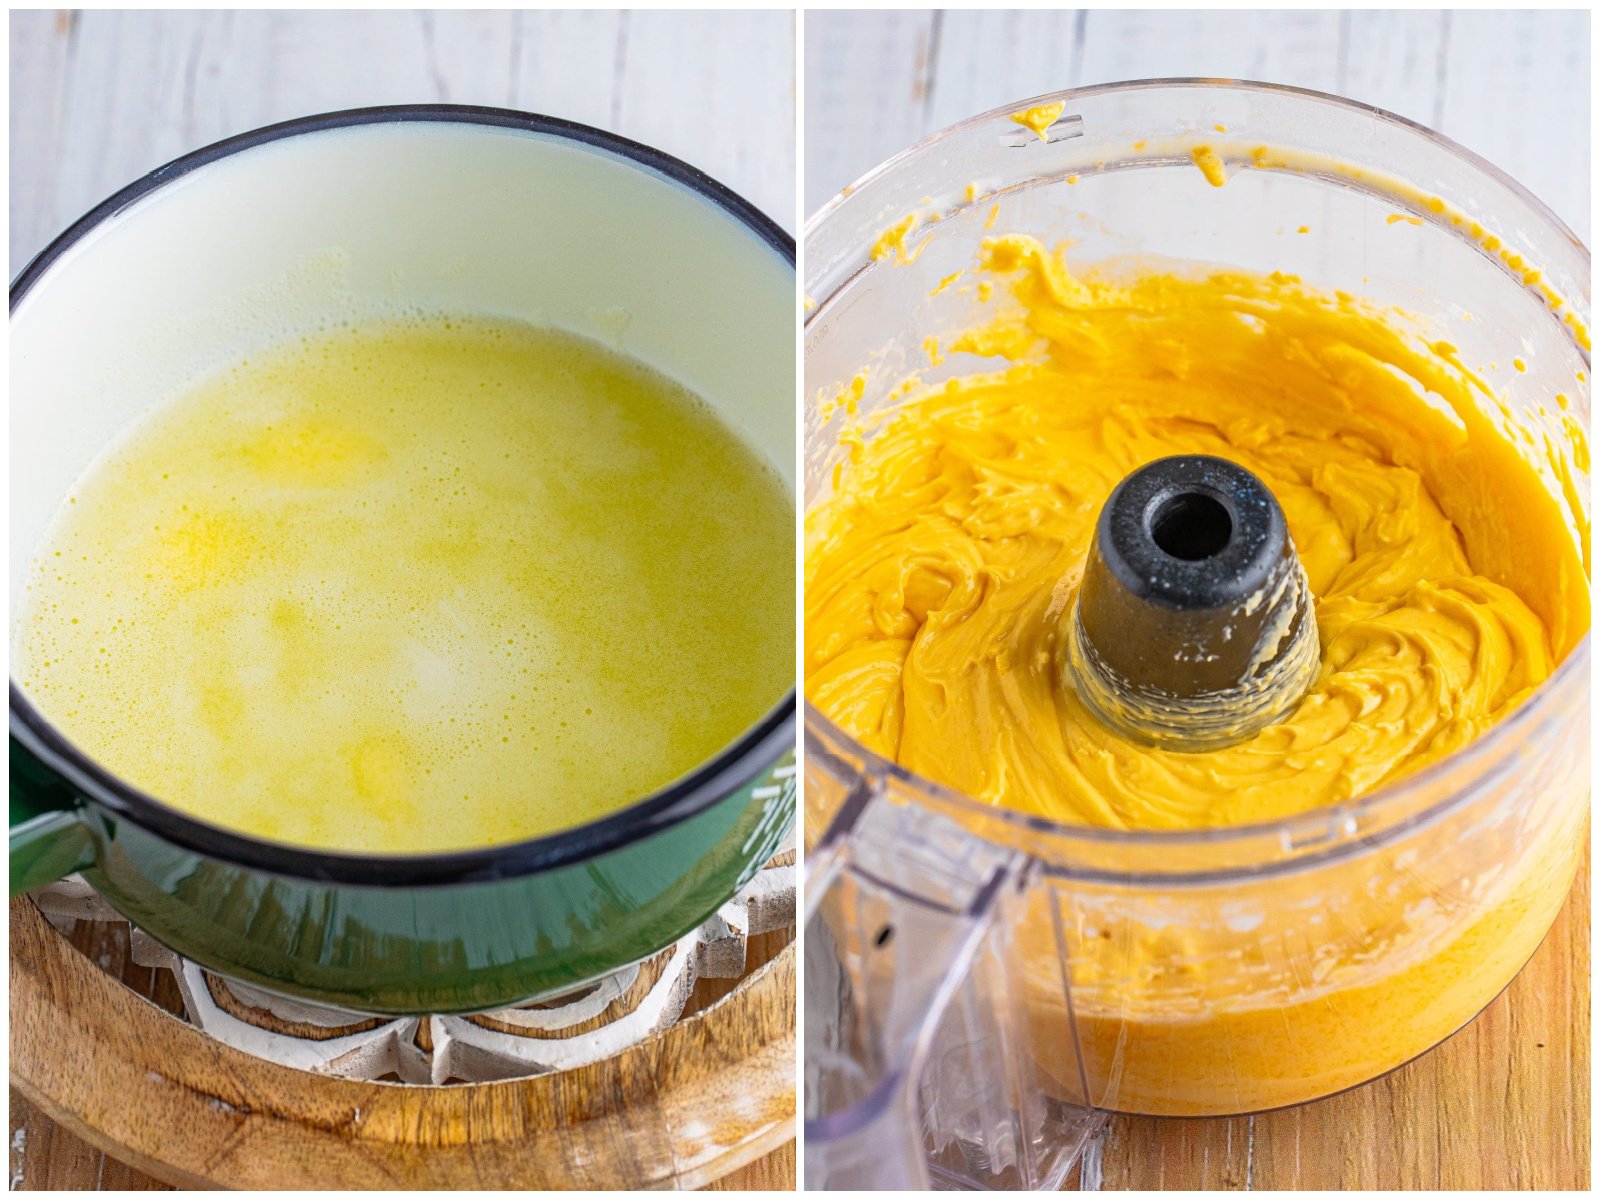
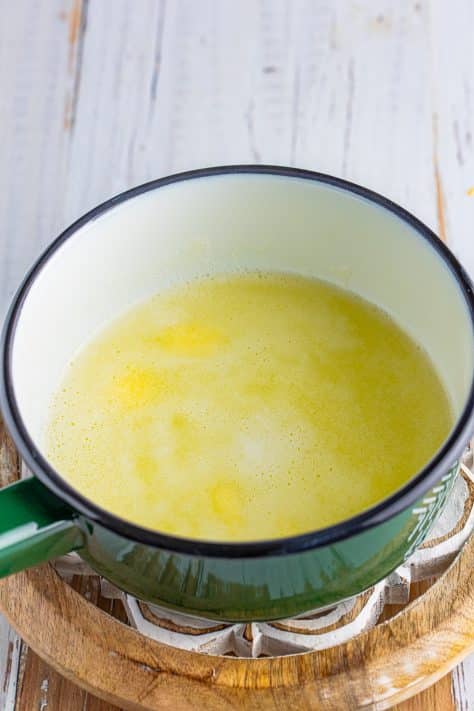
Add the water and butter to a small saucepan and bring to a boil. Remove from heat. Turn on the food processor and very carefully and very slowly stream in the water mixture.
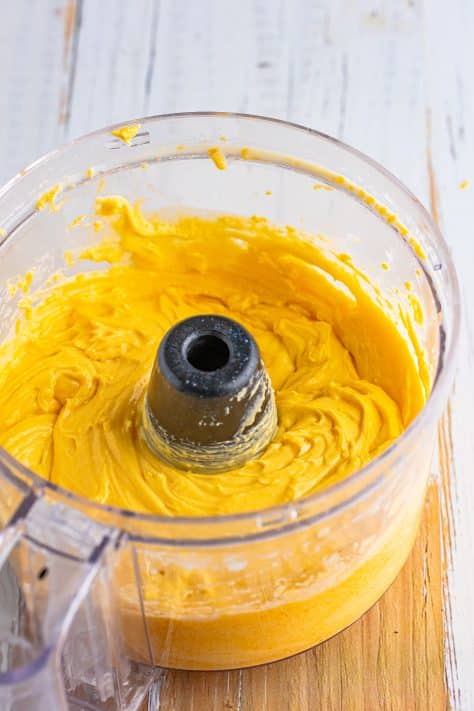
Continue to process the mixture until completely smooth, and scrape down the sides as needed to make sure everything is fully incorporated. It may seem like it won’t come together at first but give it time, be patient and it will come together and get smooth. It should be totally smooth and not lumpy or grainy – that is when you know it is ready.
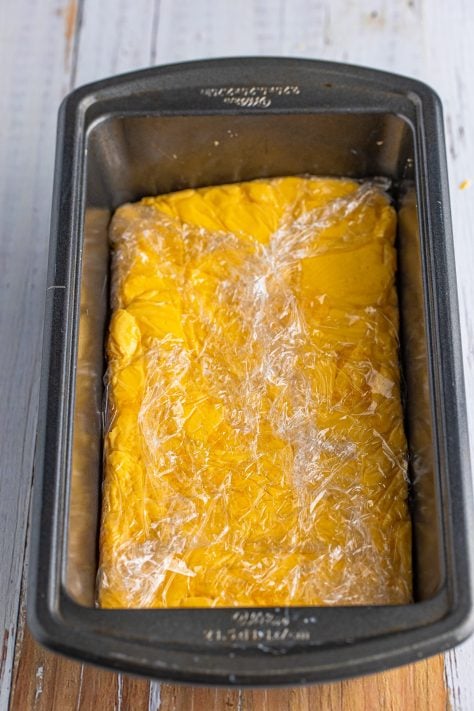
Evenly spread the mixture into the prepared pan, smoothing out the top. Cover the top with plastic wrap.
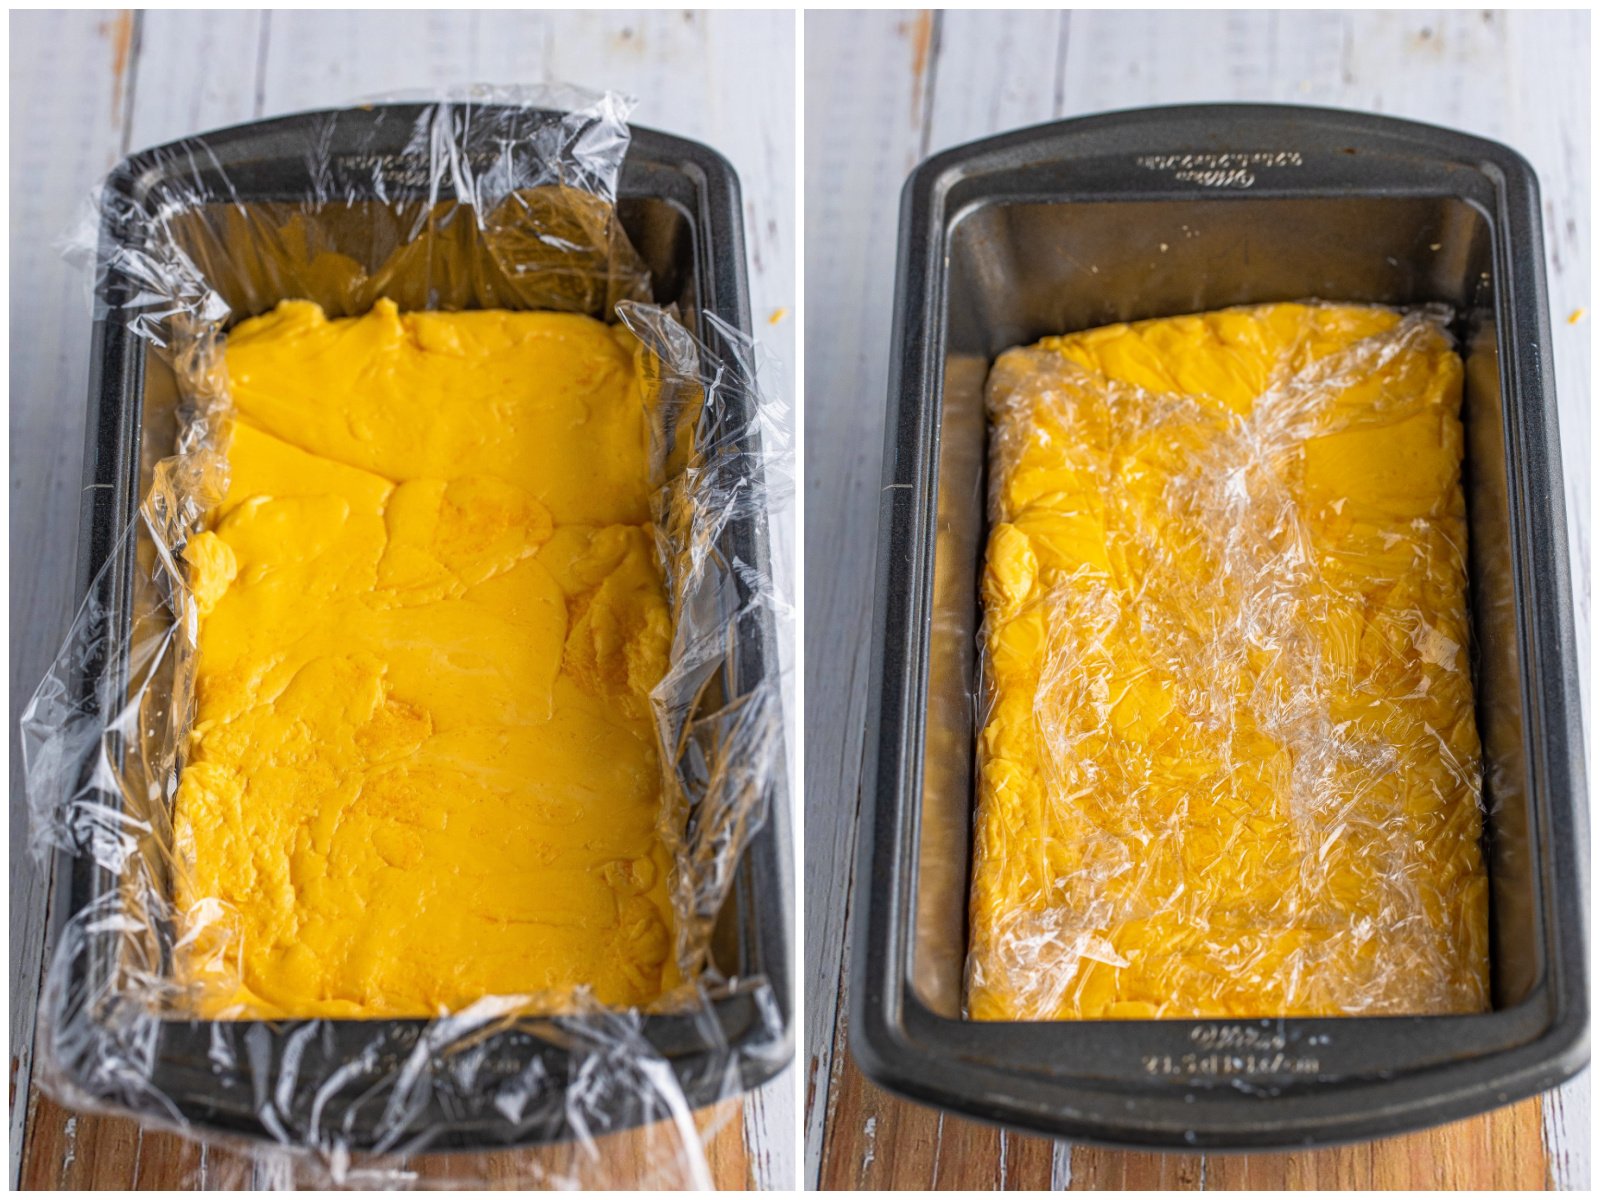
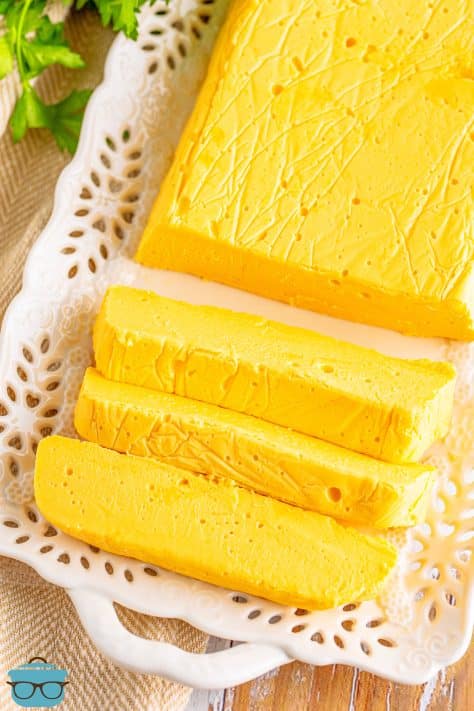
Place in the refrigerator until fully set, at least 6 hours or overnight. Please see my note below in the recipe card for heating instructions. Because this is homemade, it can’t be heated up exactly the same way as the processed Velveeta cheese.

WANT MORE HOMEMADE INGREDIENTS?
- Homemade Dry Onion Soup Mix
- Homemade Ranch Seasoning
- Homemade Everything But The Bagel Seasoning
- Homemade Apple Pie Spice
- Homemade Pumpkin Pie Spice
- Homemade Cream of Chicken Soup
- Homemade Cream of Mushroom Soup
- Homemade Nacho Cheese Sauce
- Beau Monde Seasoning
- Taco Seasoning
- Homemade Ranch Dressing
- Homemade Bisquick

Homemade Velveeta
Ingredients
- 16 ounce block mild cheddar cheese (see notes below)
- ½ cup nonfat milk powder
- 2 Tablespoons cornstarch
- ½ teaspoon salt
- 1 cup water
- 4 Tablespoons salted butter
Instructions
- Line a 9×5-inch loaf pan (or whatever size mold you want) with a couple of pieces of plastic wrap and set aside.

- Very finely grate 16 ounce block mild cheddar cheese.
- Then place it into a food processor. Pulse a few times to break it up even more.
- Add 1/2 cup nonfat milk powder, 2 Tablespoons cornstarch and 1/2 teaspoon salt. Pulse again until well mixed.
- Add 1 cup water and 4 Tablespoons salted butter to a small saucepan and bring to a boil. Remove from heat.
- Turn on the food processor and very carefully and VERY slowly stream in the water mixture.
- Continue to process the mixture until completely smooth, and scrape down the sides as needed to make sure everything is fully incorporated. It may seem like it won’t come together at first but give it time, be patient, and it will come together and get smooth. It should be totally smooth and not lumpy or grainy – that is when you know it is ready.
- Evenly spread the mixture into the prepared pan, smoothing out the top. Cover the top with plastic wrap.
- Place it into the refrigerator until fully set, at least 6 hours or overnight. Then use in your favorite recipes.


Notes
- Please refer to my FAQ’s (Frequently Asked Questions) and ingredient list above for other substitutions or for the answers to the most common questions.
- NOTE: Please do not substitute any ingredients I have on this list. It has to be made exactly with these ingredients for best results.
- The cheese MUST be freshly grated. The anti-caking agent that is in the pre-shredded cheese will keep this from setting up and coming together.
- NOTE: When melting this to use for a dip, etc. you MUST melt it extremely slowly and on very low heat. Also, allow the homemade Velveeta to come to room temperature before heating. Don’t do it from a cold state. I can’t stress this enough. These are fresh ingredients and there aren’t any additives that a processed cheese (Velveeta) would have that would normally allow you to easily melt it. It must be done very, very slowly and on the lowest heat possible so that it doesn’t end up grainy.
Nutrition
Nutritional Disclaimer
“The Country Cook” is not a dietician or nutritionist, and any nutritional information shared is an estimate. If calorie count and other nutritional values are important to you, we recommend running the ingredients through whichever online nutritional calculator you prefer. Calories and other nutritional values can vary quite a bit depending on which brands were used.


Going to make this recipe because of all the comments! I mainly used velveeta for queso. I’m wondering if this can be used right away, right after processing, add in the total and other ingredients. Don’t let it set up, sounds like it’s already in liquid form. Thanks for any advice or tips.
This is an easy recipe. Much easier than I thought it would be after making it, so do not be deterred from making this “Velveeta” style cheese loaf. It is remarkably tasty and will be a welcomed addition to our healthy food lifestyle.
Thank you for helping us escape from the ultra processed world!!!
This makes me so happy to read Melinda!! Thank you so very much for taking the time to come back and comment!
So, this is the first time I’ve ever left a comment on a cooking site, and I cook a lot! This was an amazing, and easy, recipe! I followed the recipe as written, although I didn’t have all mild cheddar, so used mostly sharp, but WOW! It came together easily, and set up nicely. I can see why people are talking about just eating it on crackers, as it’s that good. I cooked a pound of macaroni and after draining, simply used about a half a loaf right into the hot pasta, added a little cream and it mixed/melted beautifully. The flavor is spot on and can’t wait to try other cheeses. I will also be putting this as a spread on charcuterie boards. Total game changer–I will never buy Velveeta again. Thank you!
Delicious, delicious! Great flavor and tastes better than Velveeta!
I’d like to try this in the slow cooker for my queso. Will it turn out as creamy as the processed yukky block or will it turn out gritty?
I haven’t tested melting it in the slow cooker – I’m sorry!
Would the slow cooker on the low setting be a low enough heat to keep it from becoming grainy?
Possibly. I haven’t tested it out yet and I never like anyone to waste ingredients because I said to do it
Can you freeze this?
That’s a great question and I’ll be totally honest – I haven’t tried it. I think maybe you could. I just never know about texture after it thaws.
Will this cheese hold up in the oven in a casserole or will it break up because of the high heat?
It should be fine at 350F degrees
This was absolutely perfect! Mind blown. Have you tried experimenting to make it thinner? like a queso dip? I’m using this for a melty chicken dip so I will follow the “room temp” instructions to a tee.
I know you are very precise and specific about the ingredients but I still have a question for you about substitution. I already own full fat dried milk powder. Would that substitute well/well enough for nonfat dried milk powder? I don’t want to undertake this recipe if I’m introducing something that will make it fail. Thank you.
Hi Rita, I think you could. I’ll be totally upfront & tell you I haven’t tested that myself & I never want anyone to waste ingredients because I said it was ok. I’d feel terrible! But I can’t imagine adding additional fat to this is going to throw it off so much that it’s inedible.
I tried the recipe exactly as written EXCEPT I used the whole milk dry milk powder and it was FANTASTIC! This is a great recipe. I used it in cheeseburger soup and was careful to melt it very slowly. That took about half the recipe and with the rest we have been eating it on crackers. I highly recommend this recipe and it is quite easy to make.
My cheese turned out great. I used sharp cheddar. It has a very cheesy taste. YUM. Next time make it, I won’t add salt. None needed. My husband loves it too. I will keep this as a regular item to keep on hand.
Could this be dehydrated then made into powder to use on popcorn and other snacks?
I don’t think so but honestly I’ve never tried! If you give it a try, I’d love to know how it turns out for you!
Hey Brandie, will this work using a stick blender, rather than a food processor?
Hey Sarah, I don’t see why it wouldn’t. As long as you process it well 🙂
I’m wondering if this could be canned water bath or pressure canned and for how long if so, I have done regular cheese like this in the microwave drained off a little of the oil then get water bath for 20 minutes
cheese products are not generally safe to can. it is a low-acid, dense food that prevents heat from penetrating to the center of the jar, creating a high risk of botulism spores surviving.
If using this in a recipe where the velveeta is melted does it have to set up?
Do you mean like using it in a dip?
I have the same question – say for instance say, for instance, I wanted to use it in mac & cheese but I didn’t have the time/ingredients to make the cheese ahead of time. Can I use it right away for the cheese sauce and let the reset set up as normal, or do I need to let it set up first before using it at all?
I made this Velveeta cheese recipe. It looked great until I actually used it for mac-n-chz. It turned out grainy and awful. What a waist of time and good cheese.
I’d suggest to you that it was insufficiently blended or you would not have had a grainy result.
This turned out really good and the taste can’t be beat. I have done this before with another recipe. I like this one better since it doesn’t use gelatin which I think gave it a better texture. I do agree with this homemade version, if you are heating it up, it has to be done very, very slowly. Homemade velvet is not a processed cheese (which is the whole point of making it homemade) but that also means that it doesn’t heat up the same way. You honestly cannot heat this up slow enough or you will get a grainy texture and it can separate. So whatever you do – heat it super slowly and it will melt perfectly without issue.
How long does it Keep?
Hi Joy! I actually answer that question in detail above in the frequently asked question section 🙂
I wouldn’t have thought to ask that question as it doesn’t last long in my fridge having SO many uses for it.
Would Nida work instead of non-fat milk powder?It’s a dry form of whole fat milk produced by Nestlé and is easier to find than non-fat in out area.
I have not tested it with the whole fat milk powder so I can’t tell you for sure and I don’t like to speculate when I haven’t personally tested it. I don’t see why it wouldn’t work. If you try it, please let me know!
Brandi Blair – If you read the comments you will see “rita” posted a comment where she used whole fat dry milk and it turned out FANTASTIC. I hope this helps you!
Great Recipe, Velveeta cheese with real cheese. Will be making grilled cheese to.
Also will be making cheese burger soup. Thanks Bill