Easy French Bread (Bread Machine/By Hand)
No need to be intimidated by yeast with this easy French bread recipe. Nothing beats homemade bread fresh and warm straight from the oven!
AN EASY BREAD FROM SCRATCH
I ventured into the world of French bread a while back. I purchased a bread machine a few years ago at Wal-mart for about $50. Now the funny part is – I never actually make bread IN the machine. I let the bread machine mix the ingredients, knead the dough, and give the dough the first rising but I’ve never actually made a loaf in there because it makes the loaves really huge. I take the dough out after the first rising, shape it into what I need and then do the second rising in a slightly warmed oven.
DO I REALLY NEED A BREAD MACHINE?
I just like the bread machine so much because it does most of the hard stuff and it takes a lot of the guess work out for me. I use it for so many things – from breads to cinnamon roll dough. If you don’t have a bread machine, don’t worry. I’m not expecting you to go out and buy a kitchen gadget just to make good bread. You can do this by hand too (see below.)
WHAT IS THE DIFFERENCE BETWEEN BREAD FLOUR AND ALL-PURPOSE FLOUR?
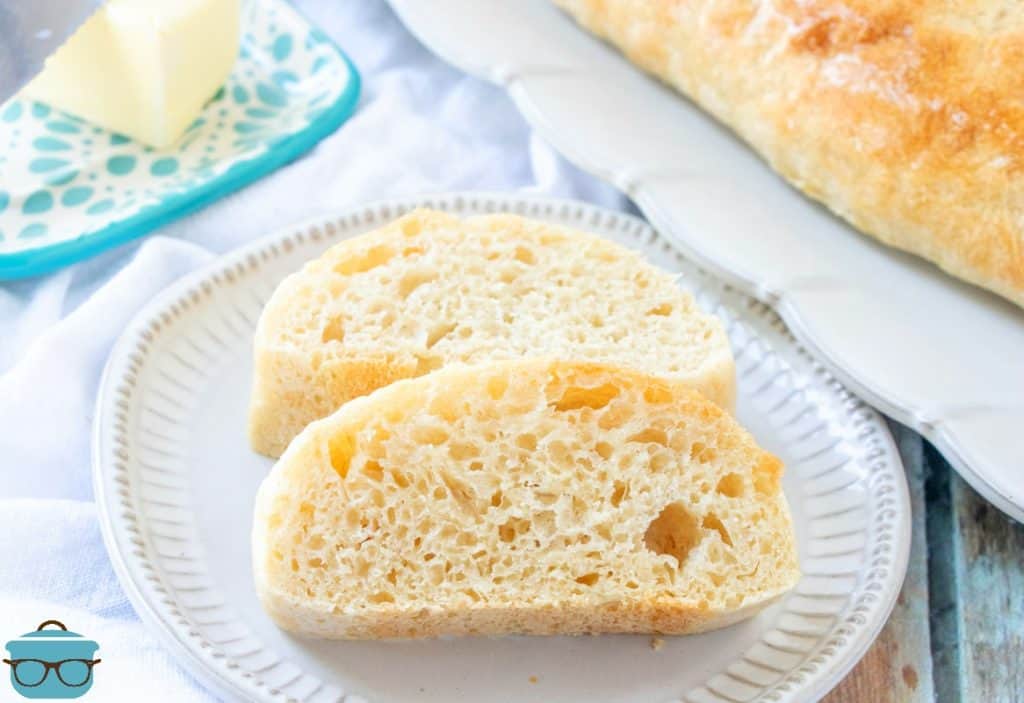
- Bread flour has more protein and helps with the development of gluten in the bread. This is going to give you that nice chewy texture that we all love in bread. It also helps the bread to keep its shape.
- With all-purpose flour, the texture will be more loose and it will probably rise a bit higher than with bread flour.
- So, if you don’t have bread flour, go ahead and substitute (one-for-one) with all-purpose flour.
HOW TO MAKE FRENCH BREAD WITHOUT A MACHINE:
- Preheat oven to 175F degrees and then turn off.
- Allow dough to rise in the warmed oven until doubled in size (about 45 min. to an hour).
- Then continue with below directions to finish making the bread (starting with cutting the dough ball in half.)

INGREDIENTS NEEDED: (SEE RECIPE CARD BELOW FOR THE FULL RECIPE)
- very warm water
- bread flour
- salt
- active dry yeast

HOW TO MAKE FRENCH BREAD
Place above ingredients in your bread machine according to manufacturer’s directions – mine requires that I put wet ingredients in first then dry. Start machine on dough setting.

Quick tip: I usually take a peek at my dough in the first 10 minutes or so to make sure all the flour is getting incorporated into the dough. Sometimes you just need to scrape down the sides a bit. After that, I leave it alone. When dough cycle is complete (usually about an hour to an hour and a half), remove dough and place on floured surface.
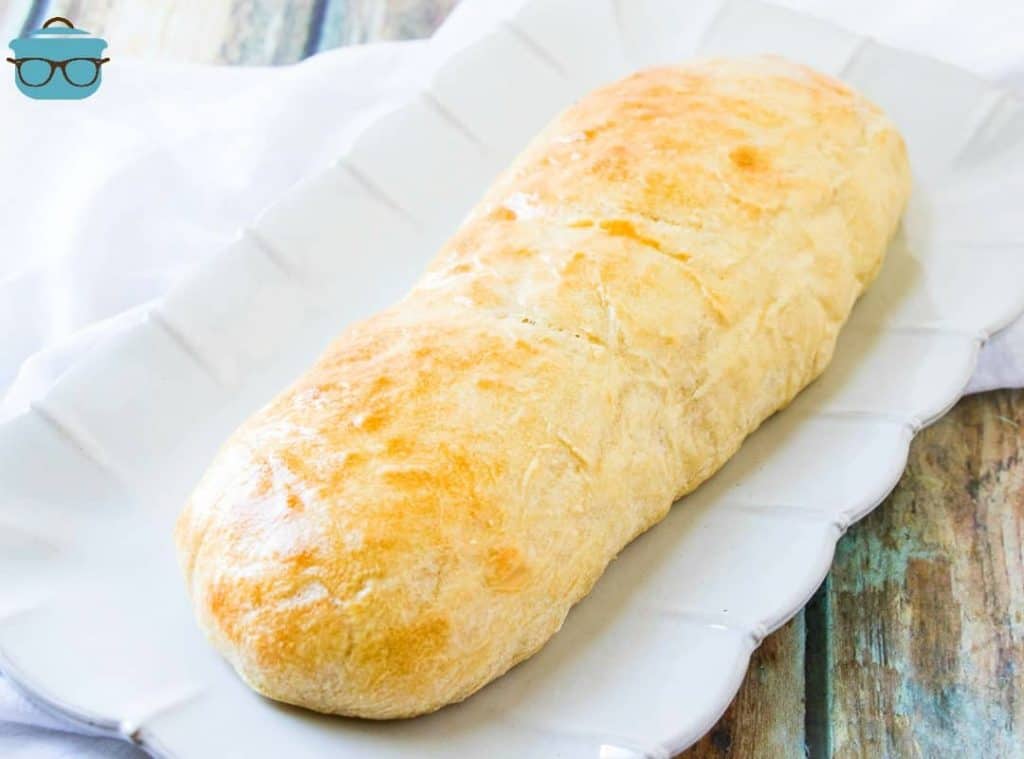
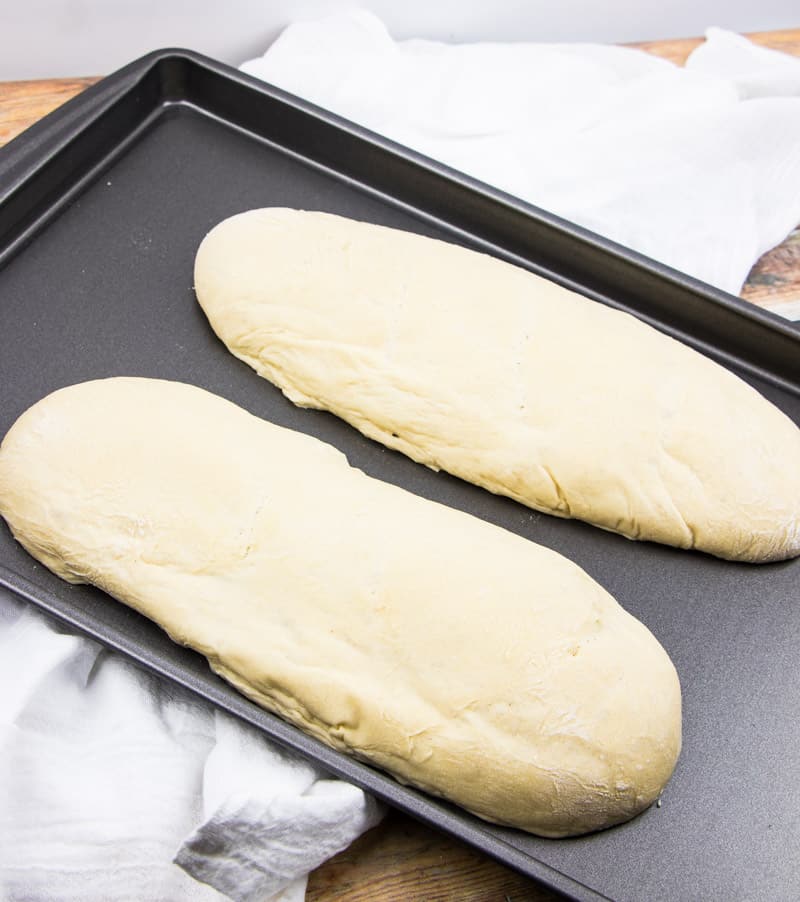
Preheat oven to 175F degrees (you’re going to put your loaves in the preheated oven to rise). Once oven reaches 175f degrees, turn it off. Cut dough ball in half and roll each loaf out (or save one dough ball for later use and put in freezer) to about 12 inches long in the shape of french bread.
Cut three small slices on top of bread and place loaves on a greased baking sheet (just spray evenly with nonstick spray.) Cover with a clean dish towel and place into warmed oven. Allow the loaves rise until doubled, about an hour.
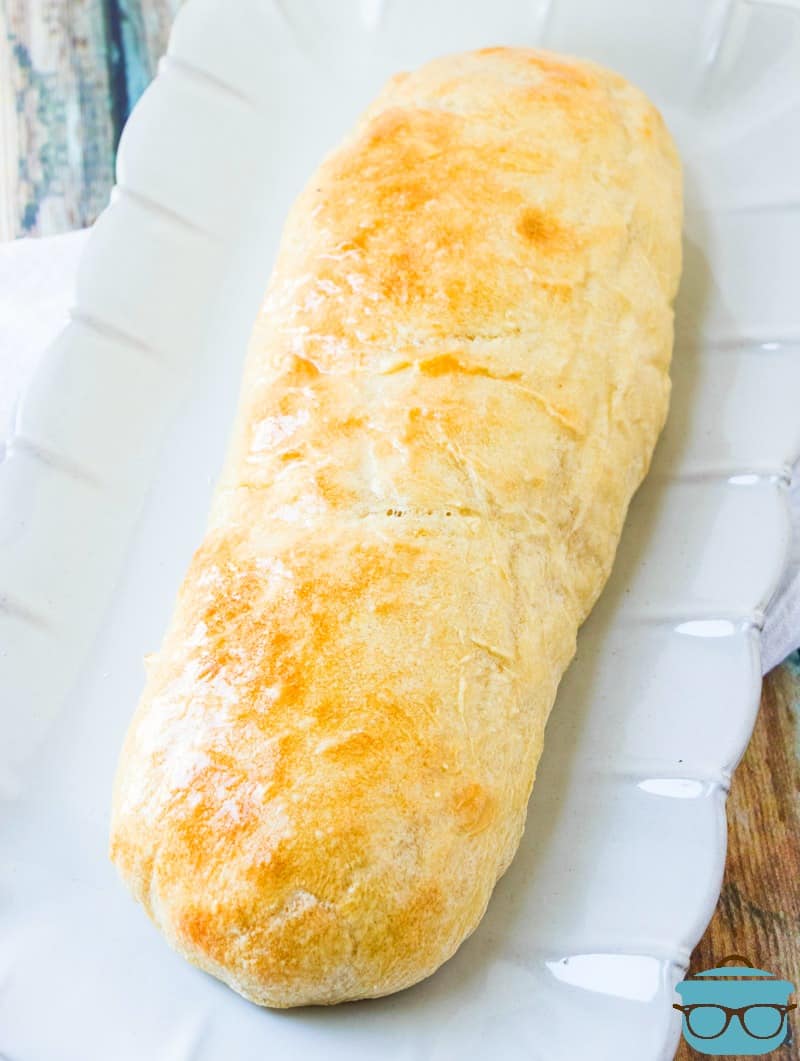
Take loaves out and preheat oven to 450F degrees. Optional: to get a really nice golden color on top of the bread, make an egg wash. Mix together one egg with a tablespoon of water and whisk really well. Then lightly spread this egg wash on top of the bread before baking.
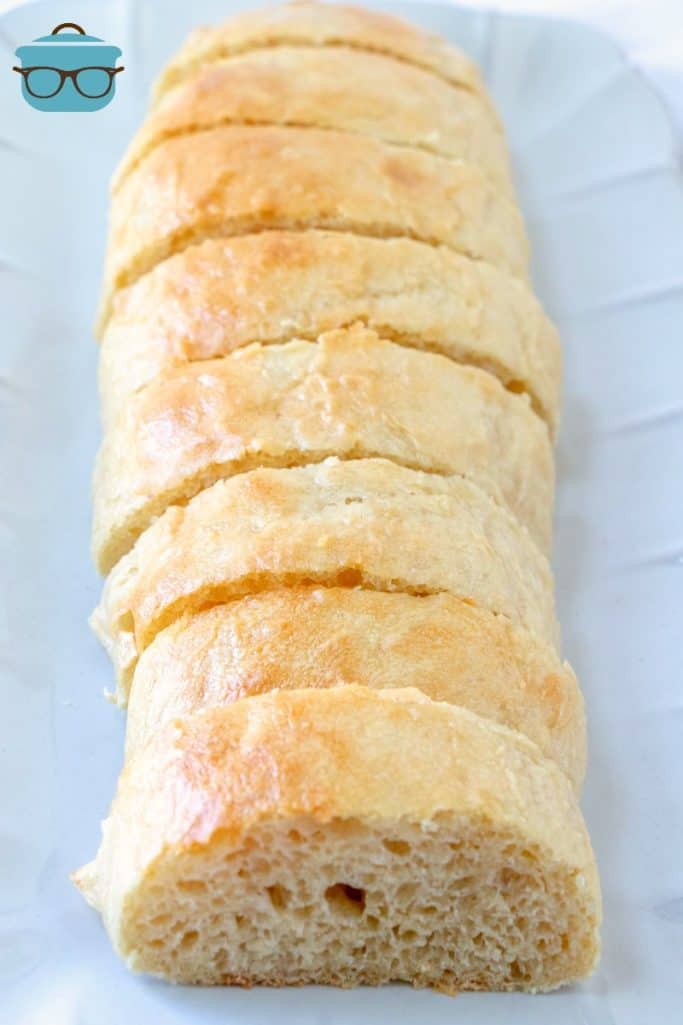
Bake loaves for 15-20 minutes until golden brown, turning the pan around once halfway during baking. Remove loaves when finished baking and allow to cool on wire racks.
Cook’s Note: I usually get the jar of Fleischmann’s Yeast for the Bread Machine and keep it stored in the fridge. If you are using yeast from a jar, give your jar a good shake and then measure out 2 ¼ teaspoons of yeast for this recipe. Also, you just need to use table salt for this recipe. Kosher salt granules will be a little too large to use here.
CRAVING MORE RECIPES?
- Easy Homemade Pizza Dough
- Beer Bread
- Homemade White Bread
- Honey Wheat Rolls
- Potato Rolls
- Homemade Whipped Butter
- Cheesecake Factory Brown Bread
- Outback Steakhouse Brown Bread
- No-Knead Dutch Oven Bread
- Dinner Rolls
- Brioche Buns
- Hot Cross Buns
- Irish Soda Bread
- Irish Brown Bread
- Bread Pudding
Originally published: March 2011
Updated photos & republished: March 2020

Easy French Bread
Ingredients
For the bread:
- 1 ¼ cups very warm water
- 3 ½ cups bread flour
- 1 teaspoon salt
- 1 packet active dry yeast (2 1/4 teaspoons)
Optional egg wash (for a golden brown top)
- 1 large egg
- 1 Tablespoon water
Instructions
- Place above bread ingredients in your bread machine according to manufacturer’s directions (mine requires that I put wet ingredients in first, then dry).
- Close lid and start machine on the dough setting for French bread (if you have that setting – if not, just use the basic bread setting).
- Once dough is done in the bread machine, preheat your oven to 175fF degrees (you’re going to put your loaves in the preheated oven to rise). Once oven reaches 175f degrees, turn it off.
- On a lightly floured surface, cut dough ball in half and roll each loaf out (or save one dough ball for later use and put in freezer) to about 12 inches long in the shape of french bread.
- Place bread on a greased baking sheet. Cut three small slices on top of bread.
- Cover with a clean dish towel and place into warmed oven.
- Allow the loaves rise until doubled, about an hour.
- Take loaves out and preheat oven to 450F degrees.
- Optional: to get a really nice golden color on top of the bread, make an egg wash. Mix together one egg with a tablespoon of water and whisk really well. Then lightly spread this egg wash on top of the bread before baking.
- Bake loaves for 15-20 minutes until golden brown, turning the pan around once halfway during baking.
- Remove loaves when finished baking and allow to cool on wire racks.
Video

Notes
- If you are doing this by hand, mix all the dry ingredients together in a large bowl, then add warm water and mix until combined.
- Take dough out and place on floured surface and knead dough for about 8-10 minutes (until dough is smooth and elastic.)
- Put dough into lightly greased oven proof bowl and cover with a clean dish towel.
- Preheat oven to 175F degrees and then turn off.
- Allow dough to rise in the warmed oven until doubled in size (about 45 min. to an hour).
- Then continue with above directions to finish making the bread (starting with cutting the dough ball in half.)
Nutrition
Nutritional Disclaimer
“The Country Cook” is not a dietician or nutritionist, and any nutritional information shared is an estimate. If calorie count and other nutritional values are important to you, we recommend running the ingredients through whichever online nutritional calculator you prefer. Calories and other nutritional values can vary quite a bit depending on which brands were used.


