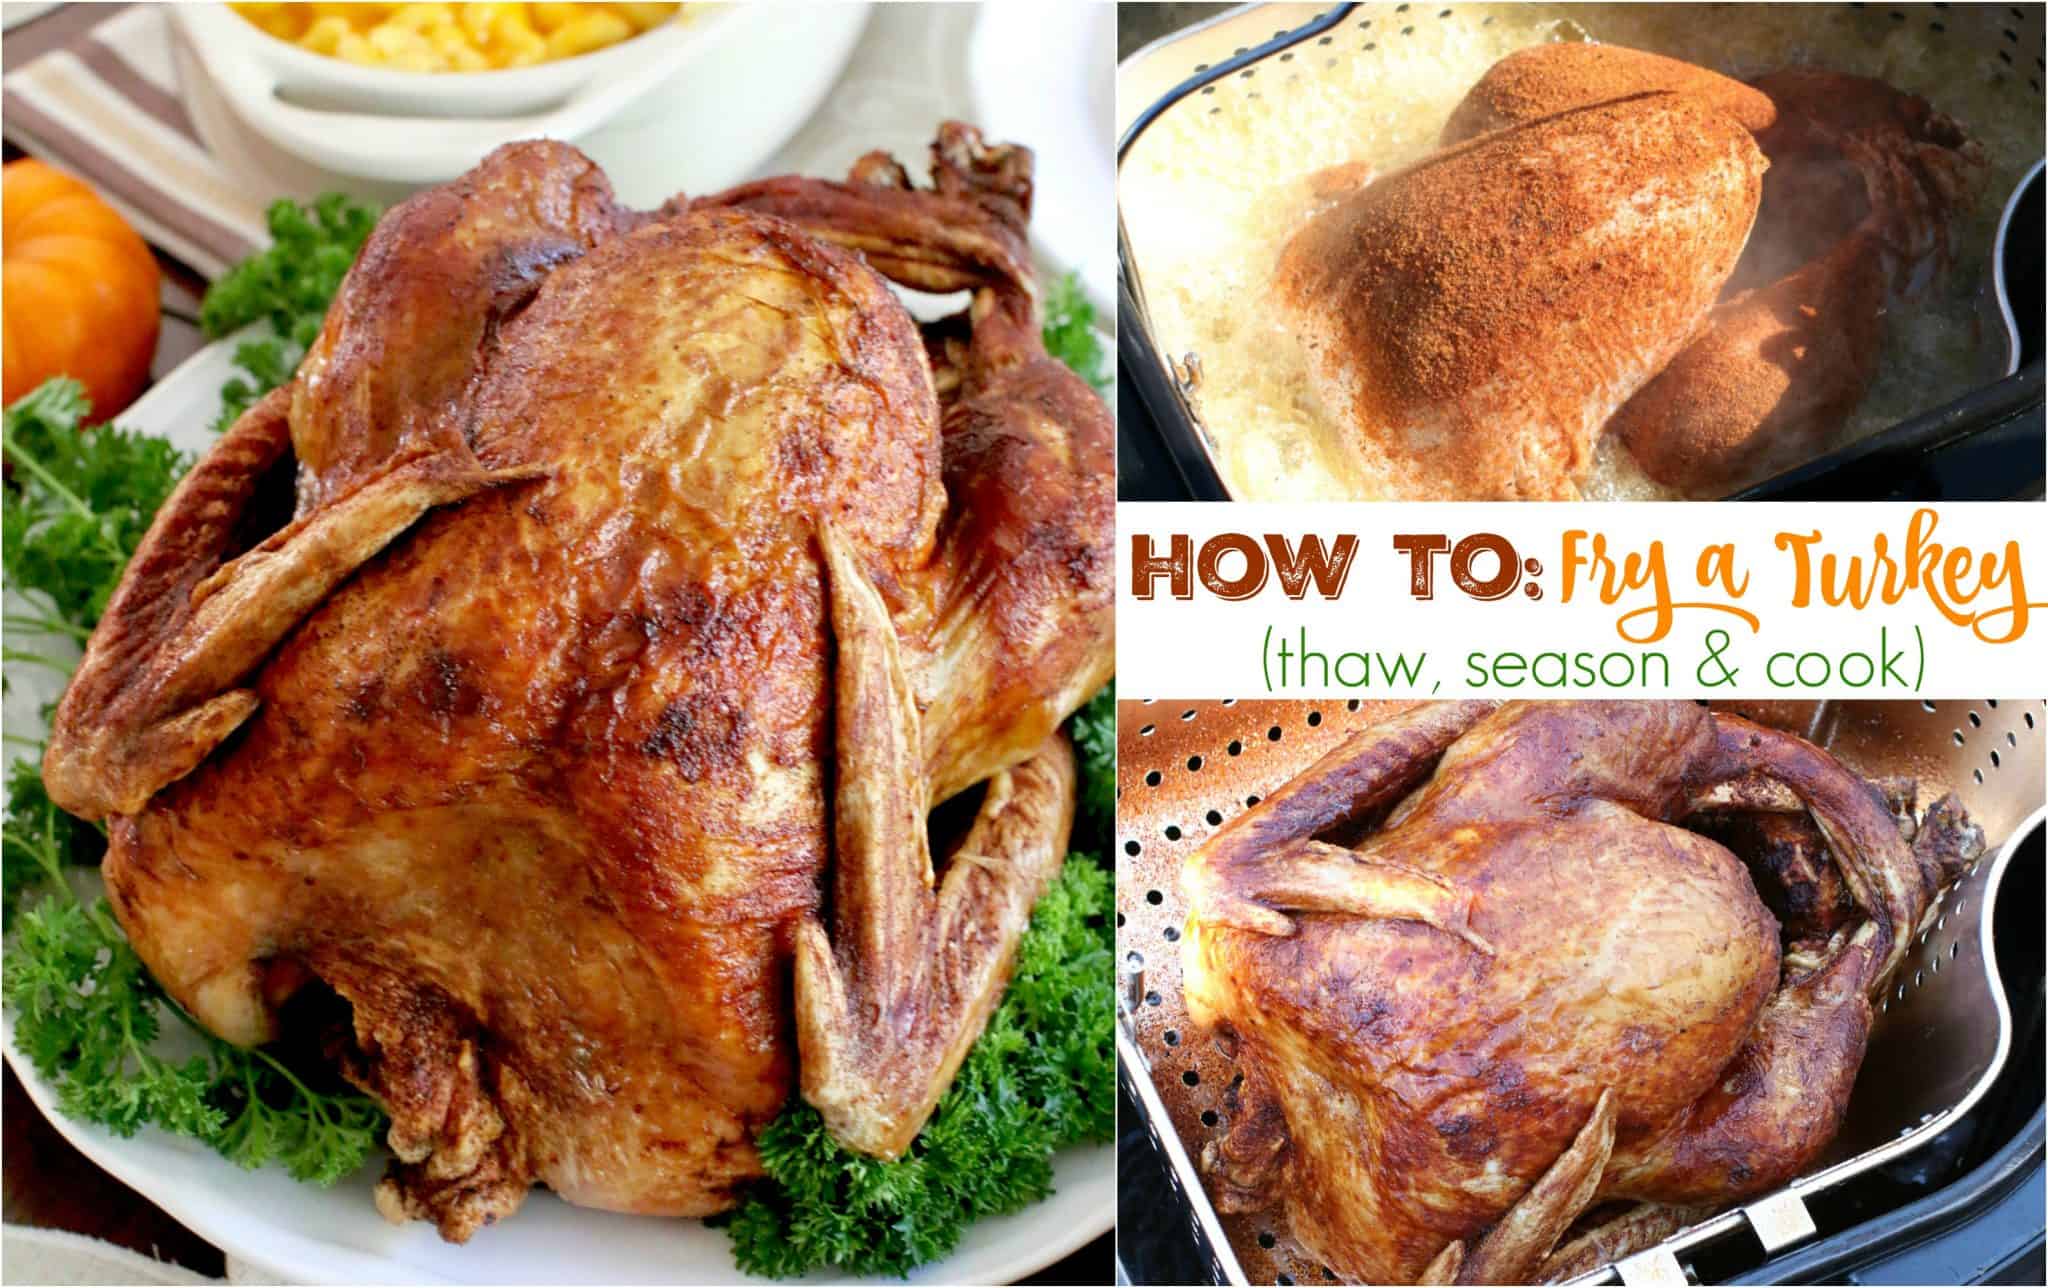
How To Fry A Turkey: (Step-by-Step Photos)
How to: Fry a Turkey (with step-by-step photos) using an electric turkey fryer. Tips given for quick-thawing a turkey and seasoning.
PERFECTLY SEASONED AND FRIED TURKEY IN AN ELECTRIC FRYER
STEP 1: THAW THE TURKEY
Most turkeys are sold frozen. You can find fresh turkey sold at some butchers or specialty grocery stores right before Thanksgiving. But, most of us pick up a frozen turkey on sale at our local supermarket. Ideally, you should pop your turkey into the fridge about 2-3 days before Thanksgiving (estimate one day of thawing per 4 pounds of turkey.) Keep it in the wrapper and just let it thaw slowly. However if you’re like me…
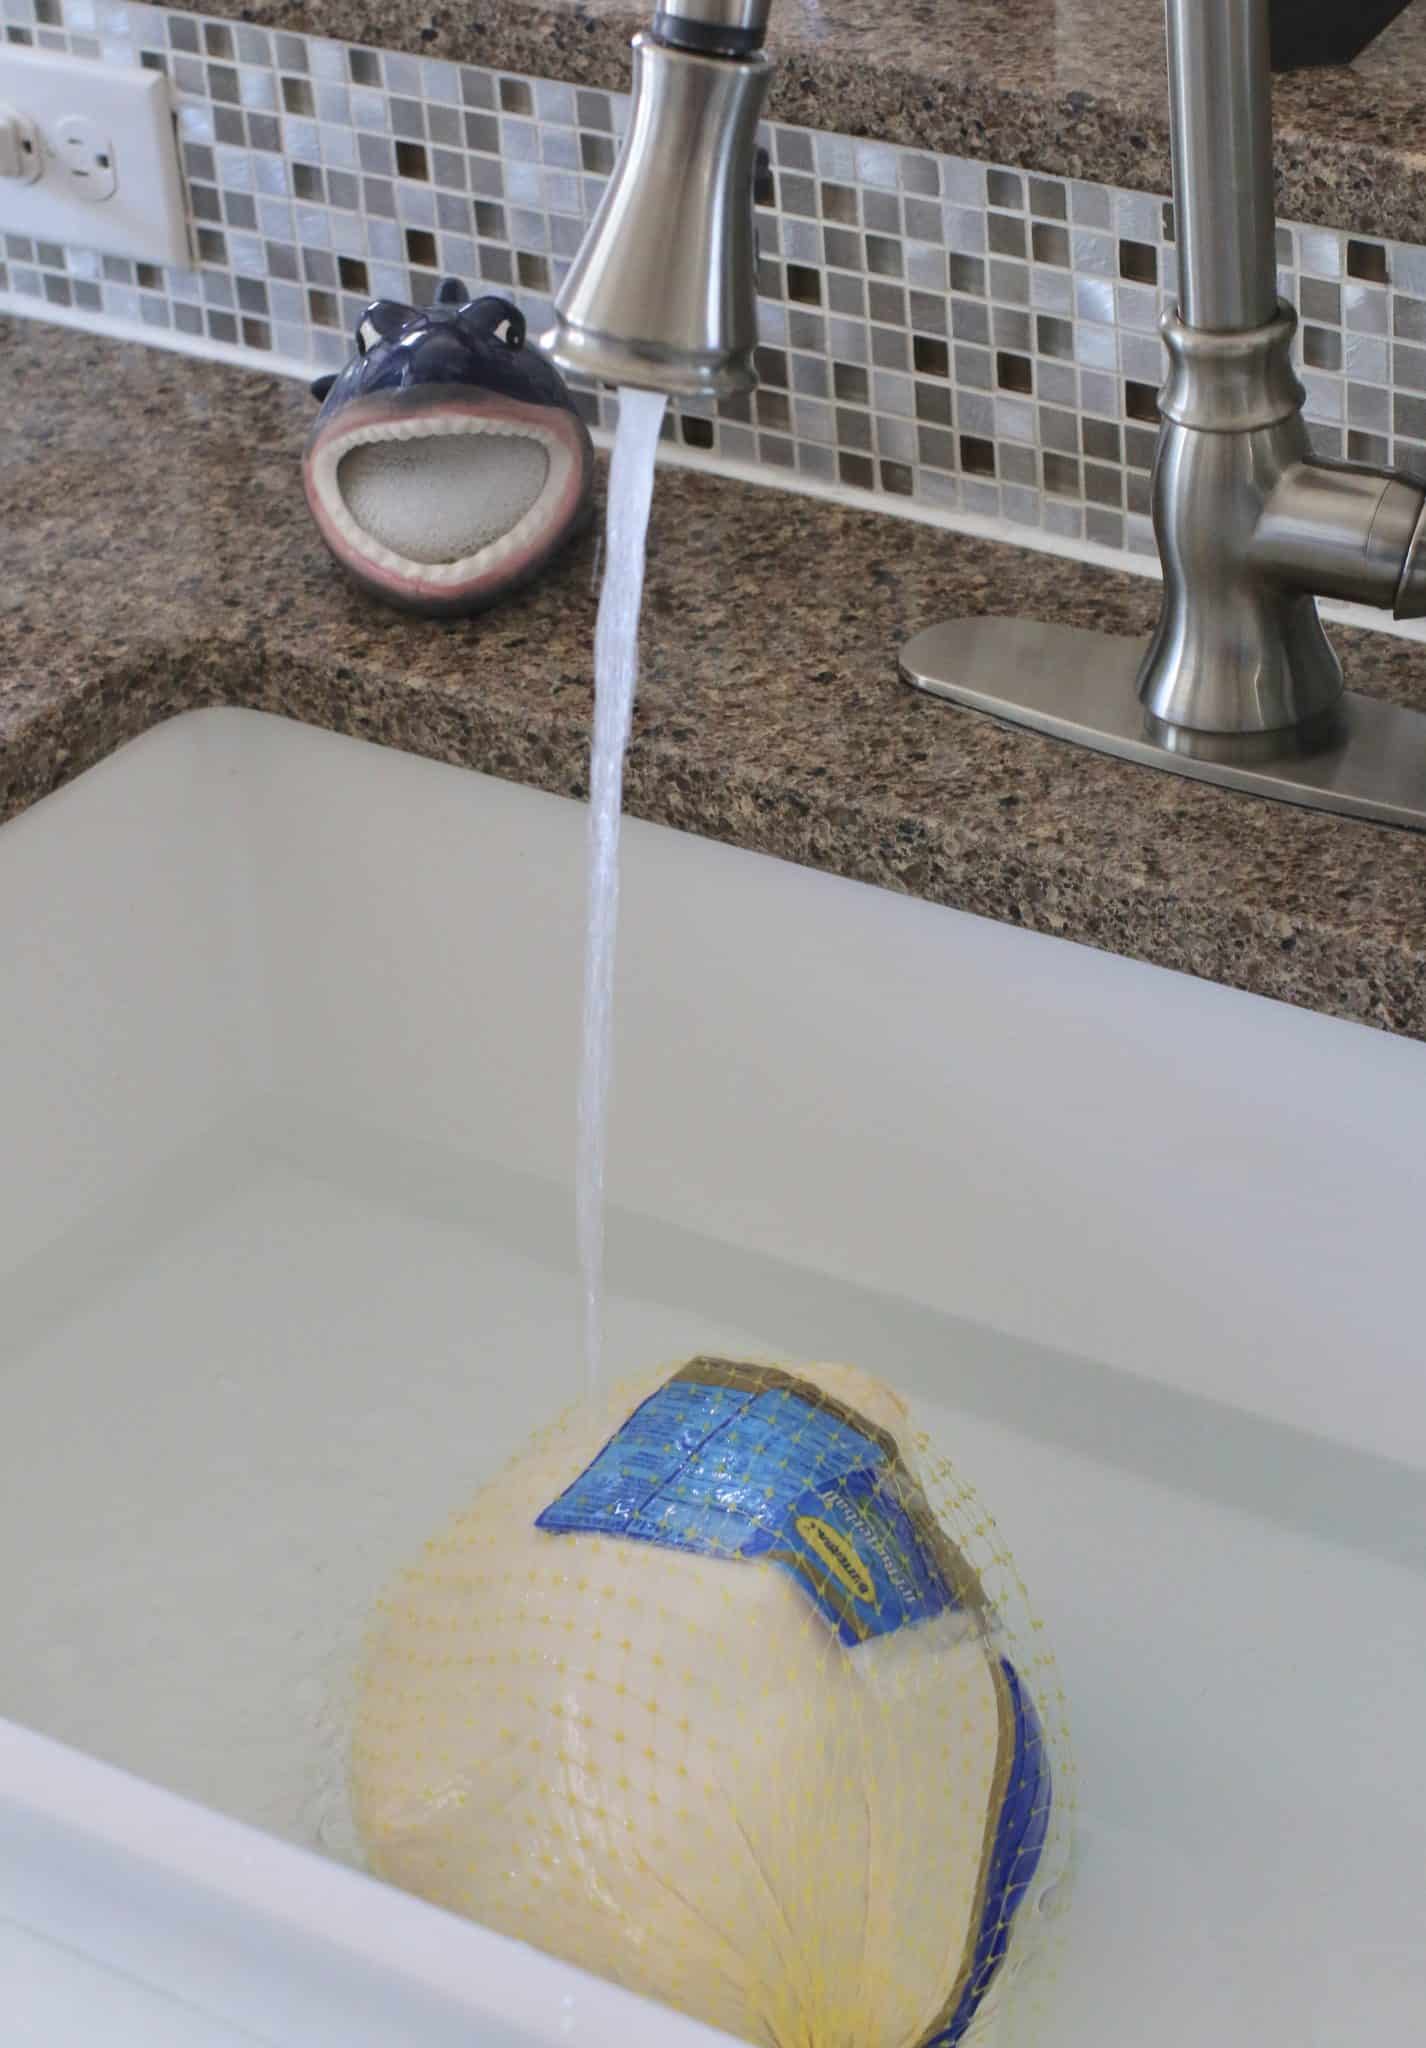
HOW TO DEFROST A TURKEY QUICKLY
If you have totally forgotten to thaw your turkey before the big day – have no fear. You still got this! Clear out all the dirty dishes from your sink 😉 , put the drain plug in, then fill it up with cool water. Place your turkey (breast-side down) into the cool water making sure the water covers the top of the turkey. Let it hang out for 30 minutes. Drain the water and start the process all over again. Estimate about 30 minutes per pound. It took me about 3 hours with this turkey. You would think you would use warm water – nope. The warm water would thaw the outside too quickly while leaving the inside still frozen. I put the word “quick” in quotations because technically it’s not all that quick but you can still thaw it out on the day you need to cook it. I can say for sure this Butterball tip works perfectly.
STEP 2: SETUP TURKEY FRYER AND ADD OIL
I am a huge fan of the electric turkey fryers they have these days. We have a Butterball Indoor Electric Turkey Fryer by Masterbuilt (paid affiliate link). These are so much safer than the propane fryers. Technically you can put this in your house and it is perfectly safe. However, I don’t have a very large kitchen so we just place it right outside on our back porch. There are a lot of options out there now for electric turkey fryers (digital, analog, etc.) We leave the oil in there and later in the week we’ll fry up some chicken or some wings to get the most use out of the oil.
WHAT KIND OF OIL IS BEST FOR FRYING A TURKEY?
Many folks will say peanut oil only. For this post I am showing peanut oil because I got it for a good price at Sam’s Club. However, for the past few years we have used a Frying Oil Blend and it works wonderfully. Plus, the blends are usually cheaper than 100% peanut oil.
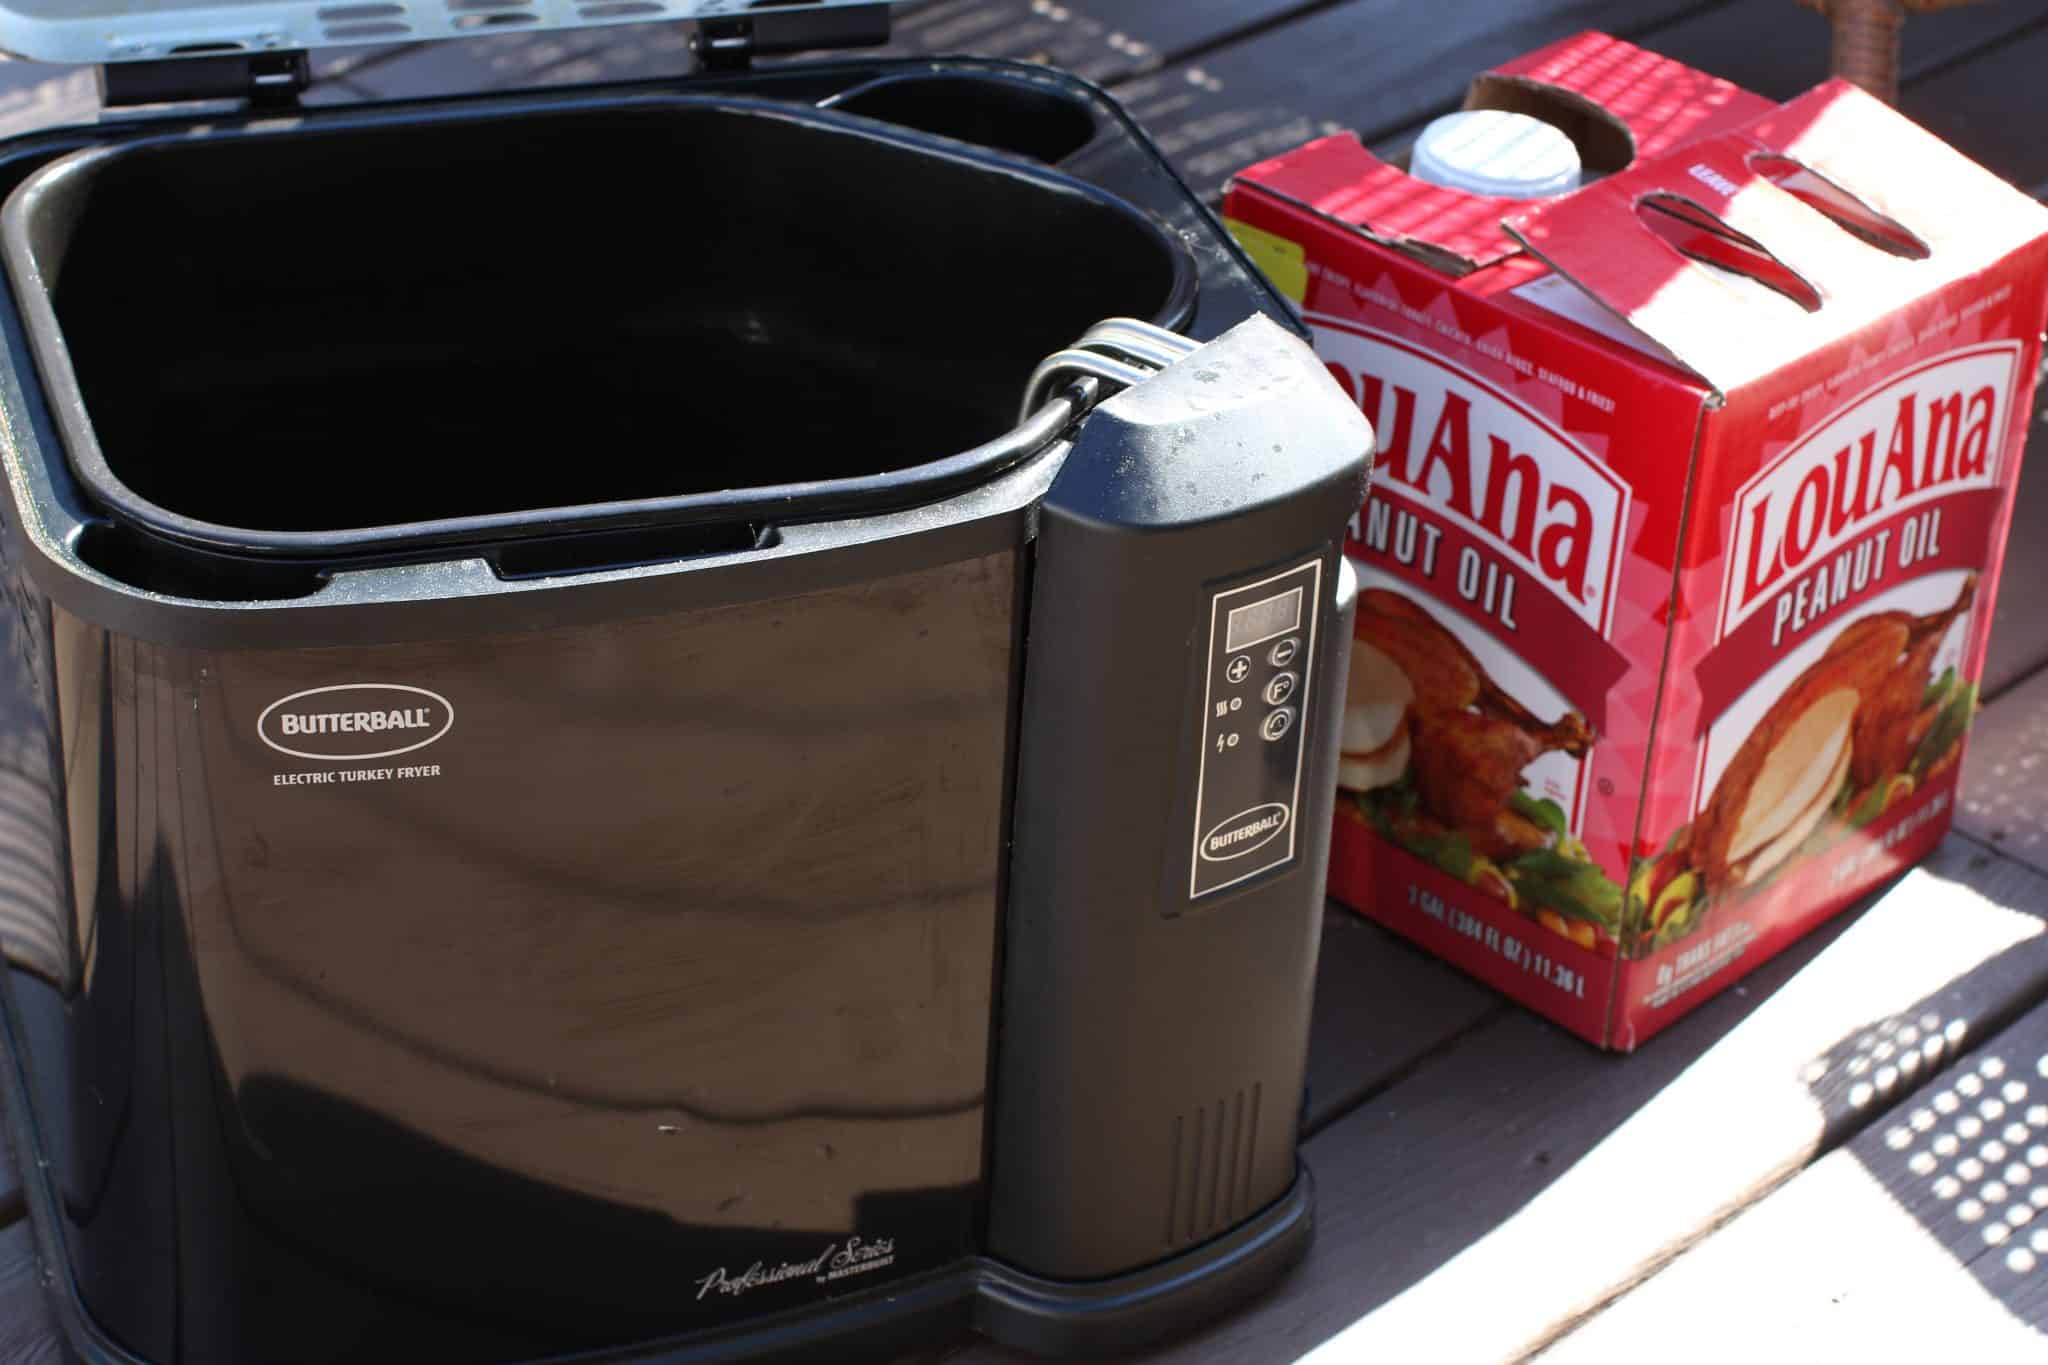
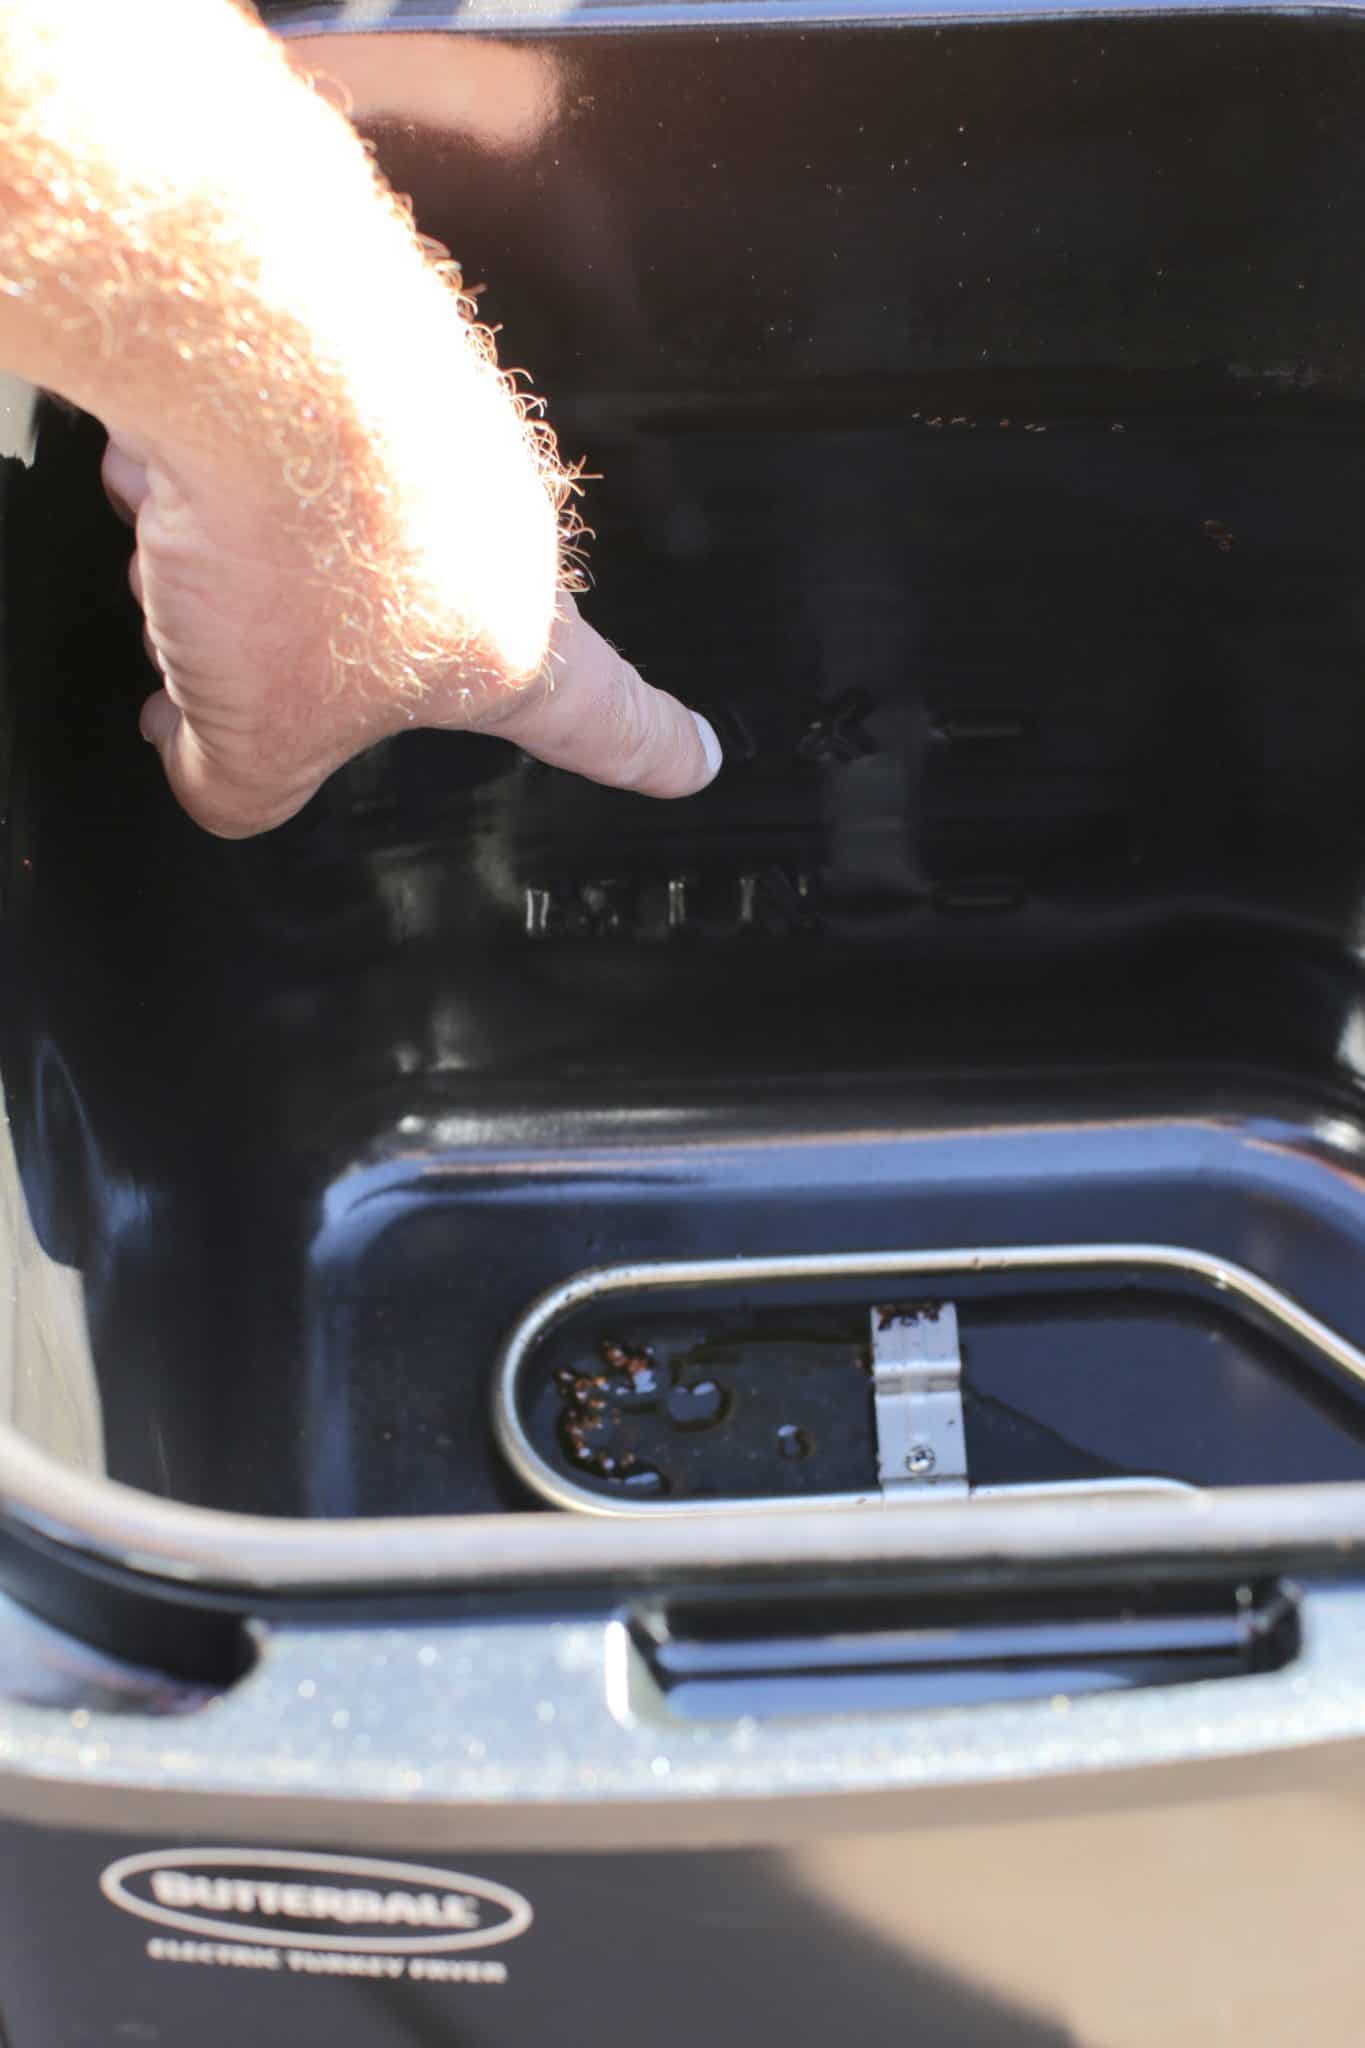
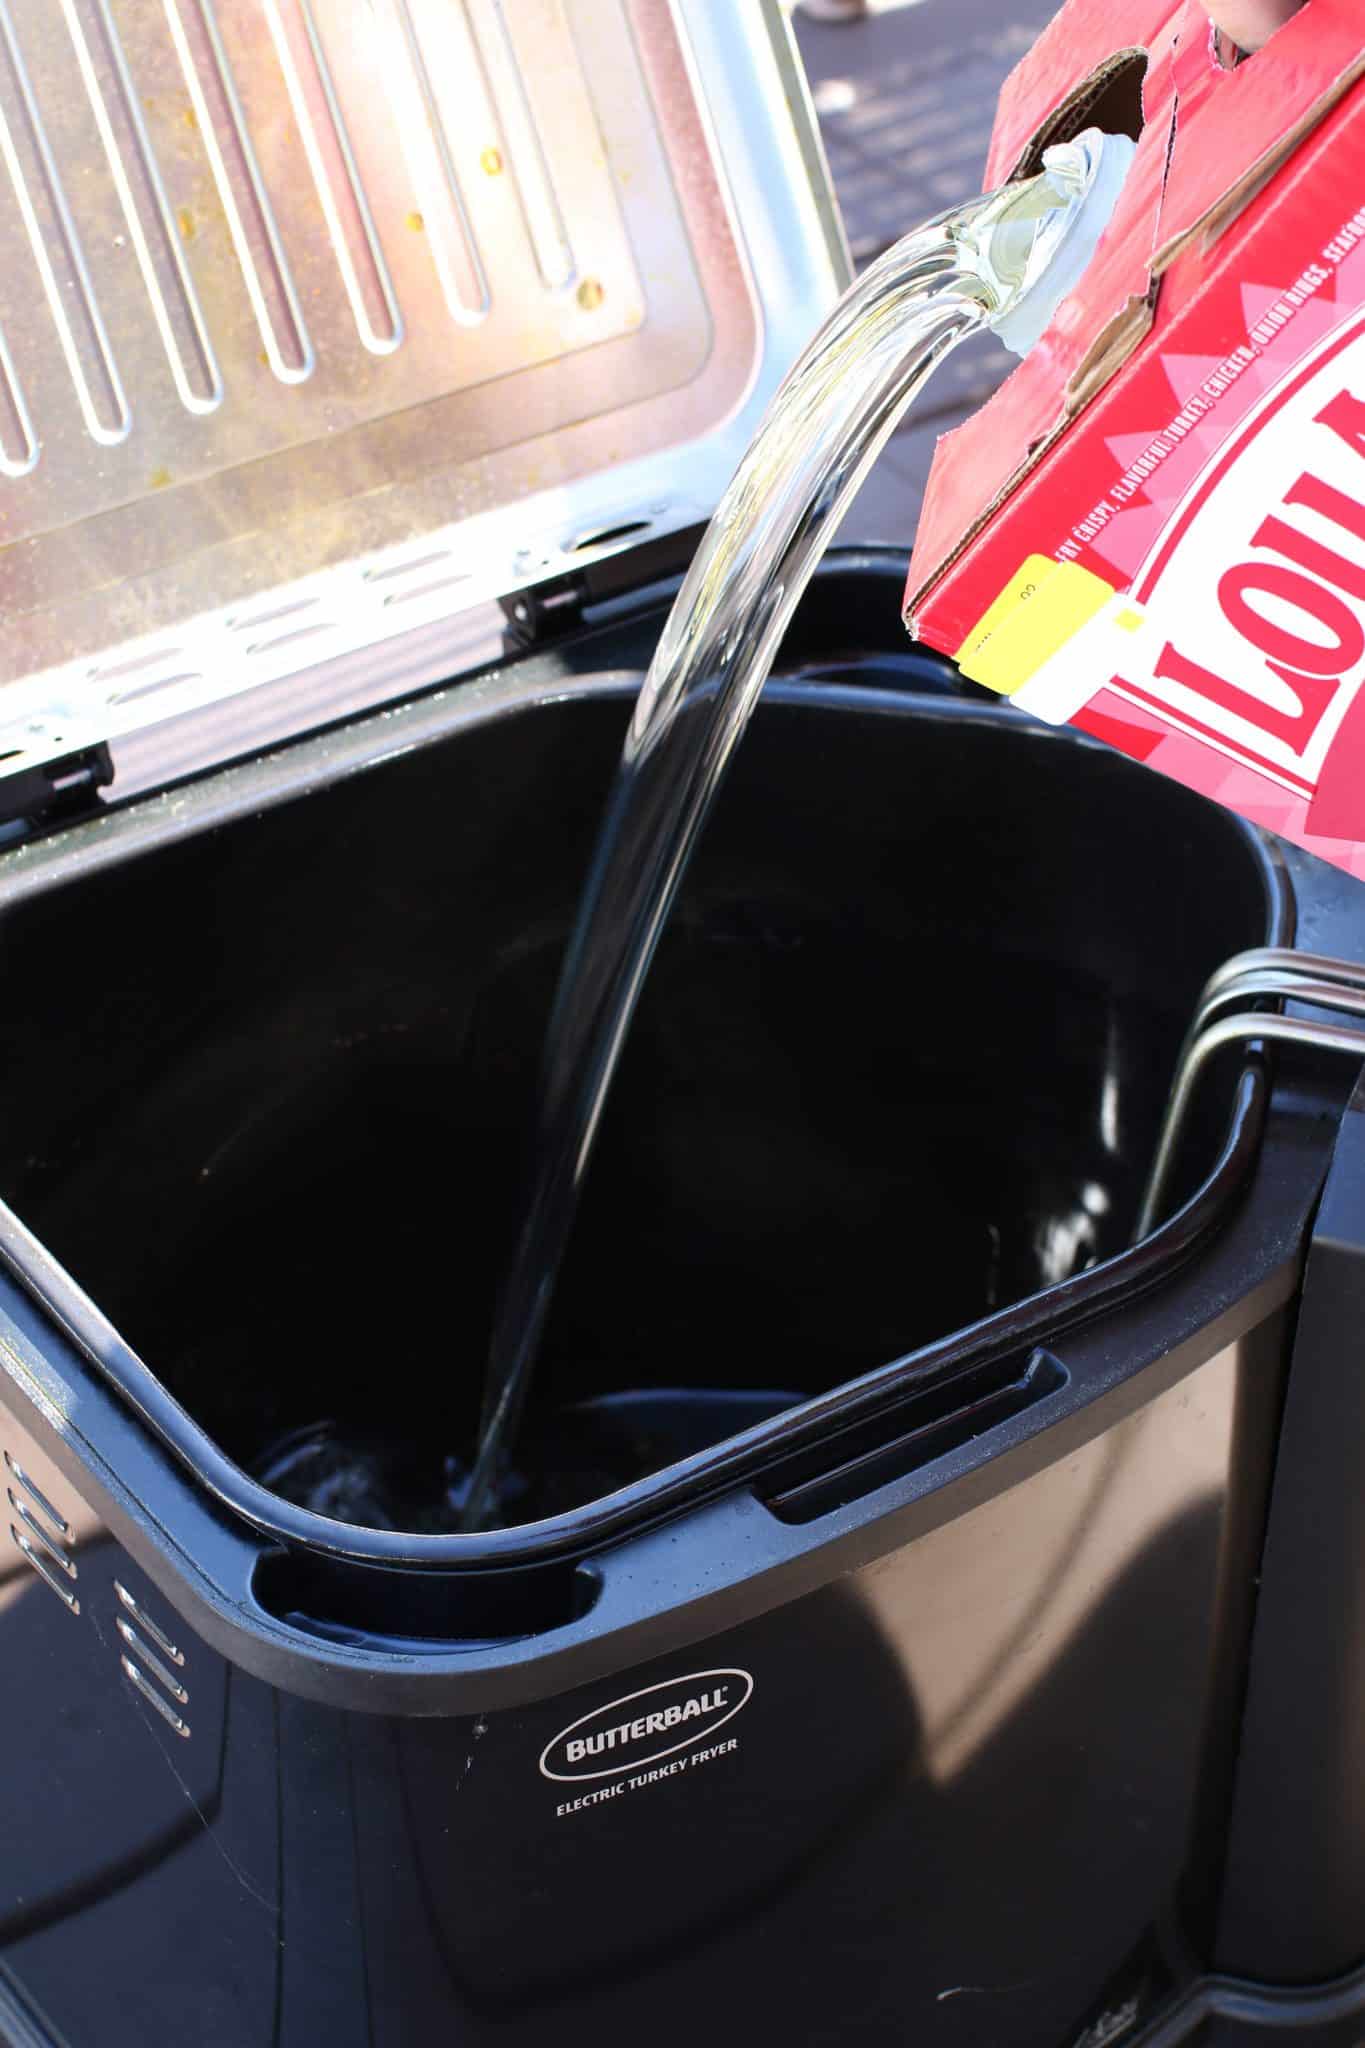
HOW MUCH OIL SHOULD I USE?
Almost all indoor turkey fryers have a fill line. It’s not always easy to see but it’s there. You do not want to fill your oil above that line. Once the turkey goes in, there will be a lot of bubbling and you don’t want your oil to overflow. Note: remove the frying basket before doing this. You’ll need that in your kitchen to put the turkey in before frying.
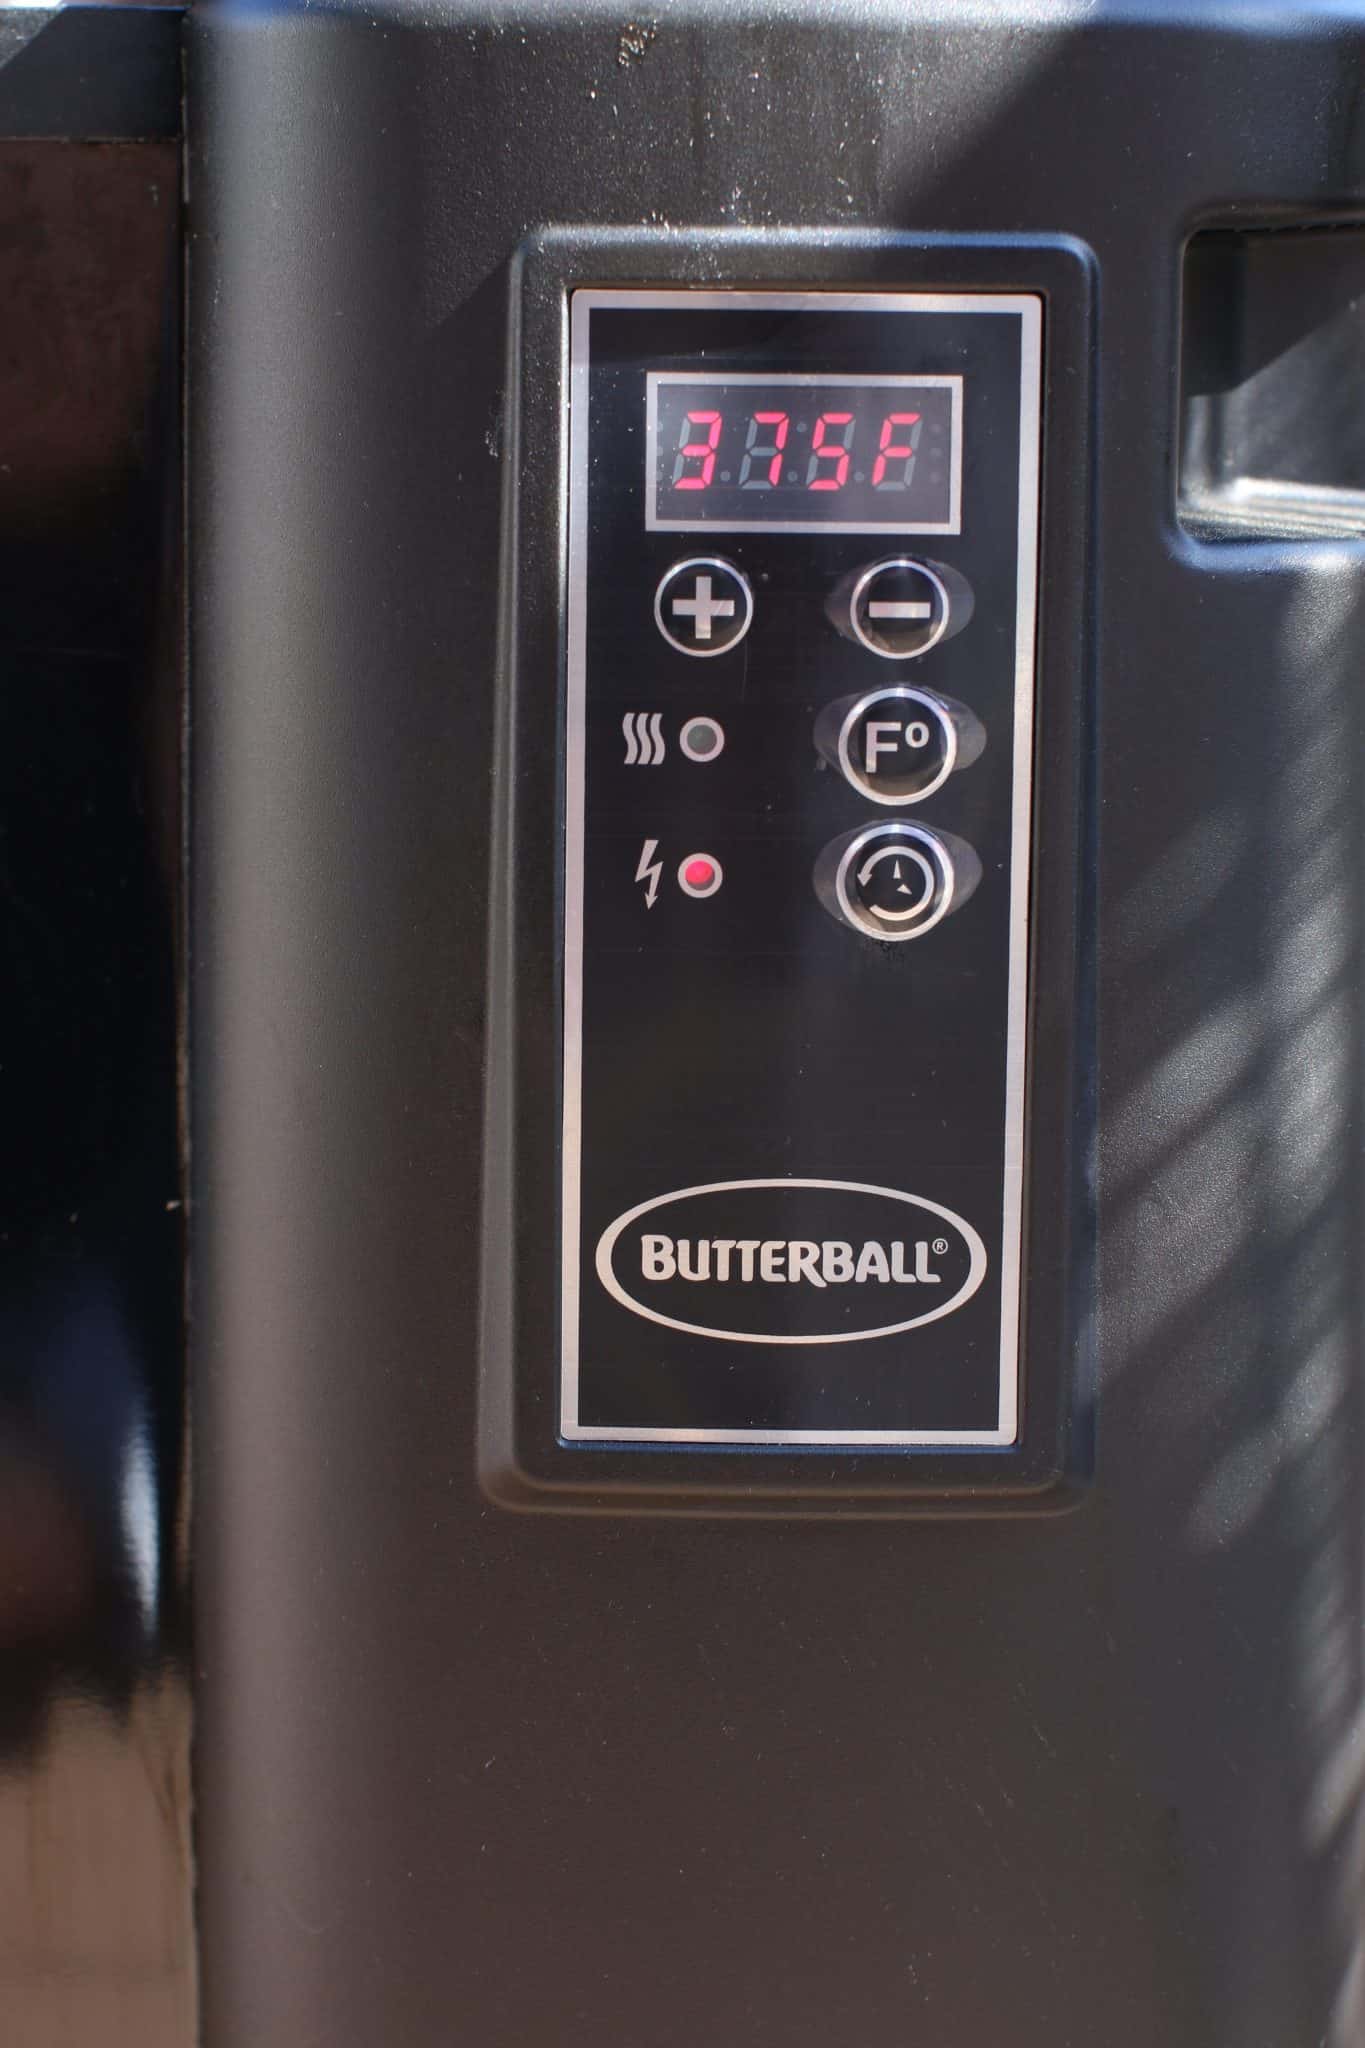
STEP 3: PREHEAT THE OIL
This part takes longer than you might think so you need to figure this time into your planning. We usually get the oil heating about an hour before we start prepping the turkey for frying because it can take that long to preheat.
This particular turkey fryer only goes to a max 375f degrees so that is what we set it on. It takes about an hour to get up to that temperature. Close the lid and let it warm up.
STEP 4: SEASON AND PREP THE TURKEY
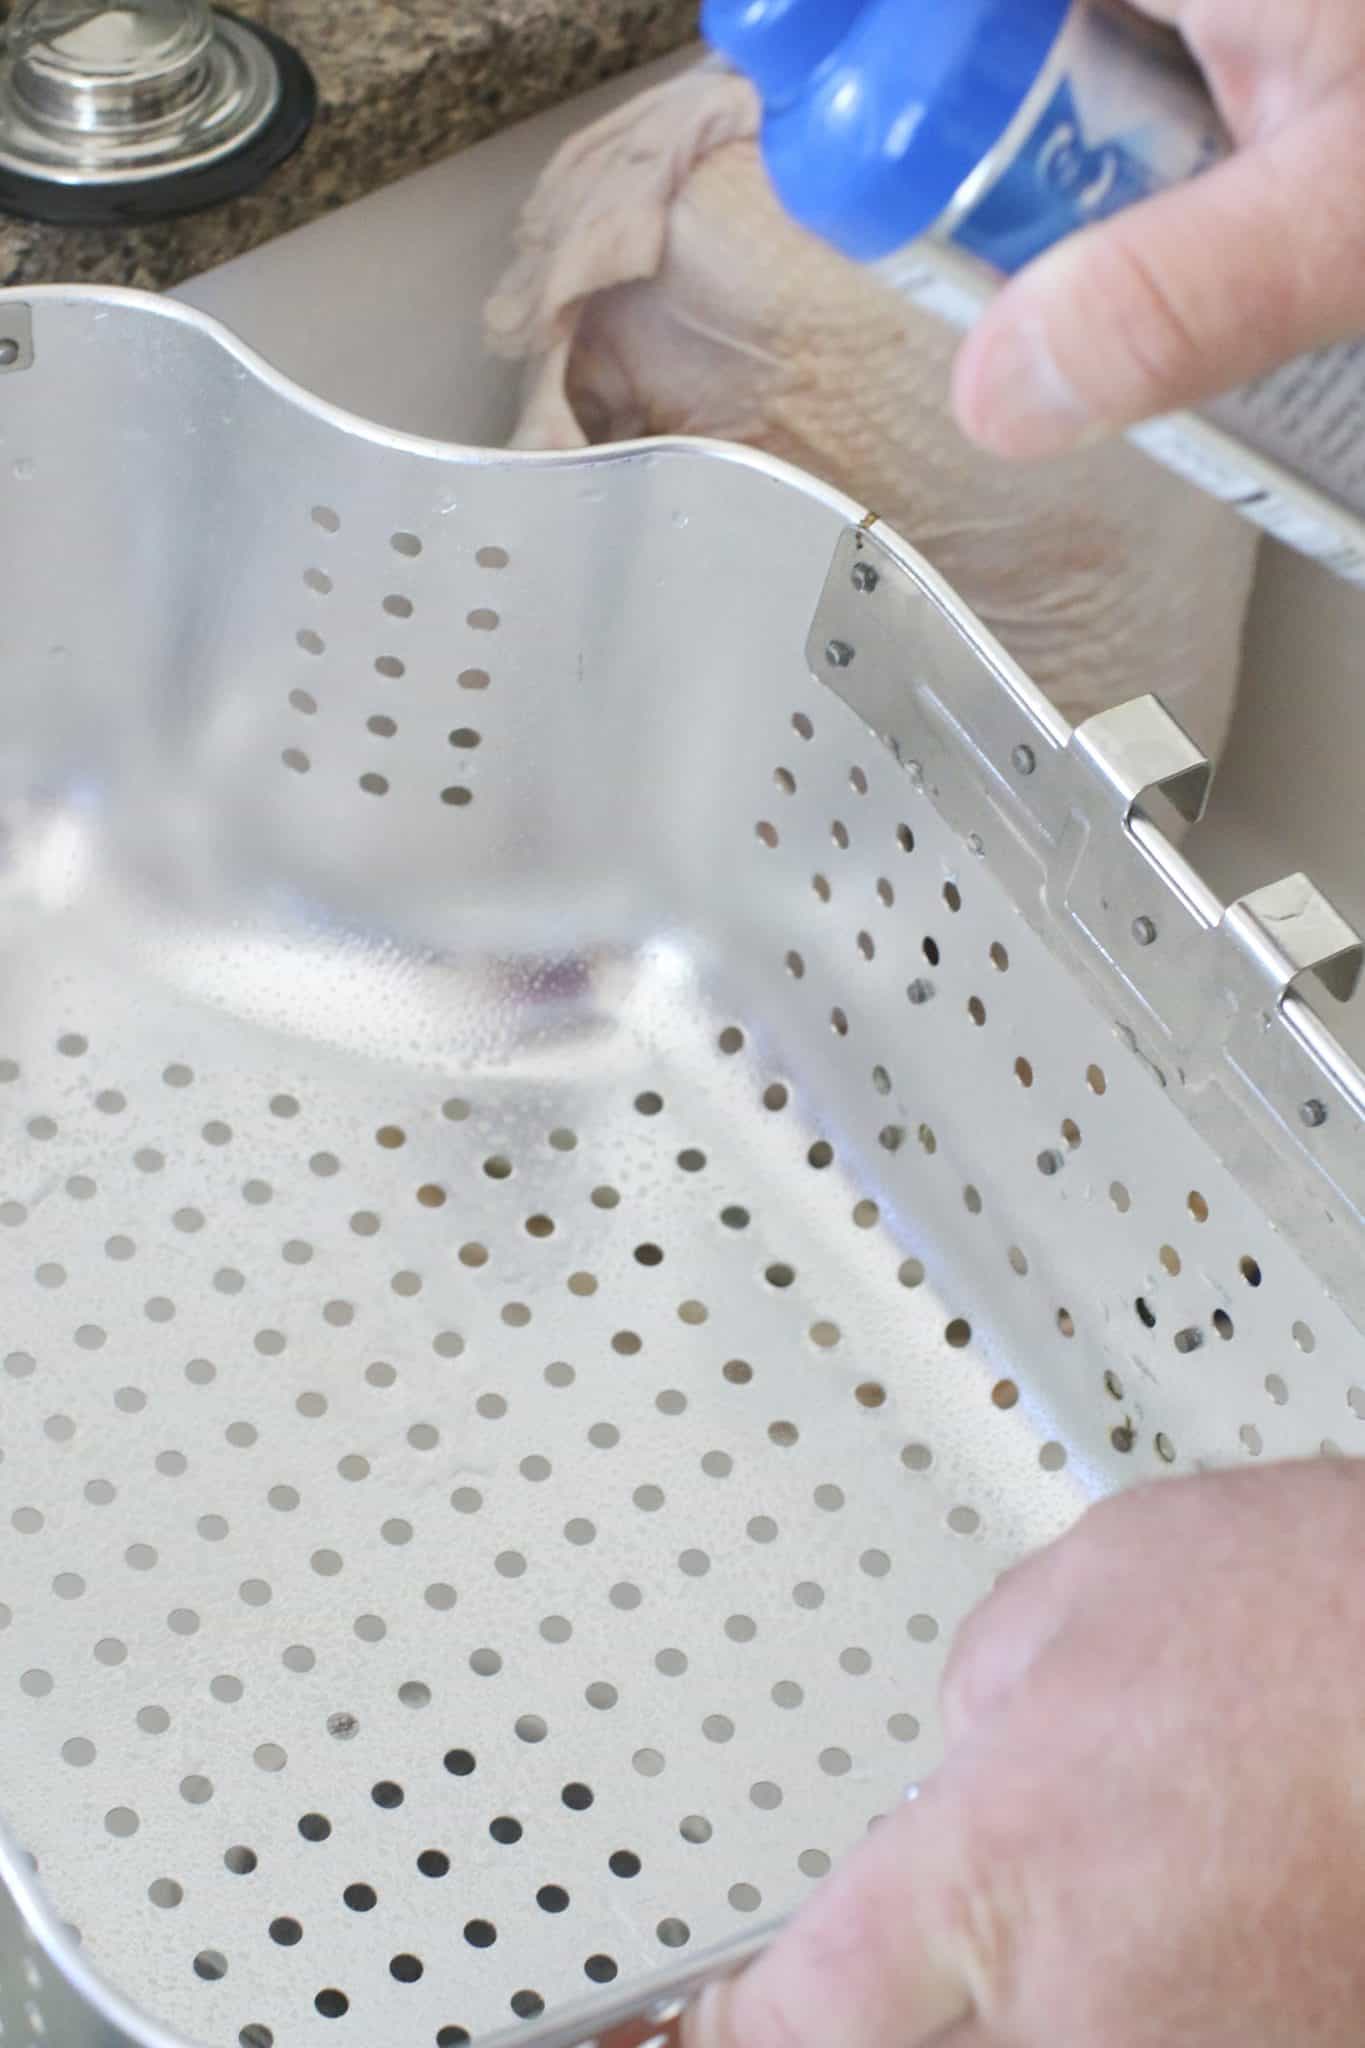
Remove the thawed turkey from the outer wrapping. Remove any giblets from the cavity of the turkey. Many times the giblets (liver, heart, gizzard, and neck) will be in a bag for you to pull out but sometimes they aren’t. Pat the turkey dry and set it aside. Spray the frying basket with no-stick cooking spray. It seems weird to do this because you’ll be putting the basket in a huge vat of oil – but trust me – it’s necessary to keep the skin from sticking to the basket.
Place your thawed turkey, breast-side up into the frying basket. This McCormick Perfect Pinch Rotisserie Chicken Seasoning is the only one we have used for years. Some folks will tell you that you need to use those injectables that have become popular in recent years. We tried that for the first time last year, and honestly, we didn’t think it added that much flavor. The whole benefit of frying a turkey is it gets a delicious, golden skin and the meat comes out so juicy and tender. So injecting anything into the meat is kind of unneccessary (in my humble opinion.) This simple seasoning is easy to use and has everything you need all in one bottle.
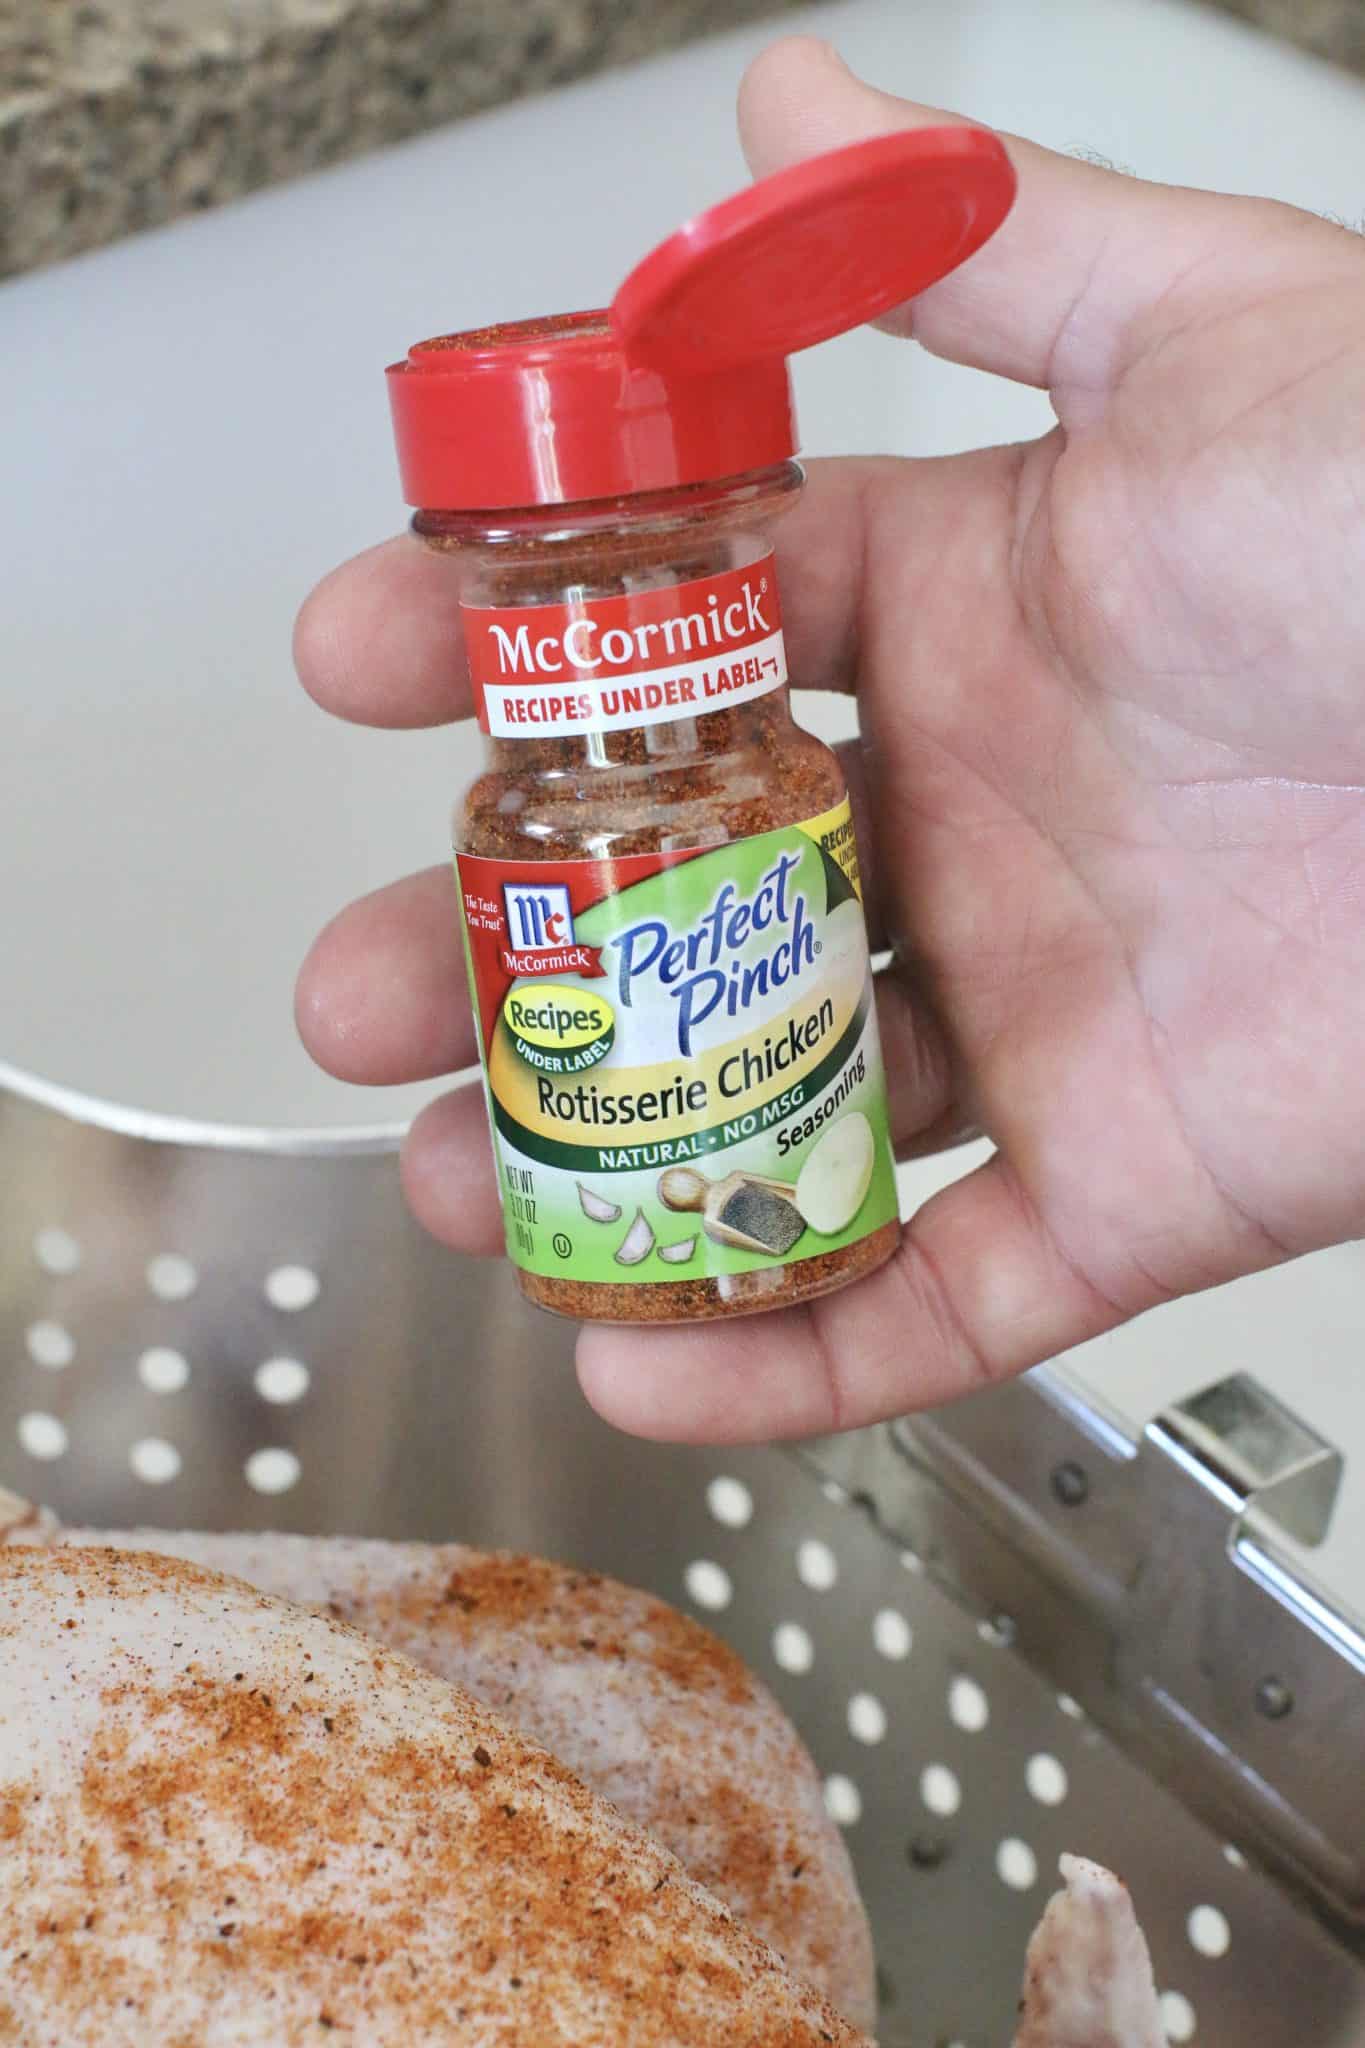
You will probably use this entire bottle. Sprinkle the entire outside. Make sure it covers everywhere and rub it in with your hands to make sure it covers all the outer parts.
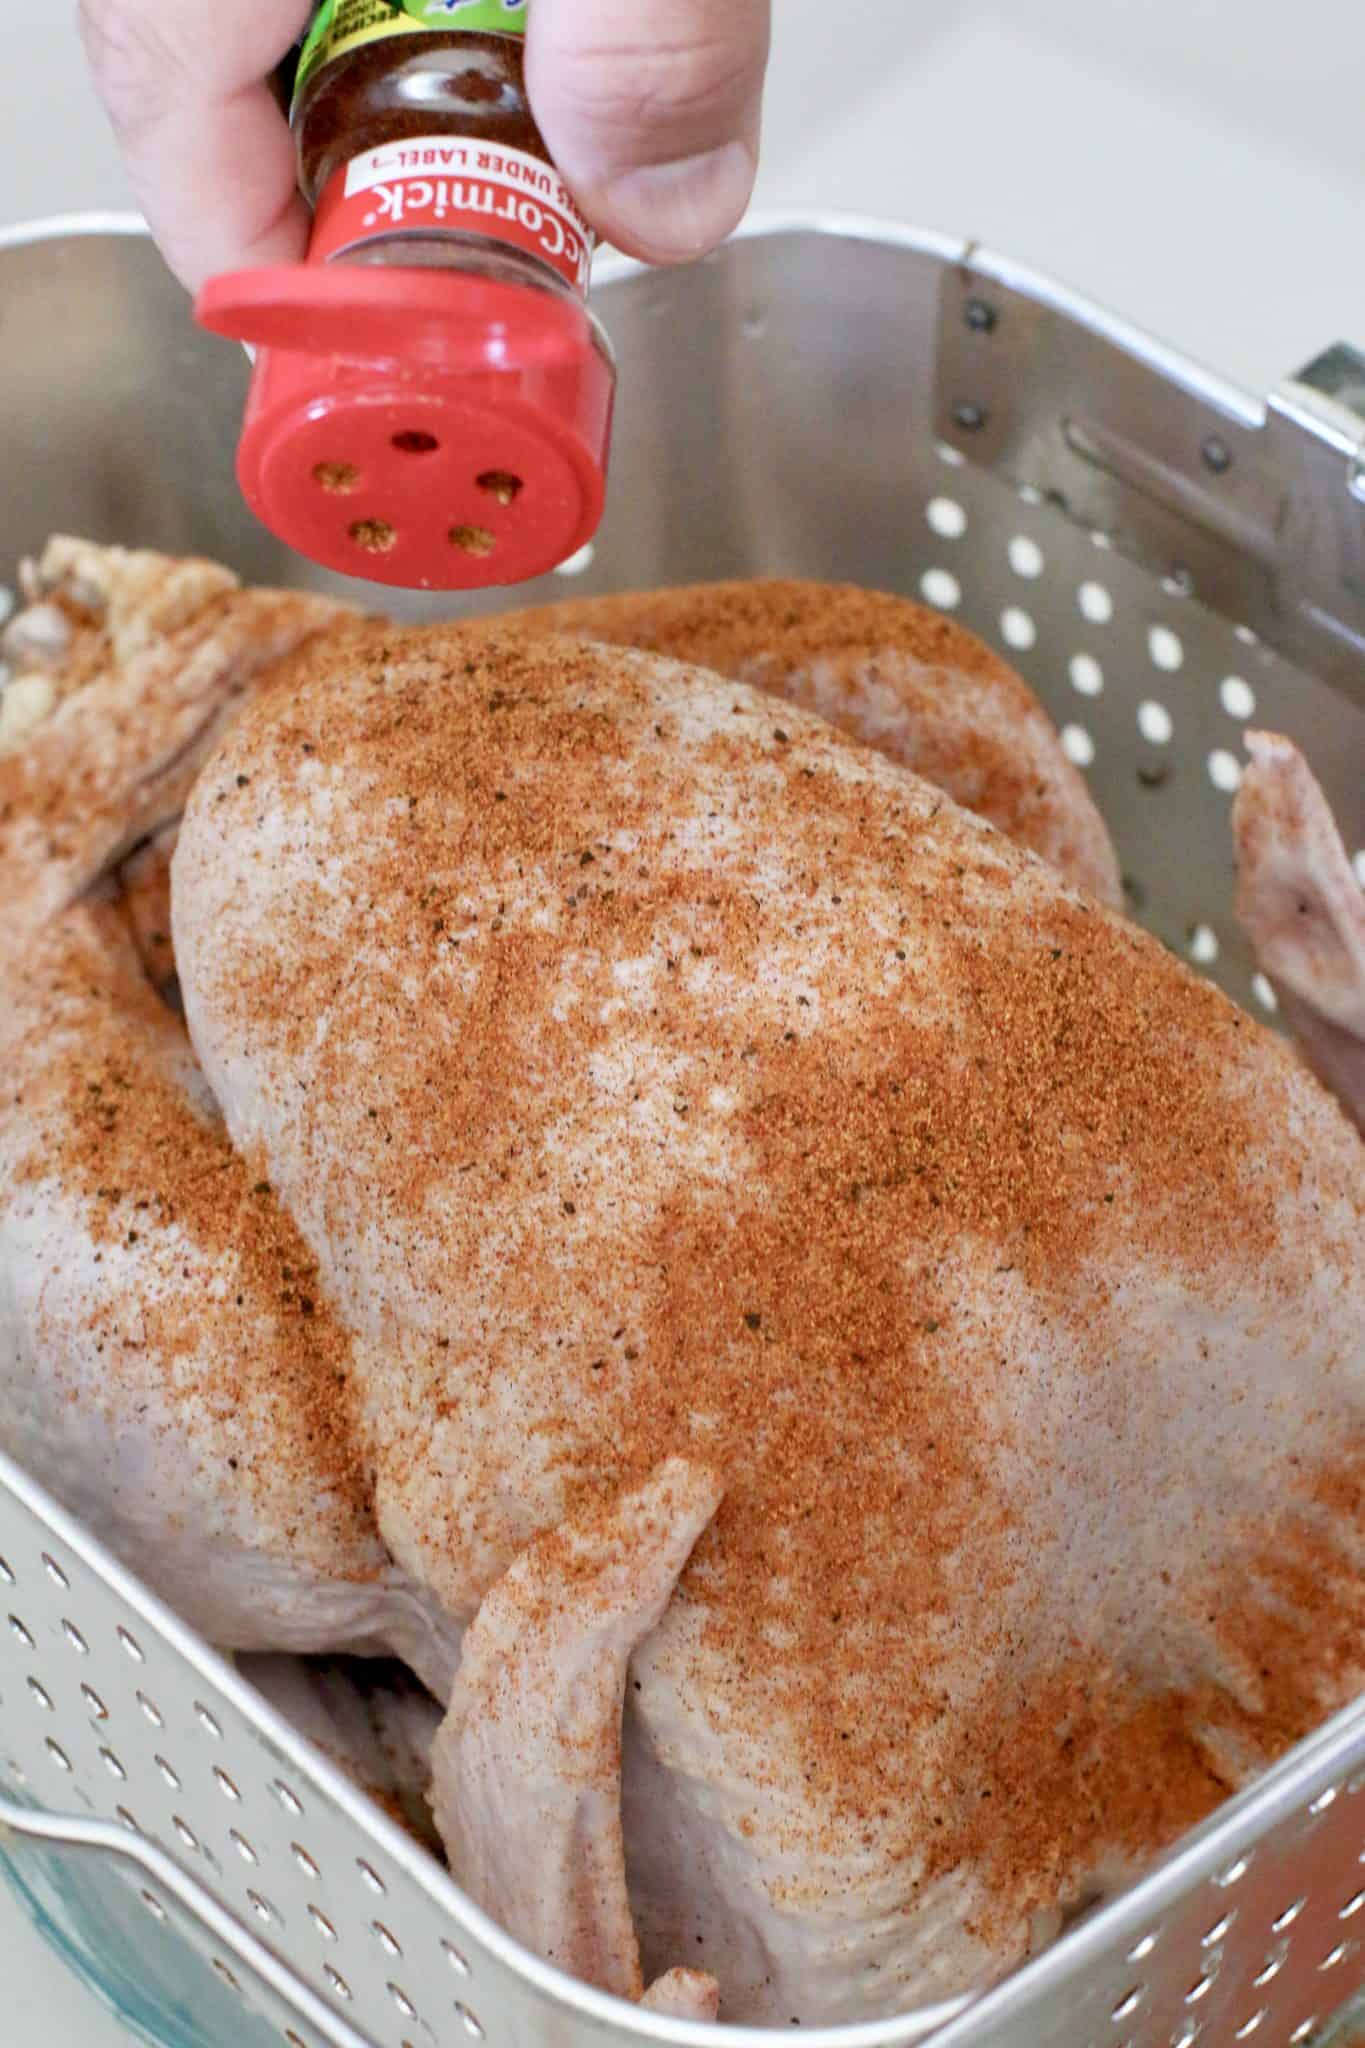
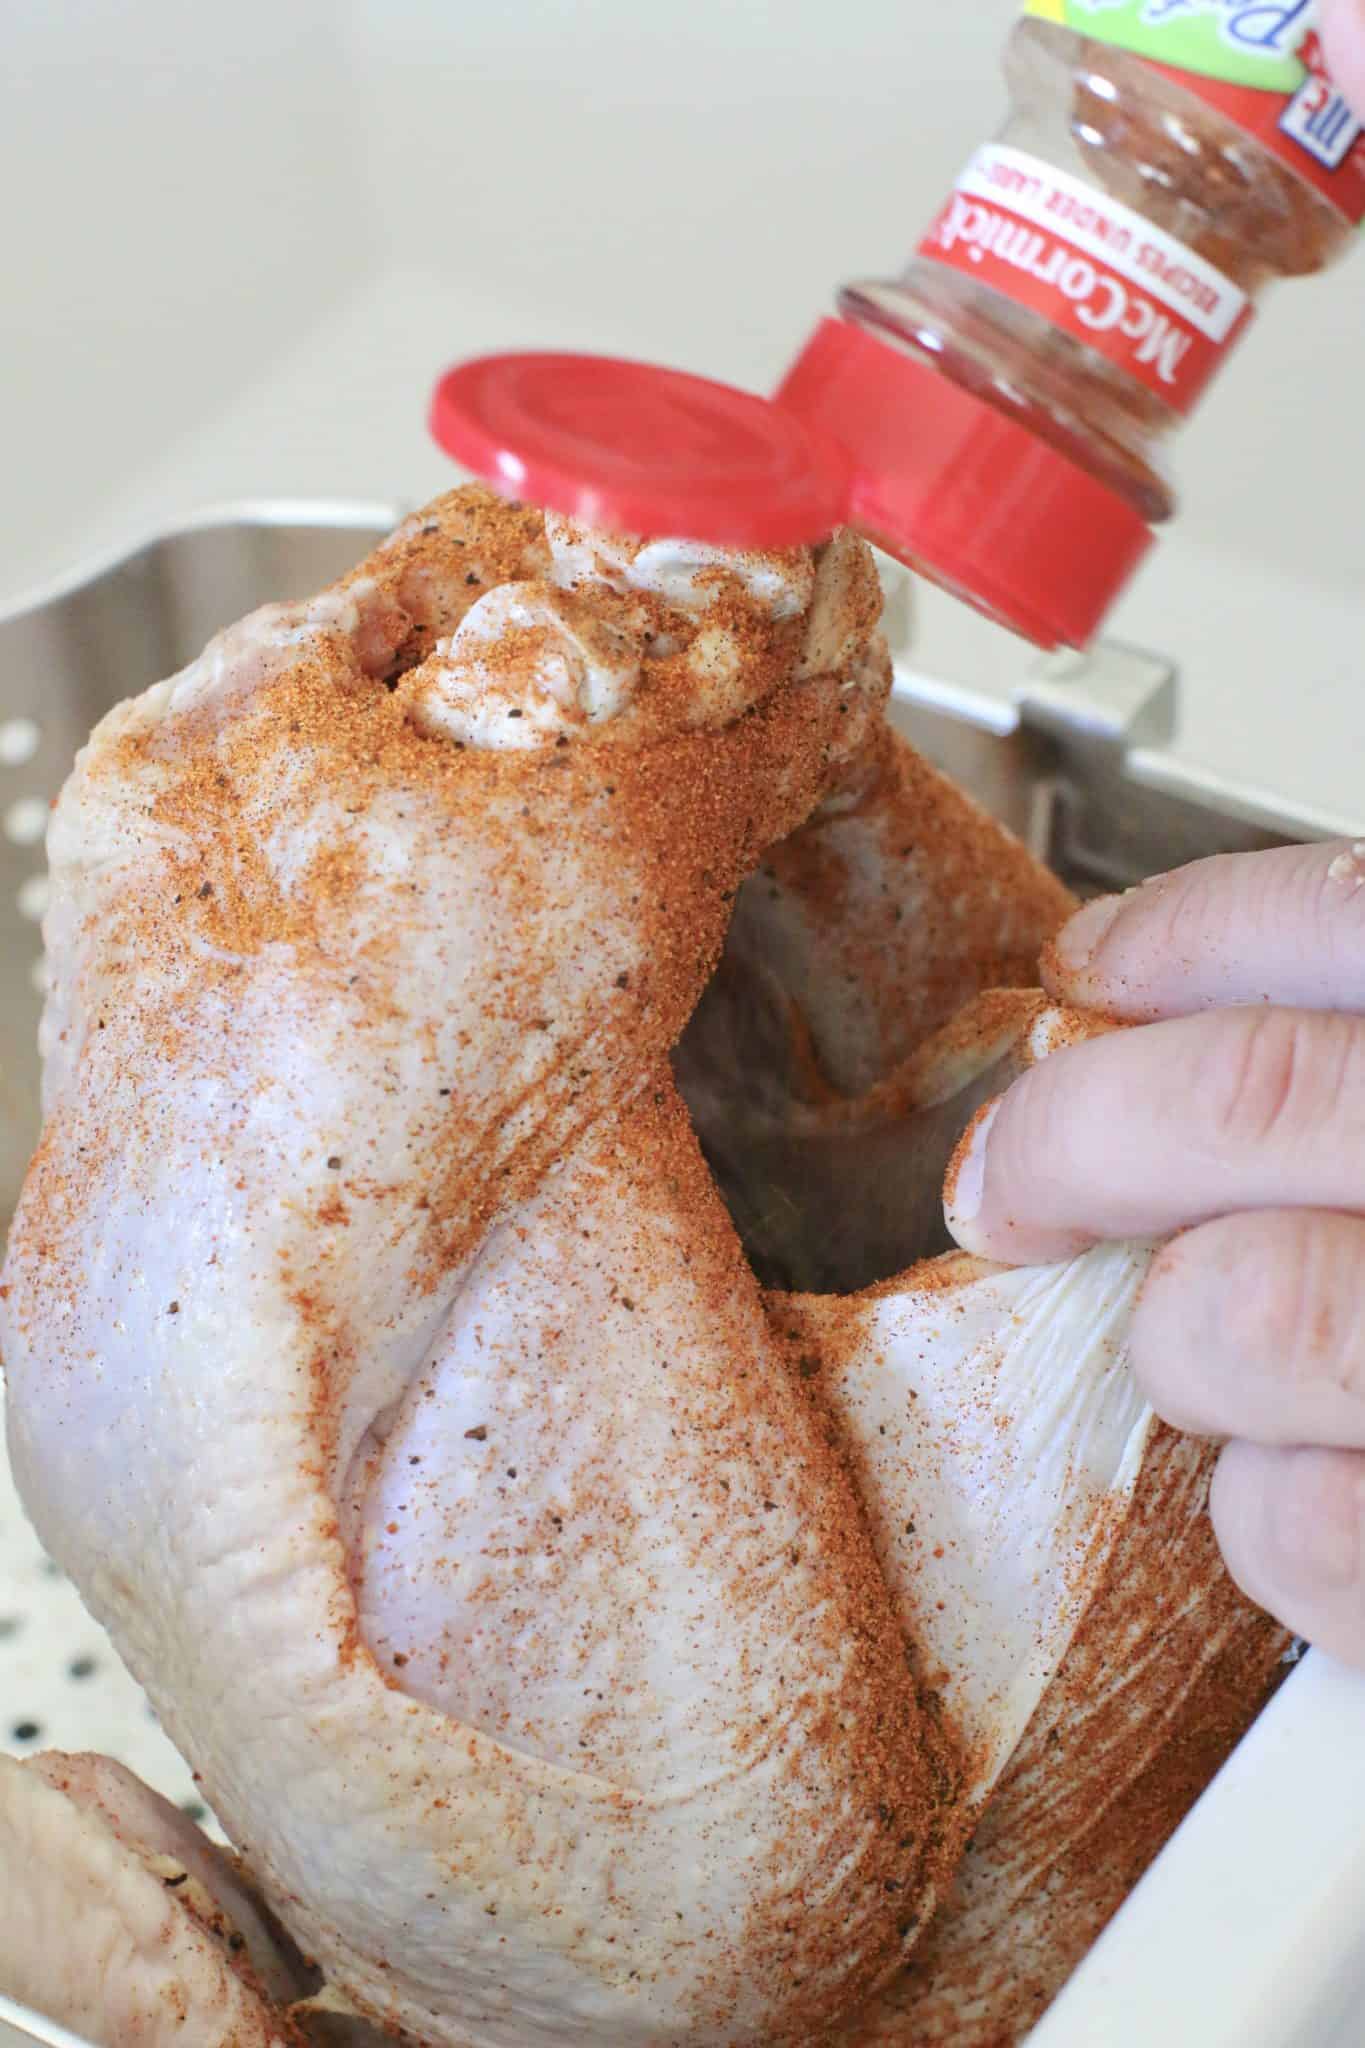
Then, this is the important step, make sure you pour lots of seasoning into the inside. This will add additional flavor to the meat while it cooks.
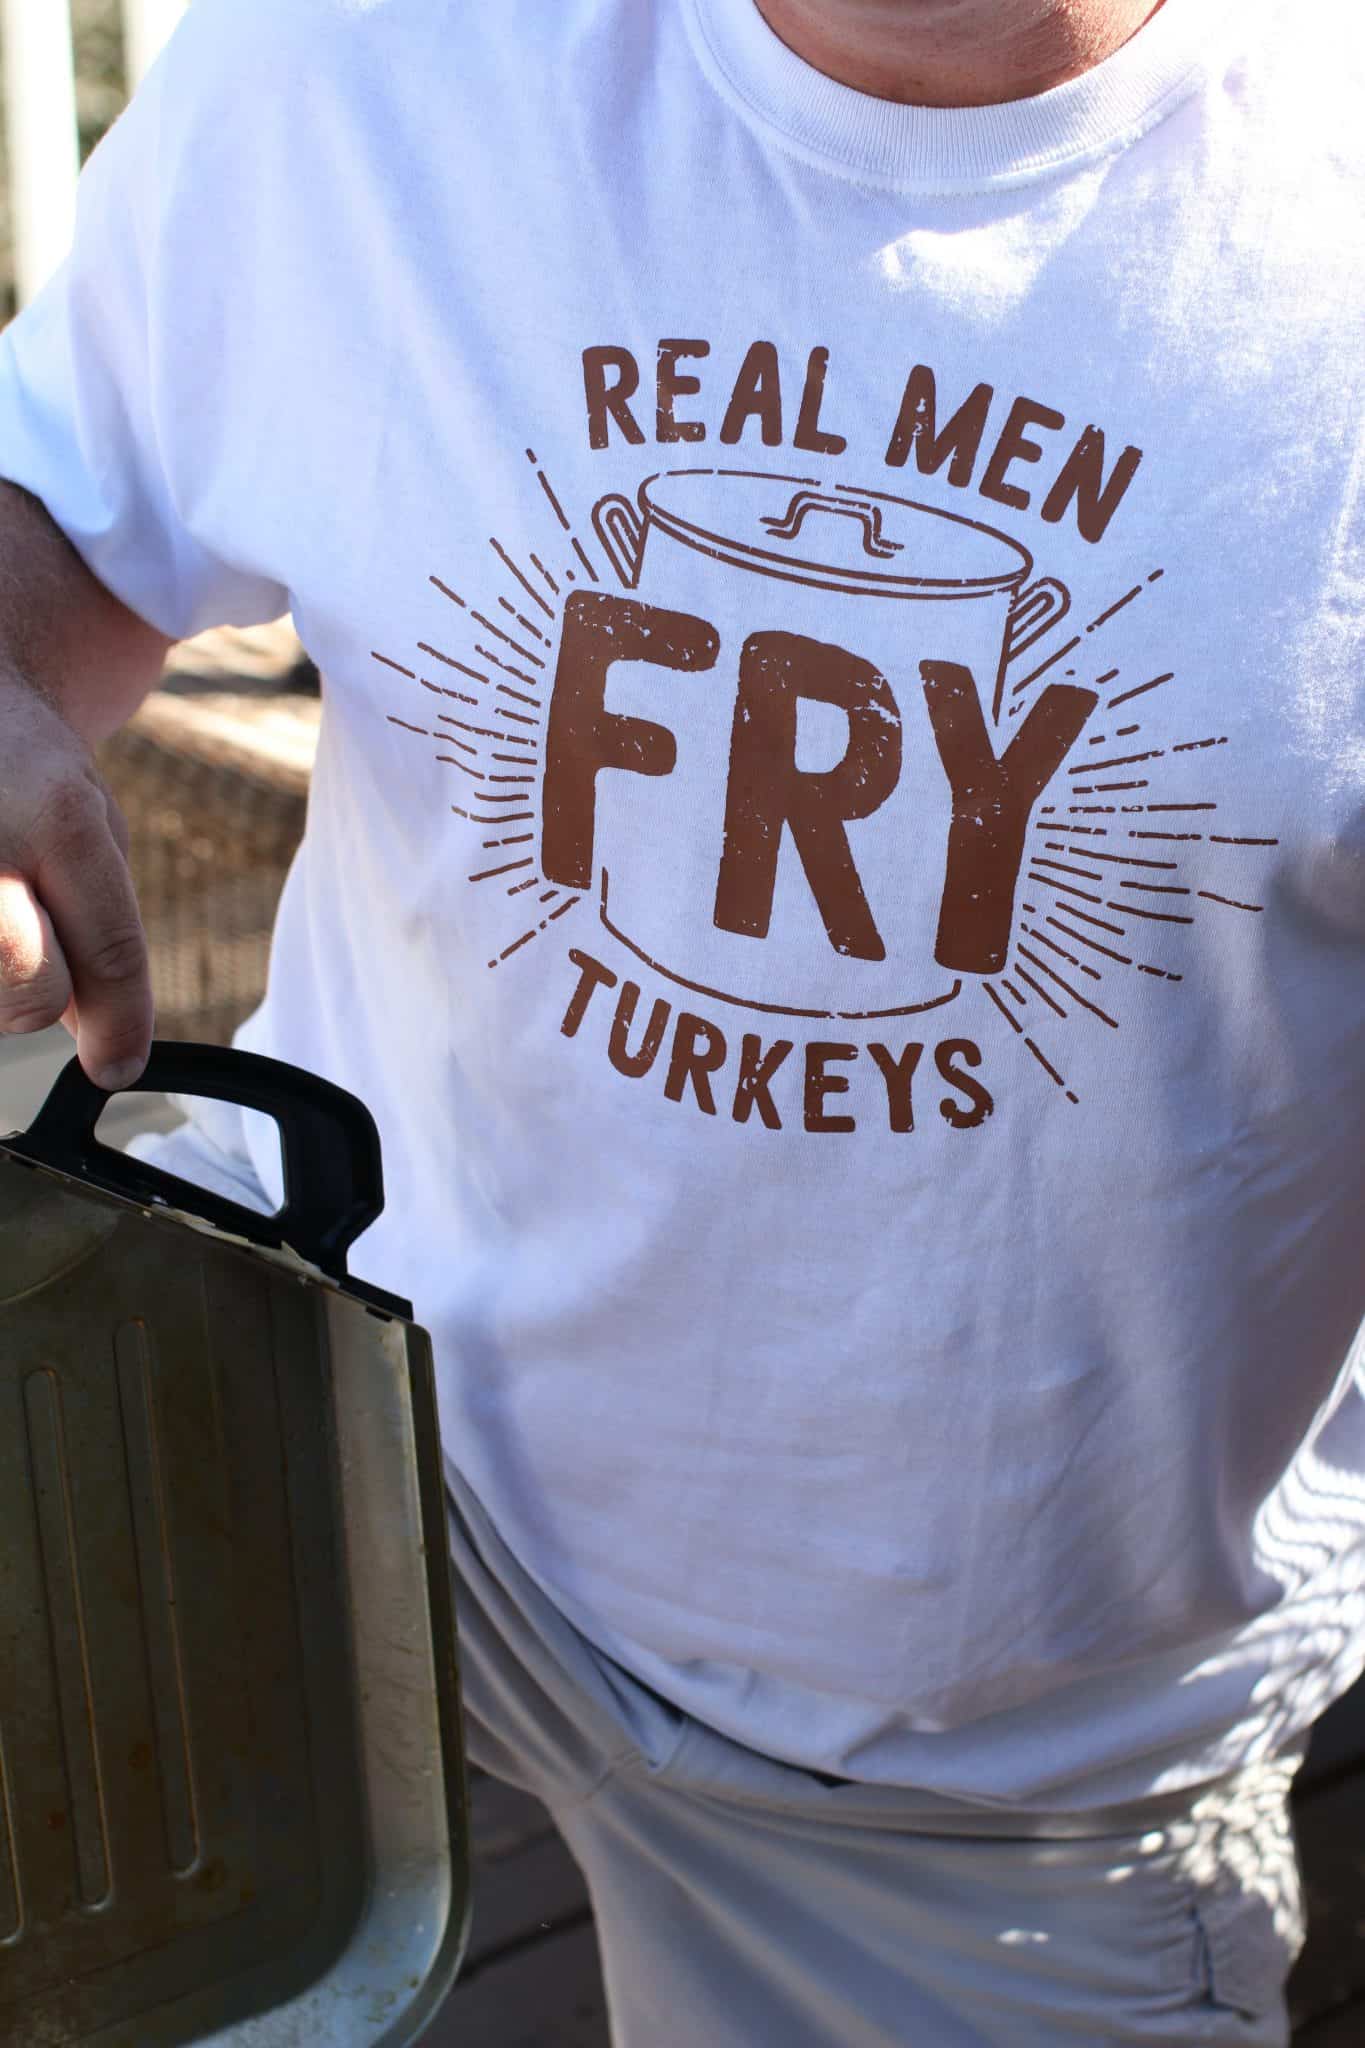
STEP 5: FRY THE PREPARED TURKEY
Time to let that turkey soak into the soothing hot oil bath. 🙂 This is the fun part. I don’t know why but we all will gather outside to watch. There is something so satisfying about watching as it is lowered in. Hey, what can I say, we are easily entertained. You gotta be careful though. The basket comes with an extension tool (it looks like a metal hangar.) That will help you lower the turkey slowly into the oil while helping you stay a safe distance away from any splattering oil.
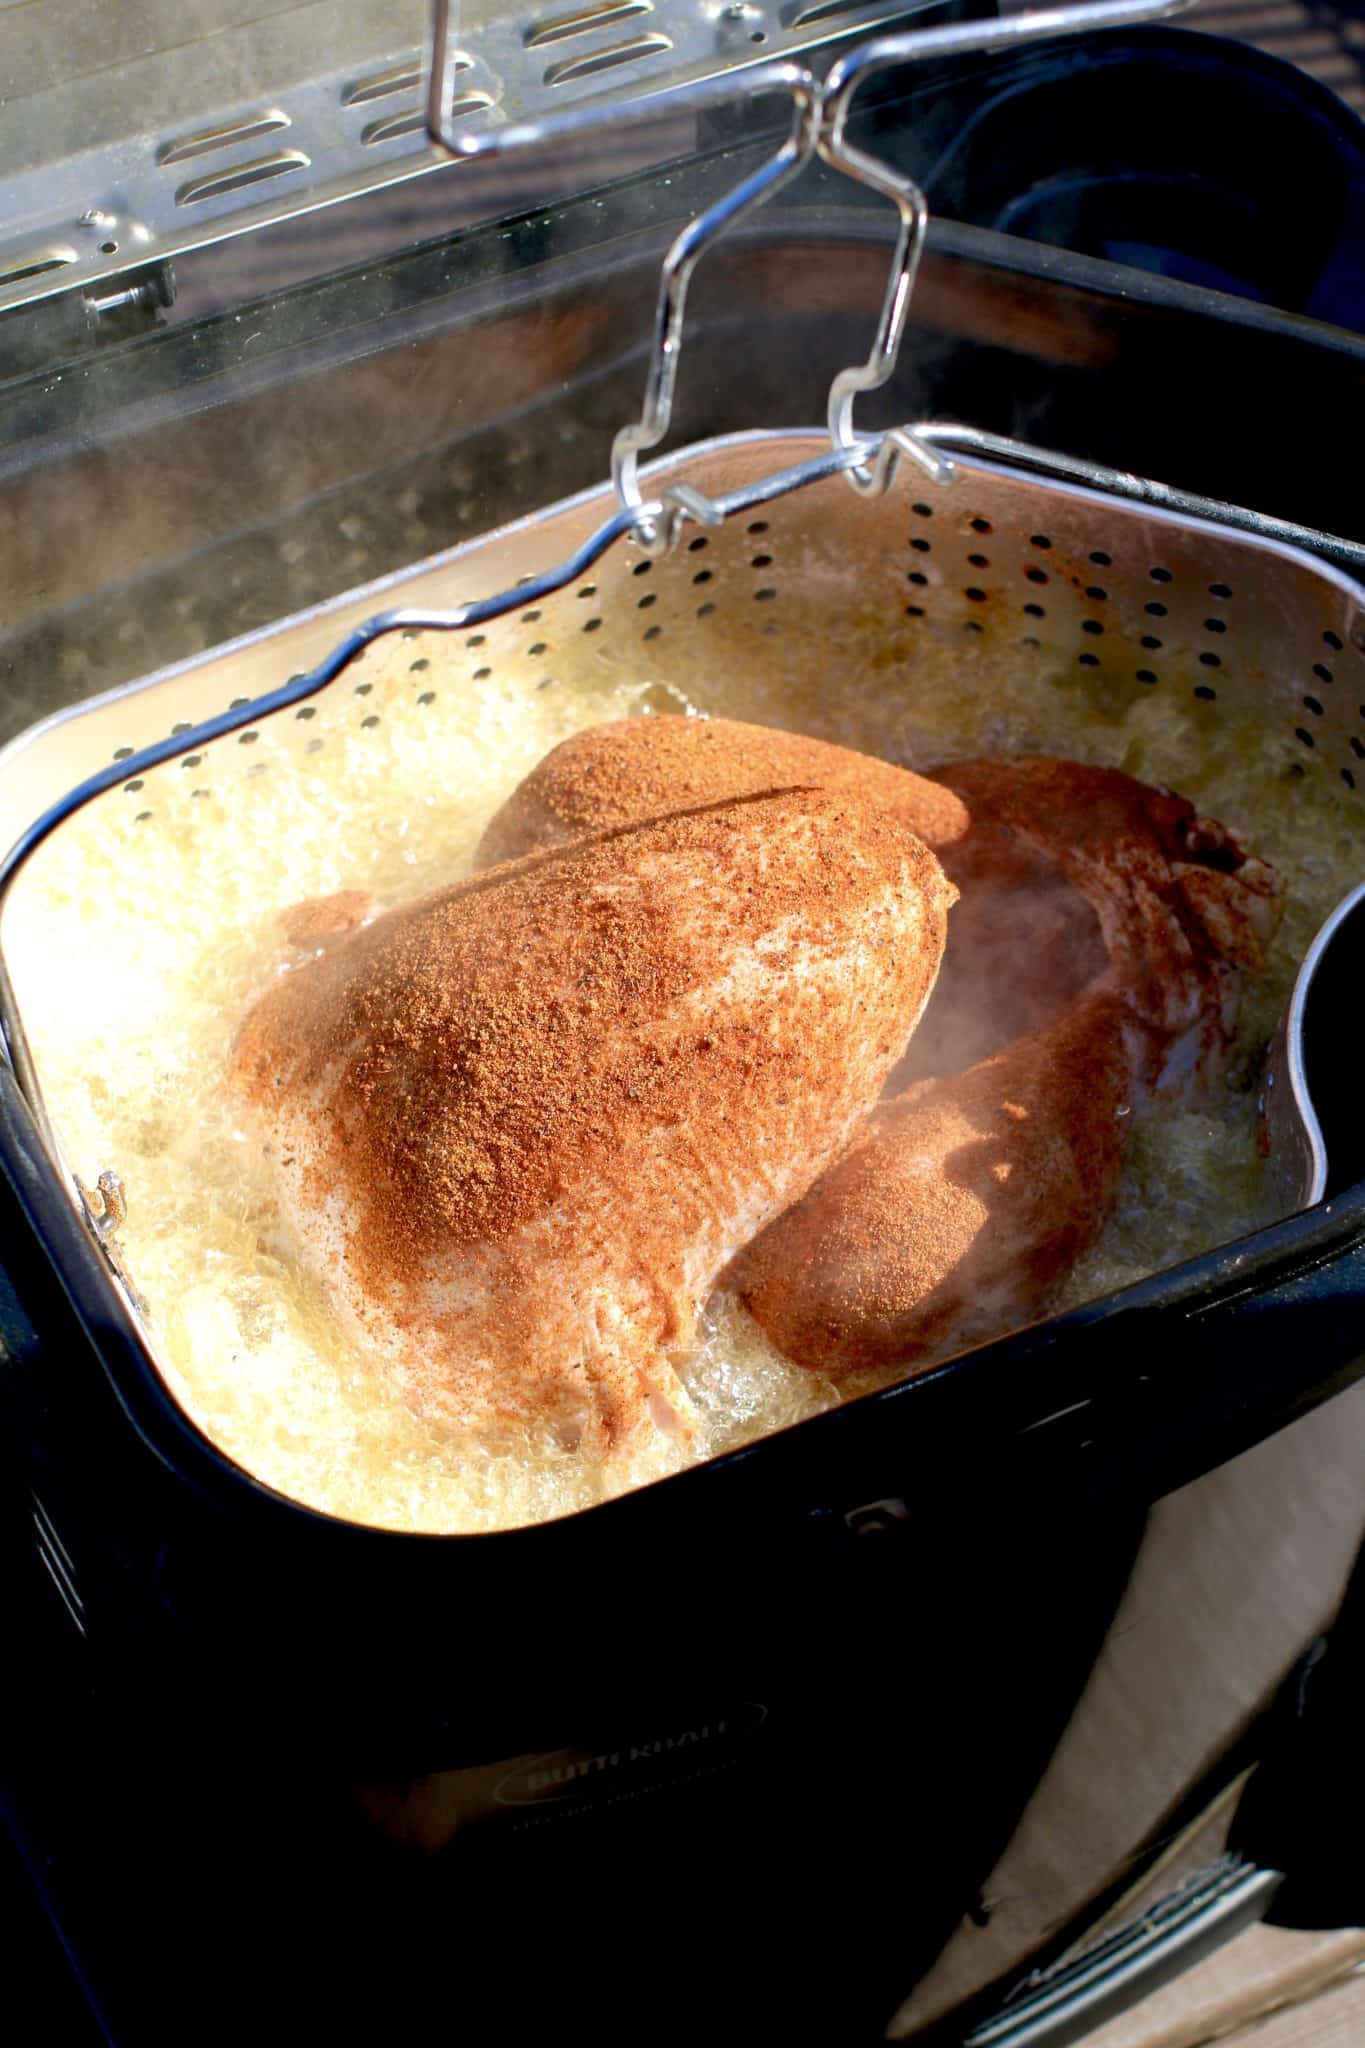
Lower the lid on the fryer and set a timer. You will fry the turkey about 3-4 minutes per pound until the turkey reaches an internal temperature of about 165f degrees (if thermometer is inserted into the breast meat) and 180f degrees (if thermometer is inserted into the thigh meat.)
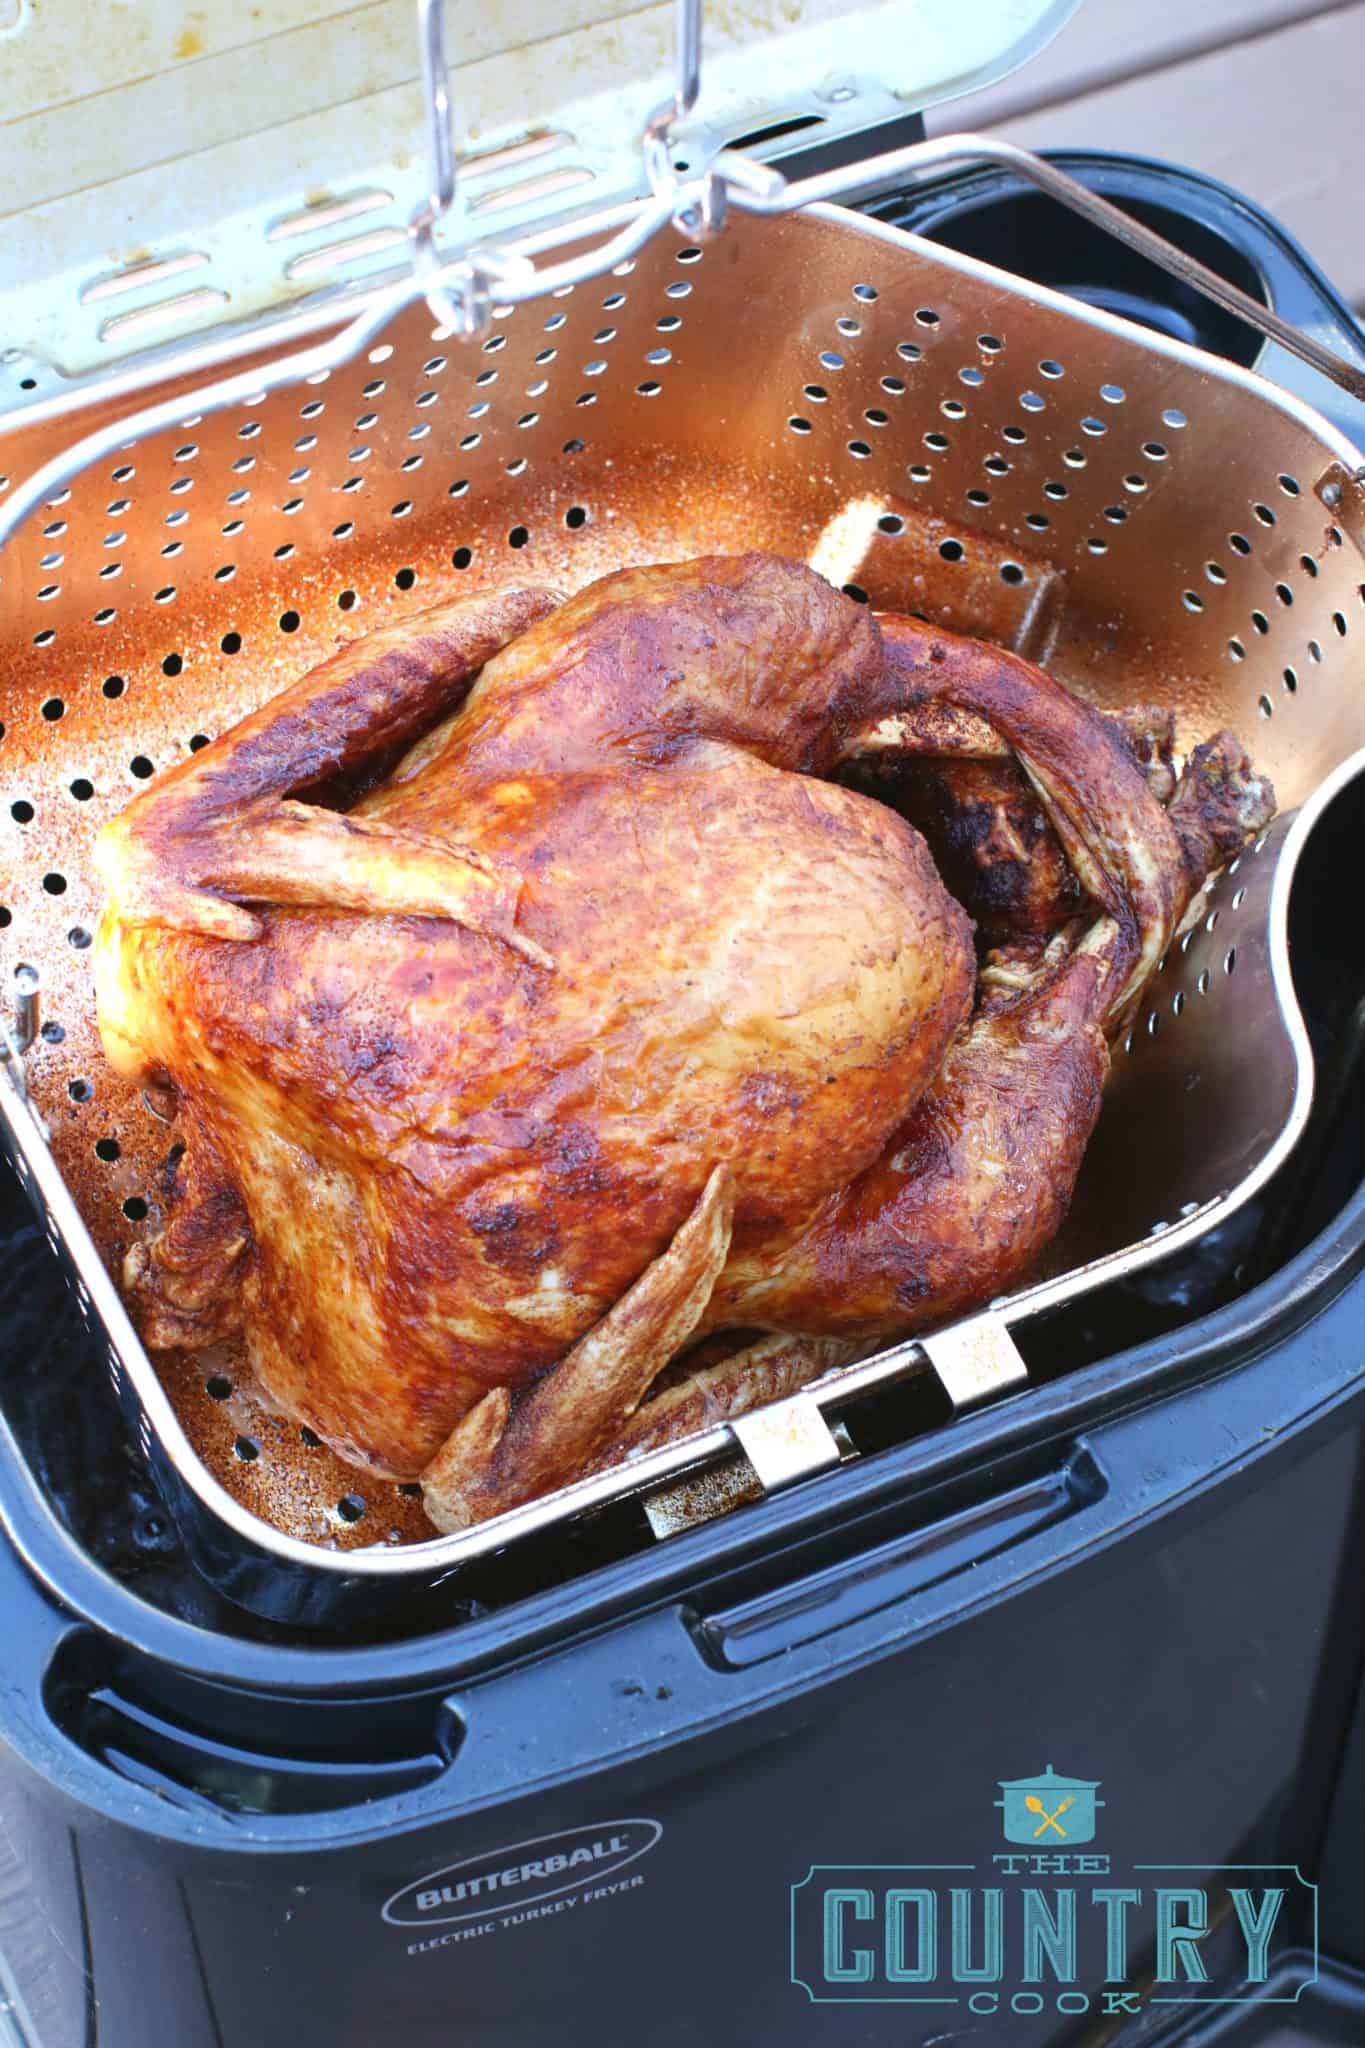
Allow oil to drain from the basket. Then carefully remove the turkey from the basket onto a serving platter. It’s best to use oven gloves for this or if you have large meat forks, you can use those to remove the turkey. I like to put some fresh, curly parsley all around the turkey to make it look picture-perfect, but not necessary unless you are Instagramming the thing or need a picture for your blog;)

CRAVING MORE THANKSGIVING RECIPES? GIVE THESE A TRY!

How to Fry a Turkey
Ingredients
- 10-20 pound frozen turkey (or fresh)
- 1 bottle McCormick Rotisserie Chicken Seasoning
- 3 gallons peanut oil (or frying blend)
Instructions
- Thaw the turkey: Place wrapped turkey into the fridge about 2-3 days before Thanksgiving (estimate one day of thawing per 4 pounds of turkey.)
- How-to "quick" thaw a turkey: Fill up sink with cool water. Place your turkey (breast-side down) into the cool water making sure the water covers the top of the turkey. Let it hang out for 30 minutes. Drain the water and start the process all over again. Estimate about 30 minutes per pound.
- Get out your electric fryer and oil:Remove the frying basket. Fill fryer with oil to the fill line indicated inside the fryer. Do not fill above this line. You will probably have some oil leftover depending on the size of your fryer.
- Preheat the oil to 375f degrees. This may take about an hour.
- Prep turkey: Remove the thawed turkey from the outer wrapping. Remove any giblets from the cavity of the turkey. Many times the giblets (liver, heart, gizzard, and neck) will be in a bag for you to pull out but sometimes they aren’t. Pat the turkey dry and set it aside. Spray the frying basket with no-stick cooking spray. Place thawed turkey, breast-side up into the frying basket. Sprinkle the entire outside with McCormick Rotisserie Chicken Seasoning. Make sure it covers everywhere and rub it in with your hands to make sure it covers all the outer parts. Then pour the seasoning into the inside. This will add additional flavor to the meat while it cooks.
- Get the turkey into the oil: The fryer basket comes with an extension tool (it looks like a metal hangar.) That will help you lower the turkey slowly into the oil while helping you stay a safe distance away from any splattering oil. Slowly lower the turkey into the oil. Carefully remove the extension tool. Lower the lid on the fryer and set timer. Fry the turkey about 3-4 minutes per pound until the turkey reaches an internal temperature of about 165f degrees (if thermometer is inserted into the breast meat) and 180f degrees (if thermometer is inserted into the thigh meat.)
- Time to eat: Once the turkey is cooked, attach extension tool to the frying basket and slowly raise the basket. Allow oil to completely drain from the basket. Then carefully remove the turkey from the basket onto a serving platter. It’s best to use oven gloves for this or if you have large meat forks, you can use those to remove the turkey. I like to put some fresh, curly parsley all around the turkey to make it pretty.
Nutrition
Nutritional Disclaimer
“The Country Cook” is not a dietician or nutritionist, and any nutritional information shared is an estimate. If calorie count and other nutritional values are important to you, we recommend running the ingredients through whichever online nutritional calculator you prefer. Calories and other nutritional values can vary quite a bit depending on which brands were used.


Oh my gracious, this was so good! We bought a turkey fryer that was used at the Goodwill a few months ago and I’ve been slowing purchasing oil when it was on sale. So I encourage people to check their local Goodwills or Facebook marketplace for people selling them super cheap.If you are smart about it, you can do this without spending a ton of money. There is absolutely nothing like a fried turkey. I have never tasted such moist turkey in my life!! Thank you, thank you for such wonderful instructions and photos. The seasoning was just right for this!
Very informative..thanks so much
I’ve been meaning to come back and tell you how wonderful this turned out for us! It was perfectly cooked and so moist! I won’t make it any other way again!
This turned out so amazing. My first time frying and your instructions were perfectly detailed and the quick thaw idea was so helpful! Thank you for making me look like a star!
I just bought this fryer and we could not be happier with it! Your post was so instructive and was so helpful for us newbies. It turned out heavenly! We will be frying from now on! I kept the oil in there and we ended up frying a couple of whole chickens. We also fried up some shrimp one night as well. We definitely got a lot more use out of that oil! The meat is ridiculously moist and it wa all so simple – thank you bunches.
It will be great Cathy! Frying the turkey makes it come out beautiful every time! Happy Thanksgiving 🙂
I have thought about buying a turkey fryer, but my grandson is allergic to peanuts. What would you recommend to use?
Hi Vickie! You could certainly use your favorite vegetable oil. Just make sure you go with a brand that you know and trust won’t have any nut oils in them. 🙂