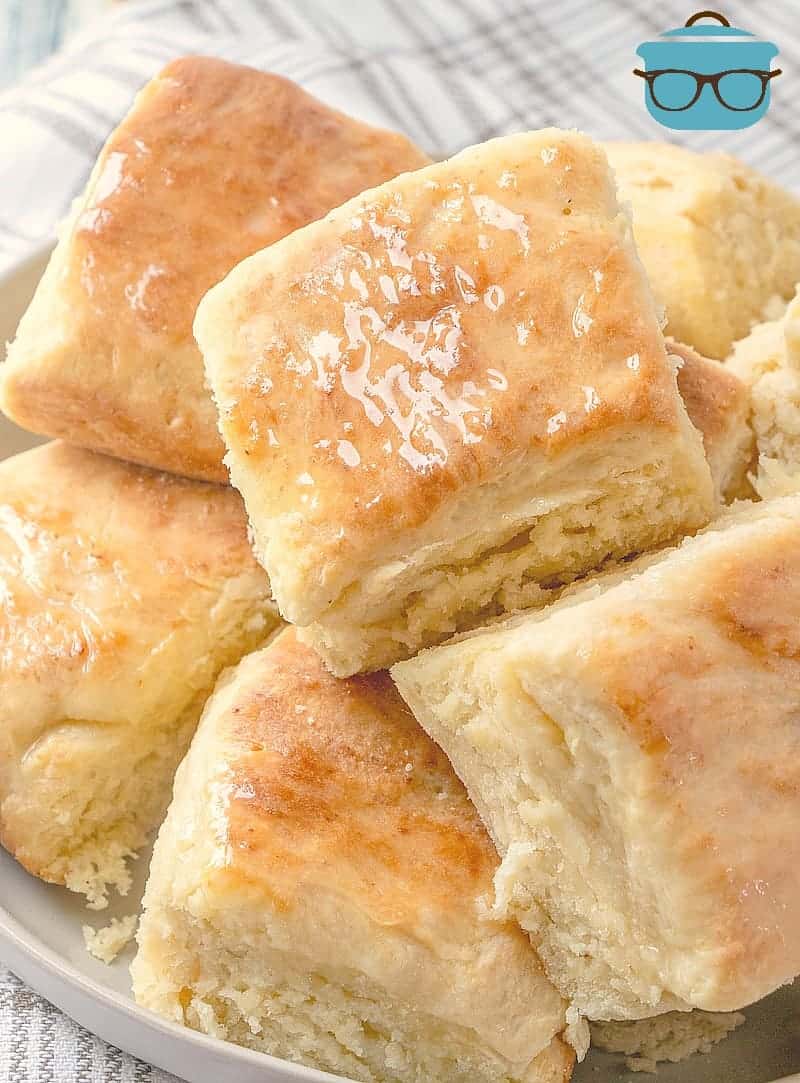
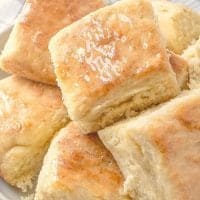
Easy Yeast Roll Biscuits
These homemade Yeast Roll Biscuits are so easy and are a combination of a roll and a biscuit. So simple to make and they come out so tender!
A COMBINATION OF A ROLL AND A BISCUIT
I just need a moment to describe these rolls I’m about to share with you. They really are one of the easiest homemade rolls I have to made and they taste amazing. If you are scared of yeast, if you’ve never tried to make rolls or maybe you had a disastrous experience in the past, then you need to try to make these.
TIPS FOR MAKING HOMEMADE BISCUIT YEAST ROLLS:
- The main tip when working with any kind of yeast is to make sure it is fresh. Most fast acting yeast is sold in little packets to help keep it fresh. Take a look at the expiration date on the packet and make sure it is still good.
- When measuring flour – don’t pack it into the measuring cup. Dip the measuring cup into the flour and shake. Then, with the flat end of a knife, scoop off excess. This will help ensure that you aren’t packing in too much flour.
- In this recipe, I am using salted butter along with a pinch of salt. It’s not a typo – it’s needed for this particular recipe. However, for this recipe, I have made it with margarine instead of butter and it still came out wonderful. Margarine tends to have more salt then salted butter so leave out the additional salt if you use margarine.
- This particular recipe is actually very forgiving. I only like easy recipes when it comes to bread making. Your natural urge will be to keep mixing and mixing to make it all blend. But trust me, it’s not needed here. Just follow my directions exactly, and they will turn out great!
- Try serving these with some Texas Roadhouse Cinnamon Honey Butter. You won’t be disappointed!

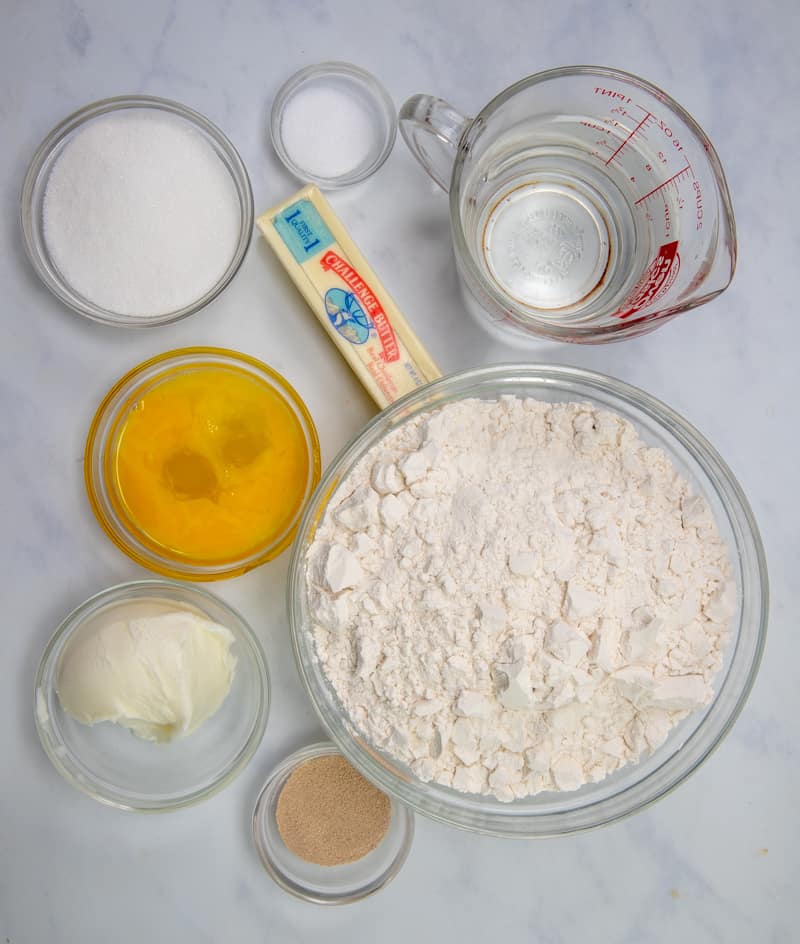
INGREDIENTS NEEDED: (SEE RECIPE CARD BELOW FOR THE FULL RECIPE)
- vegetable shortening (Crisco)
- sugar
- salt
- fast acting yeast (sometimes called instant yeast)
- all-purpose flour
- eggs
- salted butter or margarine
- warm water
HOW TO MAKE EASY HOMEMADE YEAST ROLLS:
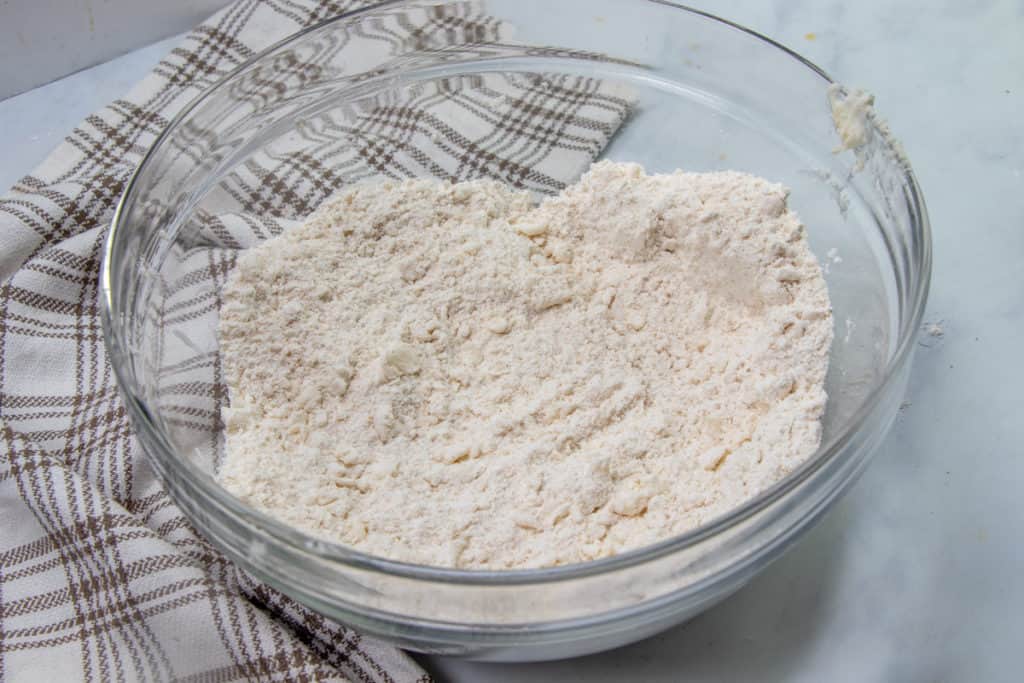
Place sugar, salt, 2 cups of flour, and yeast in a large mixing bowl. Cut in shortening with a long tined fork or pastry cutter.
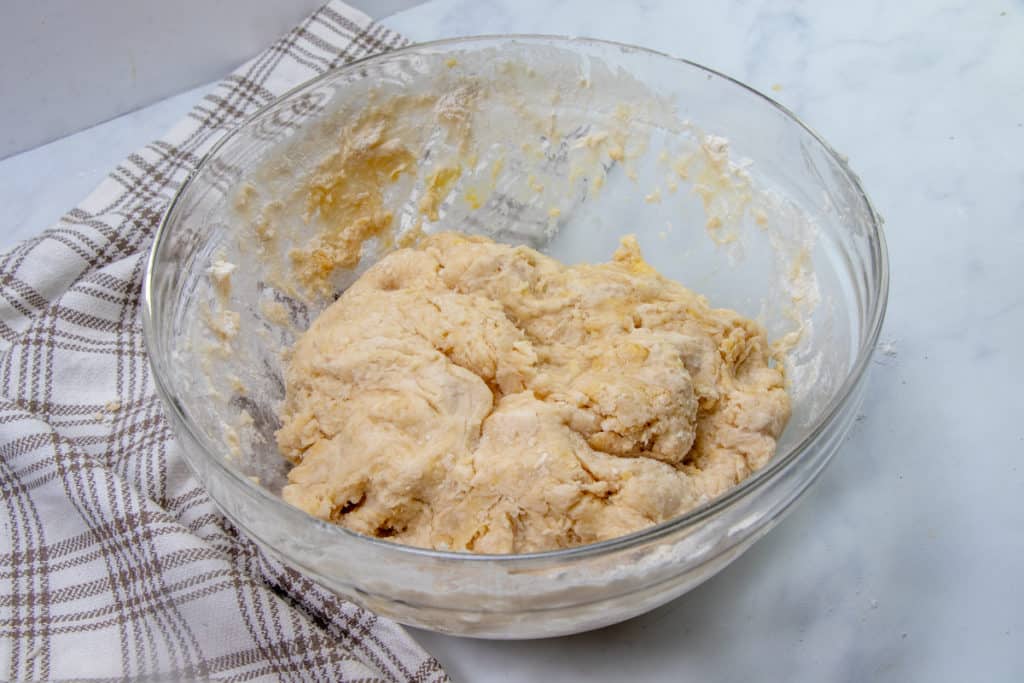
Add eggs, beating lightly with fork before stirring them in. Add remaining flour, melted butter, and water. Stir together well.

Mixture will look like a big old lumpy blob. And when I say lumpy blob, I really mean lumpy blob. Cover with a dish towel and let sit in a warm place for twenty minutes. To help with rising, I will heat my oven to 125F degrees. Once it reaches that temperature, I turn it off and then put the covered bowl (oven proof, of course) into the oven to let it rise.
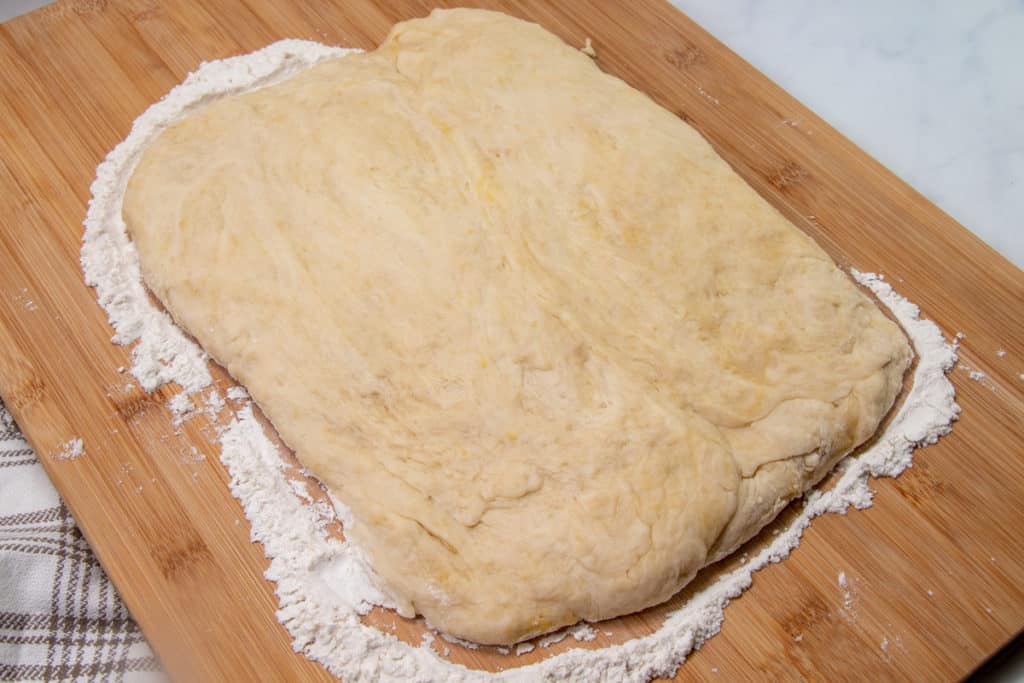
After twenty minutes, turn out onto a floured surface. Sprinkle flour over the top and knead three or four times. Pat out into a square that is about 3/4 inch thick. .
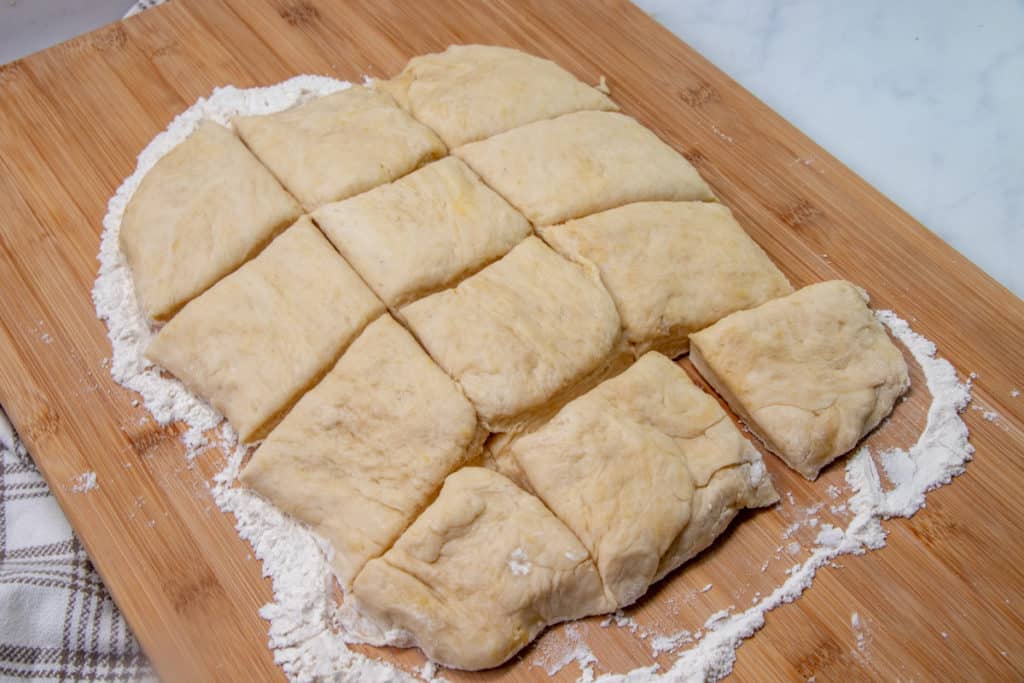
Cut into squares with a pizza cutter
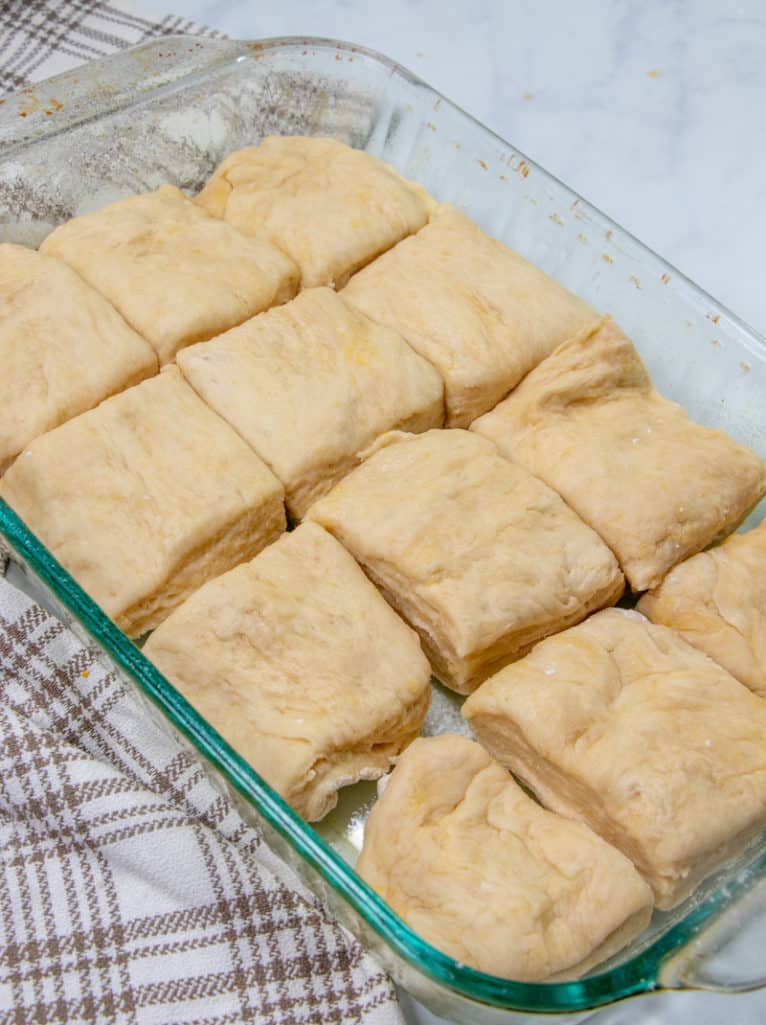
Place in greased 9″×13″ pan and cover with towel. Let rise another twenty minutes. Once again, like the first rising, I pop it back in the oven to rise.
Take the pan out of the oven after it has risen and then preheat the oven to 350F degrees. Bake at 350F for about 25 minutes, or until tops are golden. Brush hot rolls with additional melted butter.
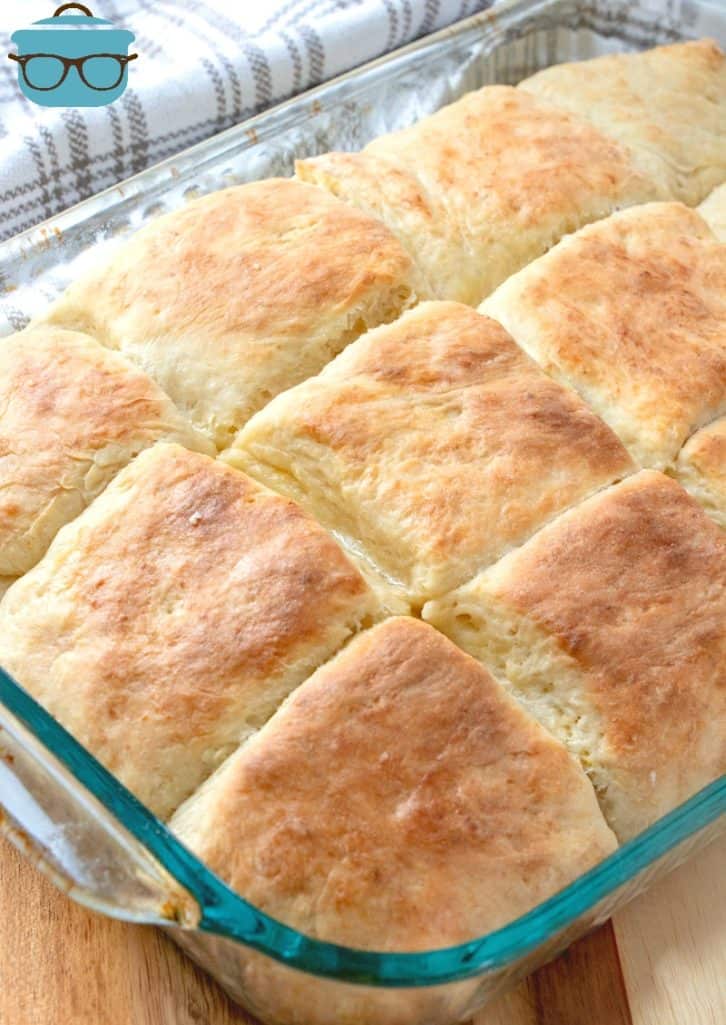
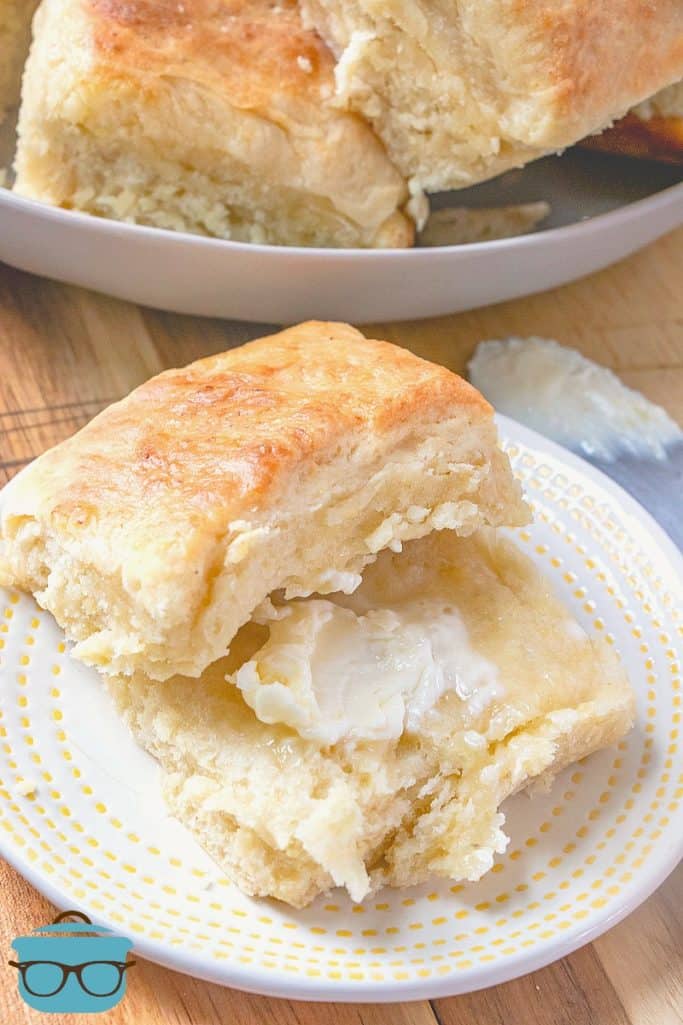
Just look at the inside of these rolls! So soft and fluffy. And they are so good warm, right out of the oven! Serve with butter, honey and some jam!
CRAVING MORE RECIPES?
- Dinner Rolls
- Potato Rolls
- Homemade White Bread
- Butter Swim Yeast Rolls
- Homemade Crescent Rolls
- Southern Buttermilk Biscuits
- Honey Wheat Rolls
- Hot Cross Buns
- Homemade Whipped Butter
Originally published: February 2011
Updated photos & republished: March 2020
Easy Yeast Roll Biscuits
Ingredients
- ½ cup solid vegetable shortening (Crisco)
- ½ cup sugar
- 1 ½ teaspoons salt
- 2 packets fast acting yeast
- 5 cups all purpose flour, divided use
- 2 large eggs
- ½ cup salted butter (1 stick), melted (plus more for brushing baked rolls with)
- 1 ½ cups very warm water
Instructions
- Place sugar, salt, 2 cups of flour, and yeast in a large mixing bowl.
- Cut in shortening with a long tined fork or pastry cutter.
- Add eggs, beating lightly with fork before stirring them in.
- Add remaining flour, melted butter, and water.
- Stir together well. Mixture will look like a lumpy blob.
- Cover with a dish towel and let sit in a warm place for twenty minutes.
- After twenty minutes, turn dough out onto a floured surface.
- Sprinkle flour over the top and knead three or four times.
- Pat out into a square that is about 3/4 inch thick.
- Cut into squares with a pizza cutter.
- Place squares into a greased 9"×13" pan and cover with clean kitchen towel.
- Let rise in a warm place for another twenty minutes.
- Take the pan out of the oven (if you are using the oven to let the bread rise) after it has risen and then preheat the oven to 350F degrees.
- Bake at 350F for about 25 minutes, or until tops are golden. Brush rolls with melted butter.
Video
Notes
- To help with rising, I will heat my oven to 125F degrees. Once it reaches that temperature, I turn it off and then put the covered bowl (oven safe, of course) into the oven to let it rise.
Nutrition
Nutritional Disclaimer
“The Country Cook” is not a dietician or nutritionist, and any nutritional information shared is an estimate. If calorie count and other nutritional values are important to you, we recommend running the ingredients through whichever online nutritional calculator you prefer. Calories and other nutritional values can vary quite a bit depending on which brands were used.


So I am right now making this recipe. I will blog all the steps and link back to you. I will let you know how they turned out. I am making them to eat with Pasta in the Oven for my daughter's 8th birthday. I can't wait to see how these look. The dough looks decadent and so yeasty and yummy! Can't wait, I am proofing them the second time. I got a lot of rolls to it in my pan, I used your method of proofing in the oven. Can't wait!
Well I'm glad the flavor was at least good for you..LOL. It is possible about the butter and water. I turn my tap on hot and let it run for a minute. You want the water very warm but not boiling. Same with the butter. You want it melted but not crackling hot. If that makes sense. Good for you for trying out a new recipe with yeast! It can be intimidating but when you make it a few times, you'll get to know the feel of it. 🙂
Thank you for getting back to me so quickly! There was no draft, and we live near the beach…. do you think maybe my water and butter could have been too hot? I don't know much about yeast-that was my first attempt, but we couldn't quit eating them, so the flavor was good! It was just a mix between a biscuit and roll-just not the texture I was hoping for. Thank you again for the fast response. I LOVE your site:)
Casey
make sure your water or milk are about 110 degrees. otherwise you kill the yeast. if your yeast does not get foamy or frothy it is no good. toss it out and try again. (it takes about 5 up to 10 minutes to "bloom")
Hi there! Since you followeed everything step by step, it should have worked. Hmmmmm. May be a bad batch of yeast. Also, did you make sure the dough was in a draft free & warm area. Do you live in a high elevation? Just trying to think of everything I can. I hope they taste alright and aren't a bunch of bricks for you!!
I tried to follow this step by step, but for some reason my dough didn't rise. Do you have any tips/thoughts on what I did wrong? I'm still waiting to eat them… I think they are going to taste just fine, I just wonder what I did (or didn't do!) 🙂
Thank you!!
Have these in the oven now and can't wait to see how they turn out!!
Hello I am featuring this great recipe in my Wednesday Wanderings collection. Thanks!
OMG, those look SO good! Perfectly moist and soft! YUM!
I'm featuring your delicious looking rolls today! Thank you for sharing the recipe. I hope you can stop by.
These rolls look amazing! I am definitely trying this recipe
Here from made by you Mondays. These rolls look really good! Thanks for the recipe.
OMG Brandie-Such amazing, light as a feather rolls. They look heavenly.
A must try!
These are melt in your mouth good! If I can do it – anyone can do it!
Holy cow is right!!! These look amazing:) Now I just need to find the perfect meal to make with them…that shouldn't be to hard,I bet they go with just about anything:)
YUM, I want to try these, thanks
Five stars! If anyone is scared of yeast rolls, then you must try these!
Ive not seen this reciPe before and it looks like I was really missing out. I've bookmarked it and I'll have to let you know how I get on!
Oh I love Southern Plate. She has a great site! And always has such yummy recipes.
I am enjoying your site too. I know you've received a few of these already but I wanted to share some love with you and I selected you to receive one of my blog awards.
Here's the link to it. http://thehomematters.blogspot.com/2011/02/blogger-awardsthank-you.html
Jenn
Wow! Those look so fluffy and good! I'm thinking I'll need to add those to my recipe box!
I have bookmarked this recipe as it looks nothing short of scrumptious!!!
These sound amazing! I'm bookmarking them right now. Thx 😉
These rolls looks gorgeous and I am going to try it.
I'm a little afraid of yeast too. But these look so light and fluffy and delicious!!
I'm going to have to give them a try. Thanks for the recipe.:)
Woah! These look AMAZING! I do hope your fear of yeast is gone, because it looks like you NAILED these rolls! YUM!
Your rolls have such a soft and wonderful texture about them. They really do look delicious. I hope you have a great day. Blessings…Mary
These rolls look so good.I love homemade bread and with the butter and shortening I bet these are to die for!
Ps- I totally love my crock pot too 🙂
Those rolls look delicious. I can just imagine how wonderful they were with the jam and butter swirled on top.
These are my kind of rolls! Fresh and fluffy. I can eat them on their own but they would go so well with a warm bowl of soup….
I thought I was the only person in the world with a fear of yeast. These look soooo good. Maybe if I can get brave enough, I will give these a try! I'm a "roll freak". 🙂
These look really great…I love fresh baked rolls!!!!
I too have had a fear of yeasted baked goods but these look so delicious and easy that I think this would be a great beginner recipe to help overcome that fear. Thanks for sharing!
Since blogging I have really become comfortable working with yeast and doughs of all sorts. I have all of the ingredients on hand and would love to give these a try. Yummy! Fresh baked rolls are incredible.
Can I have one please? I gave you an award today Brandie:
We ate the WHOLE PAN!!! LOL
These rolls look like the answers to all my problems. Amazing.
Becky – I'm sure you could. But I'll be perfectly honest, I haven't tried it with all butter so I can't say for sure that they will turn out exactly the same way. But I imagine they would still be good. And hey, maybe you can try it and then blog about it!! :o)
Thank you for sharing! These were easy! I can’t believe I made a good homemade roll!
Made them – delicious!
These rolls look so delicious. Especially with butter a a piece of cheese… yummy!!
OOO…they look like the O'Charley's rolls I remember! I'm on a gluten/dairy free diet at the moment (cleansing my innards) but this looks wonderful for when I go back to normal in a couple weeks! Thanks Christy Jordan for sharing!
I saw your post on facebook about these beauties…and now I can see what all the fuss was about! How wonderfully tender these look…and so yummy with butter and jam! I may have to make these during our next arctic plunge which is starting right now! Thanks, Brandie~
Holy Butter Batman!! Those look SOOOO yummy! I love flaky, soft, buttery rolls. There really is nothing quite like them. Another great recipe!
Oh my word are you speaking my language with the yeast thing. I have only worked with it a few times and like you, it has turned out disastrous. Although lately I have found a couple recipes where it actually worked and I was the star. I trust you Brandie. I'm making these for sure. Thanks!
I love to work with yeast and these "holy cow" rolls really look DELICIOUS! Thank you for sharing Brandie 🙂 Now off I go to visit Christy………….
These rolls sound and looks so good.
Can you substitute butter for the shortening? I don't use shortening.
I can just taste the jam on them now!
becky i make these all the time, and always use all butter. everyone says they prefer them the butter way:)
YUM!!!
I may have to cut the recipe in half…I can't be trusted with that much bread, lol!
1/2 c shortening + 1 stick butter definitely = Holy Cow in my book! This looks so decadent and totally delicious!
Oh wow..those rolls looks so delicious! yummy!
Good lordy! I want the one with the jam and butter on it! lol These sound divine!!
Dang – now I want a roll!! They look great. I have this recipe on my to try list. I might have to try them this weekend.