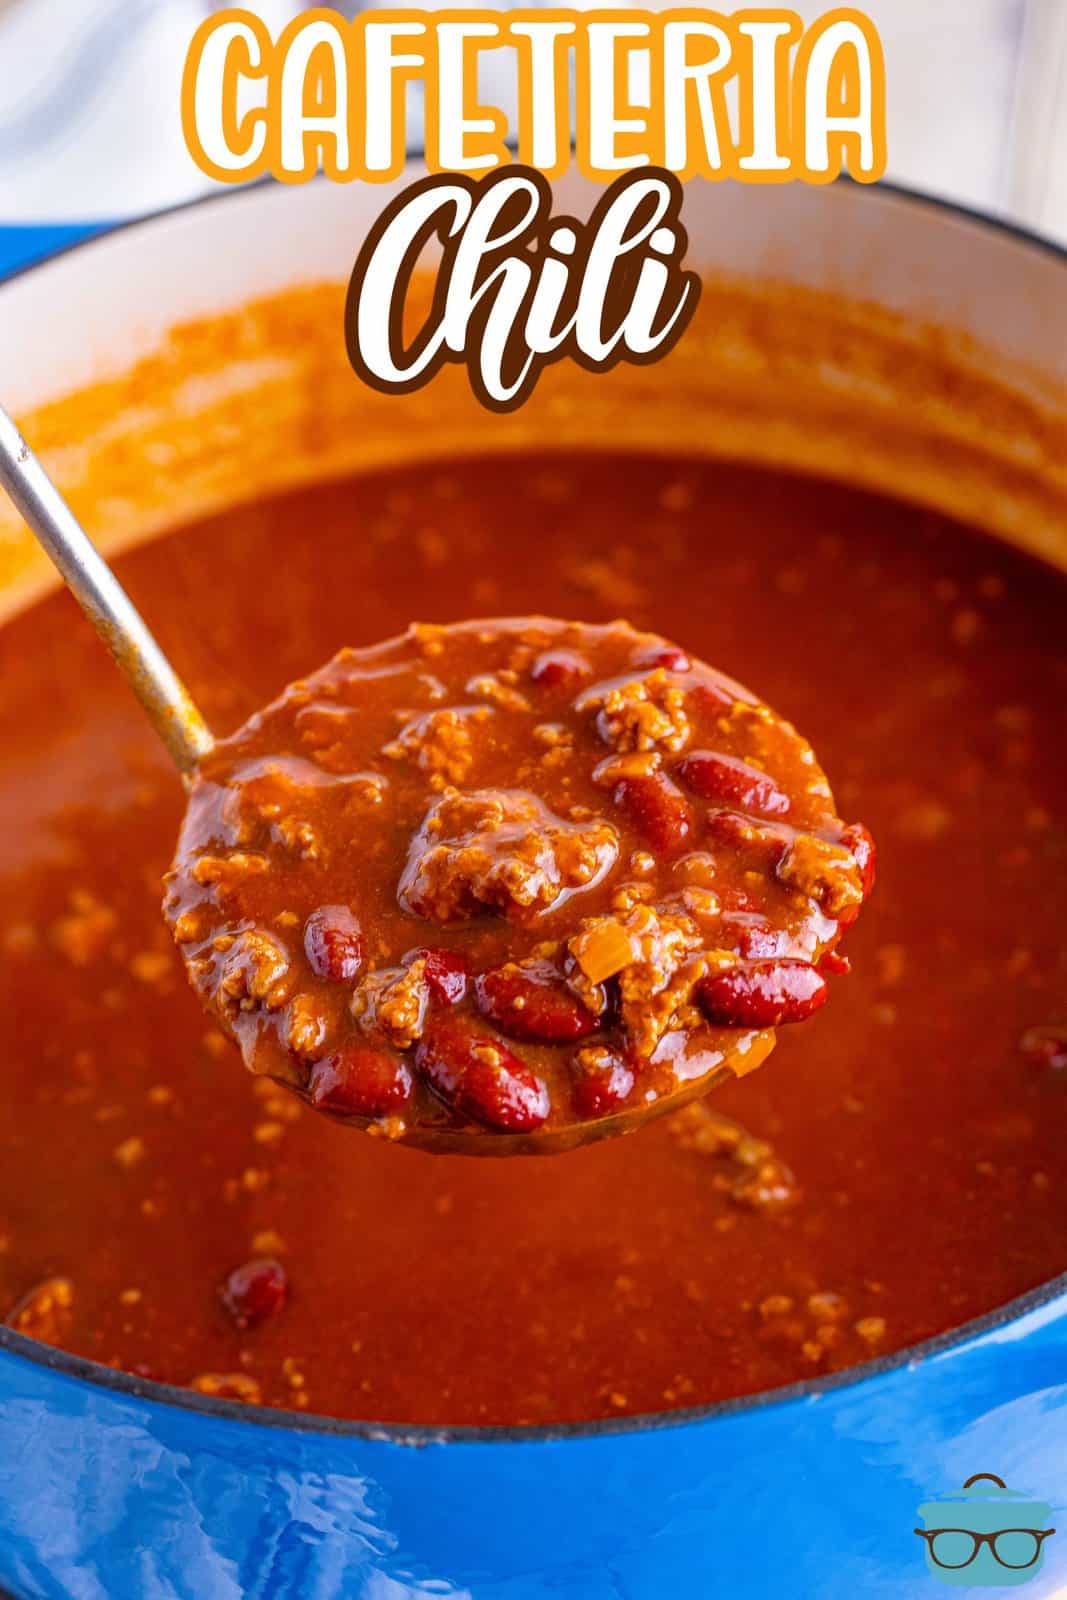
Cafeteria Chili
This Cafeteria Chili is guaranteed to take you back to your school days! It fills your belly and warms your soul. There isn’t much work involved either – just dump and stir!
A NOSTALGIC DISH FROM YOUR CHILDHOOD
If you are looking for a simple chili dish that will bring back some childhood memories, this Cafeteria Chili is just what you need! This chili recipe was actually from a school lunchroom lady, Sally Paulson, who was a School Cafeteria Supervisor. Everyone asked her for years for her recipe so when she retired she decided to publish it in her local newspaper (The Rapid City Journal) on December 11, 1983. It’s been around a while and there’s a darn good reason, it’s so delicious! It has the perfect chili flavor, but it’s not too strong- it’s the perfect chili for picky eaters.
FREQUENTLY ASKED QUESTIONS:
This kind of chili is a good “dipping” chili for dipping sandwiches in or for serving over rice. In the midwest the schools often served this with cinnamon rolls (if you can believe it!) or even peanut butter crackers or a peanut butter sandwich. I guess it’s that whole sweet and salty vibe. My husband likes it with a ham sandwich. However, I was also informed that in many schools, this was served with something called Cowboy Bread!
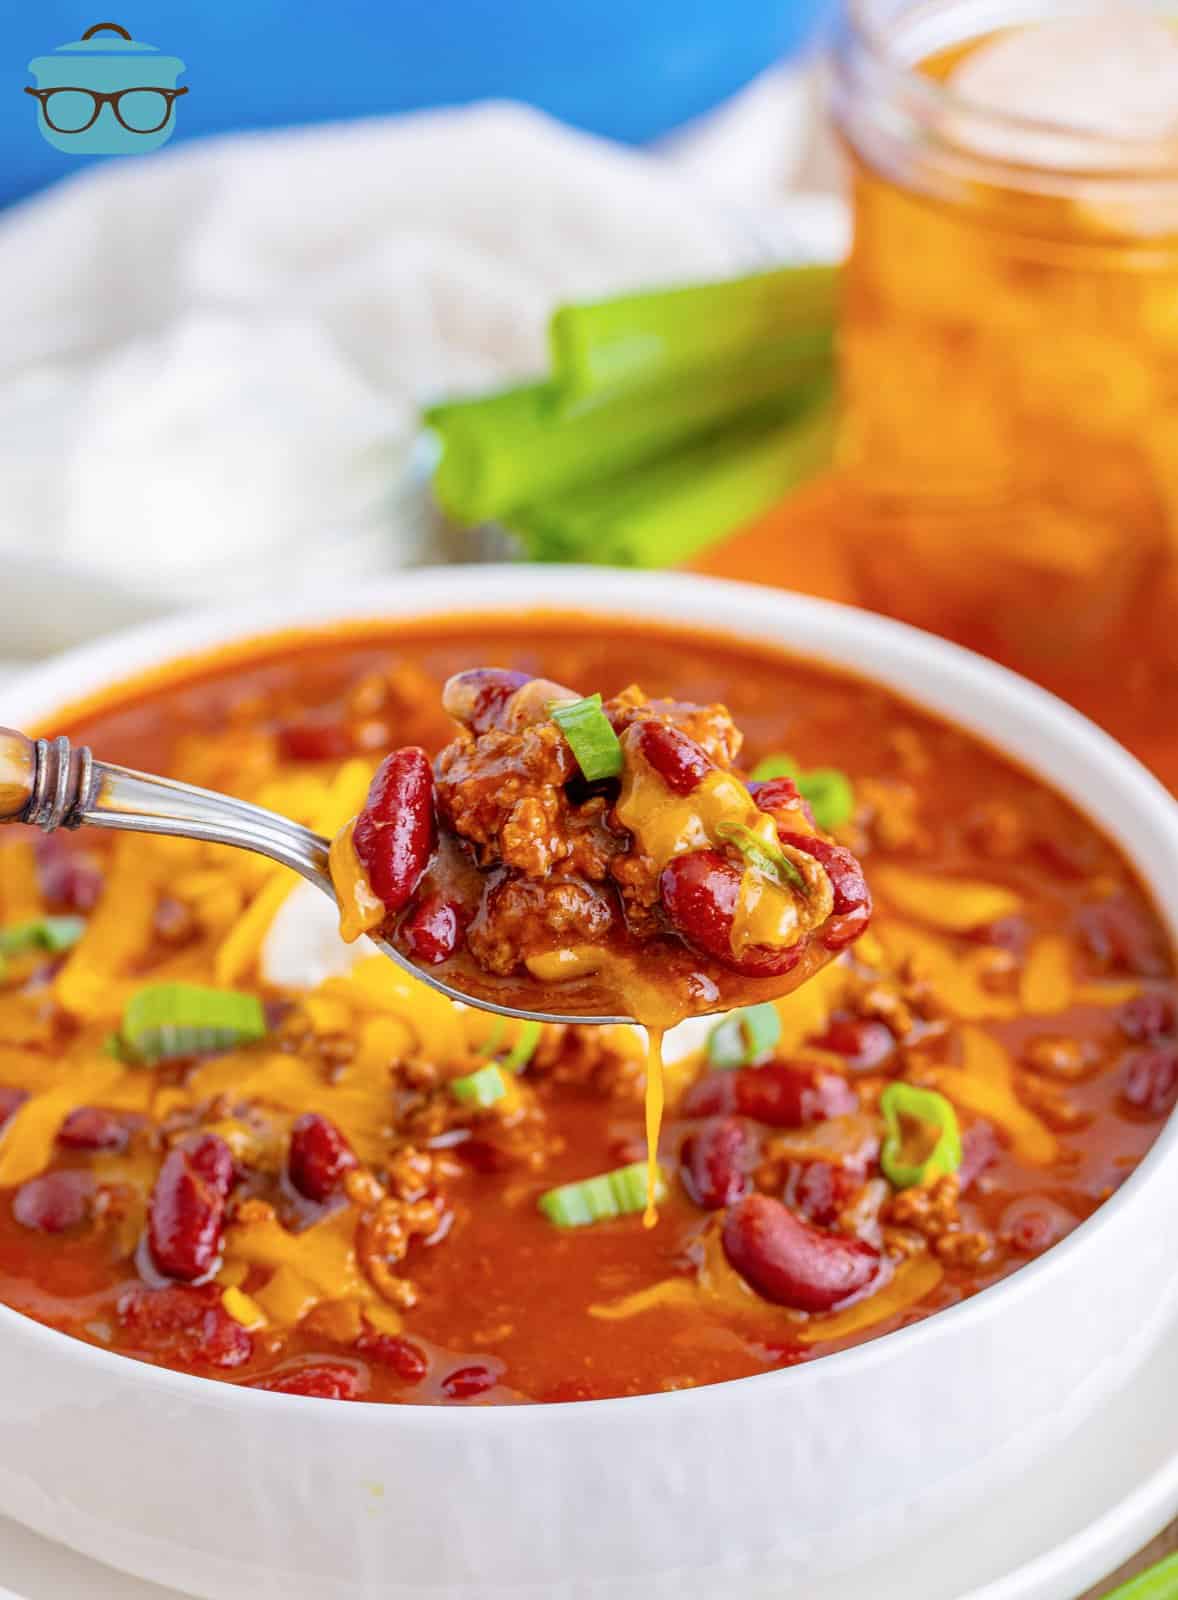
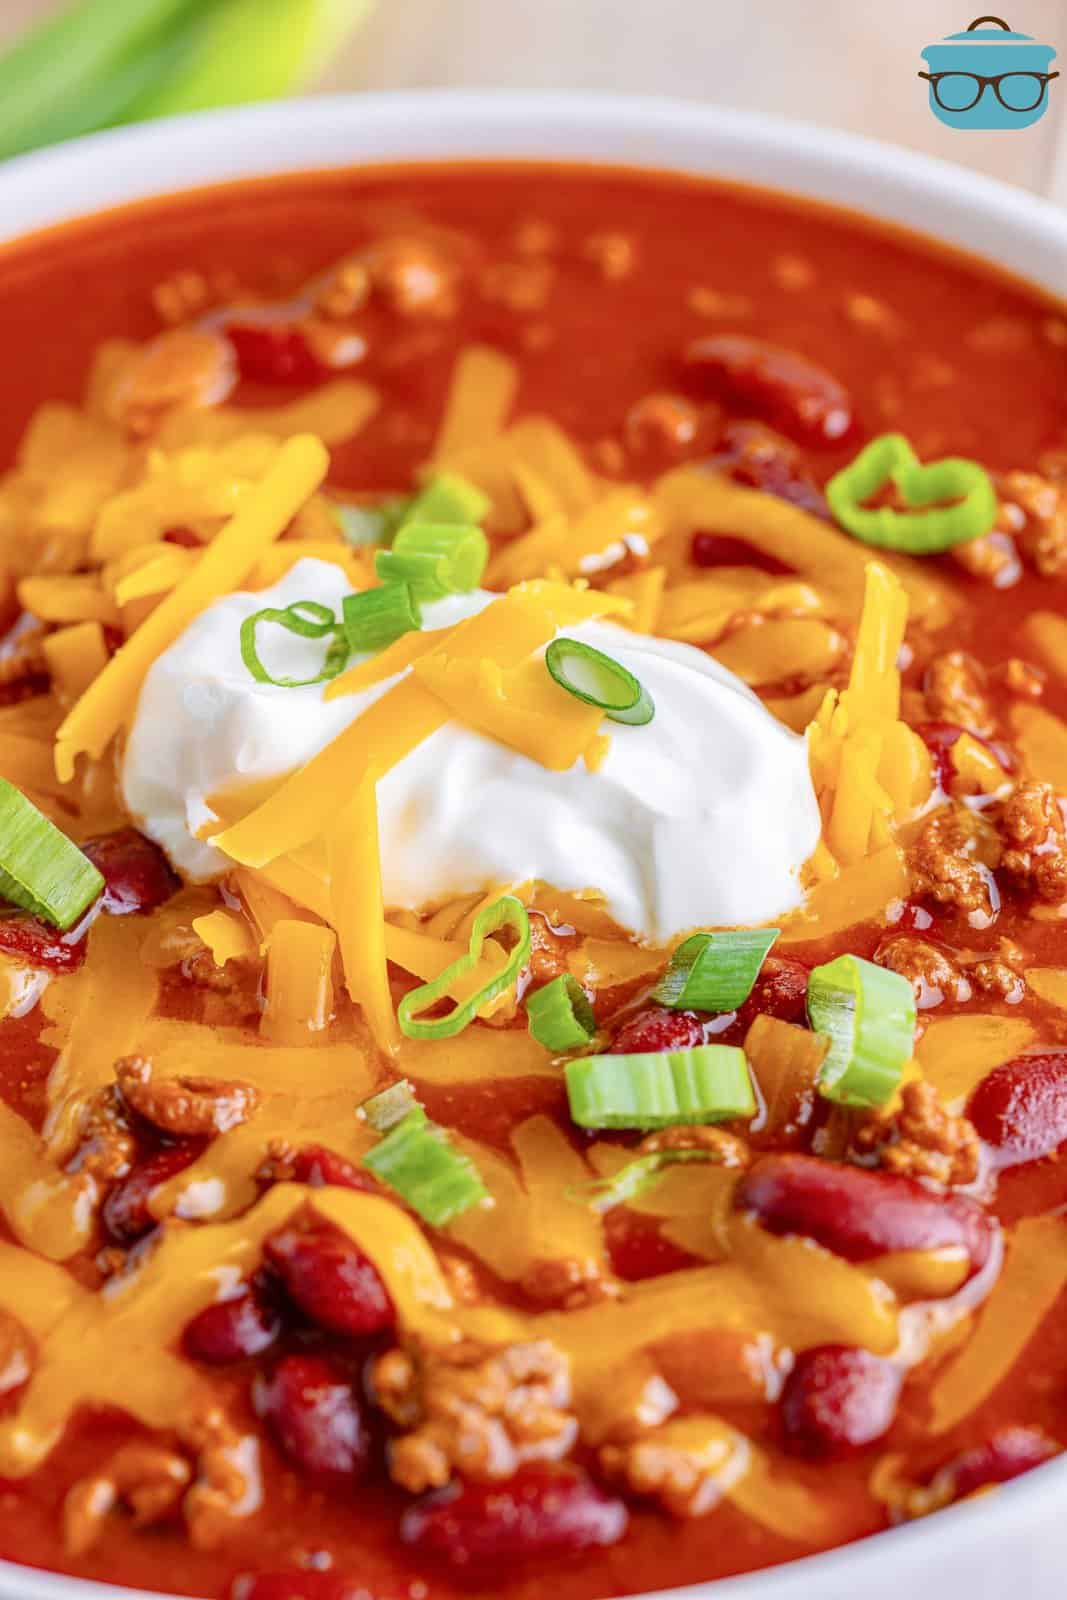
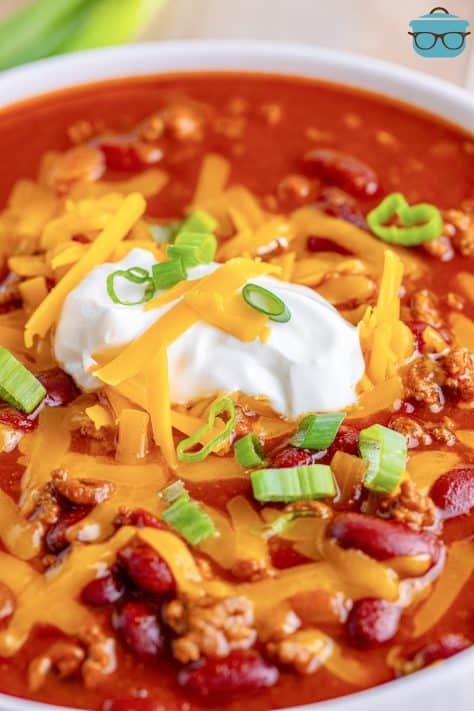
You can enjoy this all by itself or with your favorite toppings like shredded cheese, sour cream, green onions, or other toppings. I also love eating this chili with a square of cornbread.
This is a great base recipe to use and alter to make it exactly how you would like it. If you want some more texture, you can add a can of diced tomatoes. You could also add some diced green peppers for texture and flavor.
Yes! It’s an important step and one that really helps to develop the flavors and thickens the chili. Letting it simmer for an hour and a half is crucial, so don’t skip this.
Sure thing. First, just cook the ground beef. Then toss everything into the crockpot on low for 6-8 hours. Give it a good stir before serving and enjoy!
Sure! If you have some guests who enjoy a spicier dish you can add some diced green chiles or a spicier chili powder or even throw in some red pepper flakes or jalapeños. I used mild chili powder, but you can opt for something with more heat if desired.
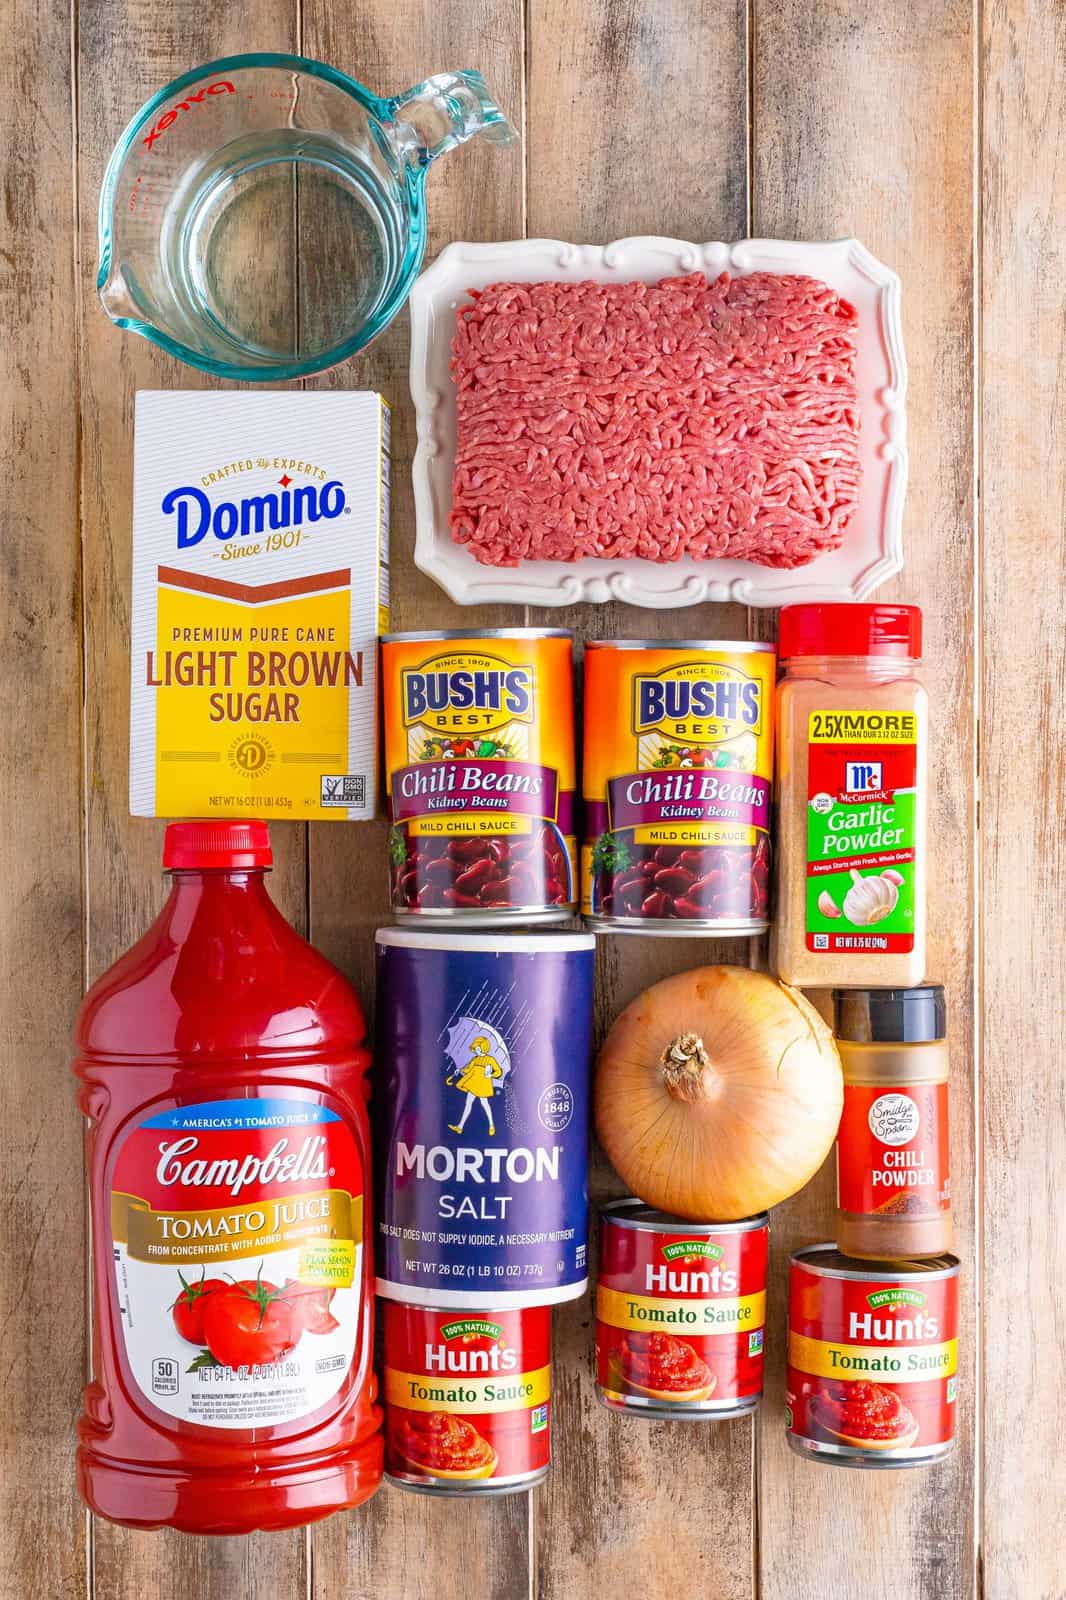
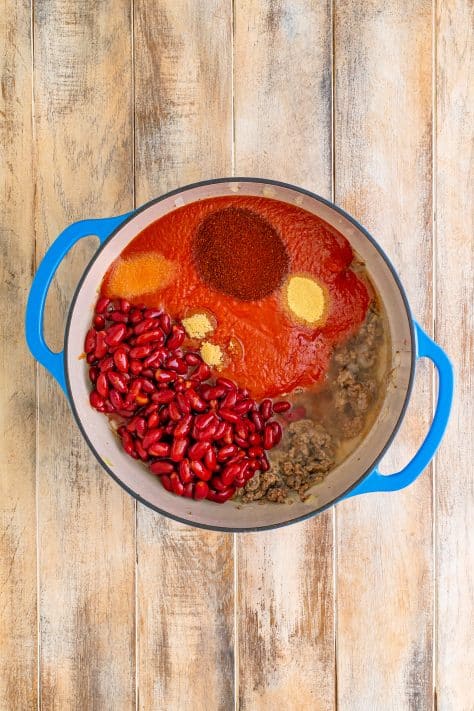
Chili Beans are typically made with either kidney beans or pinto beans. They are just beans that are in a chili sauce so make sure you don’t rinse the beans – you want to pour all of it in so you get all the flavor. See my ingredient photo below so you have an idea of what you’re looking for. You may have a different brand depending on where you live. You’ll find them near all the other canned beans in your grocery store.
If you can’t find chili beans, you can use a combination of both or just one or the other kind of beans, whatever you prefer.
Leftovers can be stored in an airtight container for up to 3-4 days in the fridge. Make sure they have cooled before placing in container. If you want to keep longer, you can freeze leftovers for up to 4-6 months.
INGREDIENTS NEEDED: (SEE RECIPE CARD BELOW FOR THE FULL RECIPE)
- ground beef – you could also use ground chicken, ground pork or ground turkey in this (but of course, with every substitution you make, the less and less it tastes how it is supposed to taste). Also note, the original recipe calls for a pound and a half of meat. I know it is sold in one pound increments so go with what you can afford. I just freeze the other half pound for later but if you only want to go with one pound here, that is fine. It will just be a little less beefy, that’s all.
- chopped onion – you could also use a shallot or even add some diced green pepper in there for even more flavor (I know folks have a love/hate relationship with peppers).
- light brown sugar – this doesn’t add a lot of sweetness, it just adds to a nice balance of flavor to counteract all the acidity from the tomato sauce. Also, brown sugar also has a touch of molasses in it which adds to the depth of flavor in the chili.
- chili powder – I went by the original recipe here and I think I much prefer a more mild chili powder so you could really taste all the other flavors. But if you really enjoy a lot of spice then go with the spicy version.
- tomato sauce and tomato juice – again, I am going by the original recipe here and this is what she used and I think it works perfectly with this recipe. The tomato juice really adds such a nice background flavor and keeps the chili from having an overwhelming plain tomato sauce flavor. I haven’t tested this with any other substitutions so couldn’t say how that would turn out.
- water – if you like a pretty thick chili, you can leave out the water. I find though that this chili is their perfect balance between thick and thin because it makes it a good droppable chili without being like a soup – but do what you prefer.
- chili beans – I think these are really key to this recipe since you are getting another layer of chili flavor from the seasoning in the beans. I’m sure you could just use either plain kidney beans or pinto beans (or both) but I think if you can find chili beans, it really is so much better.
HOW TO MAKE CAFETERIA CHILI:
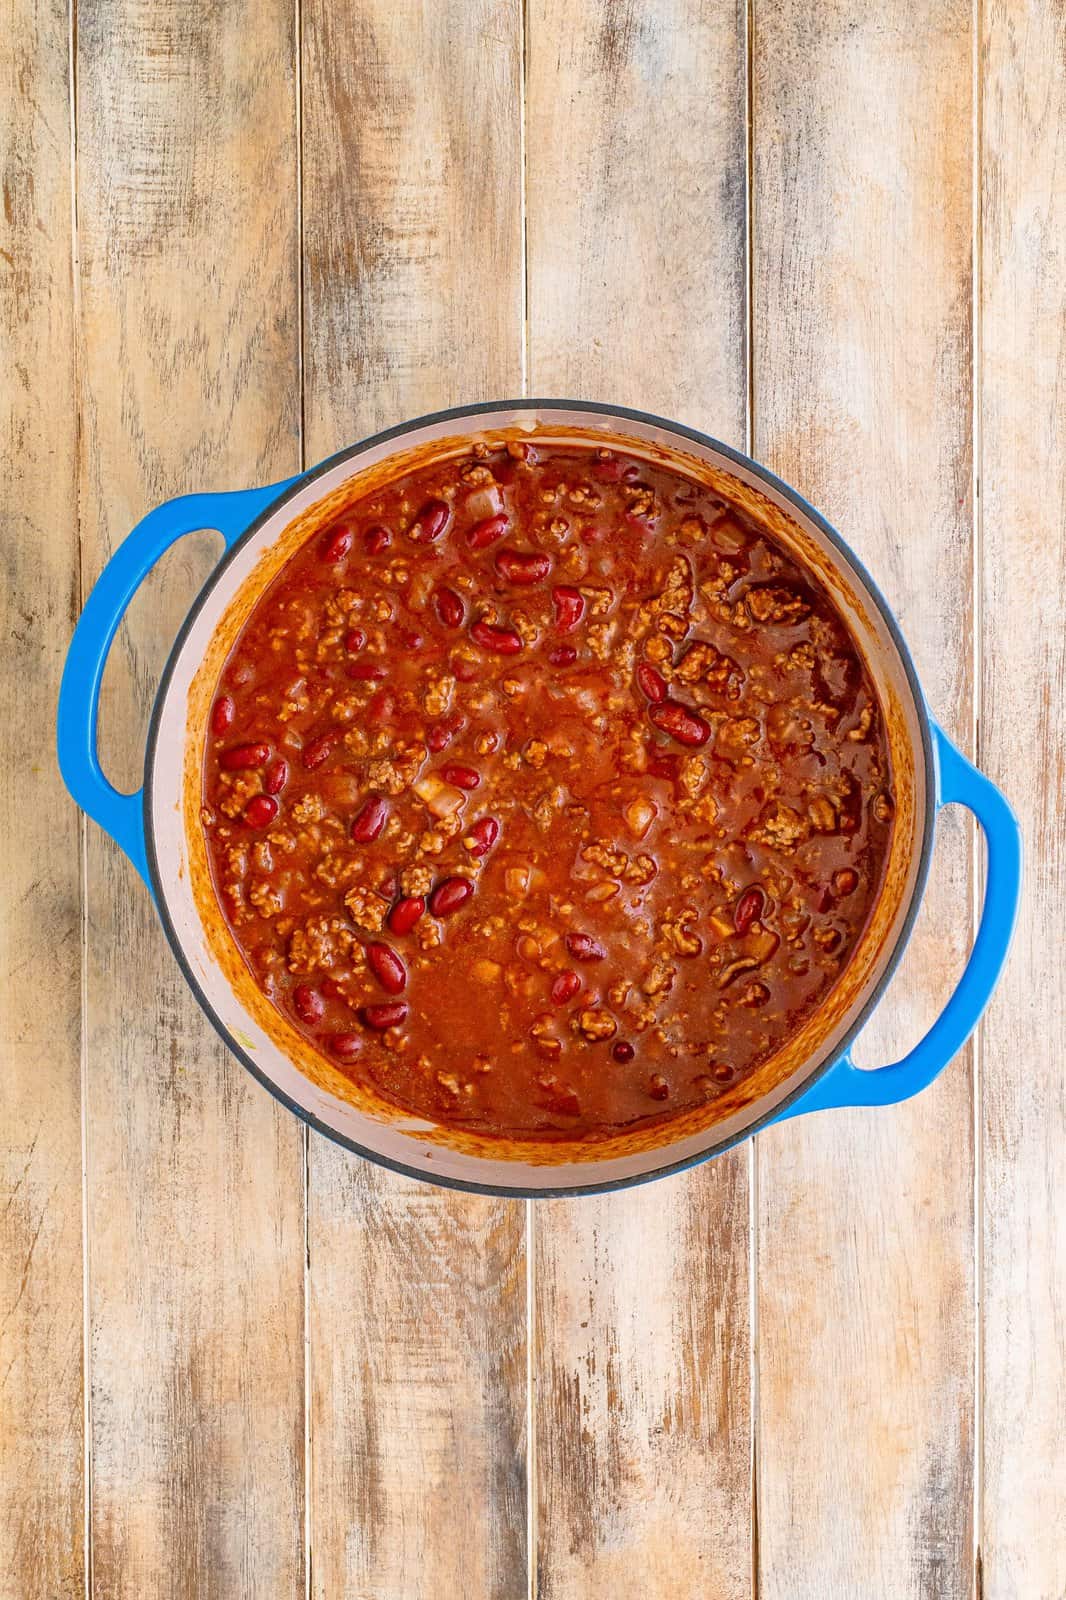
In a large pot or dutch oven, cook and crumble ground beef with the chopped onion. Drain any excess grease and put back into the pot.

Add all the other ingredients and stir well.
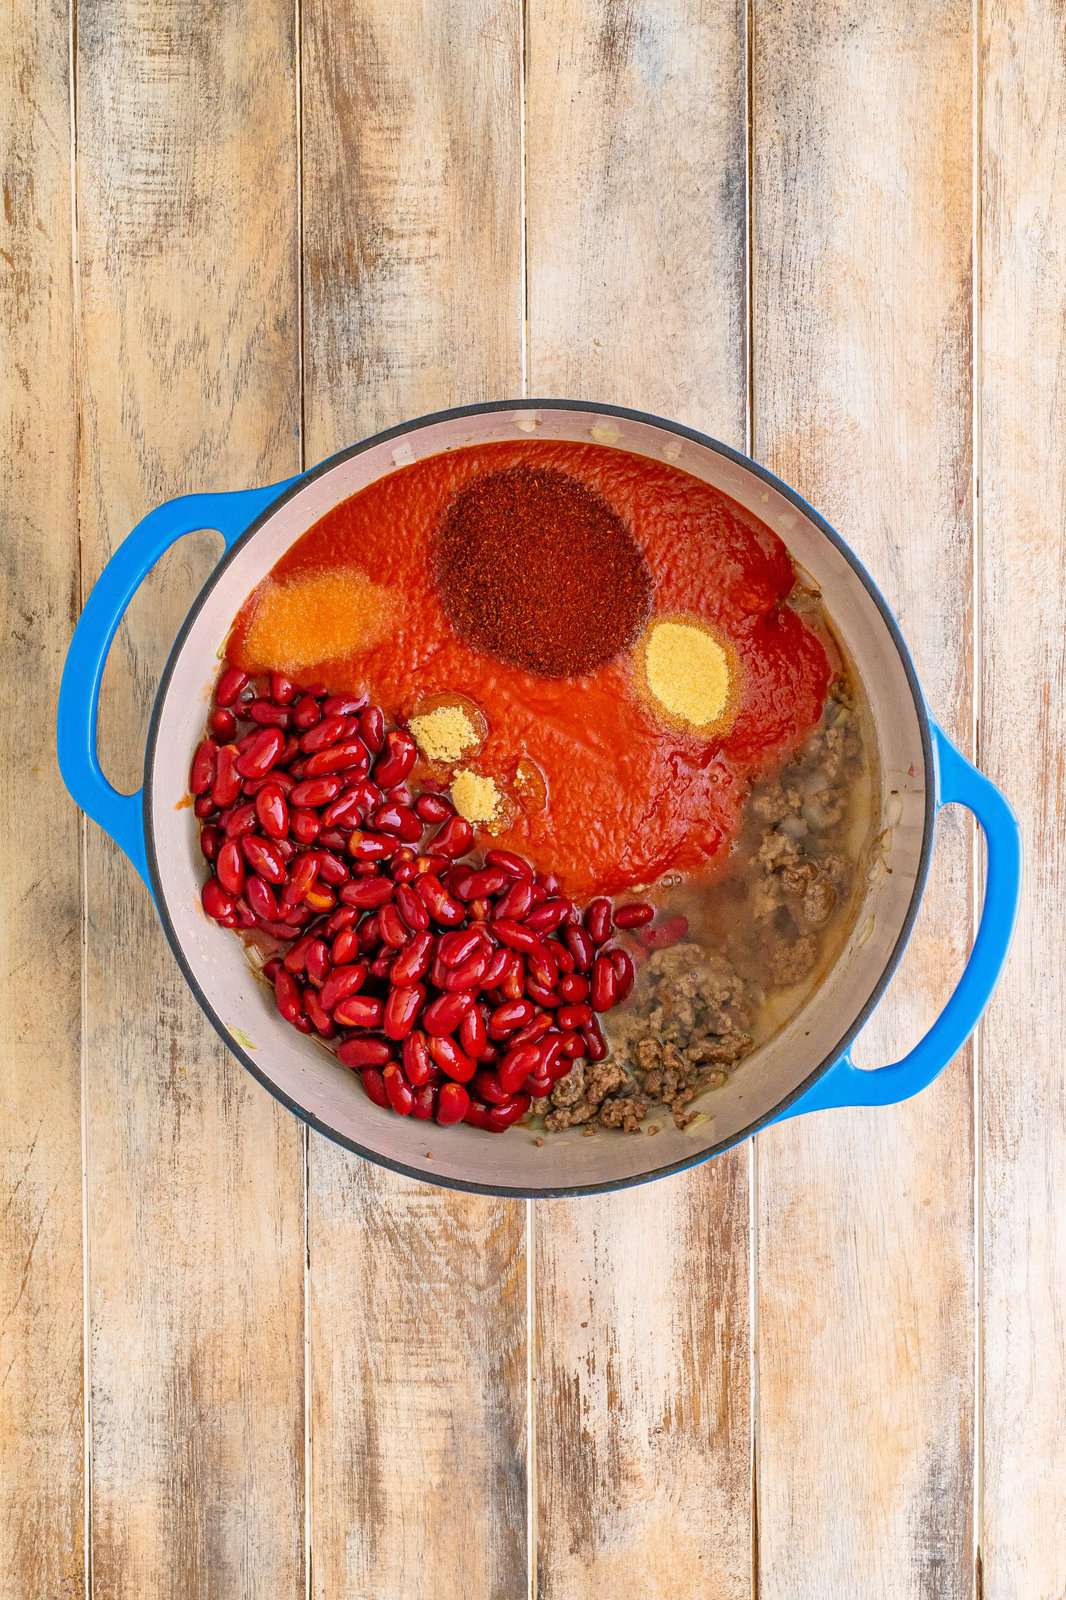
Cover and simmer for about 1 ½-2 hours (stirring occasionally.)
Top with your favorite toppings (sour cream, shredded cheese, green onions)
CRAVING MORE RECIPES?
- Cafeteria Noodles
- School Cafeteria Spaghetti
- Crock Pot Dr Pepper Chili
- Rectangle School Pizza
- Cornbread Waffles with Chili and Fixins’
- Chili Cheese Dog Sliders
- Best Crockpot Chili
- Slow Cooker Ultimate Beef Chili
- Pepperoni Rolls
- Homemade Spaghettios

Cafeteria Chili
Ingredients
- 1 ½ pounds ground beef (it's fine to just use one pound)
- ½ cup chopped onion
- 1 teaspoon salt
- 2 teaspoons light brown sugar
- 2 Tablespoons mild chili powder (more or less to taste)
- ¾ teaspoons garlic powder
- 3 cups tomato sauce
- 2 cups tomato juice
- 1 cup water
- 2 (16 ounce) cans chili beans
Instructions
- In a large pot or dutch oven, cook and crumble 1 ½ pounds ground beef with ½ cup chopped onion. Drain any excess grease and put back into the pot.

- Add 1 teaspoon salt, 2 teaspoons light brown sugar, 2 Tablespoons mild chili powder, ¾ teaspoons garlic powder, 3 cups tomato sauce, 2 cups tomato juice, 1 cup water and 2 (16 ounce) cans chili beans and stir well. Cover and simmer for about 1 ½-2 hours (stirring occasionally.)
- Serve and top with your favorite toppings (sour cream, shredded cheese, green onions).

Video

Notes
- Please refer to my FAQ’s and ingredient list above for other substitutions or for the answers to the most common questions.
- A can of diced tomatoes could be added for a bit more texture or some green peppers.
- I definitely think simmering for at least an hour and a half really helps to develop the flavors and thickens the chili so I definitely wouldn’t skip this step.
- This could be done in the crock pot after the ground beef has been cooked first. I’d cook on low for 6-8 hours.
- You can find chili beans where all the other canned beans are in your grocery store.
Nutrition
Nutritional Disclaimer
“The Country Cook” is not a dietician or nutritionist, and any nutritional information shared is an estimate. If calorie count and other nutritional values are important to you, we recommend running the ingredients through whichever online nutritional calculator you prefer. Calories and other nutritional values can vary quite a bit depending on which brands were used.


So thick and flavorful! Took it to a work event and everyone raved how yummy this was. I went home with an empty pot and everyone asking me to make again and wanted the recipe! Thank you!!
I just finished making a double batch of this chili. It will need to simmer for a while but it tastes great. That little bit of brown sugar just hits the spot. I added 1 bell pepper and a partly drained can of diced tomatoes to the recipe as stated. Yum! This is a keeper for sure!!
Absolutely delicious!!!
Jeannine
this chili is great tasting and easy to make. needs quite a bit chili powder but we like our food spicy. recipe is a keeper. I recommend it.
Thanks so very much Vergie!!
What size crockpot?
Thank you
Made this today. It was was very easy to make. My first time making chili from scratch. Will make it often during the fall and winter. Thanks, Brandie!
This makes me so happy Charlie! I love hearing that and I’m so happy you loved this one!
awesome
I love this chili recipe!! Yummy ❤️
Thanks so much Sue!!