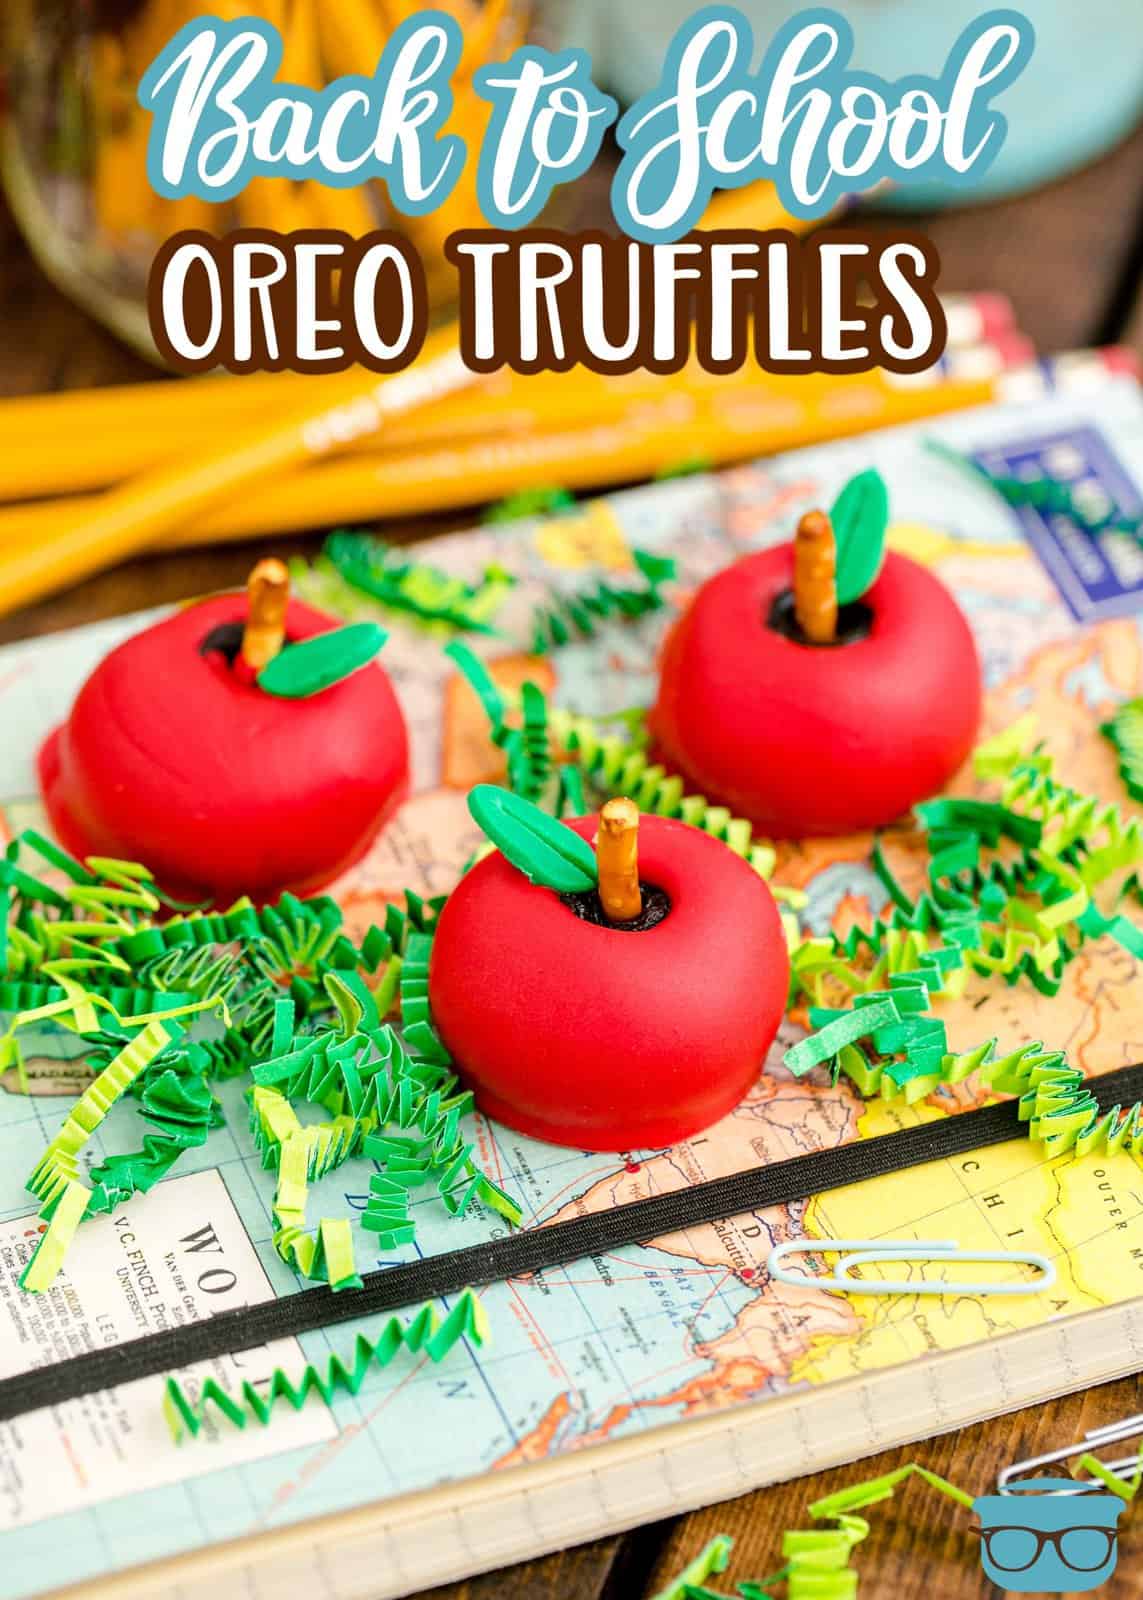
Back-to-School Apple Shaped Oreo Truffles
These Back-to-School Apple Shaped Oreo Truffles are easy, flavorful and fun! With easy ingredients, you can have that perfect back-to-school treat that kids and teachers will love! Plus a free printable gift tag included!
A CHOCOLATEY BACK-TO-SCHOOL TREAT
Are you someone who loves to make themed recipes, especially when it comes to back-to-school? Then you are in luck with these easy and irresistible Back-to-School Apple Shaped Oreo Truffles. These make the perfect welcome back gift to all those beloved and hardworking teachers out there. I love making these and packaging them up with a gift certificate to start the year out right and with appreciation. Looking for that perfect treat to send with your kids to welcome their teachers back for the upcoming school year? Then you have to make this Back-to-School Apple Shaped Oreo Truffle recipe!
FREQUENTLY ASKED QUESTIONS:
Absolutely, we know that not everyone has access to store-bought pre-made fondant so you can use green M&M’s instead if you’d like. Pre-made fondant is usually found down the cake decorating aisle at Walmart or in the baking aisle of most craft stores.
Yes! These would be great green as well. The “leaves” wont stand out as much but they would still be great in a green color or a mixture of the two colors as well.
These will need a total of 50 minutes set up time from chilling to freezing. Freezing helps to make these easier to coat and decorate.
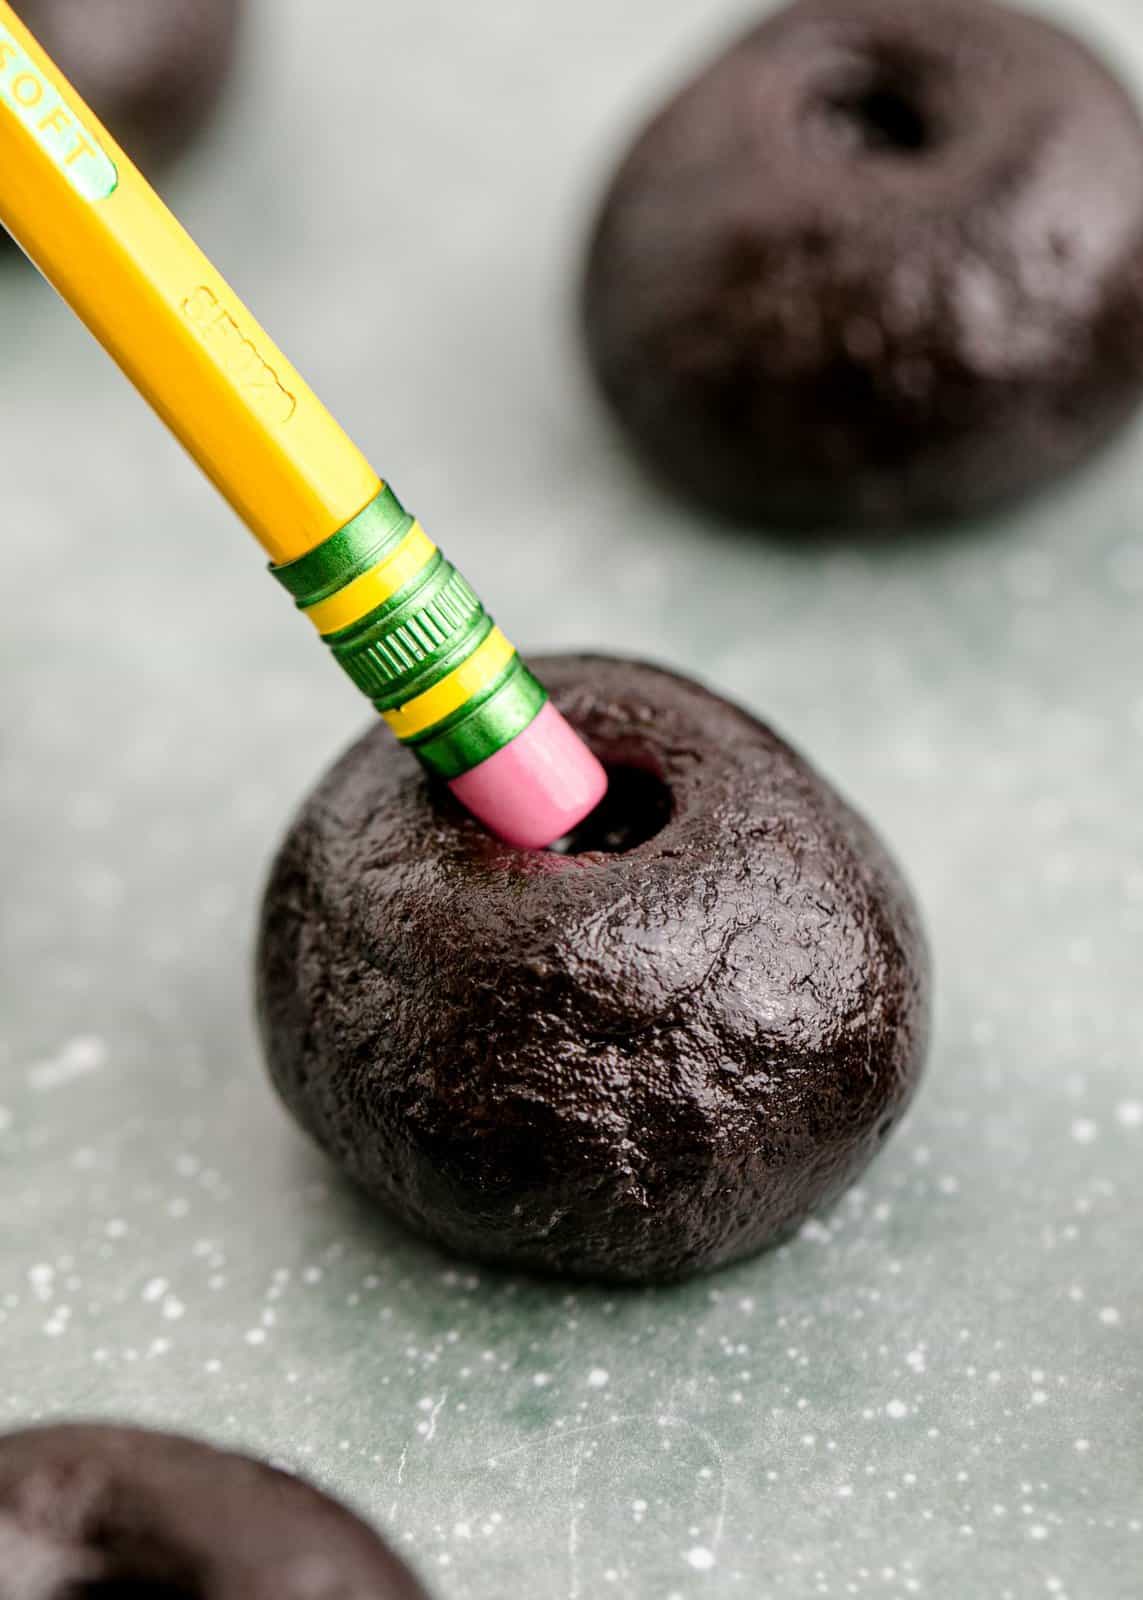
I used a FAKE pencil for this but anything roughly the size and shape of that will work like a straw or pretzel stick.
Yes, this happens because the truffle mixture is warming in your hands which releases the oils in them.
I hold onto the pretzel sticks to dip. It will leave a nice and clean truffle.
These are best stored in the refrigerator in an airtight container where they will keep for up to 3 weeks. These can also be frozen. Place in a freezer container and they will keep for up to 2 months in the freezer. To defrost, remove to the refrigerator overnight until thawed.
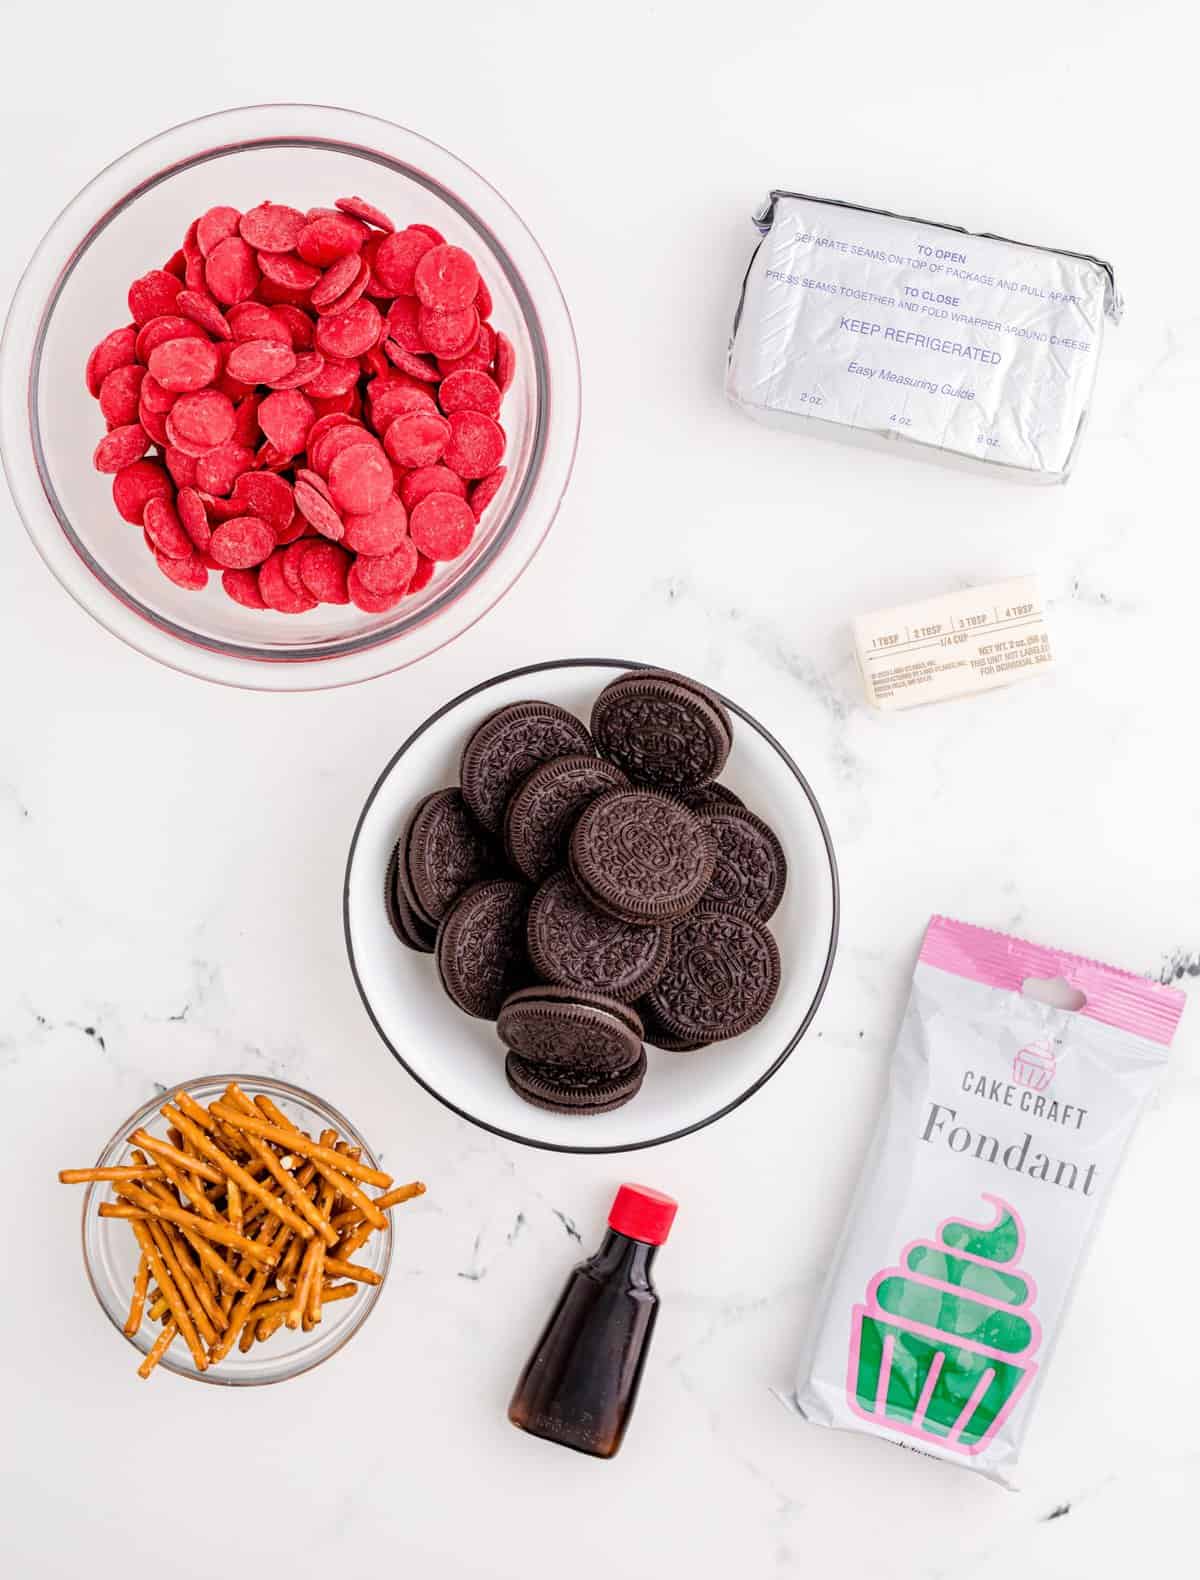
INGREDIENTS NEEDED FOR BACK-TO-SCHOOL APPLE SHAPED OREO TRUFFLES: (FULL RECIPE AT THE BOTTOM OF THE POST)
- Oreo cookies
- cream cheese
- salted butter
- vanilla extract
- red candy melts
- pre-made green fondant
- small pretzel sticks
HOW TO MAKE BACK-TO-SCHOOL APPLE SHAPED OREO TRUFFLES:
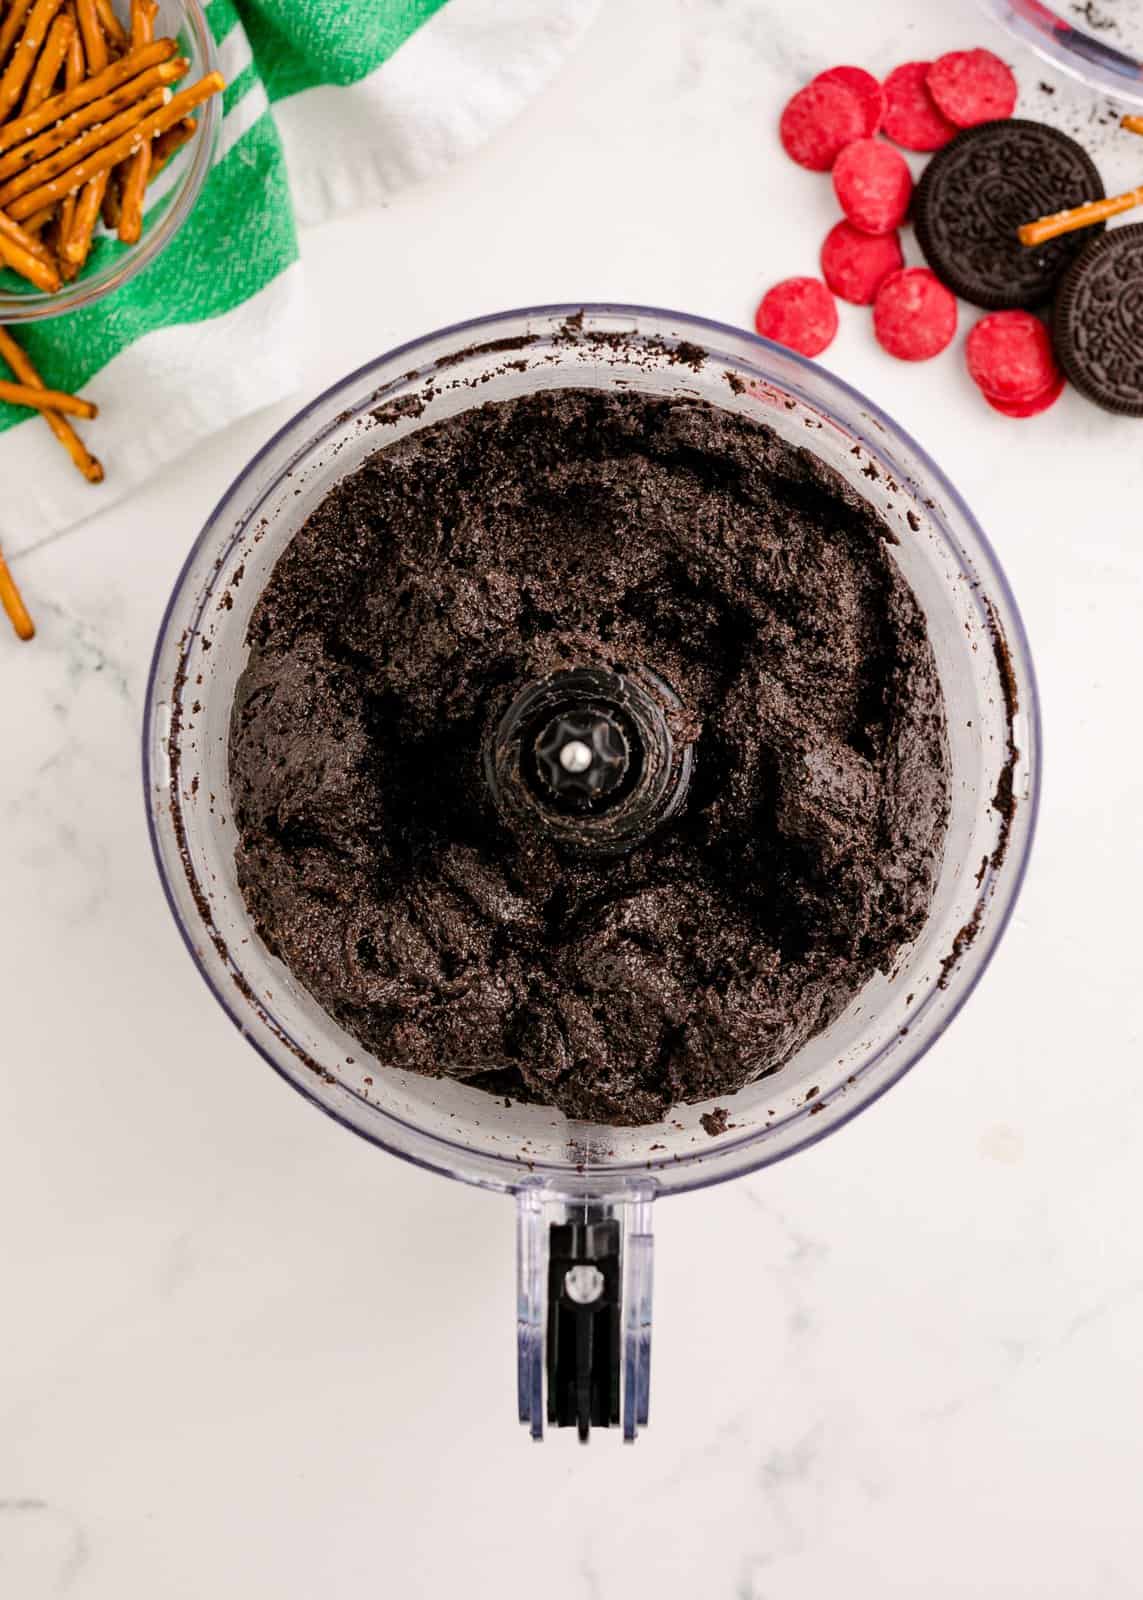
Place Oreo cookies in a food processor and pulse until Oreos become fine crumbs.
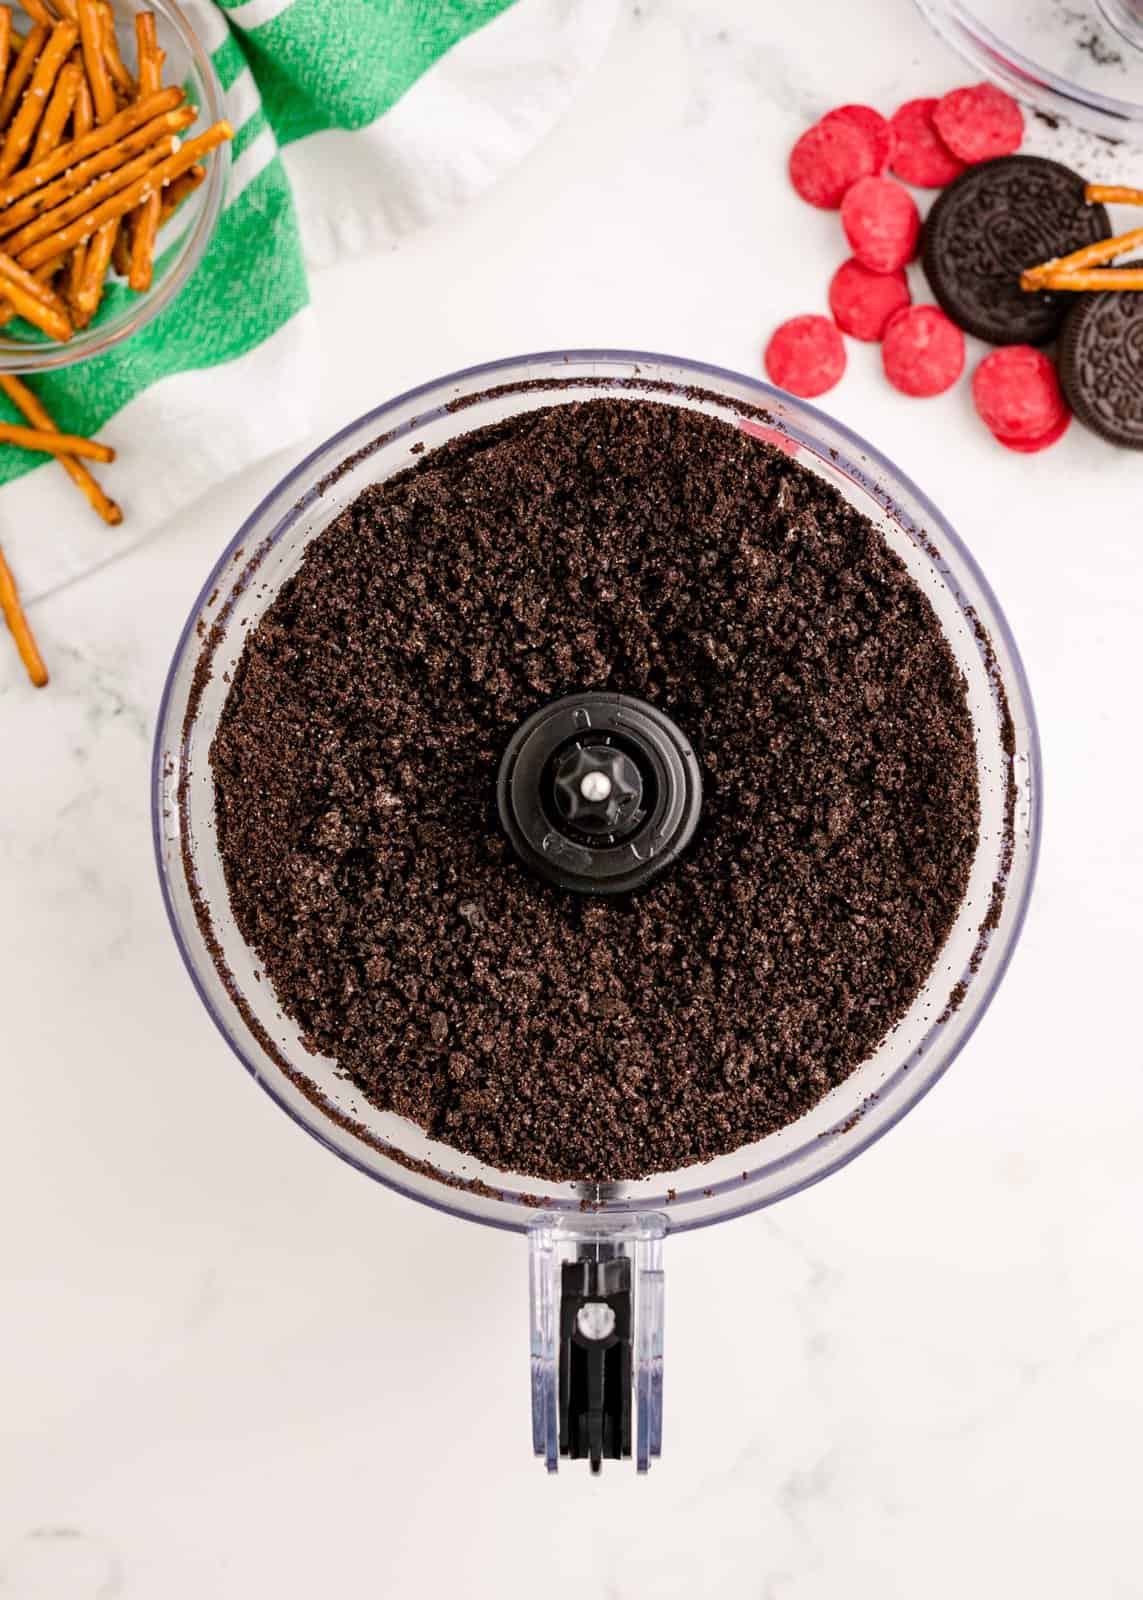
Add the softened cream cheese, softened butter and vanilla extract to the Oreo crumbs and blend together. (You may need to scrape down the bowl as you blend because the mixture can get caught and be sticky). Chill the Oreo truffle mix for 10 minutes in the freezer, this allows you to form the Oreo balls a little easier.
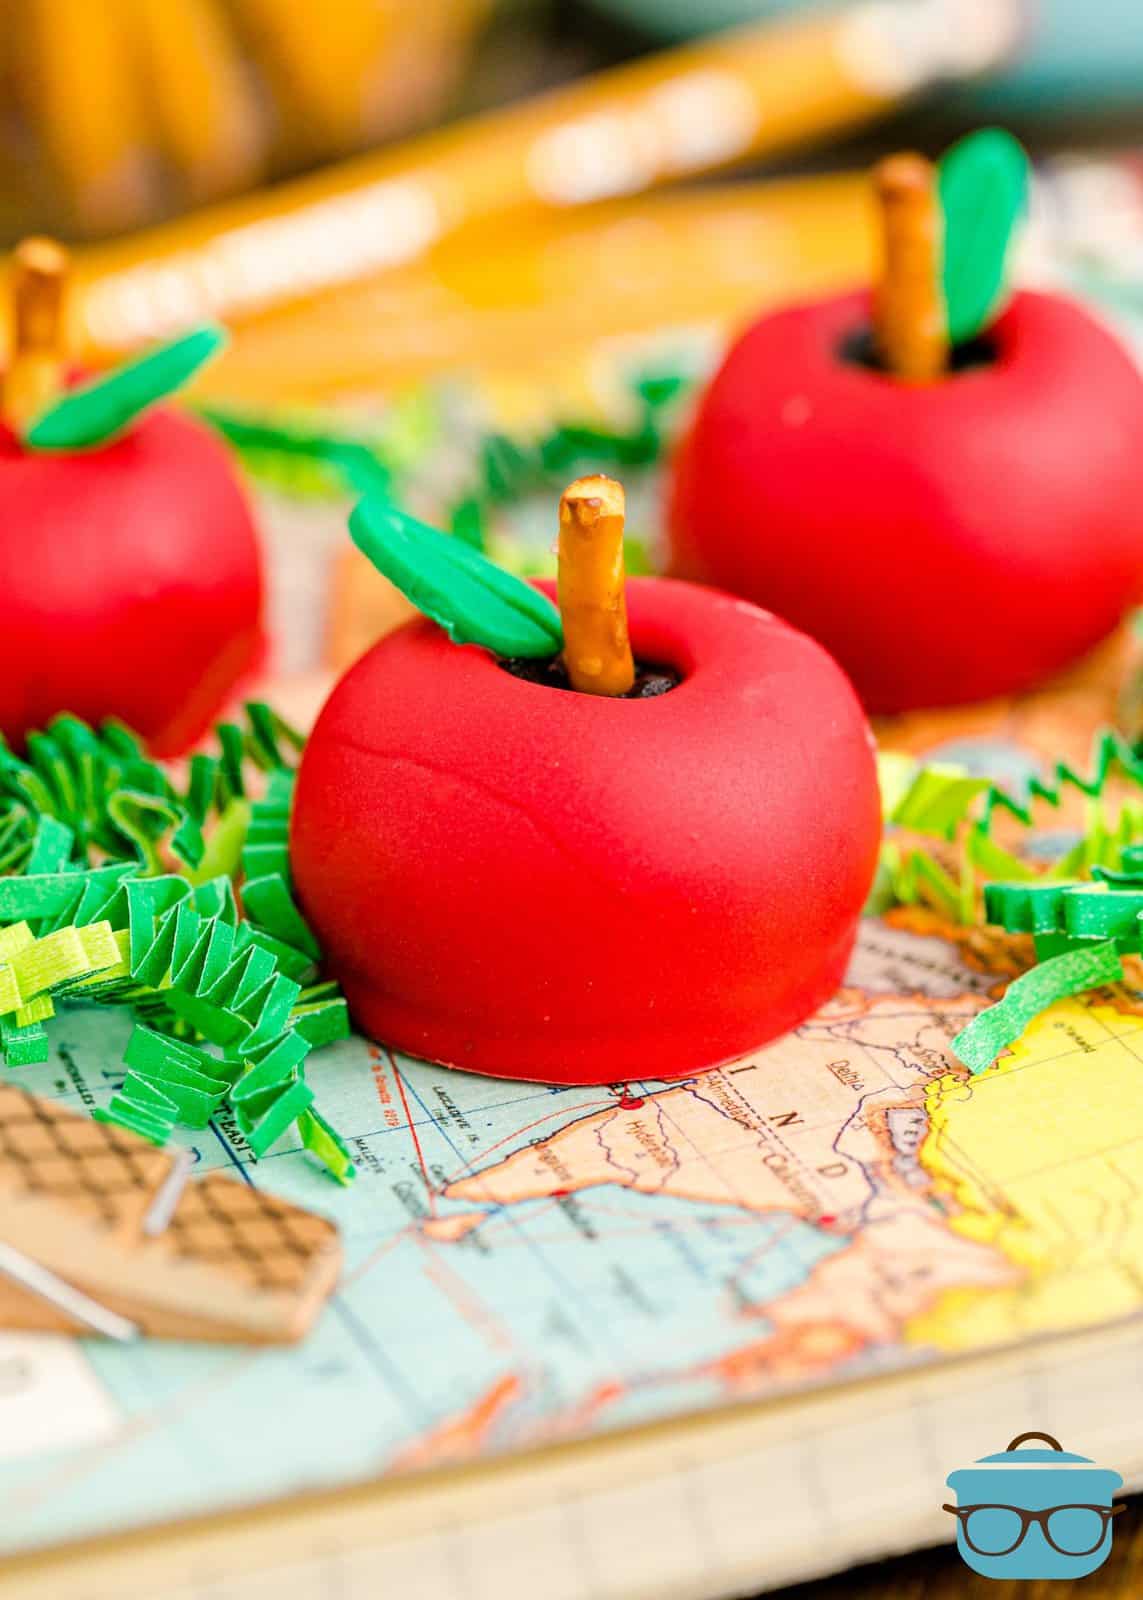
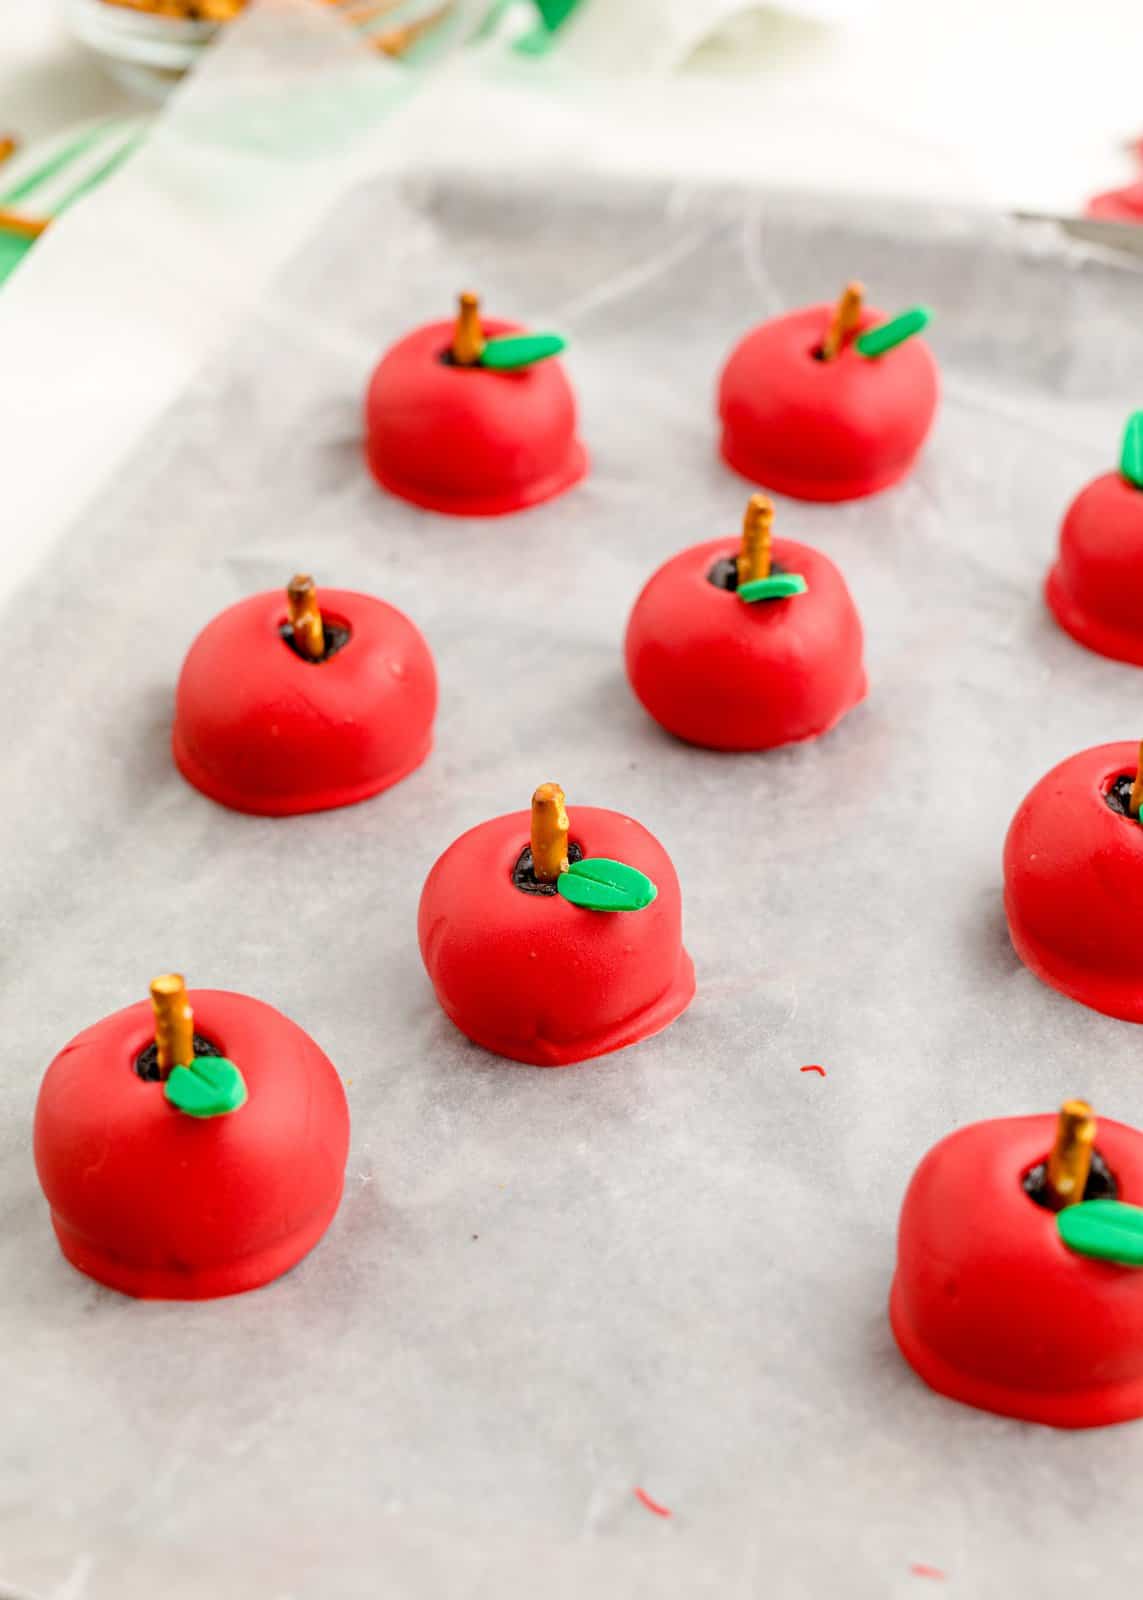
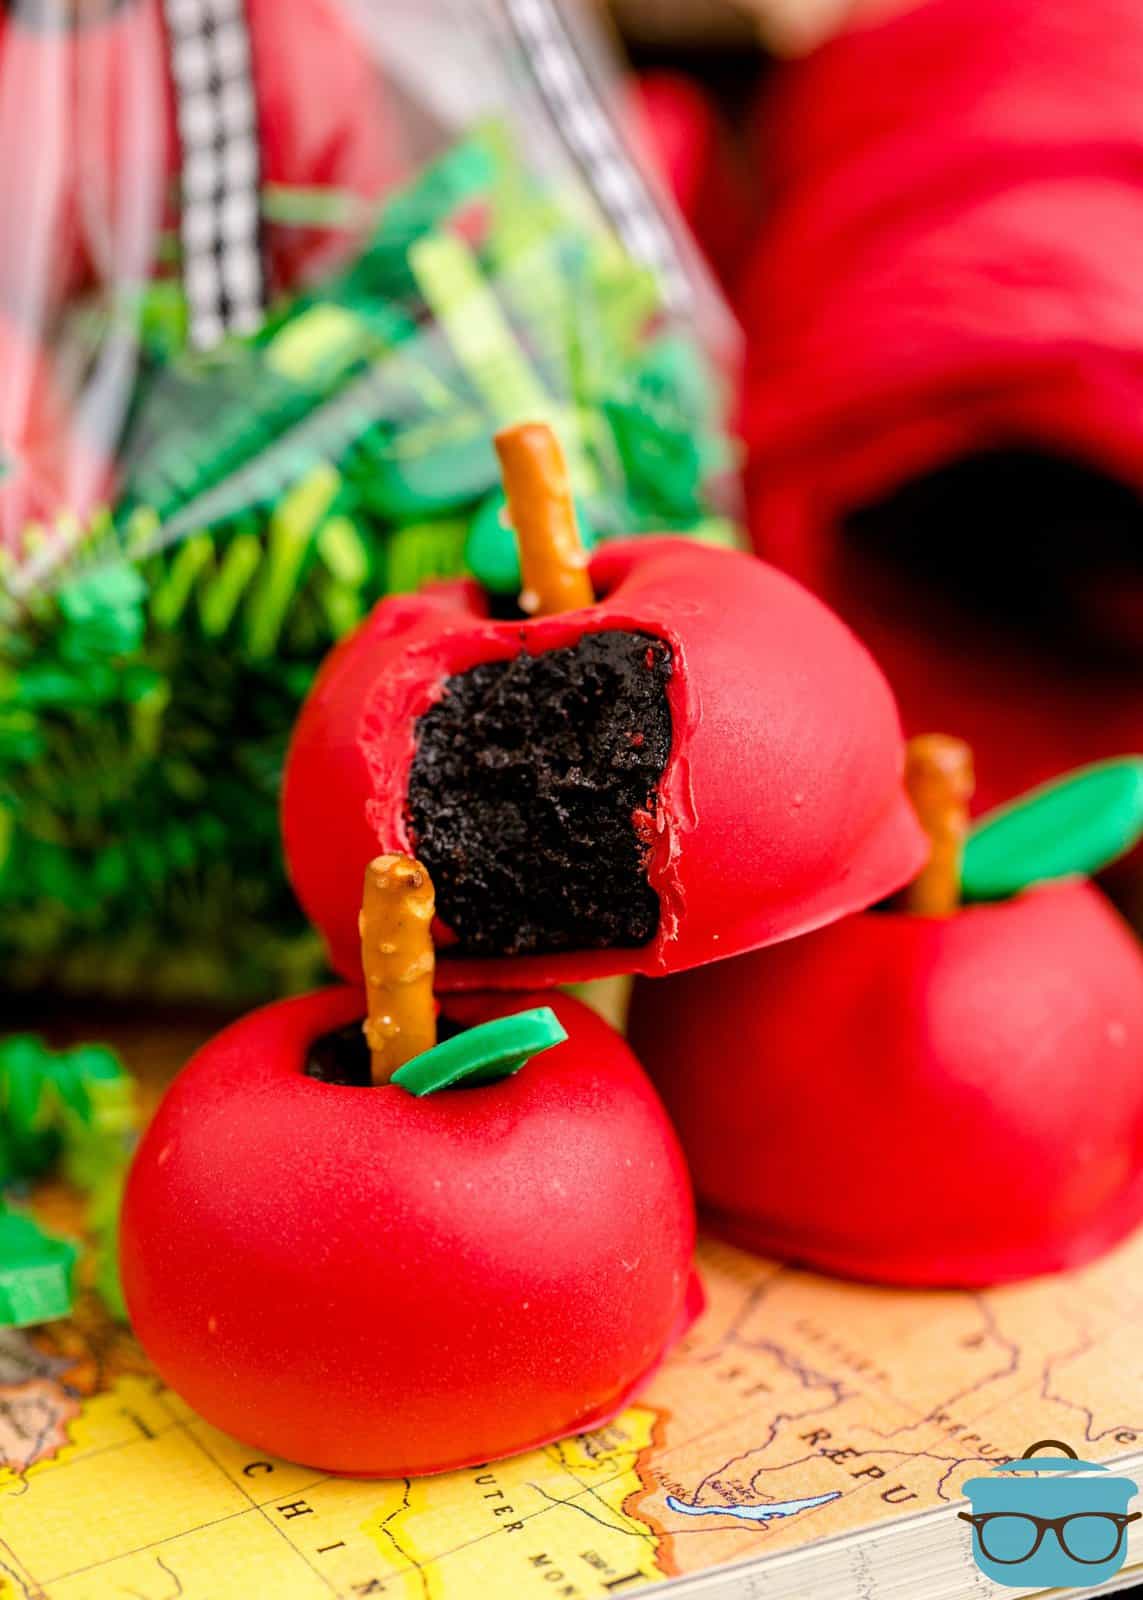
Use a 1-inch cookie scoop to measure out the Oreo truffles, then roll each into a ball and place them on a baking sheet lined with wax paper. Make a very small indent to the top of each ball, like you would see on an apple where the stem would be. We used a fake pencil for this but you could use a straw or other similar size object.
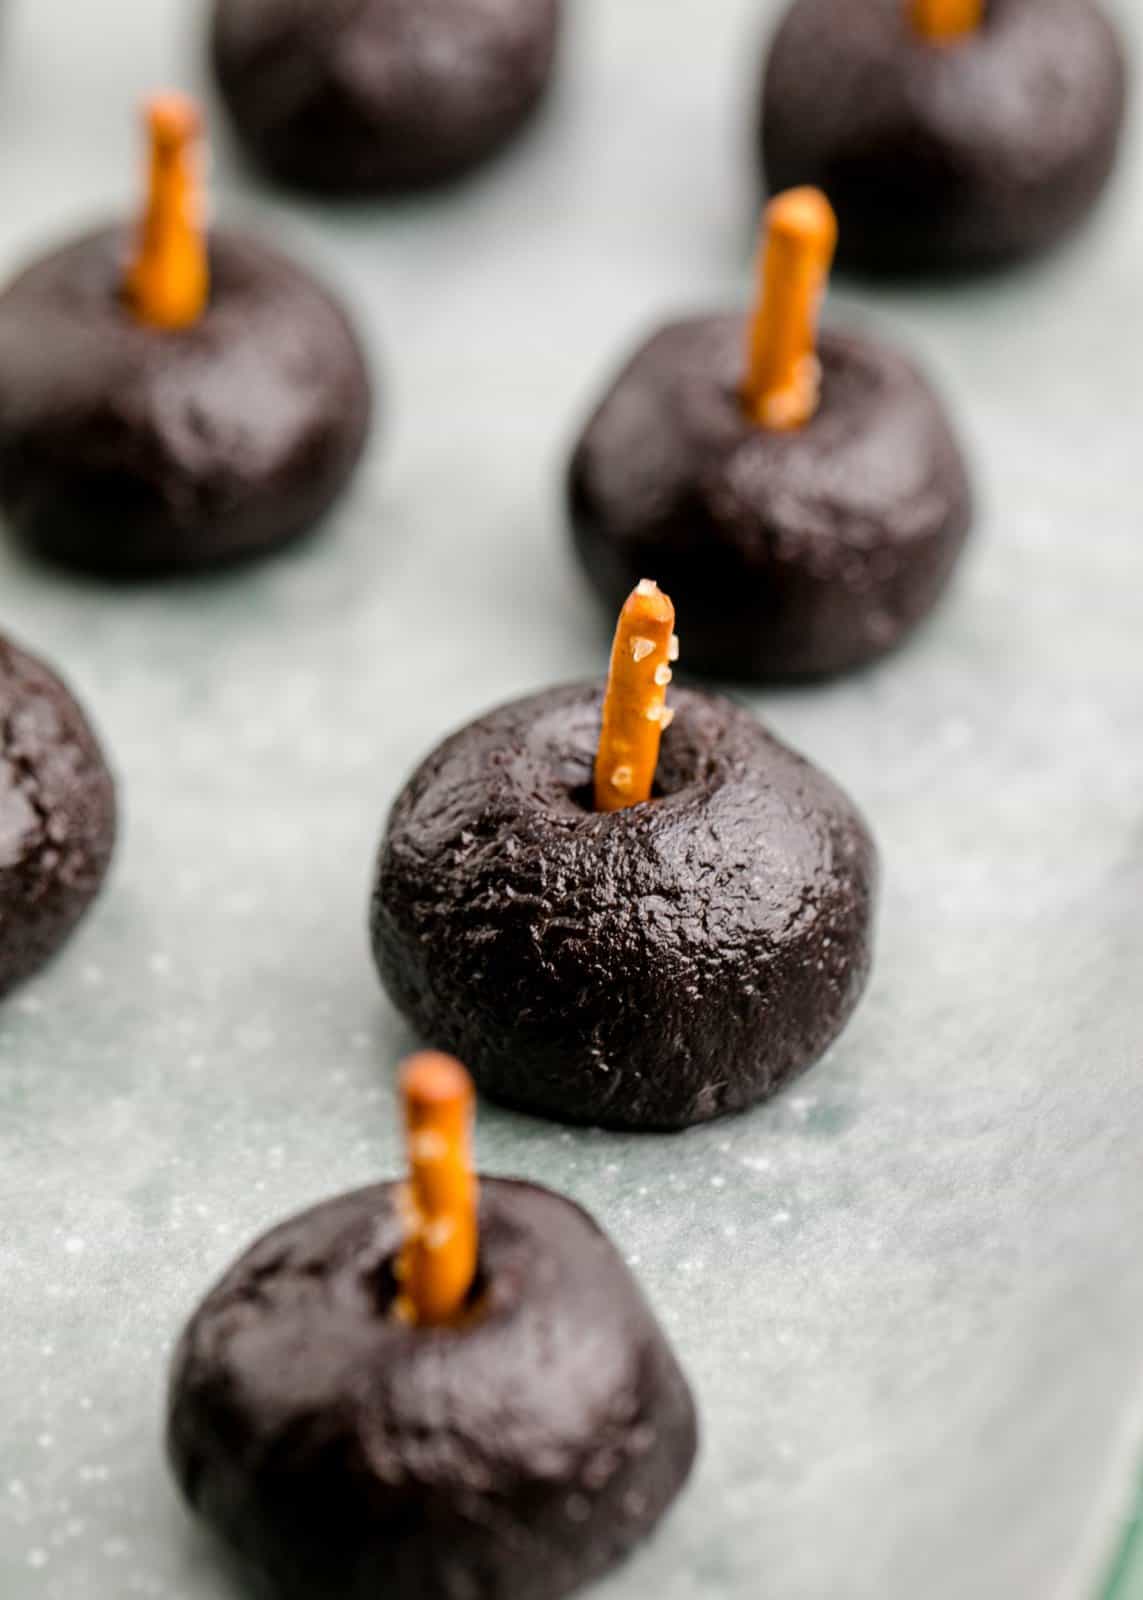
Then break each pretzel stick in half and push the broken ends into each of the indented Oreo truffle balls. (Make sure to leave enough at the top to allow you to dip the truffles in chocolate later. Place the baking sheet in the freezer for 20 minutes. While the truffles are chilling, roll out your green fondant and use a leaf shaped cookie cutter or knife to cut out tiny leaves for the apples. Set these aside.
In a microwave safe bowl, melt the red candy melts according to the package directions. Remove the truffles from the freezer and begin to coat in red chocolate.
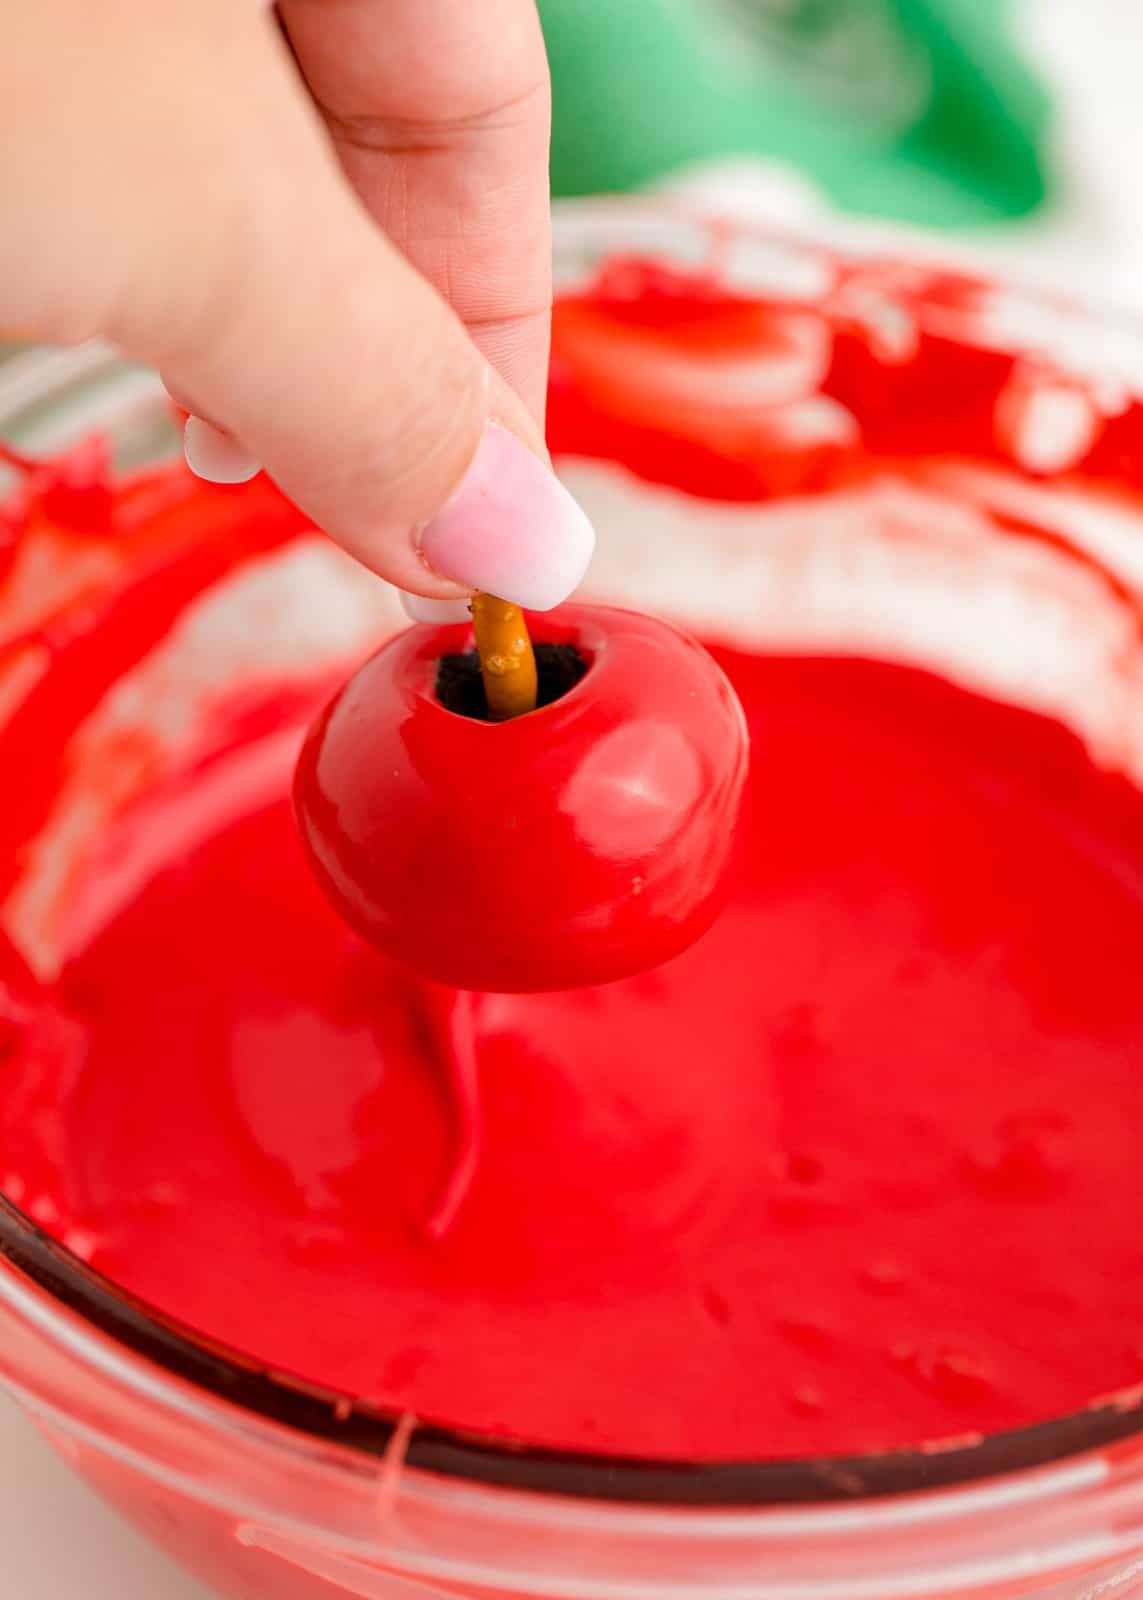
Work in batches and make sure to add the fondant leaves to each apple before they harden. Once you cover all of the truffles and assemble the apples, put them in the refrigerator for at least 20 minutes to fully harden.
Then cut out the gift tags (printable gift tags below).

Place truffles in bags and tie them up for the perfect gift!

Enjoy!
Print tags below!
WANT MORE DELICIOUS RECIPES?

Back-to-School Apple Shaped Oreo Truffles
Ingredients
- 48 Oreo cookies (one family size package)
- 8 ounces cream cheese, softened to room temperature
- ½ Tablespoon salted butter, softened to room temperature
- ½ teaspoon vanilla extract
- 16 ounces red candy melts (2-8 ounce bags)
- 8 ounces premade green fondant
- 15 small pretzel sticks
Instructions
- Place Oreo cookies in a food processor and pulse until Oreos become fine crumbs.
- Add the softened cream cheese, softened butter and vanilla to the Oreo crumbs and blend together. (you may need to scrape down the bowl as you blend because the mixture can get caught and be sticky).
- Chill the Oreo truffle mix for 10 minutes in the freezer, this allows you to form the Oreo balls a little easier.
- Use a 1-inch cookie scoop to measure out the Oreo truffles, then roll each into a ball and place them on a baking sheet lined with wax paper.
- Make a very small indent to the top of each ball, like you would see on an apple where the stem would be.
- Then break each pretzel stick in half and push the broken ends into each of the indented Oreo truffle balls. (Make sure to leave enough at the top to allow you to dip the truffles in chocolate later.)
- Place the baking sheet in the freezer for 20 minutes.
- While the truffles are chilling, roll out the green fondant and use a leaf shaped cookie cutter or knife to cut out tiny leaves for the apples. Set these aside.
- In a microwave safe bowl, melt the red candy melts according to the package directions.
- Remove the truffles from the freezer and begin to coat in red chocolate.
- Work in batches and make sure to add the fondant leaves to each apple before they harden.
- Once you cover all of the truffles and assemble the apples, put them in the refrigerator for at least 20 minutes to fully harden.
- Then print and cut out gift tags. I prefer to print these out on card stock.
- Place truffles in bags and tie them up for the perfect gift!
Notes
- Pre-made fondant and colored candy melts can usually be found in the Wal-mart baking aisle or at most craft stores.
- These can be colored green as well.
- If you cannot find or don’t want to use fondant use green M&M’s for this.
- These can be frozen, see above on how to do that.
Nutrition
Nutritional Disclaimer
“The Country Cook” is not a dietician or nutritionist, and any nutritional information shared is an estimate. If calorie count and other nutritional values are important to you, we recommend running the ingredients through whichever online nutritional calculator you prefer. Calories and other nutritional values can vary quite a bit depending on which brands were used.


