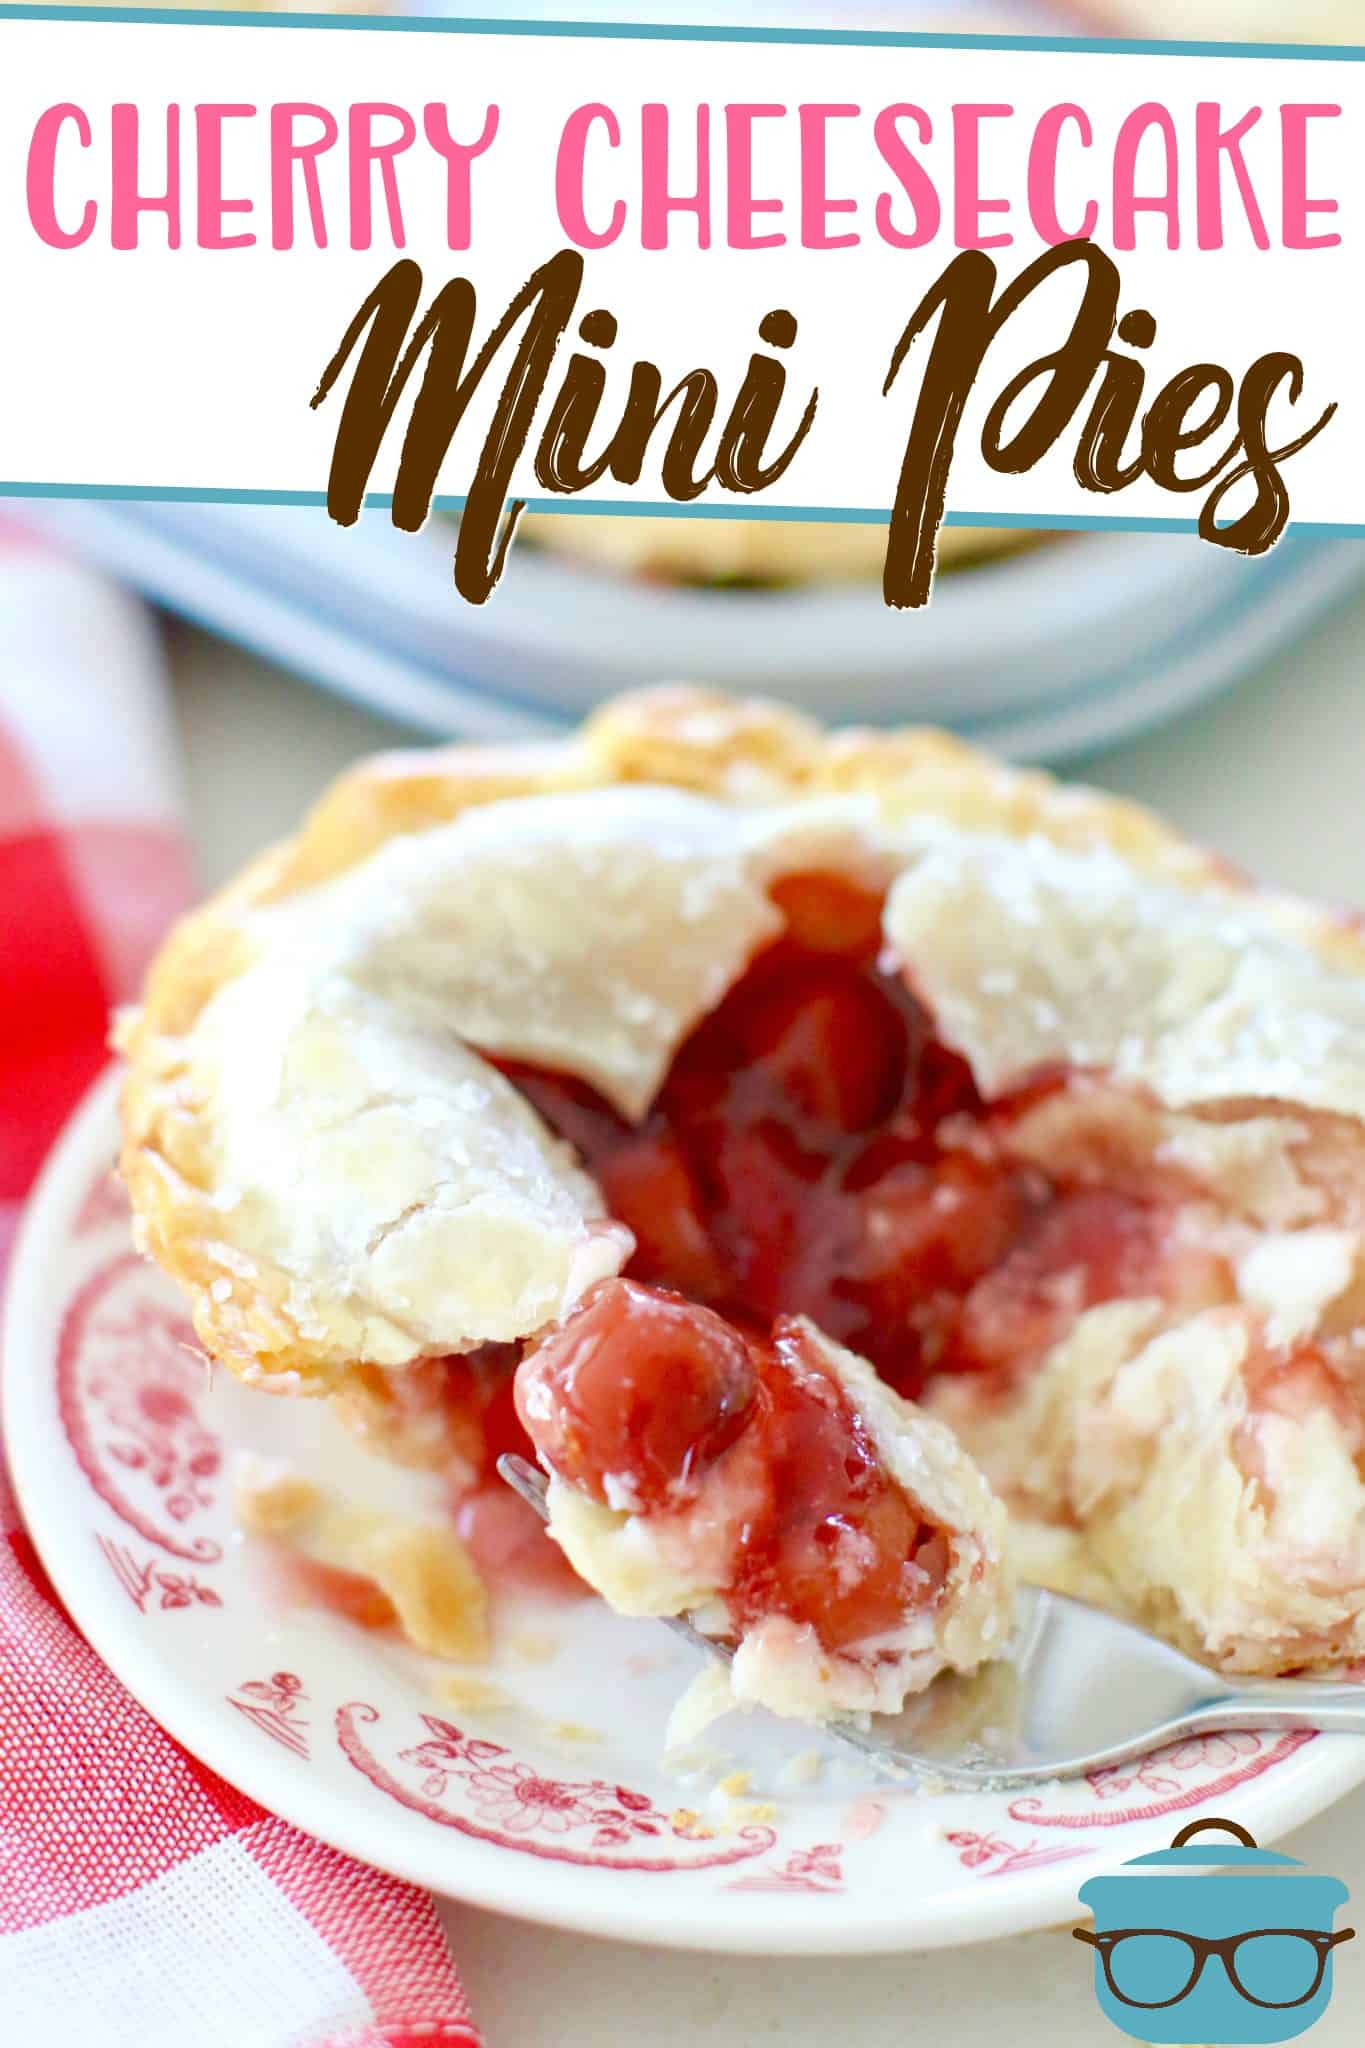
Mini Cherry Cheesecake Pies
Mini Cherry Cheesecake Pies are an easy and giftable treat! Refrigerated pie crusts, cherry pie filling and an easy, creamy cheesecake center!
A SIMPLY DELICIOUS CHERRY PIE
Mini Cherry Cheesecake Pies are an easy and giftable treat! Refrigerated pie crusts, cherry pie filling and an easy, creamy cheesecake center! They are so simple to make but taste absolutely heavenly!

TIPS FOR MAKING THESE INDIVIDUAL DESSERT PIES:
- Use any pie filling that you enjoy for this recipe.
- You’ll need a large pie dough or biscuit cutter. For this recipe, I am using tools from a PAMPERED CHEF MINI PIE PAN SET.
- If you don’t have a pie pan similar to the one I used, just use a large muffin tin. You’ll just need to adjust the size biscuit cutter and amount of filling since it will be a little smaller.
- This same recipe can be used for one larger pie.
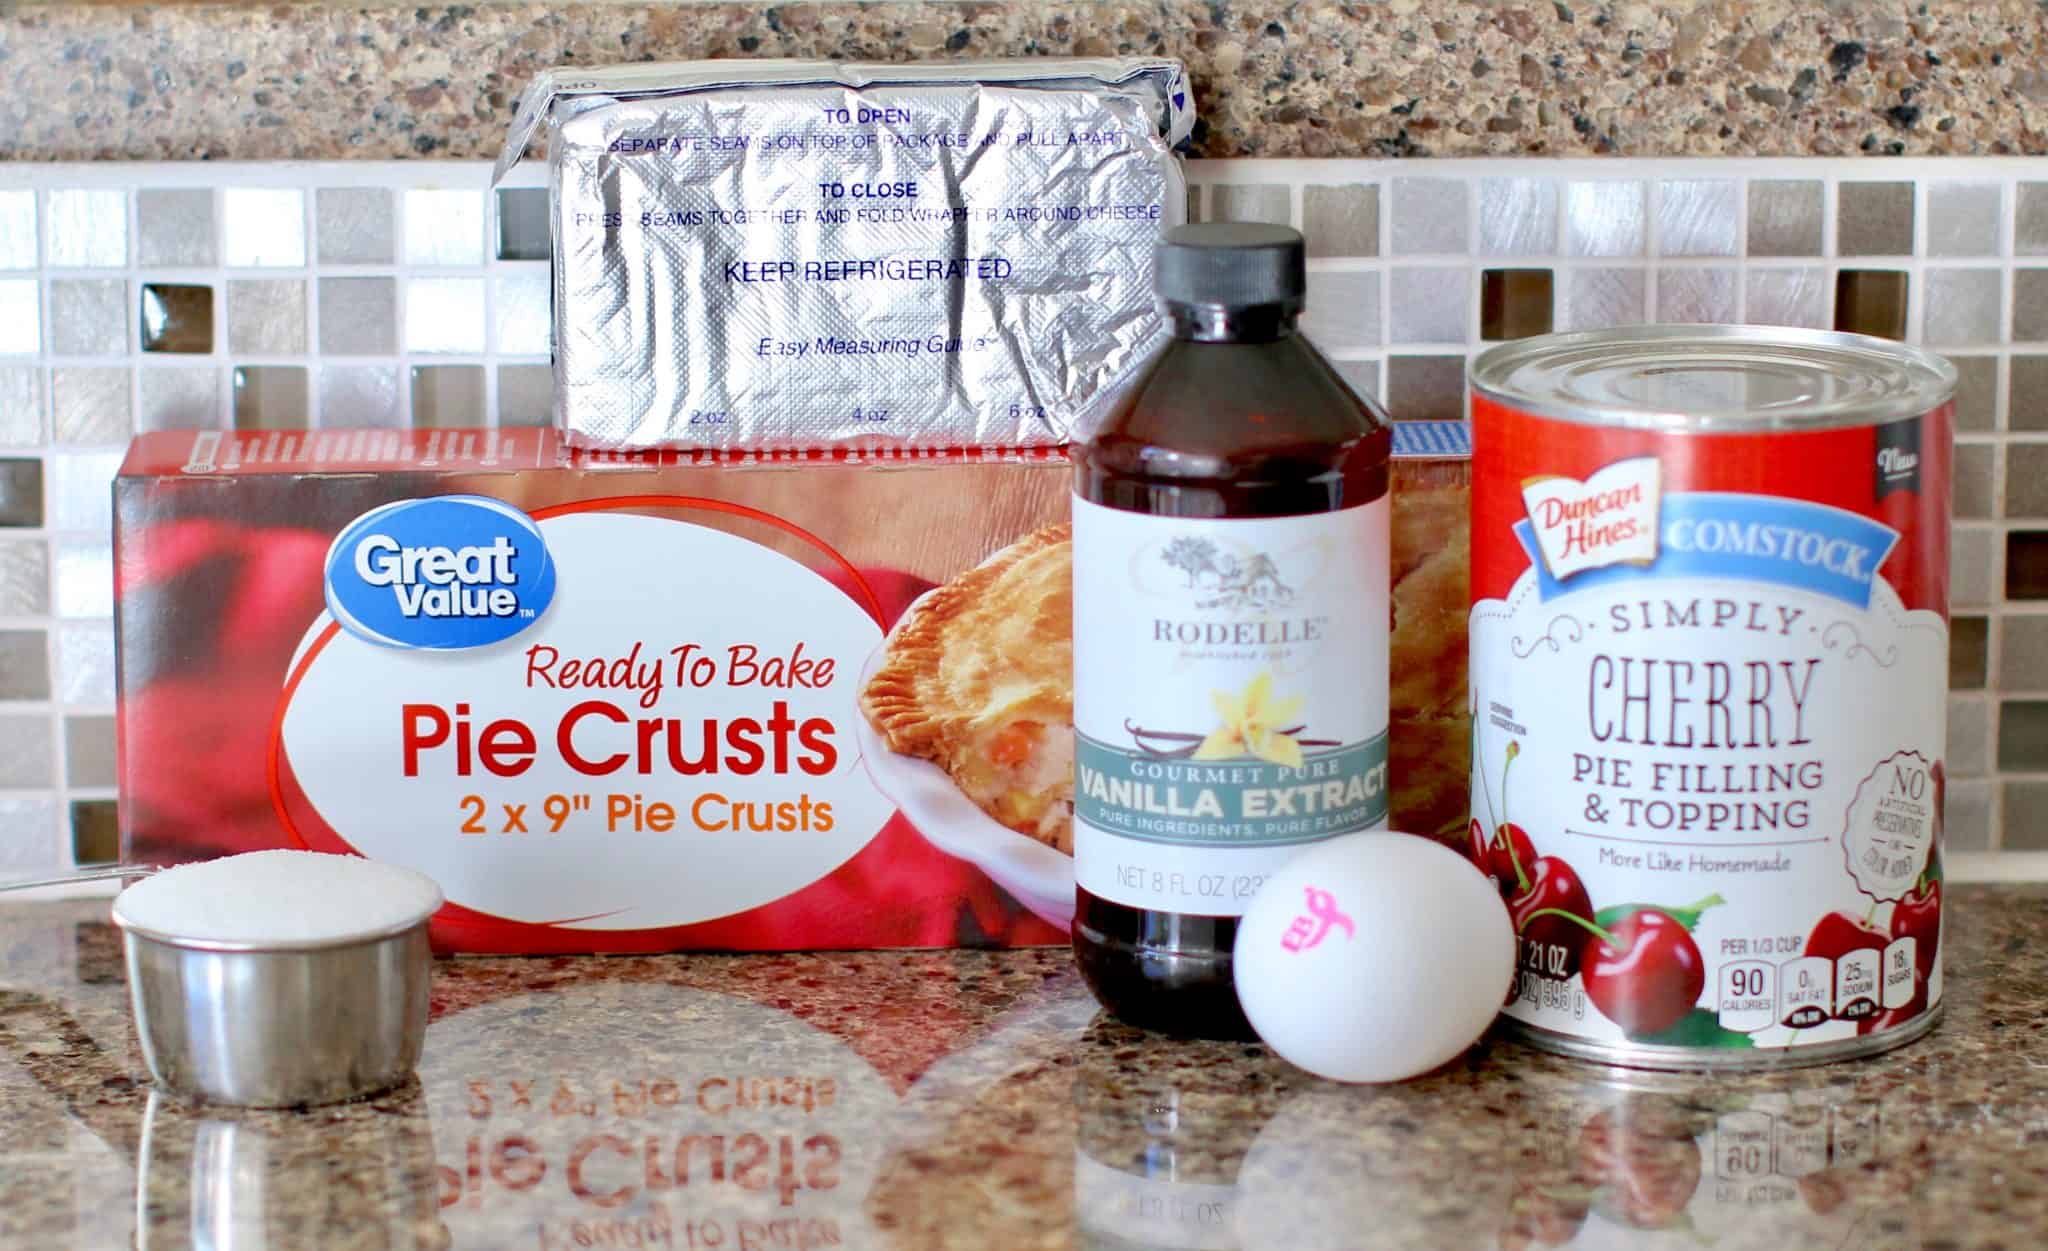
INGREDIENTS NEEDED: (FULL RECIPE AT THE BOTTOM OF THE POST)
- refrigerated pie crusts
- cream cheese
- sugar
- vanilla extract
- cherry pie filling
- egg
- water
- sugar
HOW TO MAKE MINI CHERRY CHEESECAKE PIES:
Pre-heat oven to 400F degrees. In a small bowl, mix together cream cheese, sugar, and vanilla extract. Set aside.
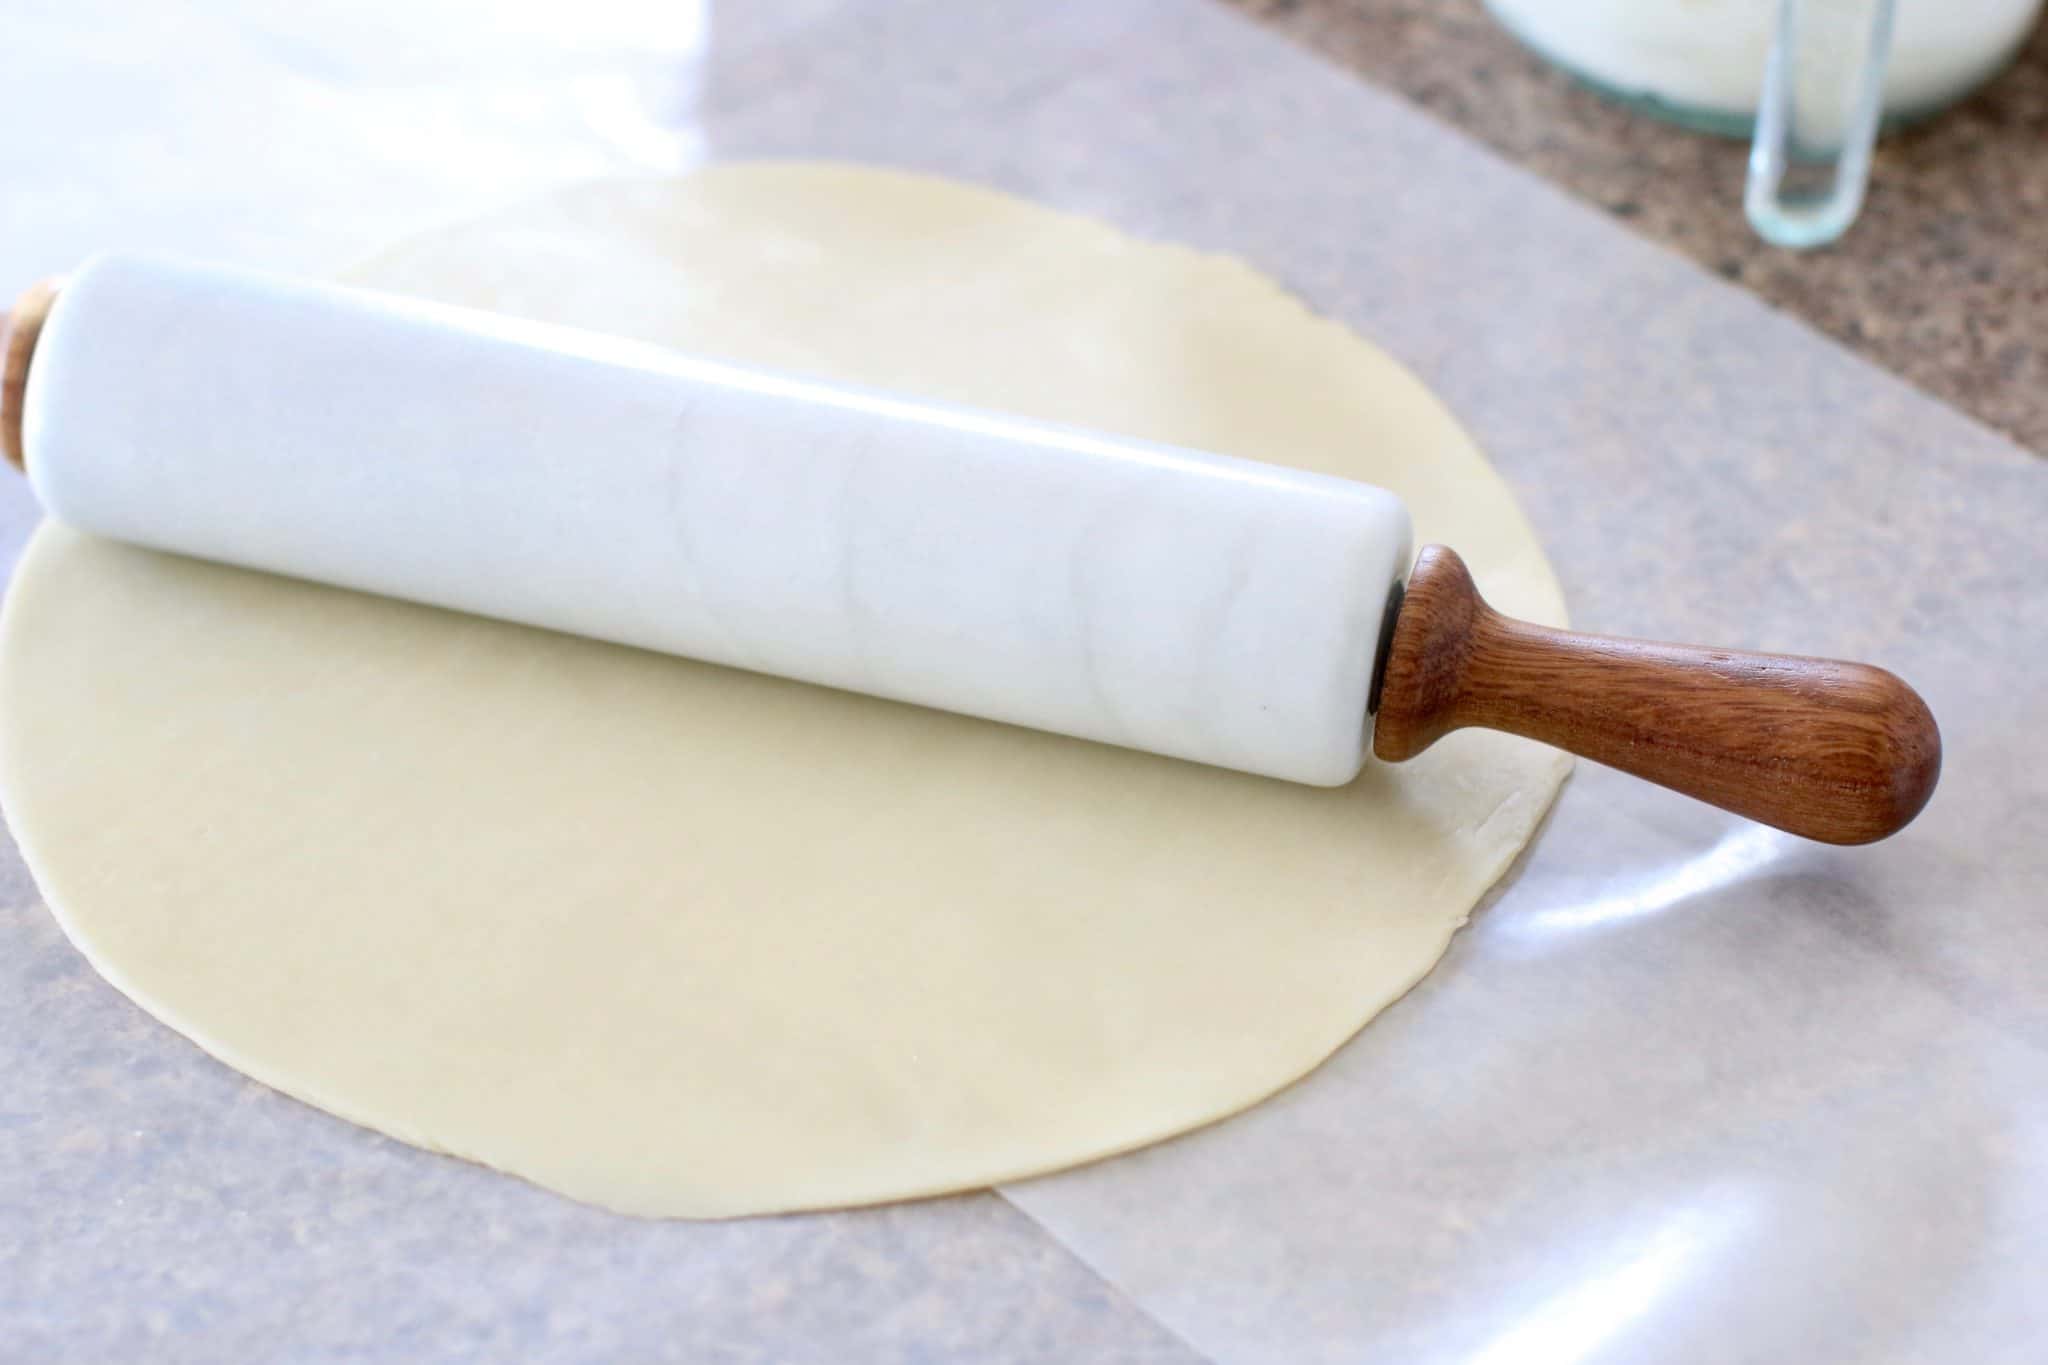
Unroll the pie crusts onto a lightly floured surface. Or roll out some wax paper to make for easier clean up. Gently roll out the crusts with a rolling pin to flatten out the pie crust.
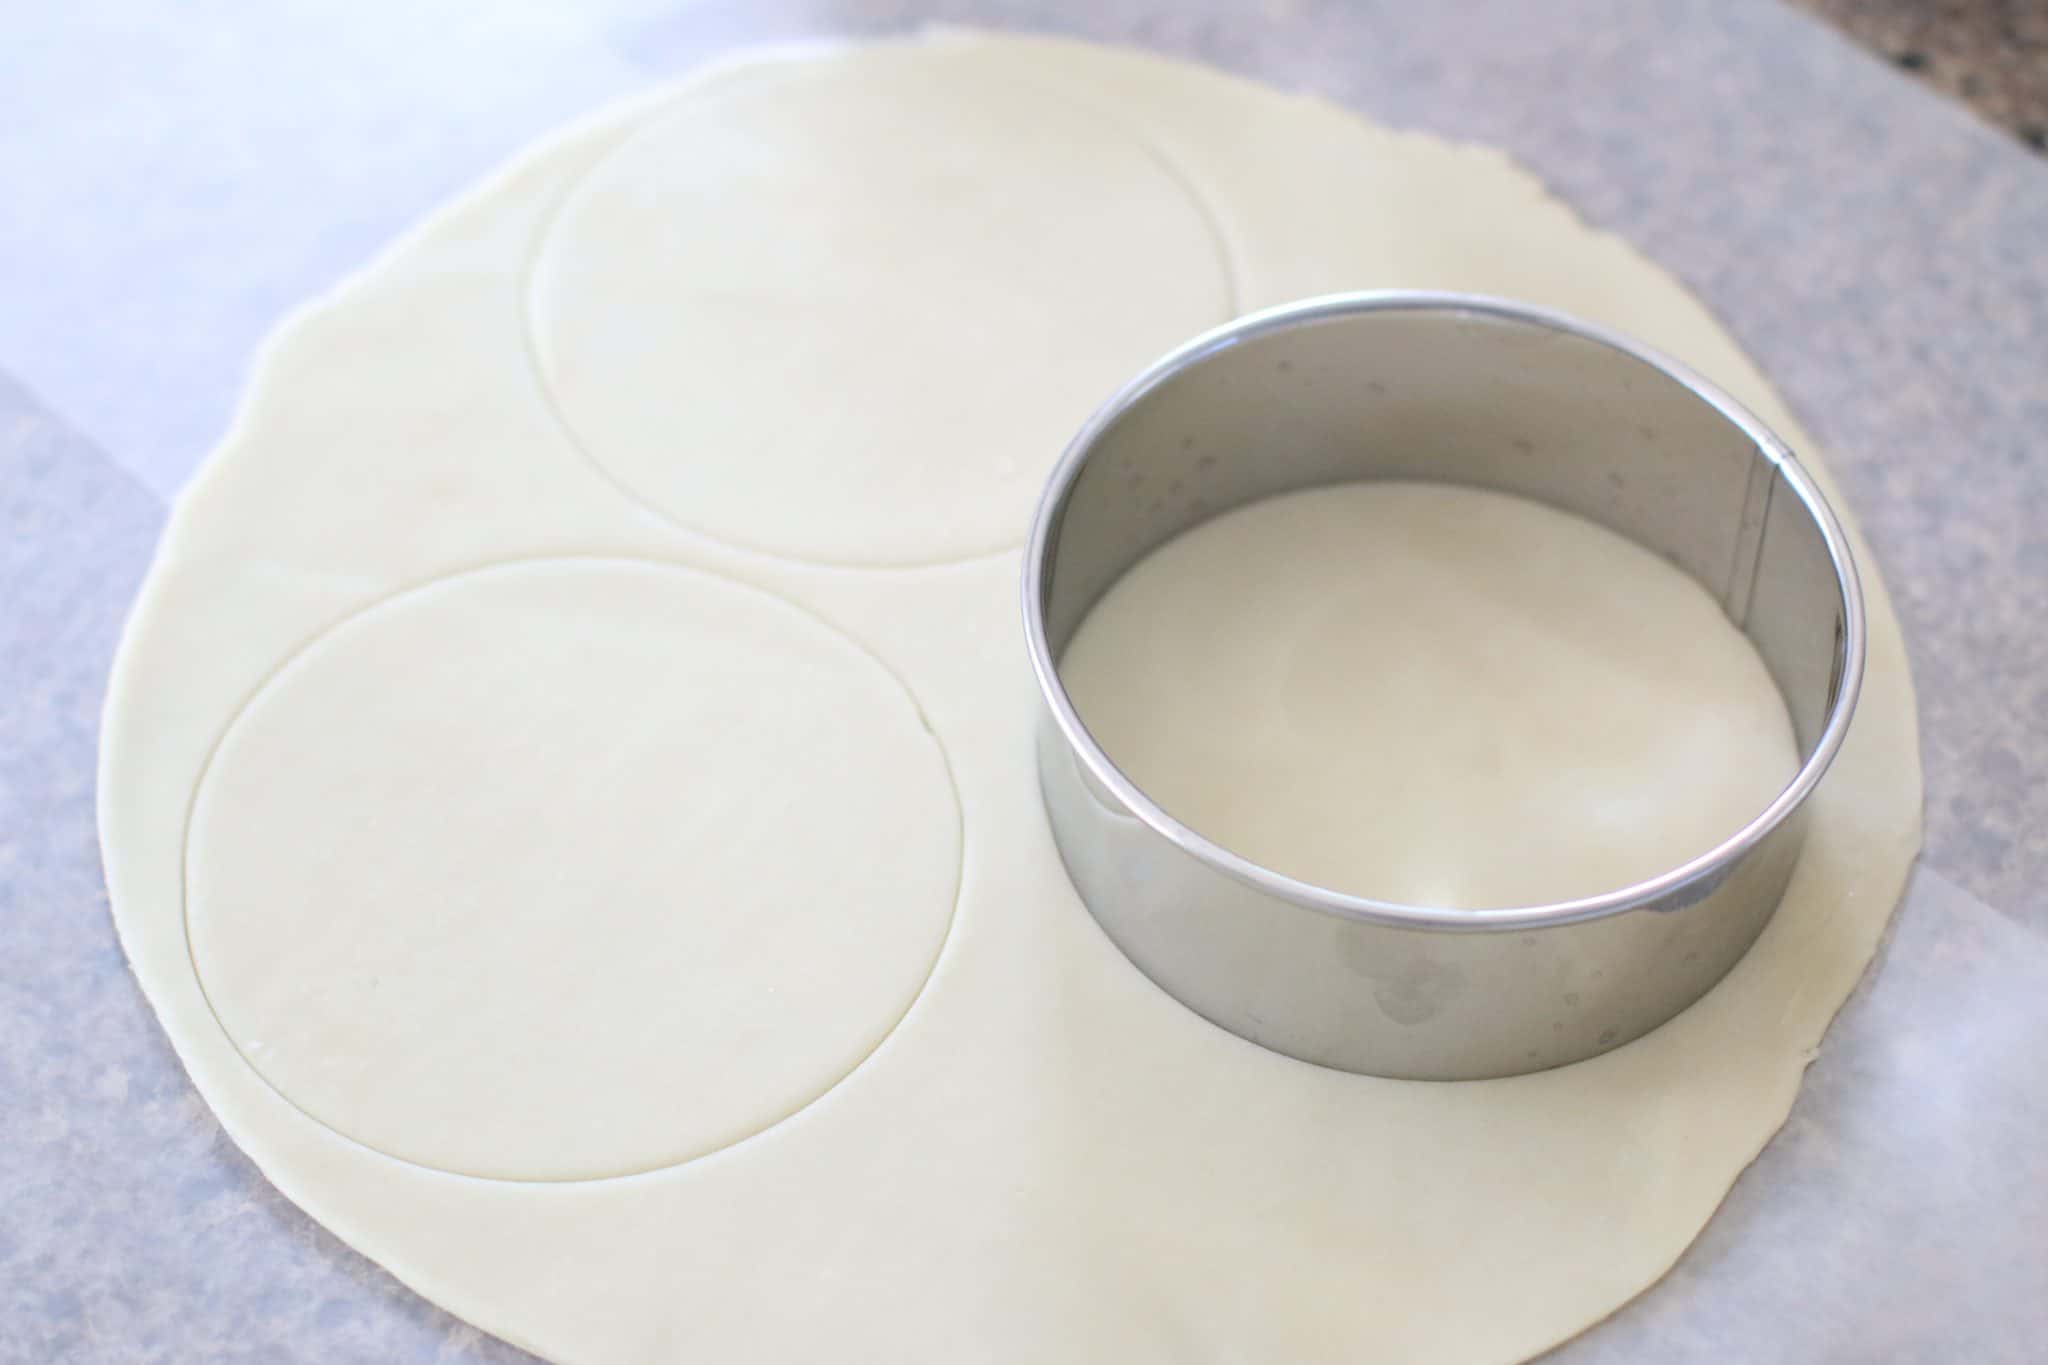
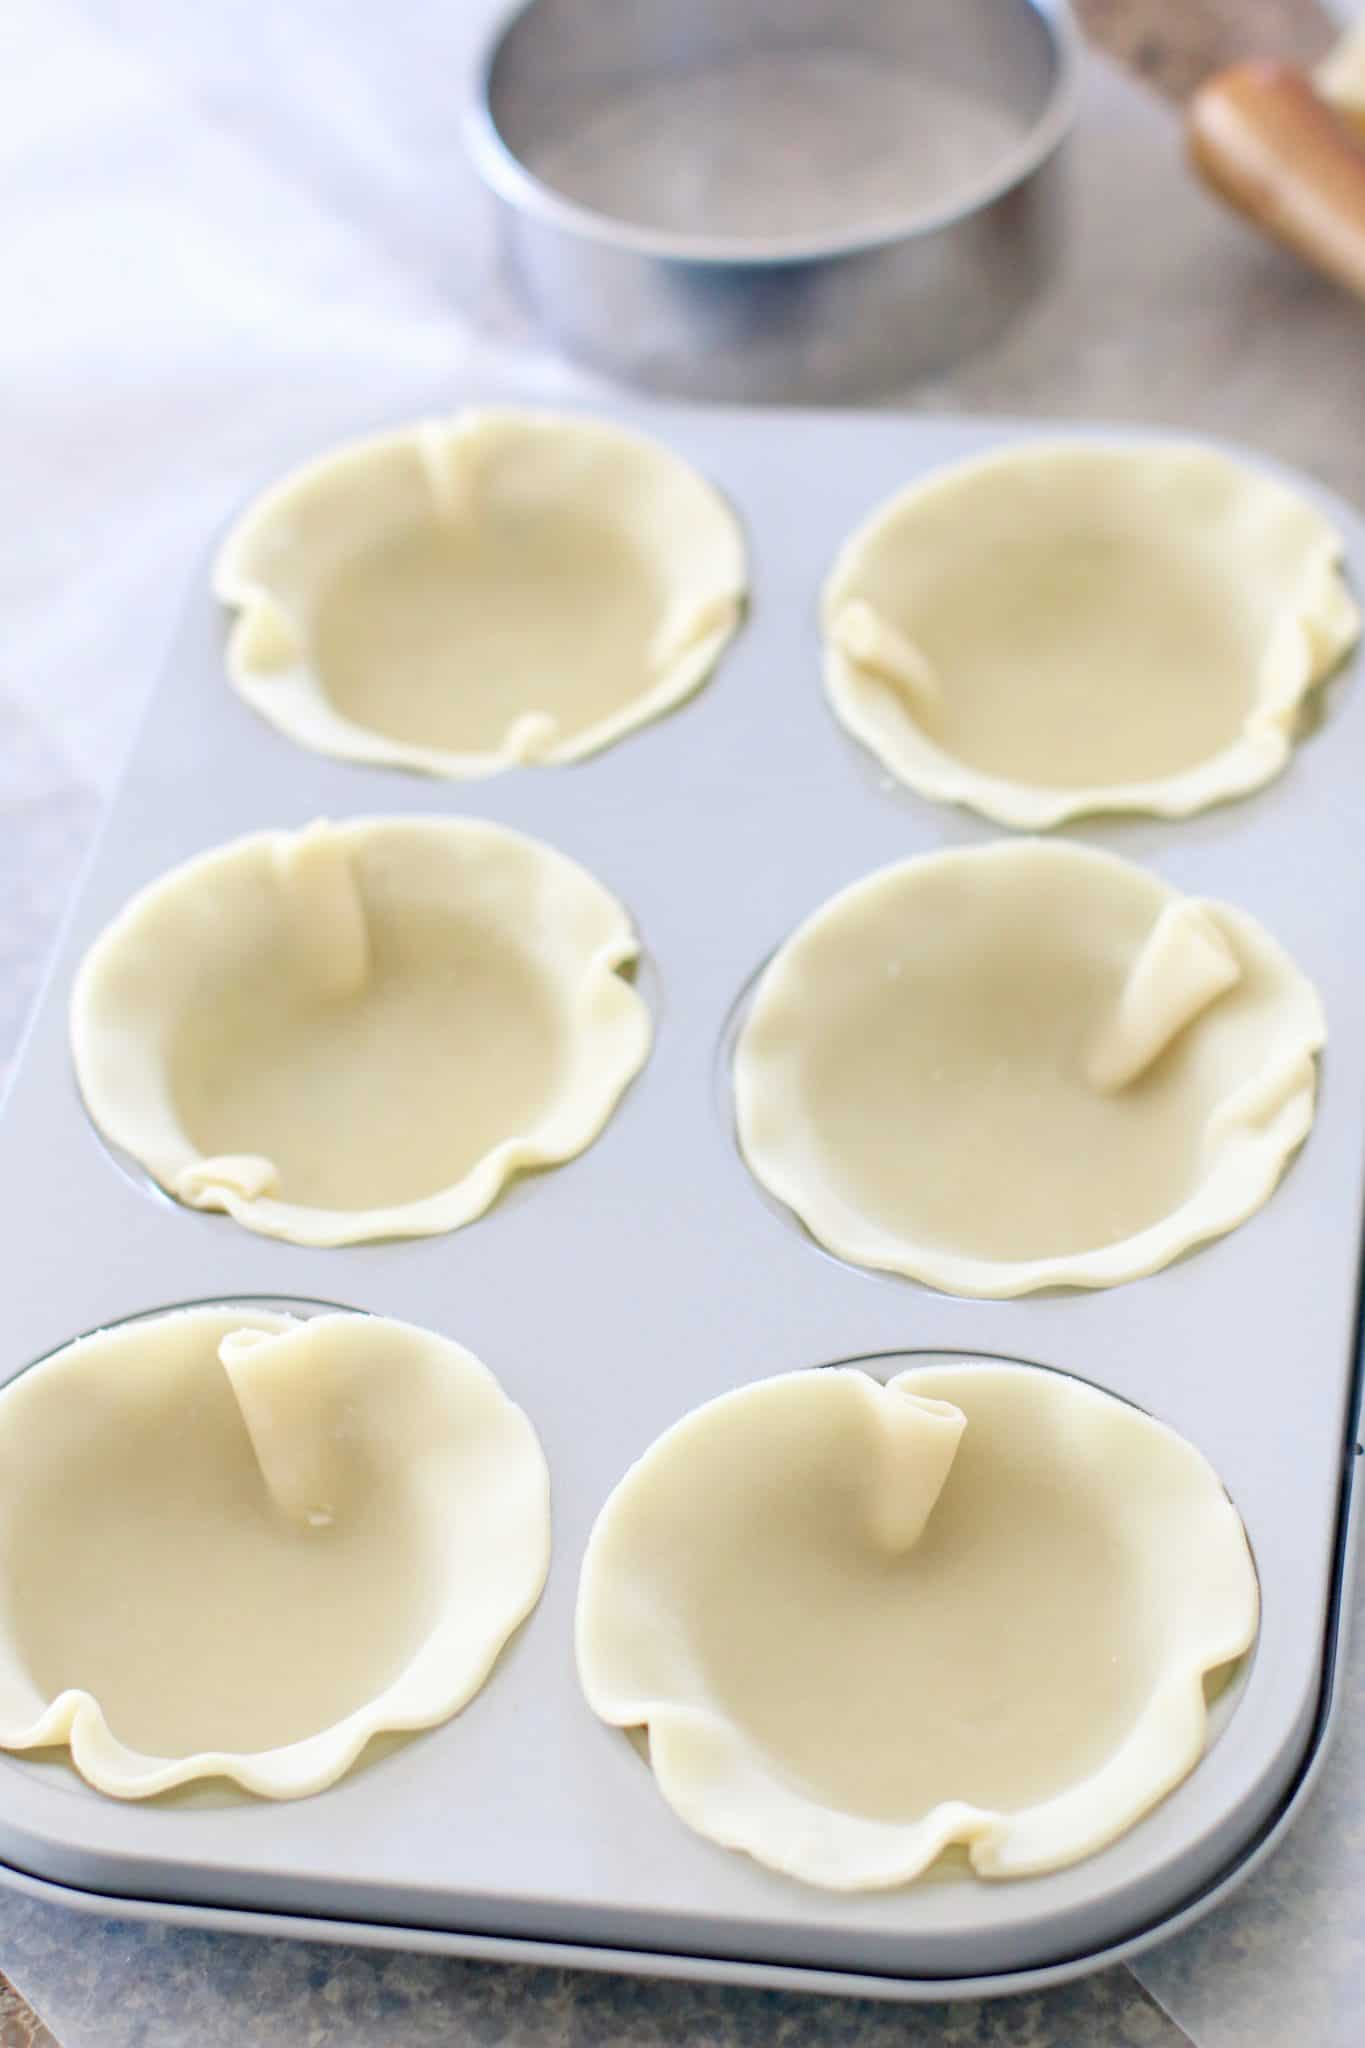
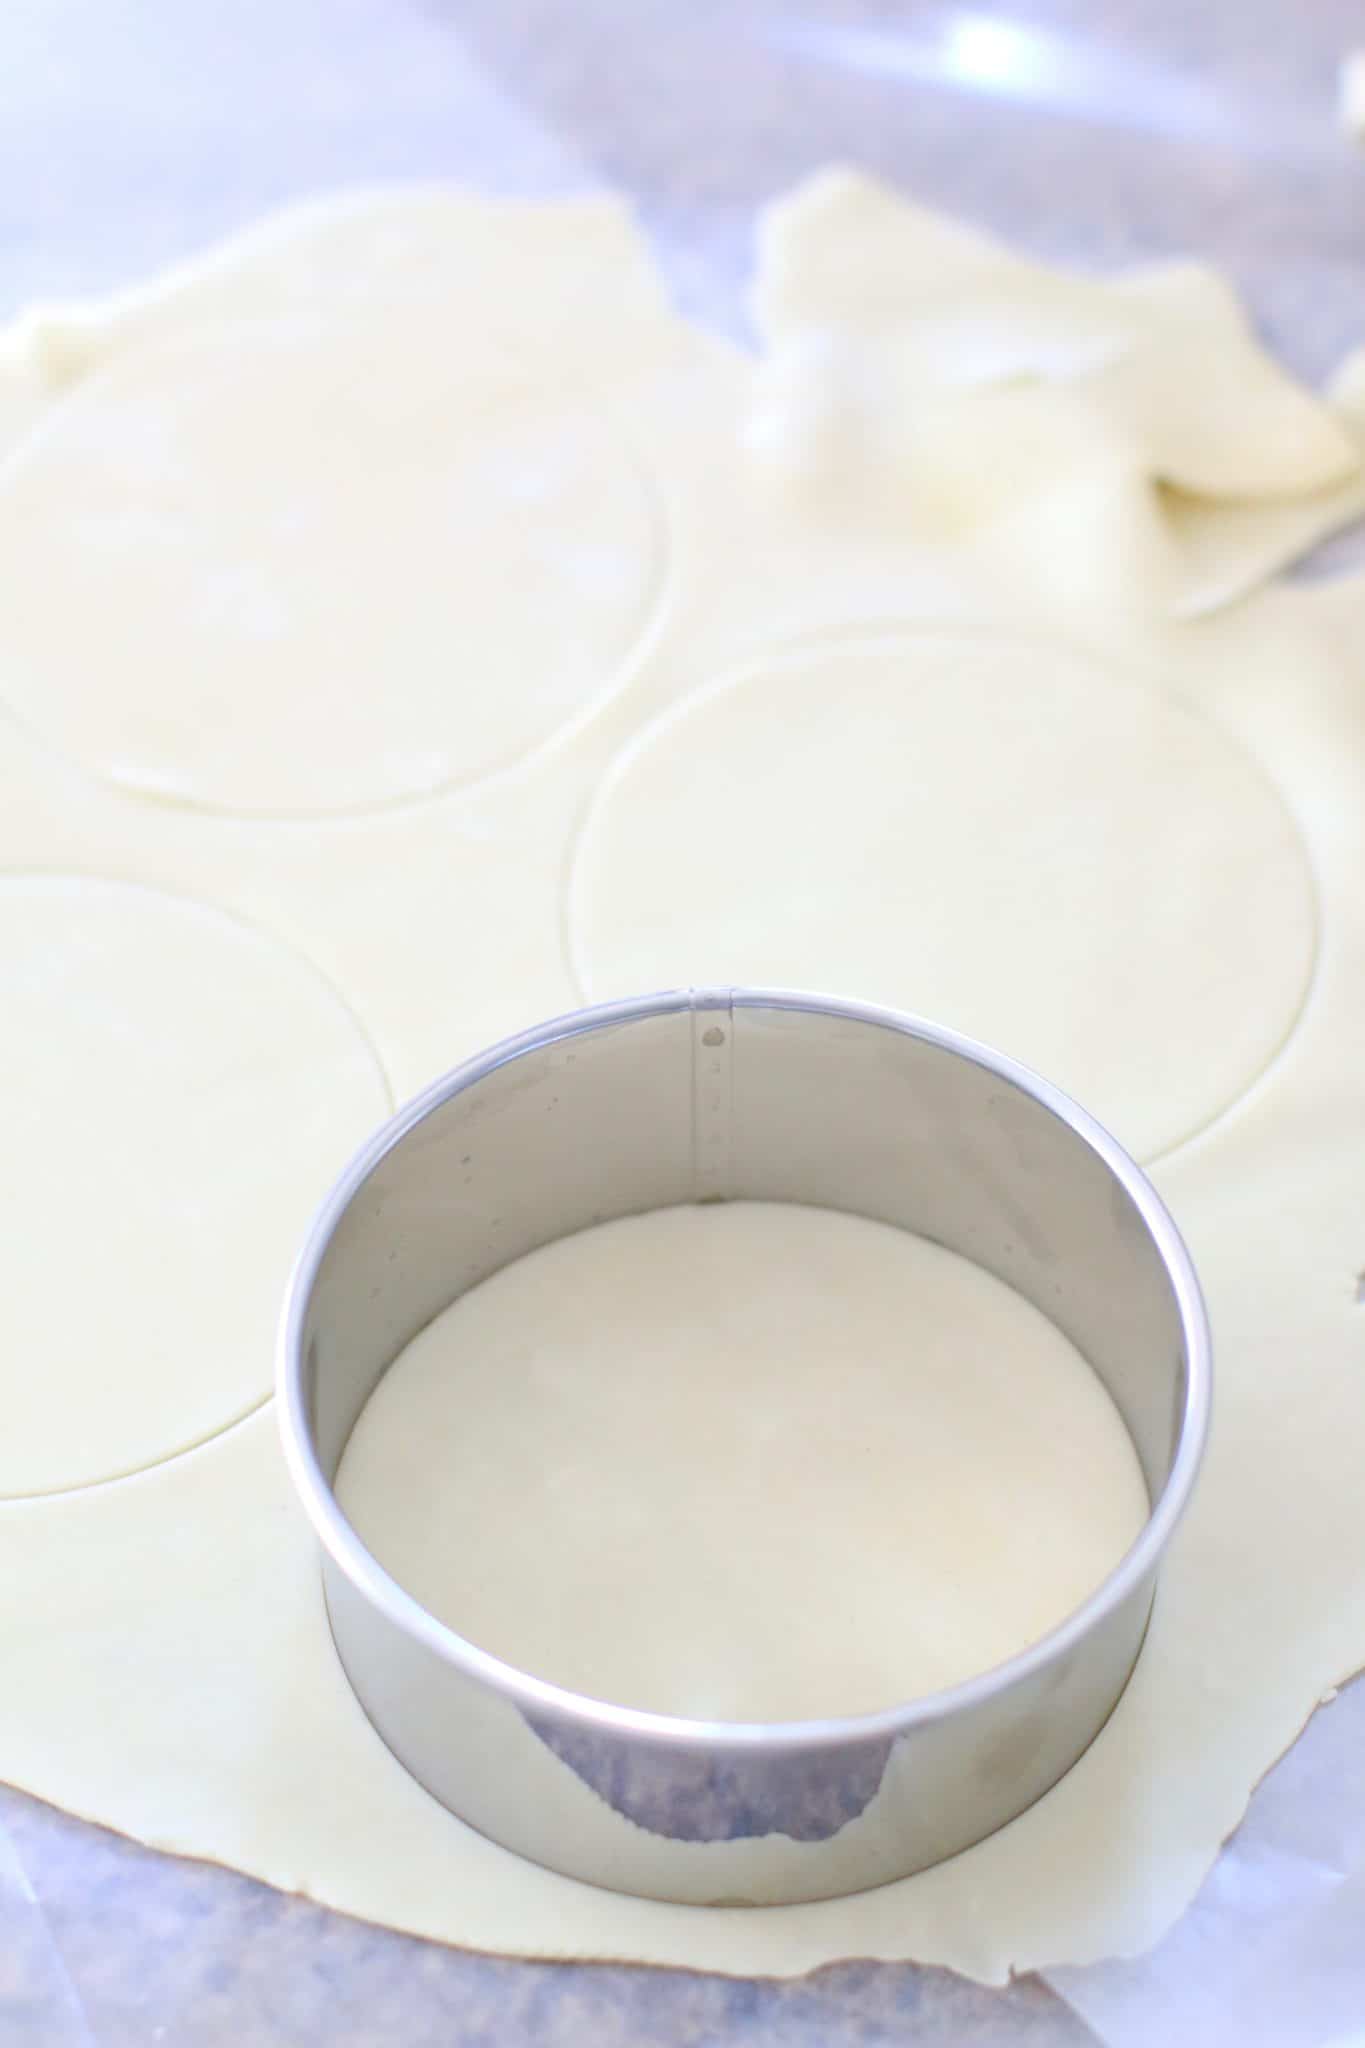
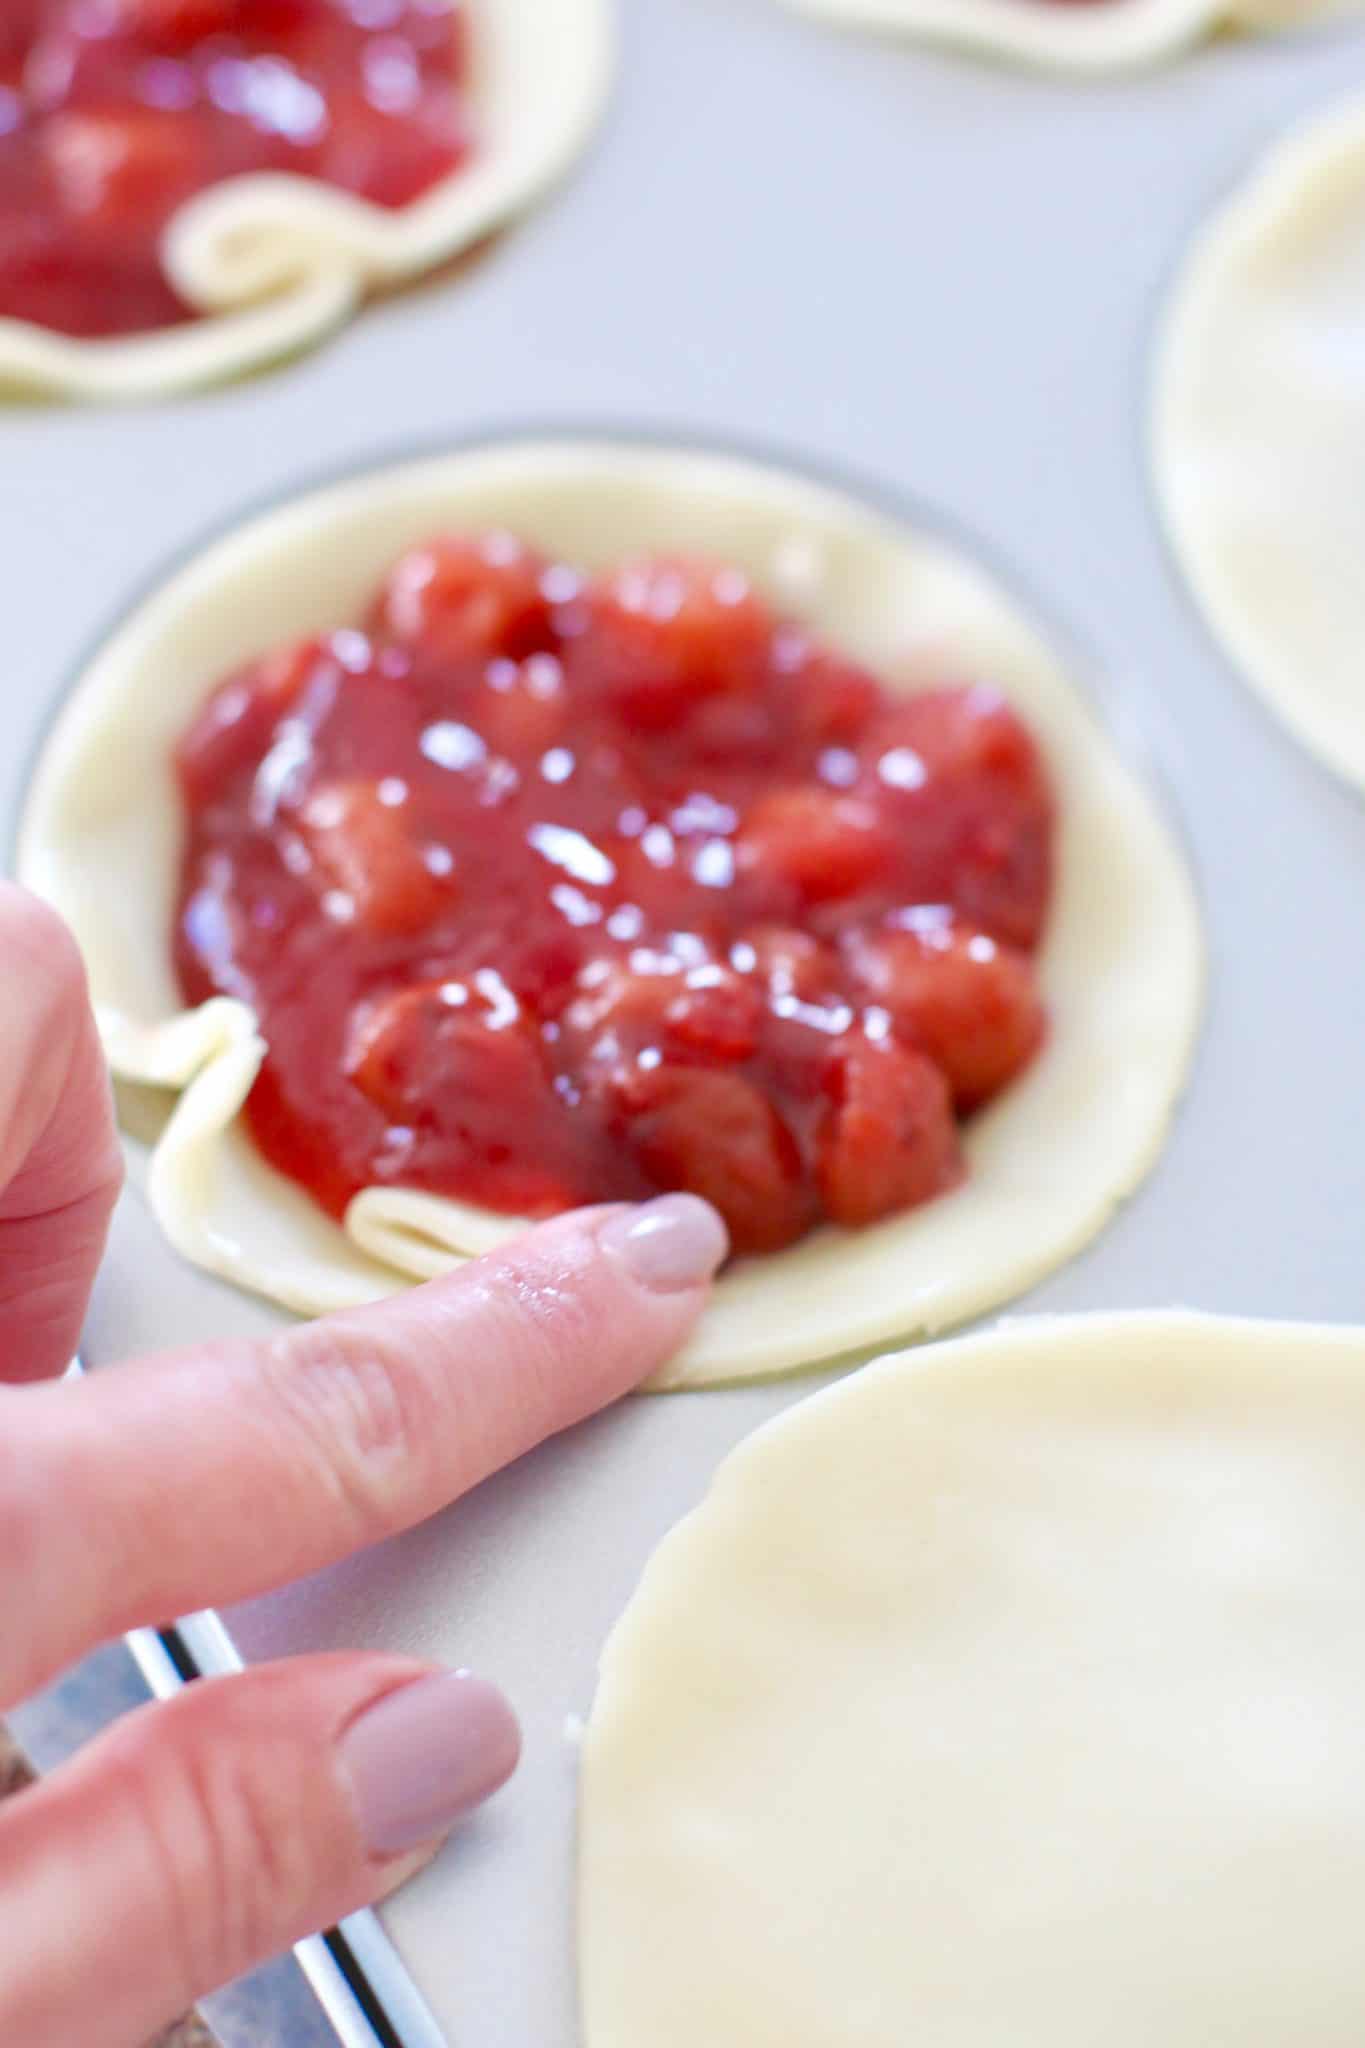
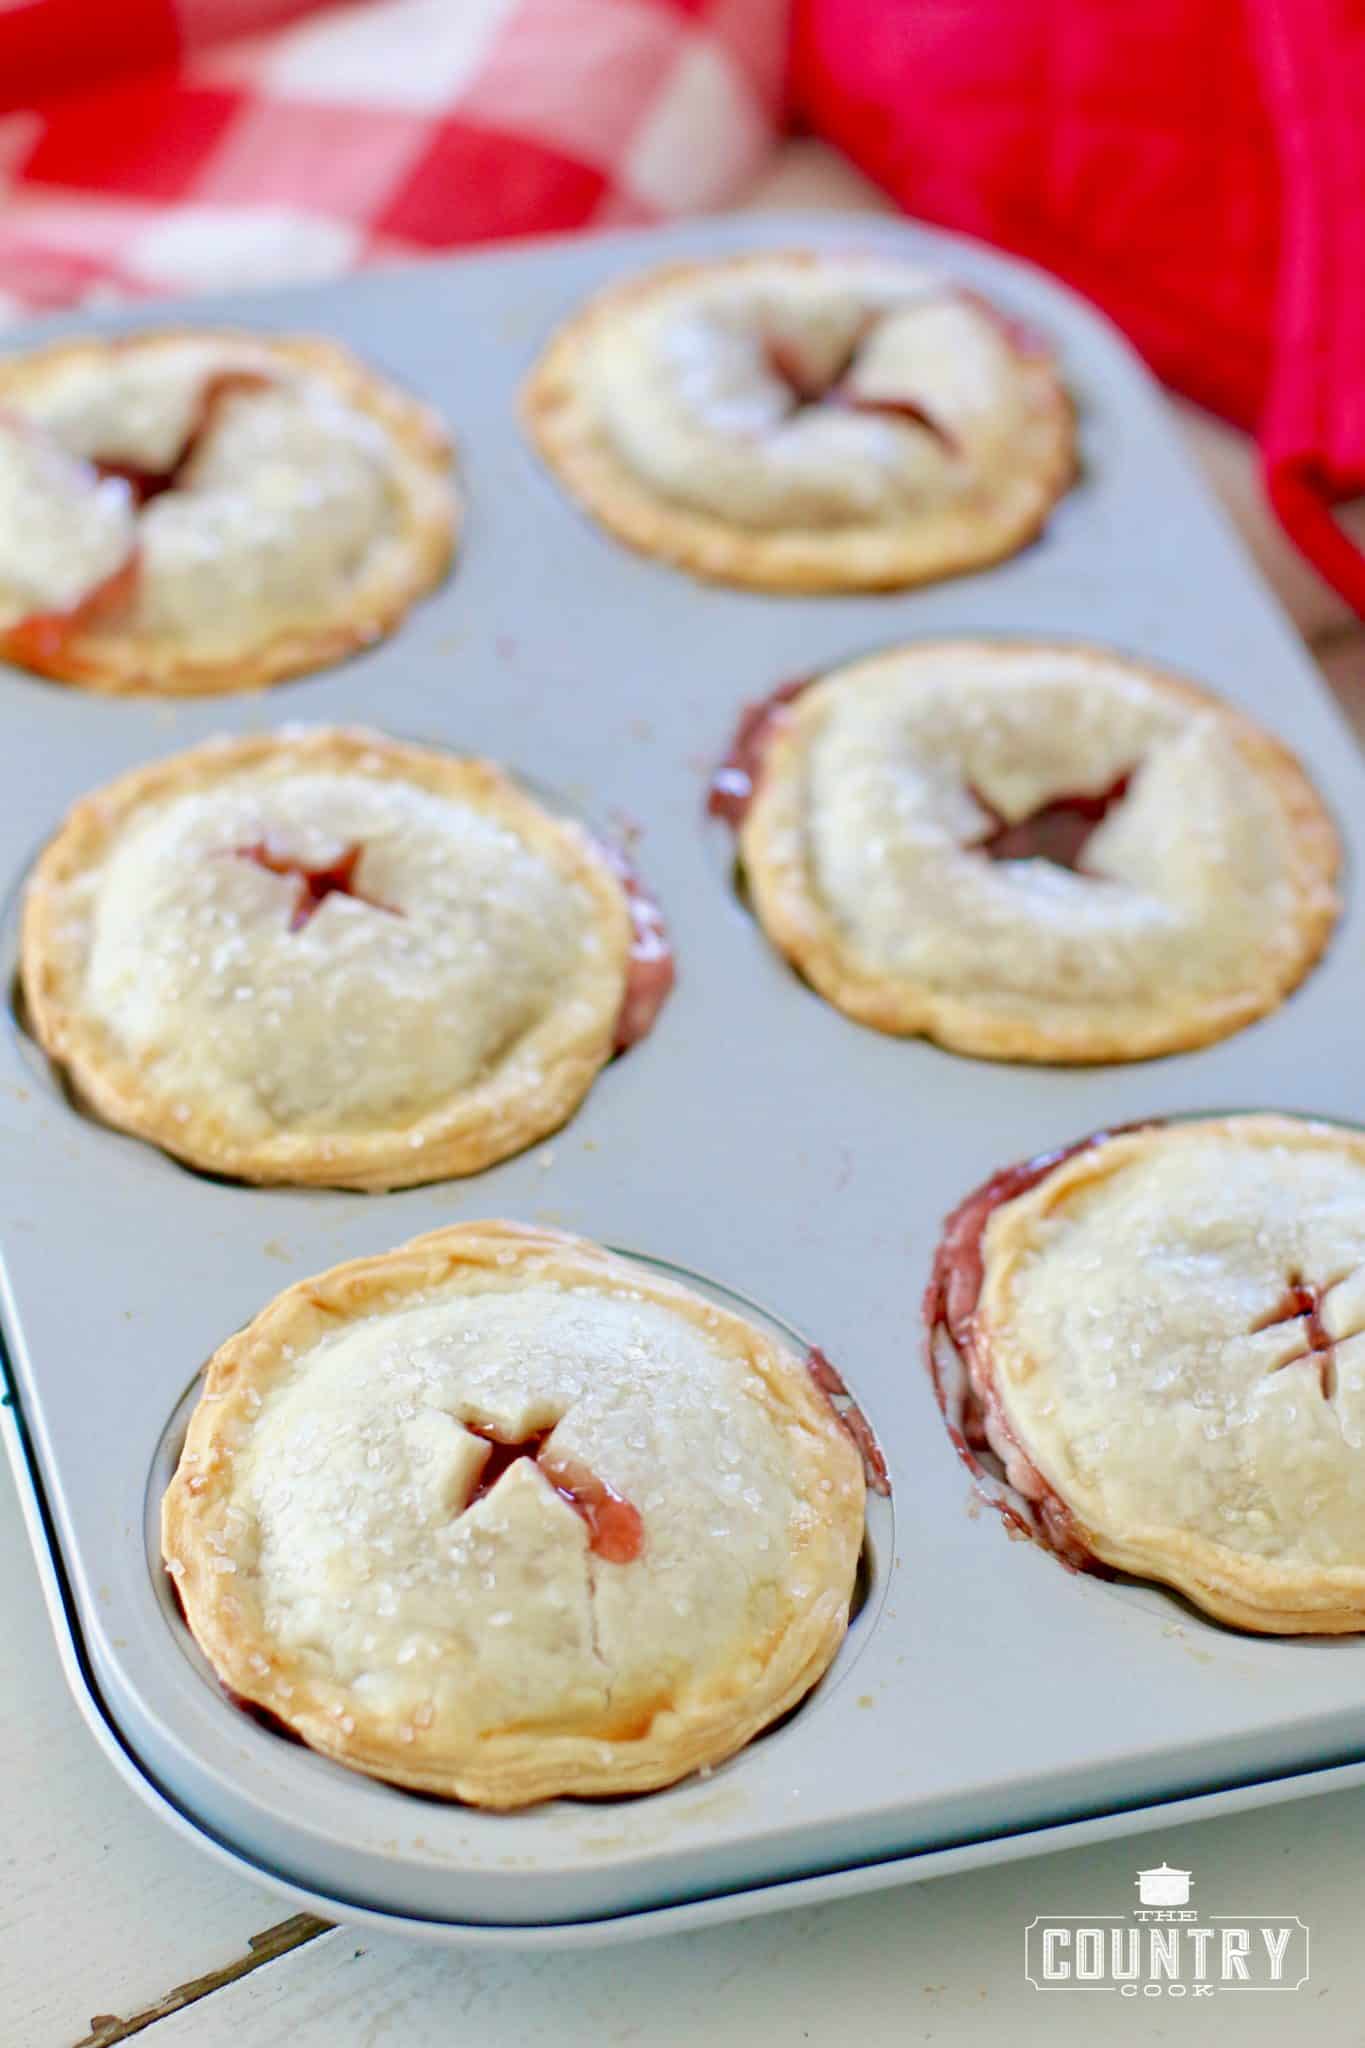
Cut 3 circles from each crust with a large pie dough or biscuit cutter.
Place the circles into the wells of the Mini Pie Pan, pressing the dough gently into the bottom and up the sides of the pan.
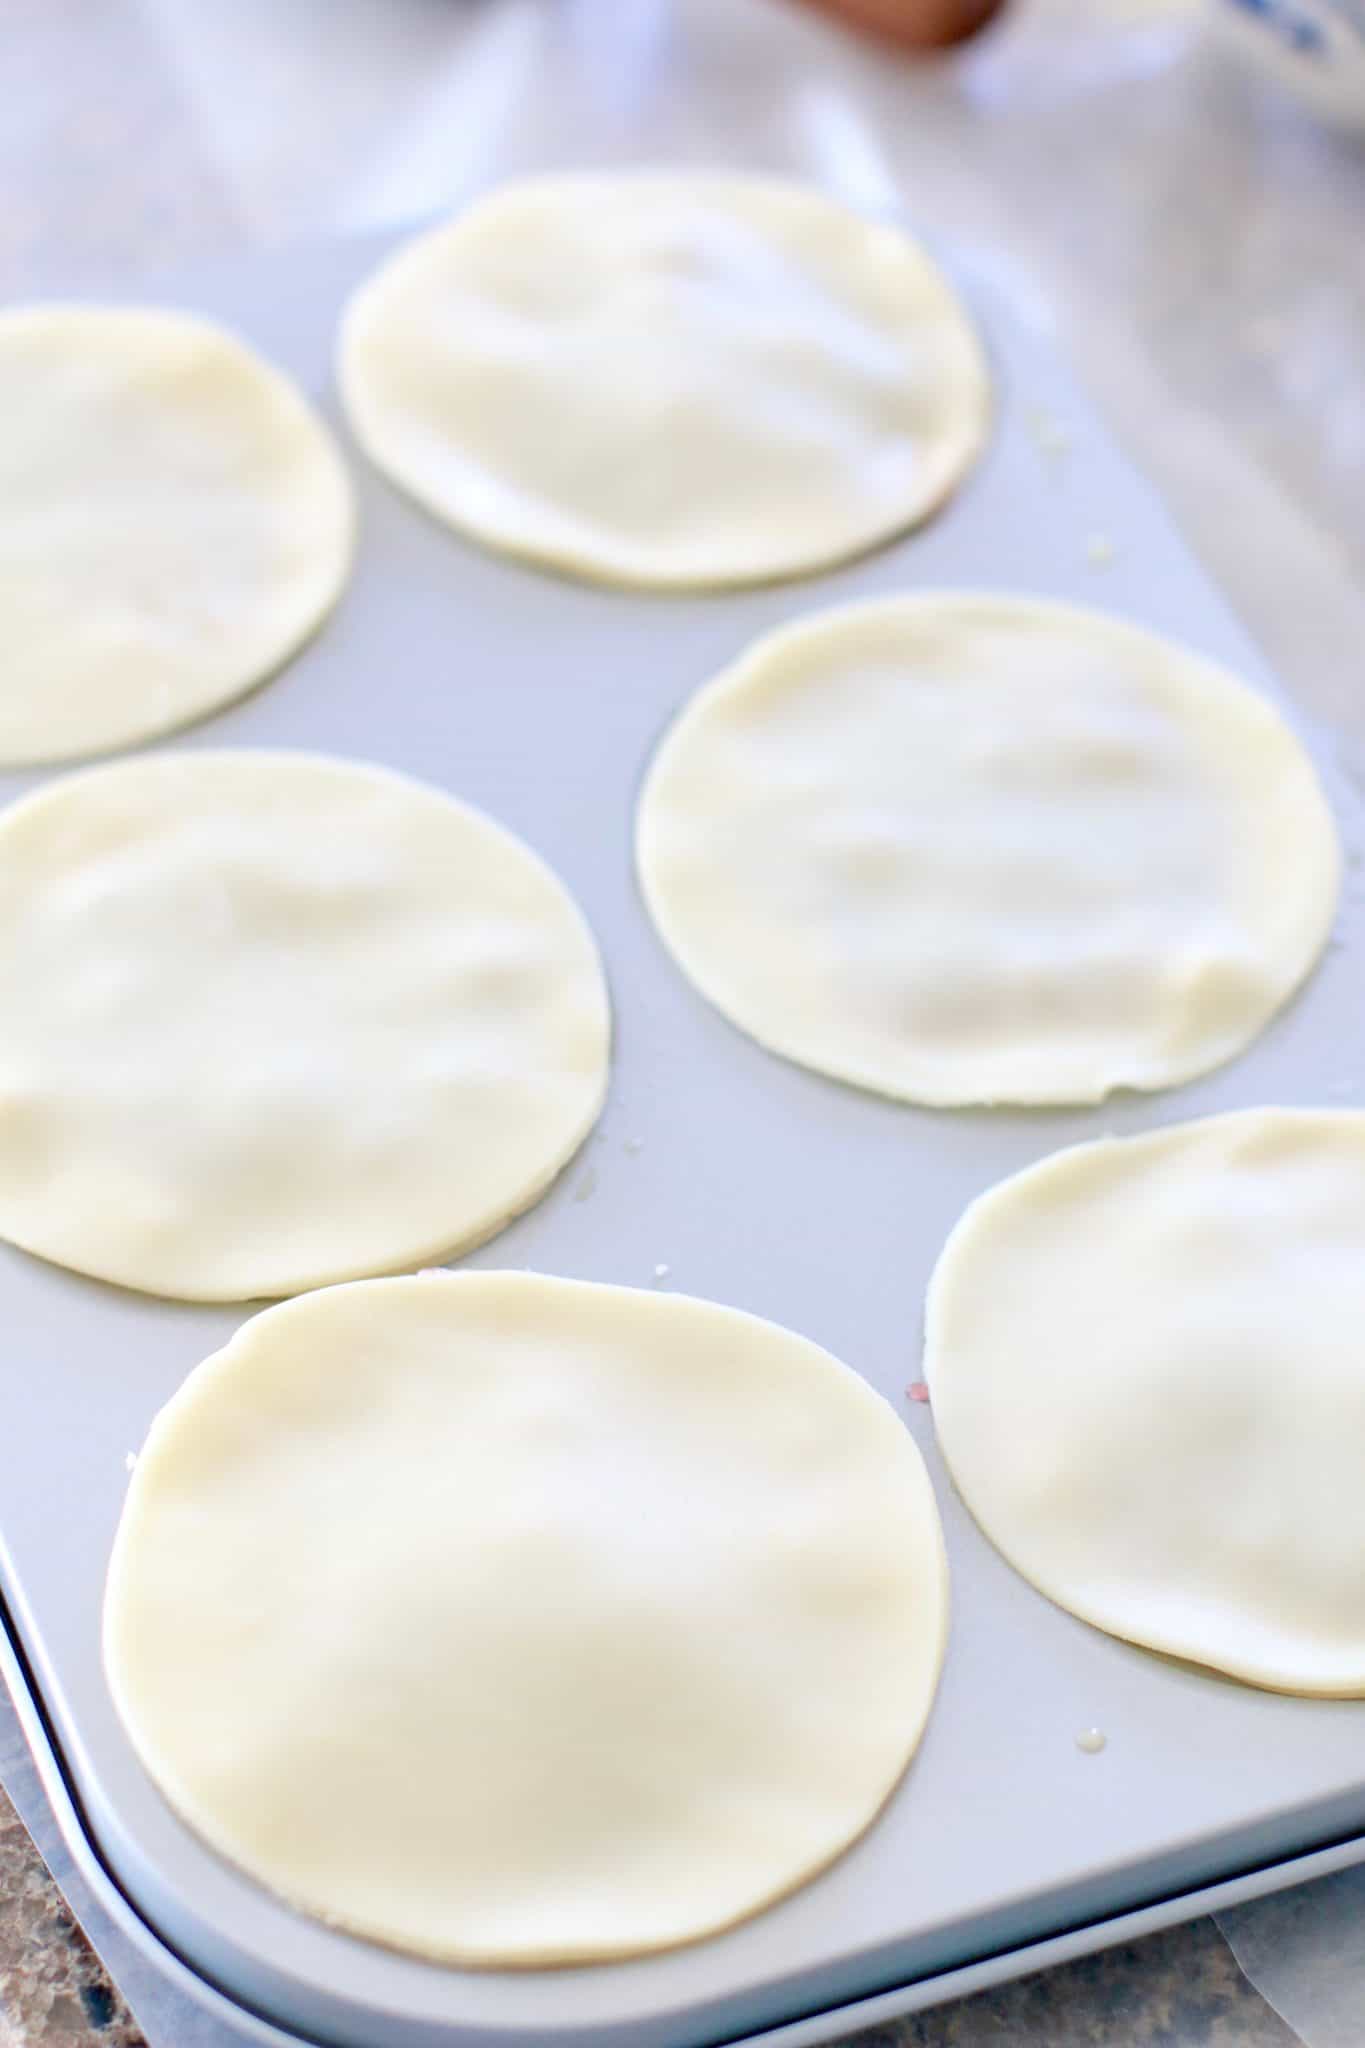
Roll out the remaining dough to ⅛-” (3-cm) thick. Cut 6 more circles with a large pie dough or biscuit cutter. Set aside.
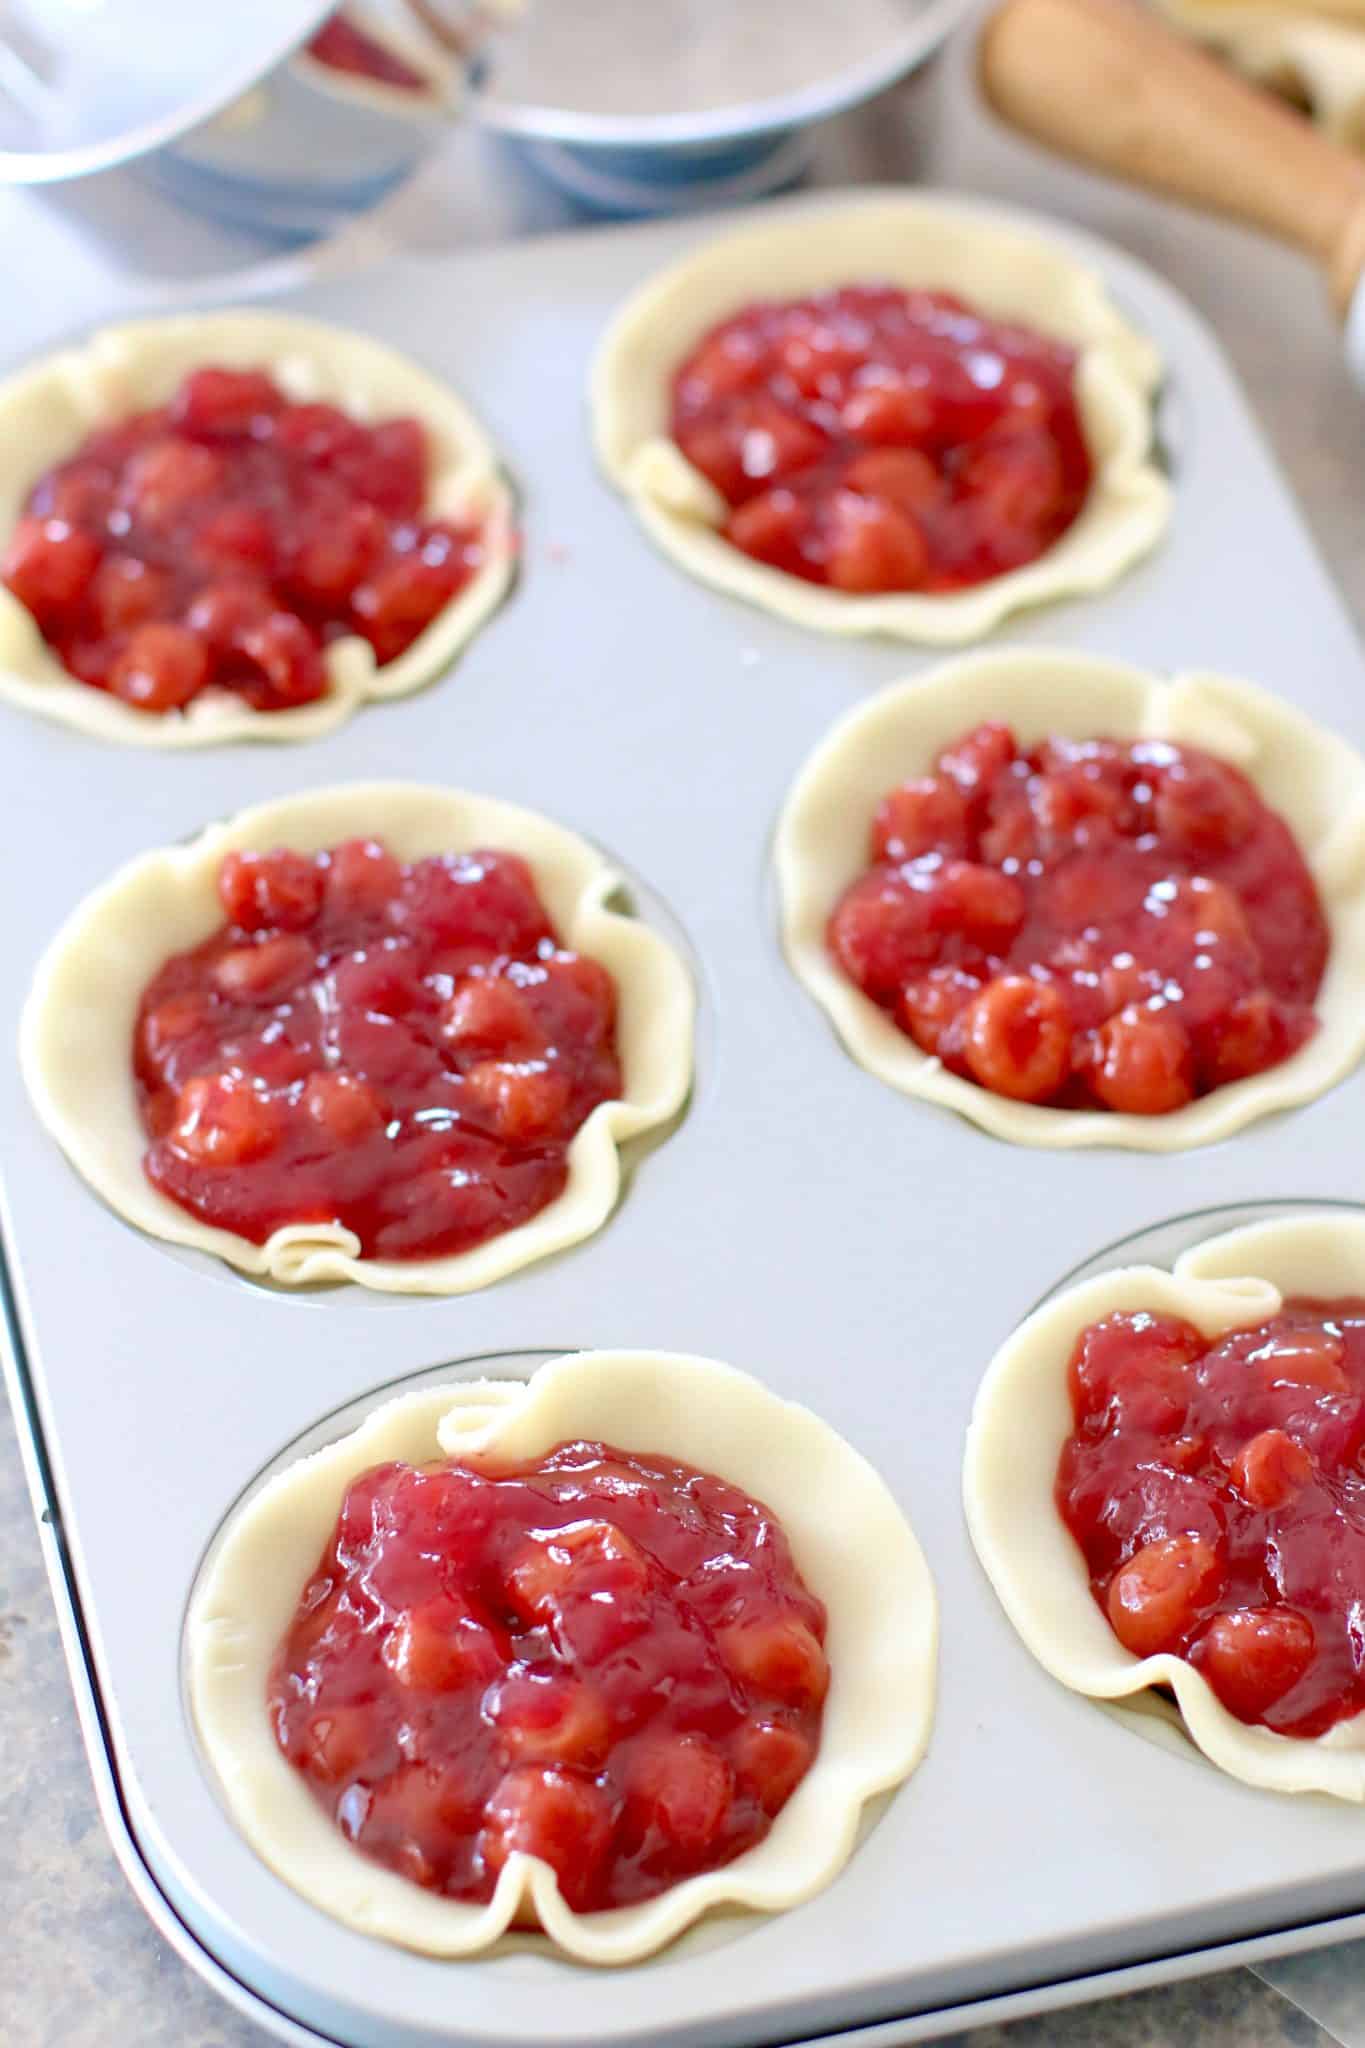
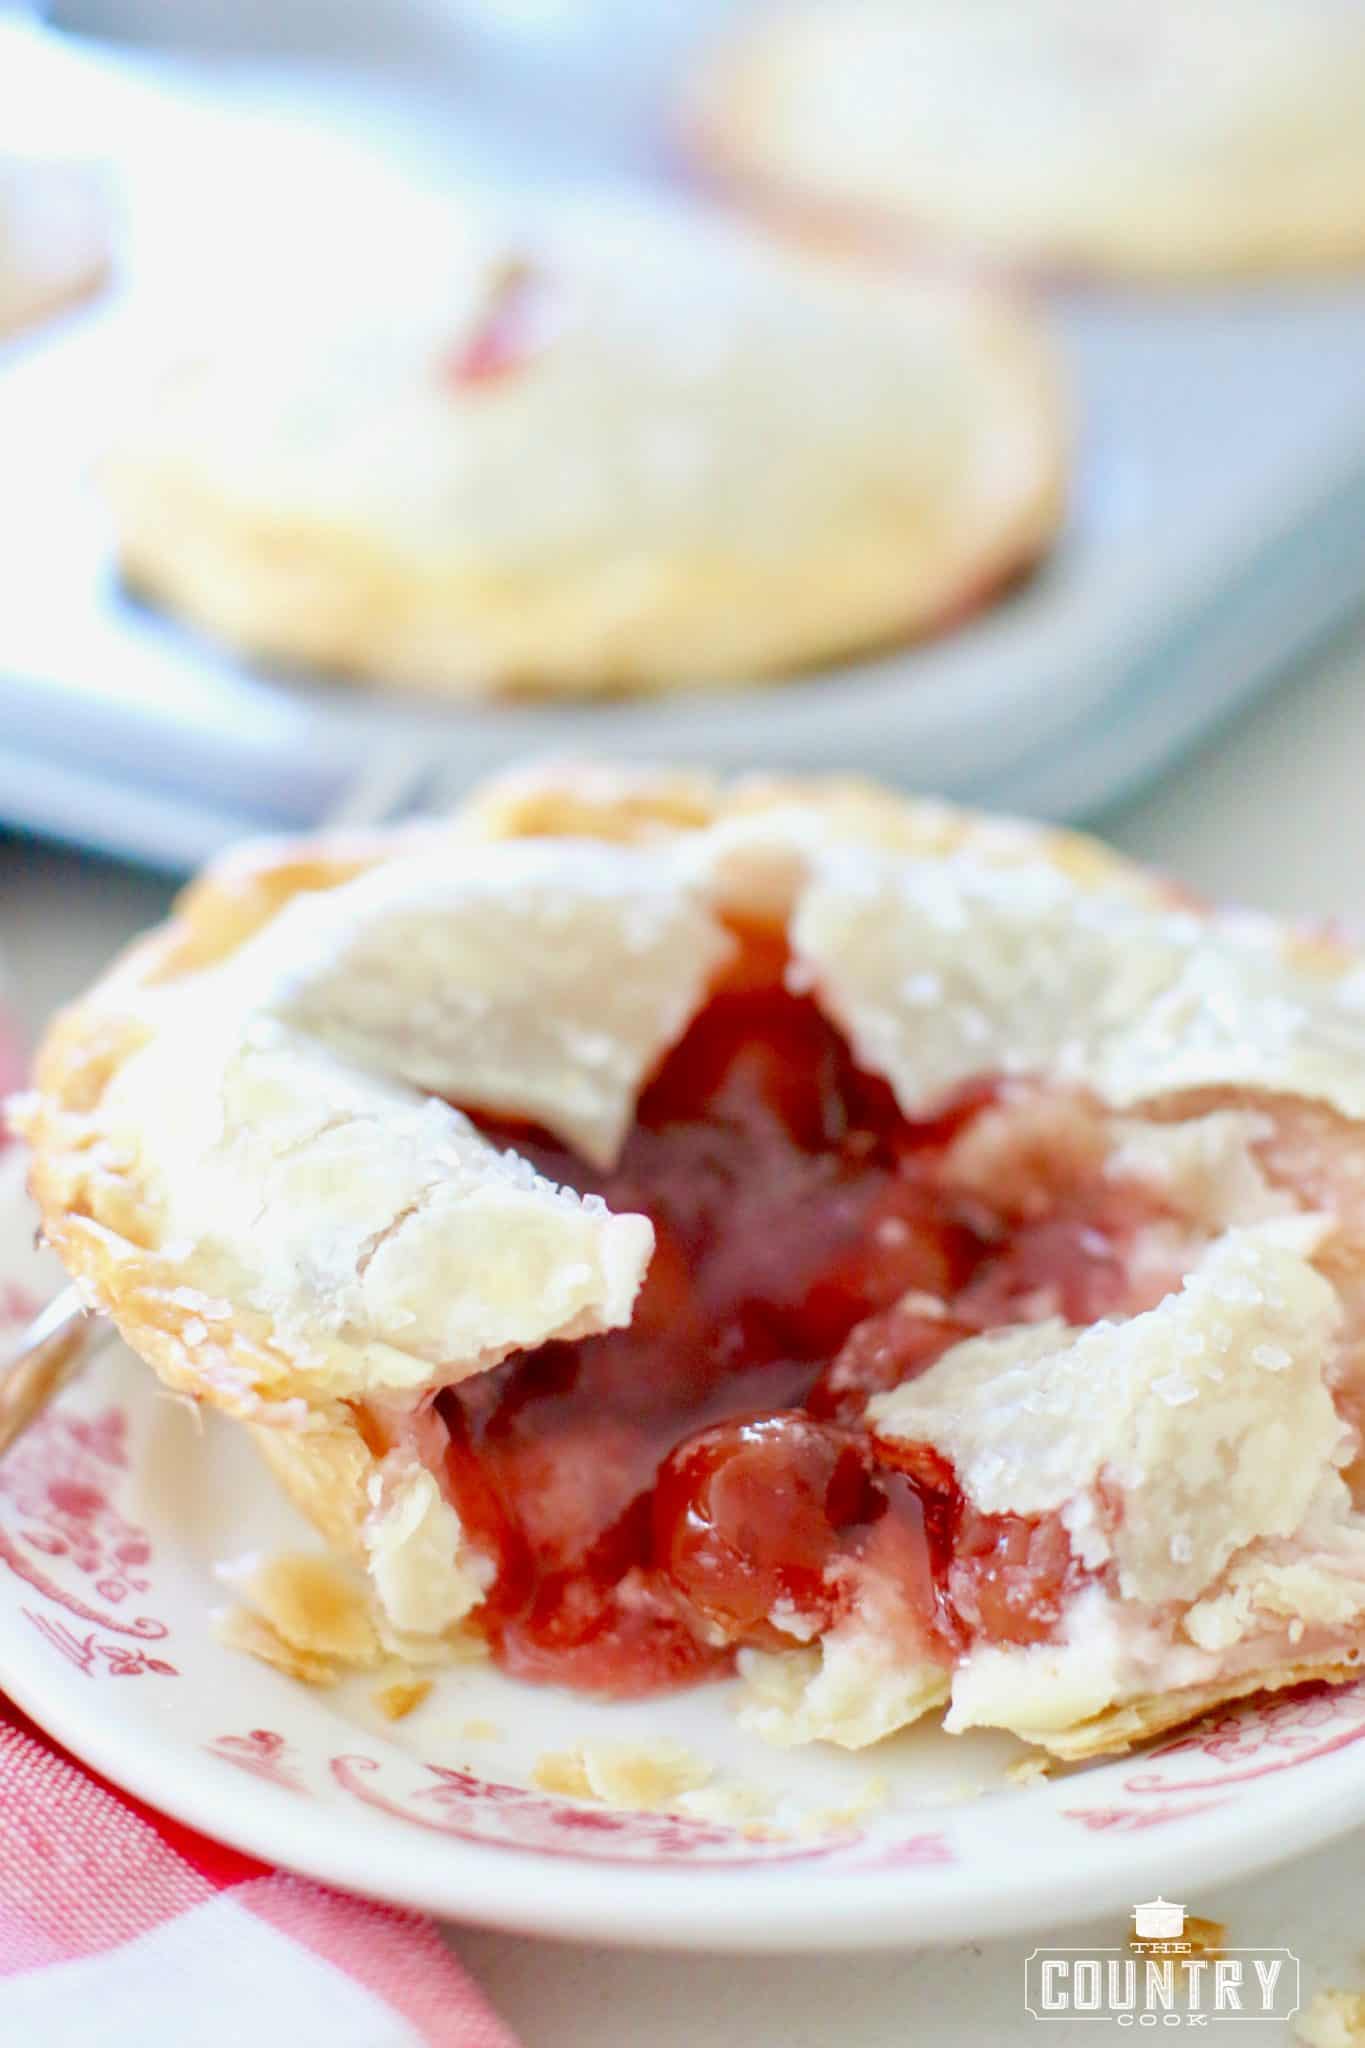
Spoon 2 tablespoons of the cream cheese mixture into the bottom of each pie.

Then spoon 3 tablespoons of the pie filling on top of the cream cheese mixture.
Whisk together beaten egg and water. Take your finger, dip it in the beaten egg.
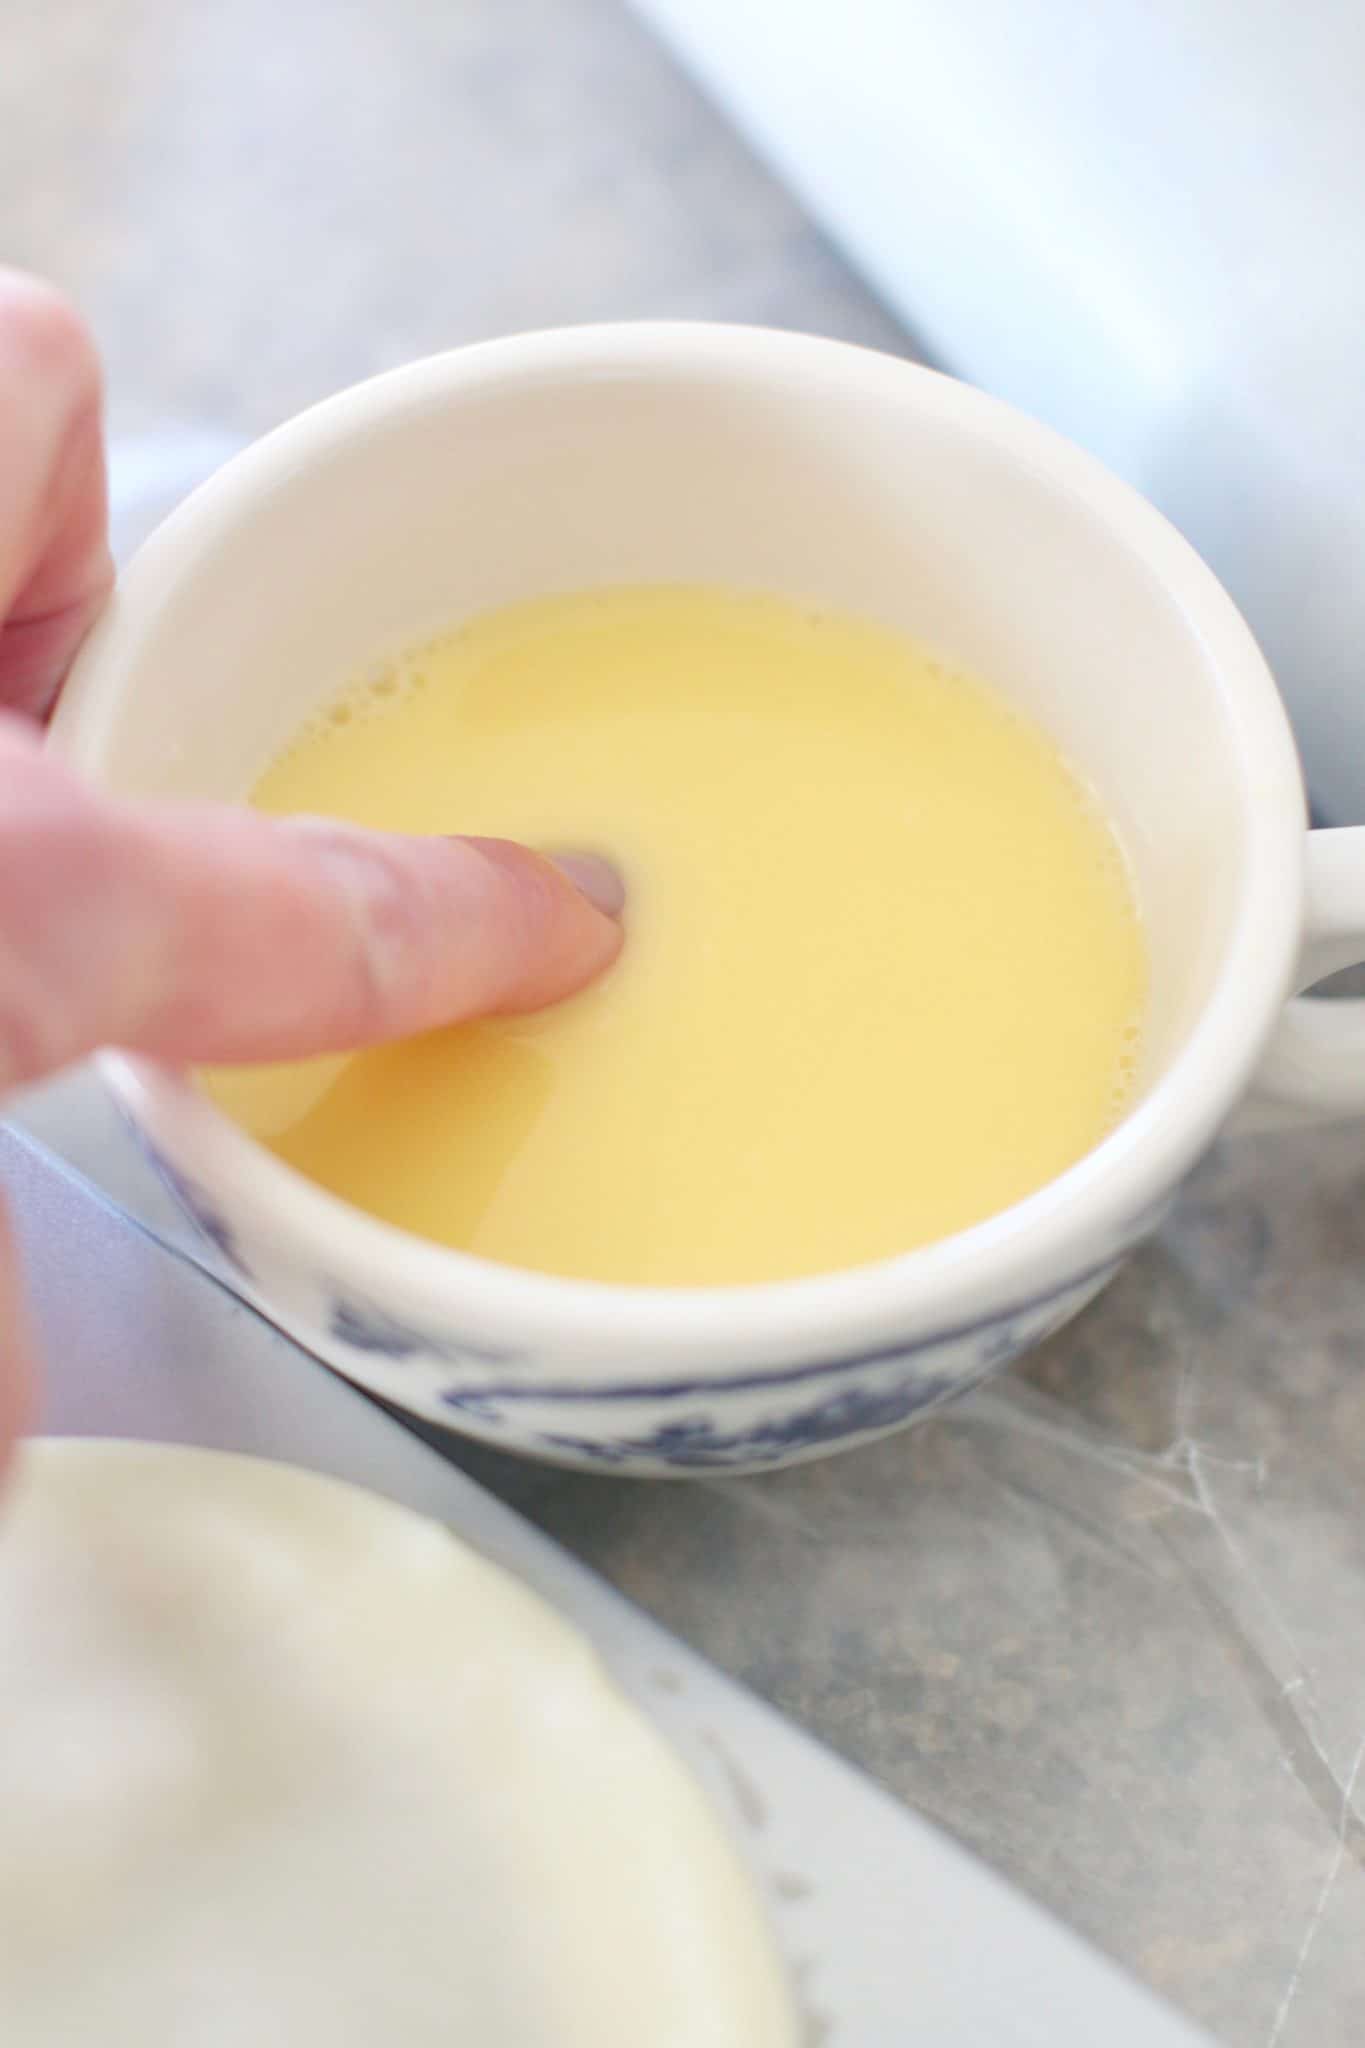
Then run your finger around the inside edge of each pie.
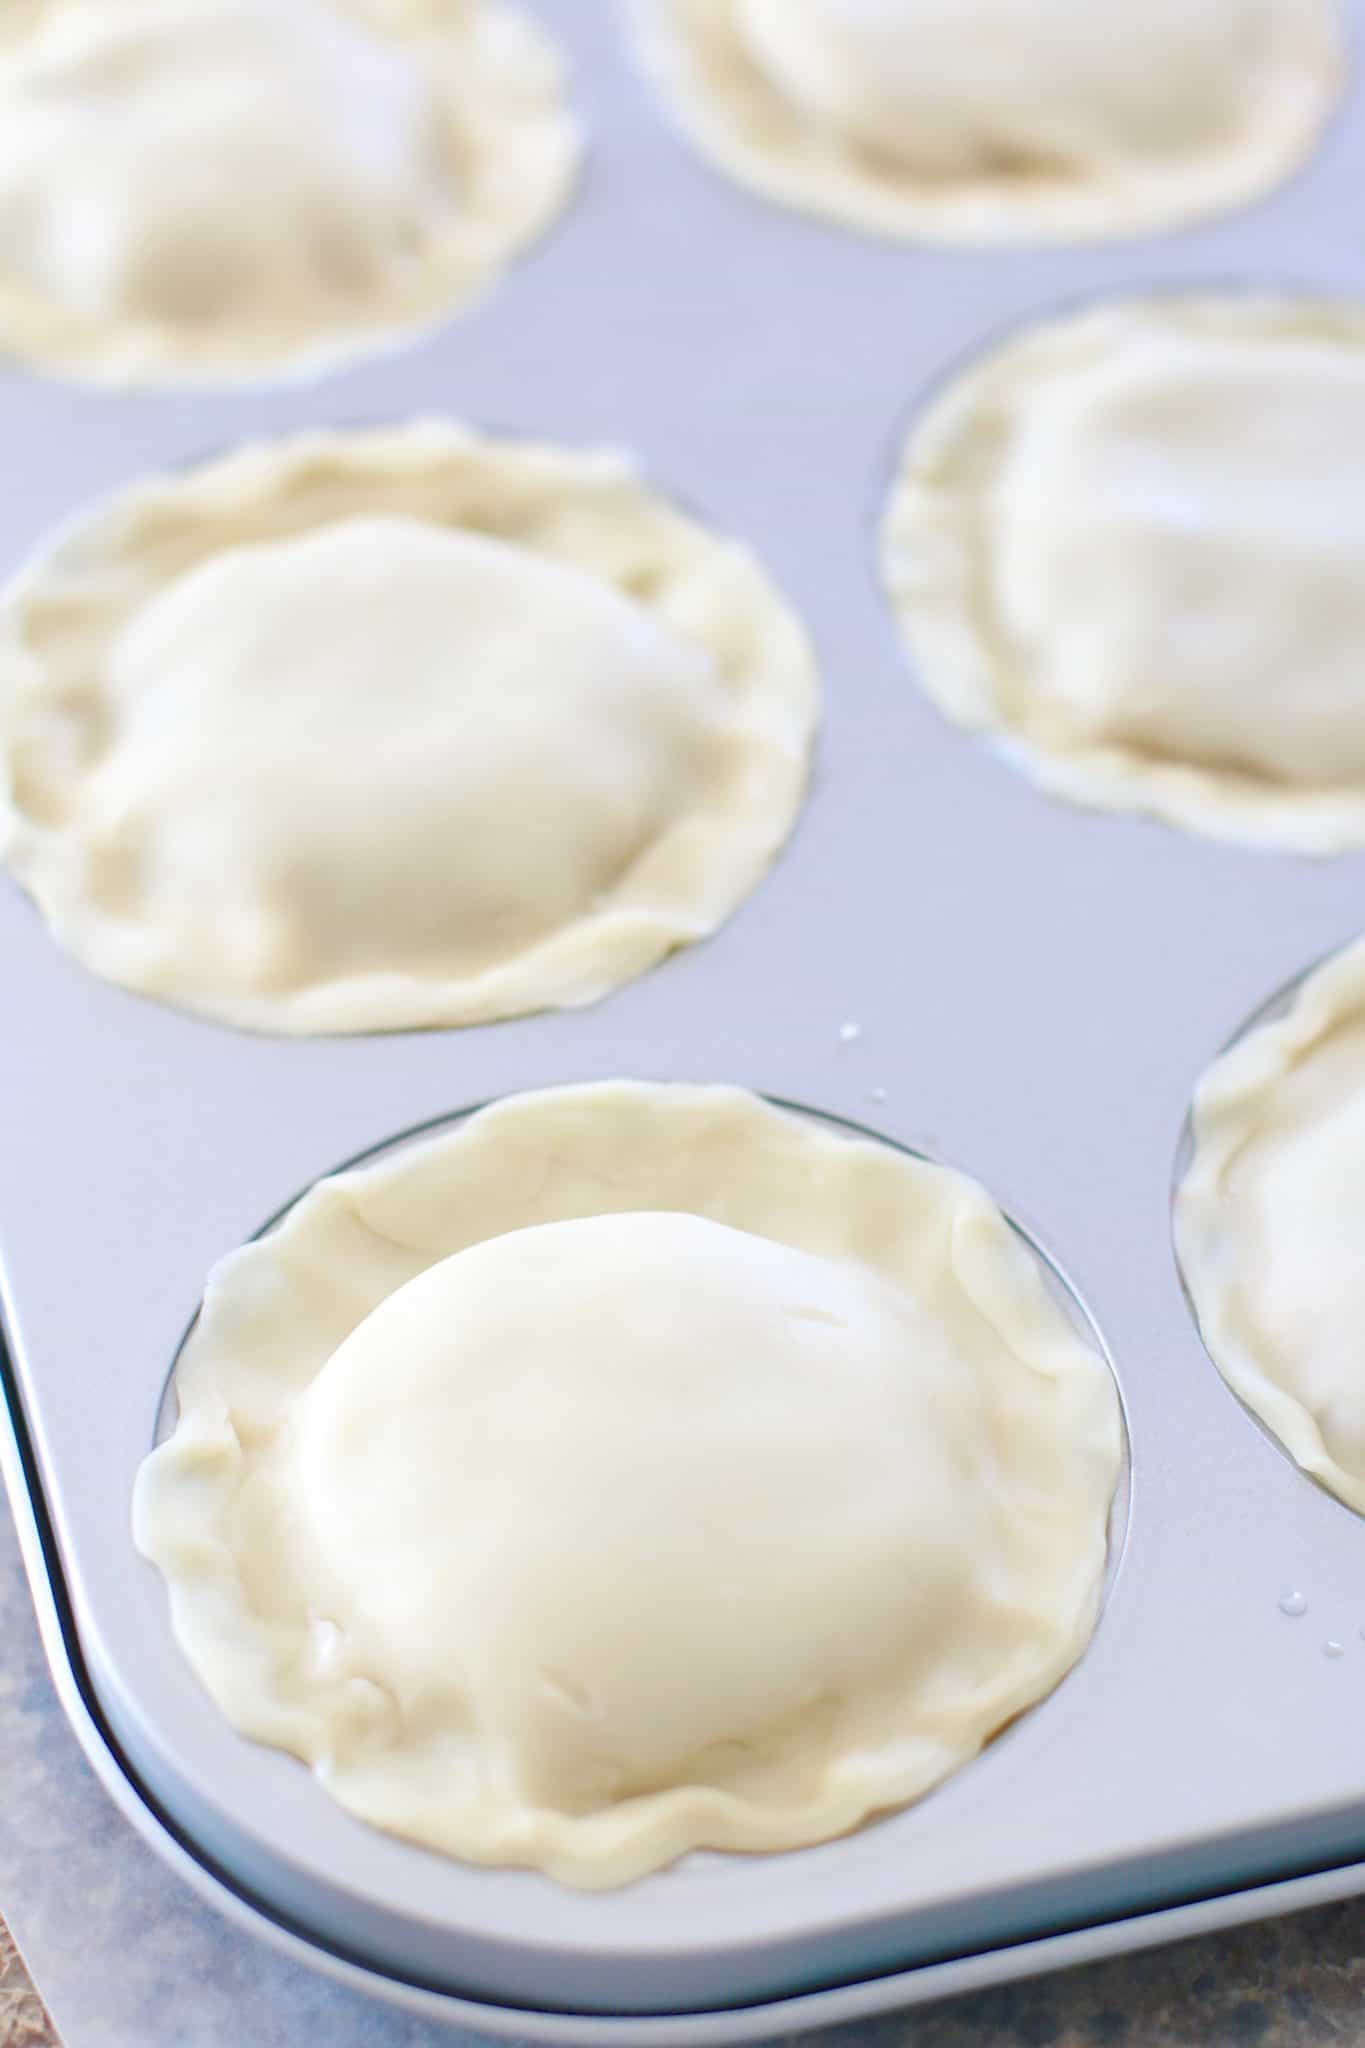
Place the remaining smaller pie crust on top to cover and seal each pie.
Pinch the top and bottom dough together and press it into the scalloped rim.
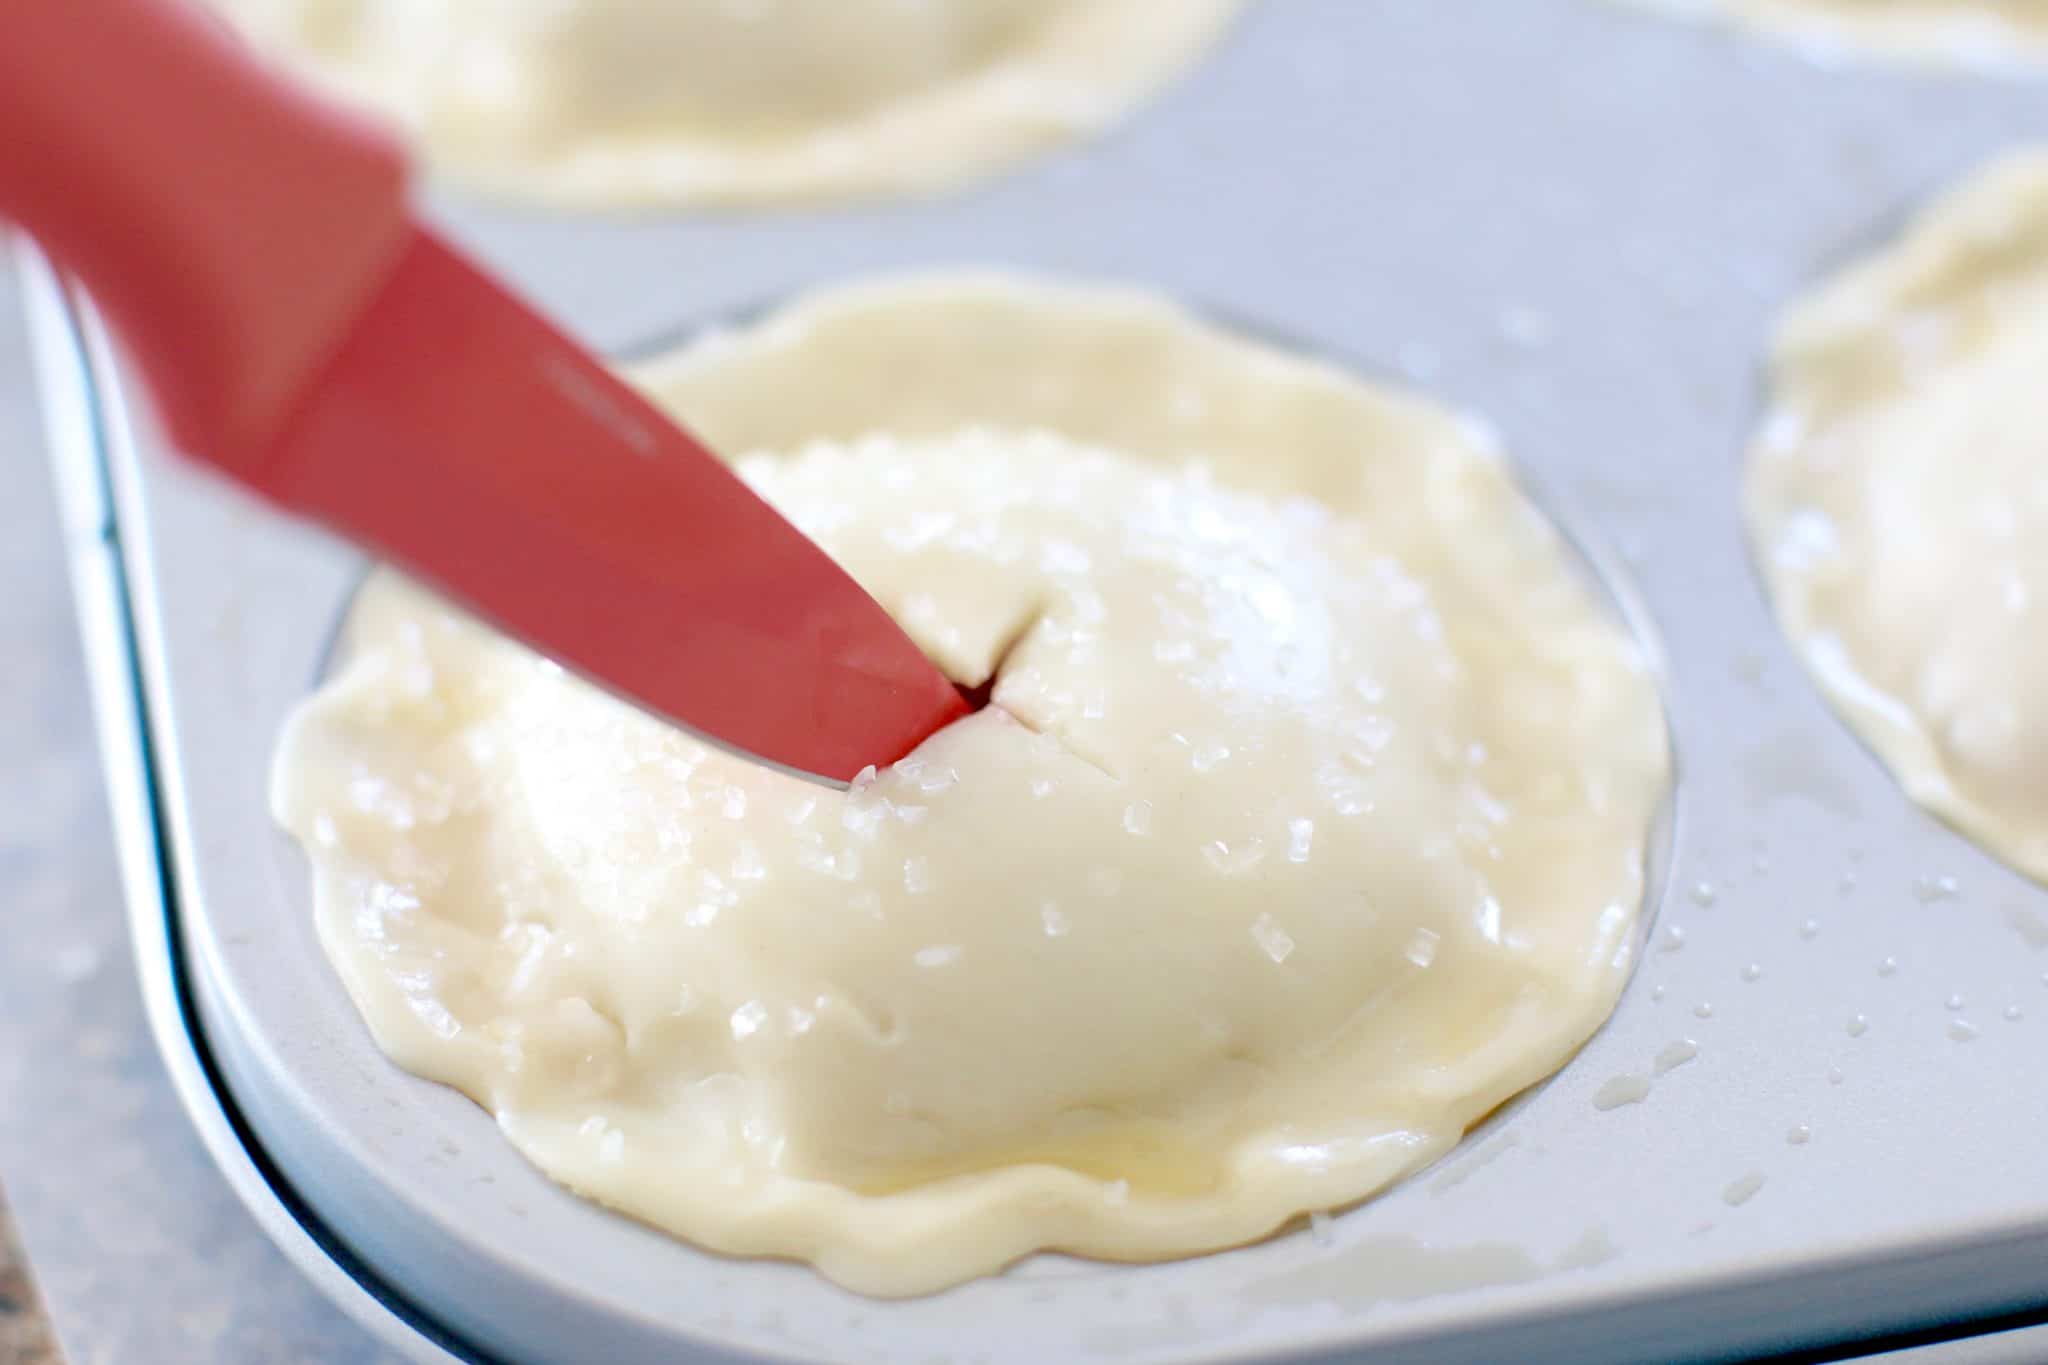
Brush the tops of each pie with a little bit of the egg wash. If you don’t have a pastry brush, just dip a clean paper bowl into the egg wash. Sprinkle each pie with sugar.

Cut 2 slits in the top of each pie. This lets the steam out as they cook so they don’t burst or get soggy.
Bake for 18-20 minutes or until golden brown.
The filling will be extremely hot so make sure you allow them to cool slightly before eating.
CRAVING MORE RECIPES?
Mini Cherry Cheesecake Pies
Ingredients
- 2 refrigerated pie crusts (2 crusts come in one box)
- 8 ounce block cream cheese softened to room temp.
- ¼ cup sugar
- 1 tsp vanilla extract
- 21 ounce can cherry pie filling
- 1 large beaten egg
- 1 tablespoon water
- 1 tablespoon sugar
Instructions
- Pre-heat oven to 400 degrees. In a small bowl, mix together cream cheese, sugar, and vanilla extract. Set aside.
- Unroll the pie crusts onto a lightly floured surface. Or roll out some wax paper to make for easier clean up. Cut 3 circles from each crust with the large Pie Dough Cutter. Place the circles into the wells of the Mini Pie Pan, pressing the dough into the bottom and up the sides of the pan.
- Roll out the remaining dough with the Marble Rolling Pin to ⅛-” (3-cm) thick. Cut 6 circles with the small Pie Dough Cutter. Set aside.
- Spoon 2 tablespoons of the cream cheese mixture into the bottom of each pie.
- Then spoon 3 tablespoons of the pie filling and spoon it on top of the cream cheese mixture.
- Whisk together beaten egg and water. Take your finger, dip it in the beaten egg and run it around the inside edge of each pie then place the remaining smaller pie crust on top to cover and seal each pie. Pinch the top and bottom dough together and press it into the scalloped rim.
- Brush the tops of each pie with a little bit of the egg wash and then sprinkle each pie with sugar.
- Cut 2 slits in the top of each pie. This lets the steam out as they cook so they don’t burst or get soggy.
- Bake for 18-20 minutes or until golden brown. The filling will be extremely hot so make sure you allow them to cool slightly before eating.
Notes
Nutrition
Nutritional Disclaimer
“The Country Cook” is not a dietician or nutritionist, and any nutritional information shared is an estimate. If calorie count and other nutritional values are important to you, we recommend running the ingredients through whichever online nutritional calculator you prefer. Calories and other nutritional values can vary quite a bit depending on which brands were used.


Looks yummy and have all the ingredients except the mini pie tins. Can I use a muffin tin ?
You should be able to. You might need to adjust the bake time slightly 🙂
If you make this in one large pie, is the cooking temperature and baking time the same? Thanks in advance.
Can these be served cold or hot? Which is better? Want to make them but need to make ahead of time so want to serve cold… thanks
Should this be served warm or is it ok cold.
Hi Katie, it depends on your tastes but it can be served either way!
My name is Diane Roark. I am very interested in promoting pampered chef on my blog. I have not signed up yet because I am looking for someone to mentor me. After searching the web for a blogger who promotes Pampered Chef, I came across your blog.
I would be glad to send you my media kit if you would like to see how my blog does and if it would be a good fit for Pampered Chef. I love their products and think they would be a great fit and something I could use in every post.