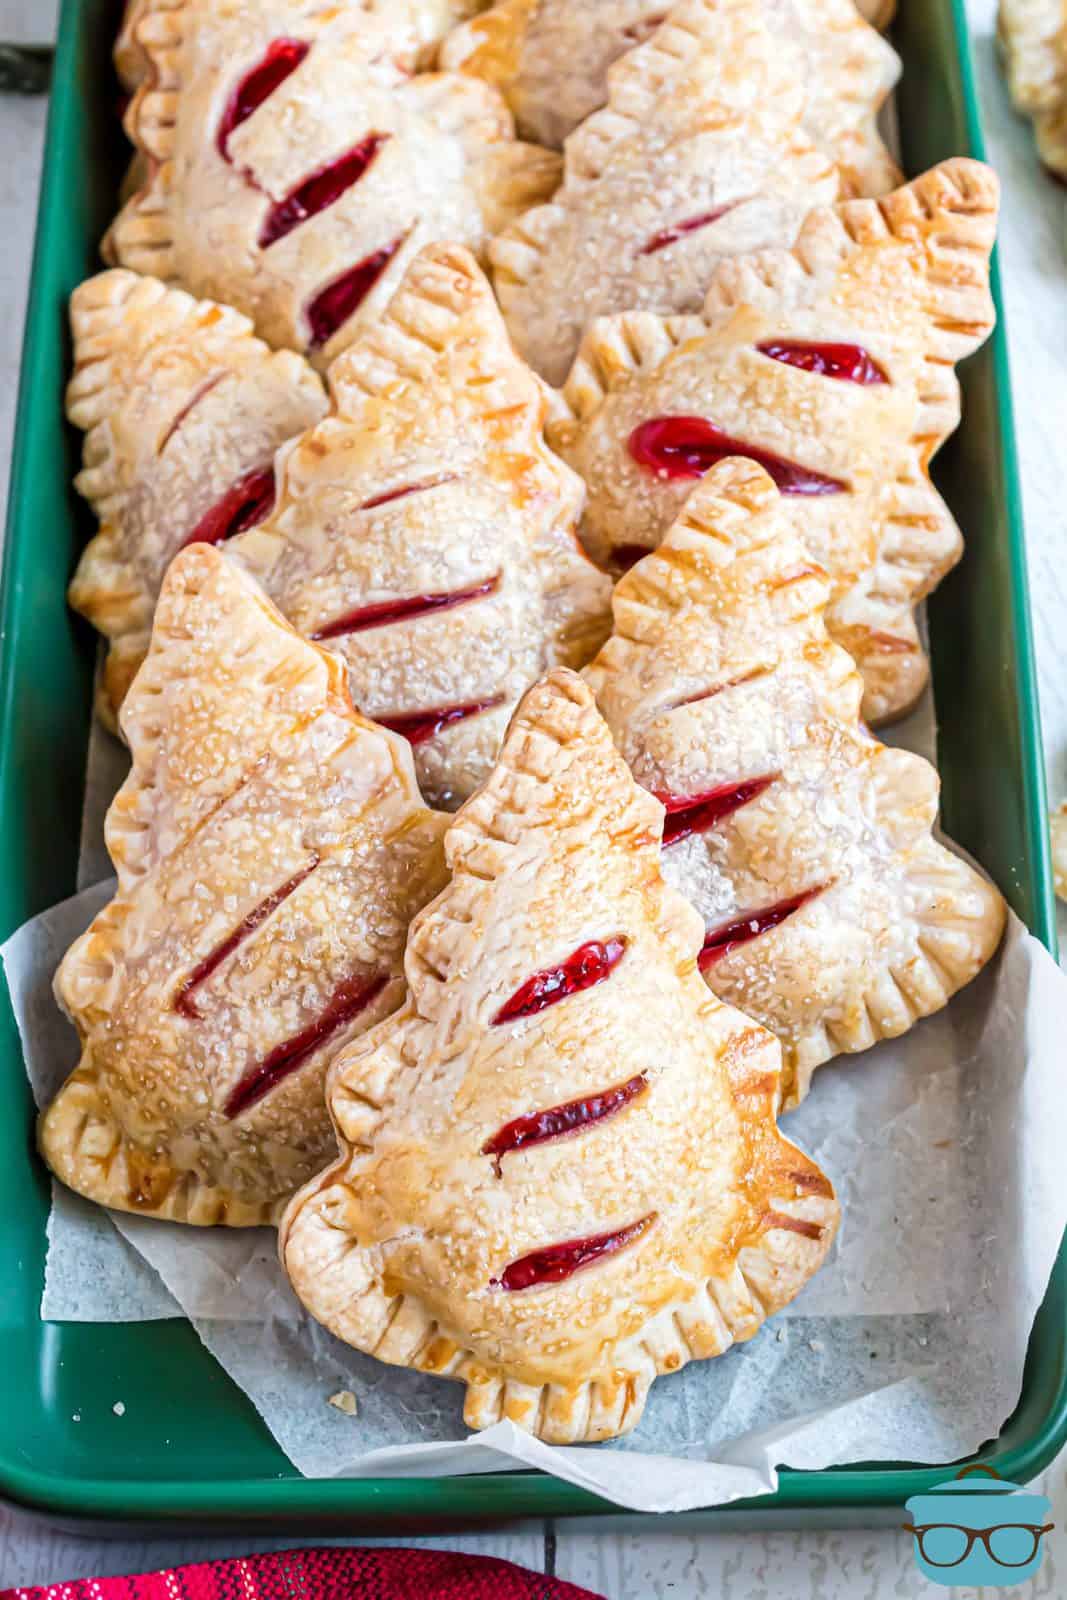
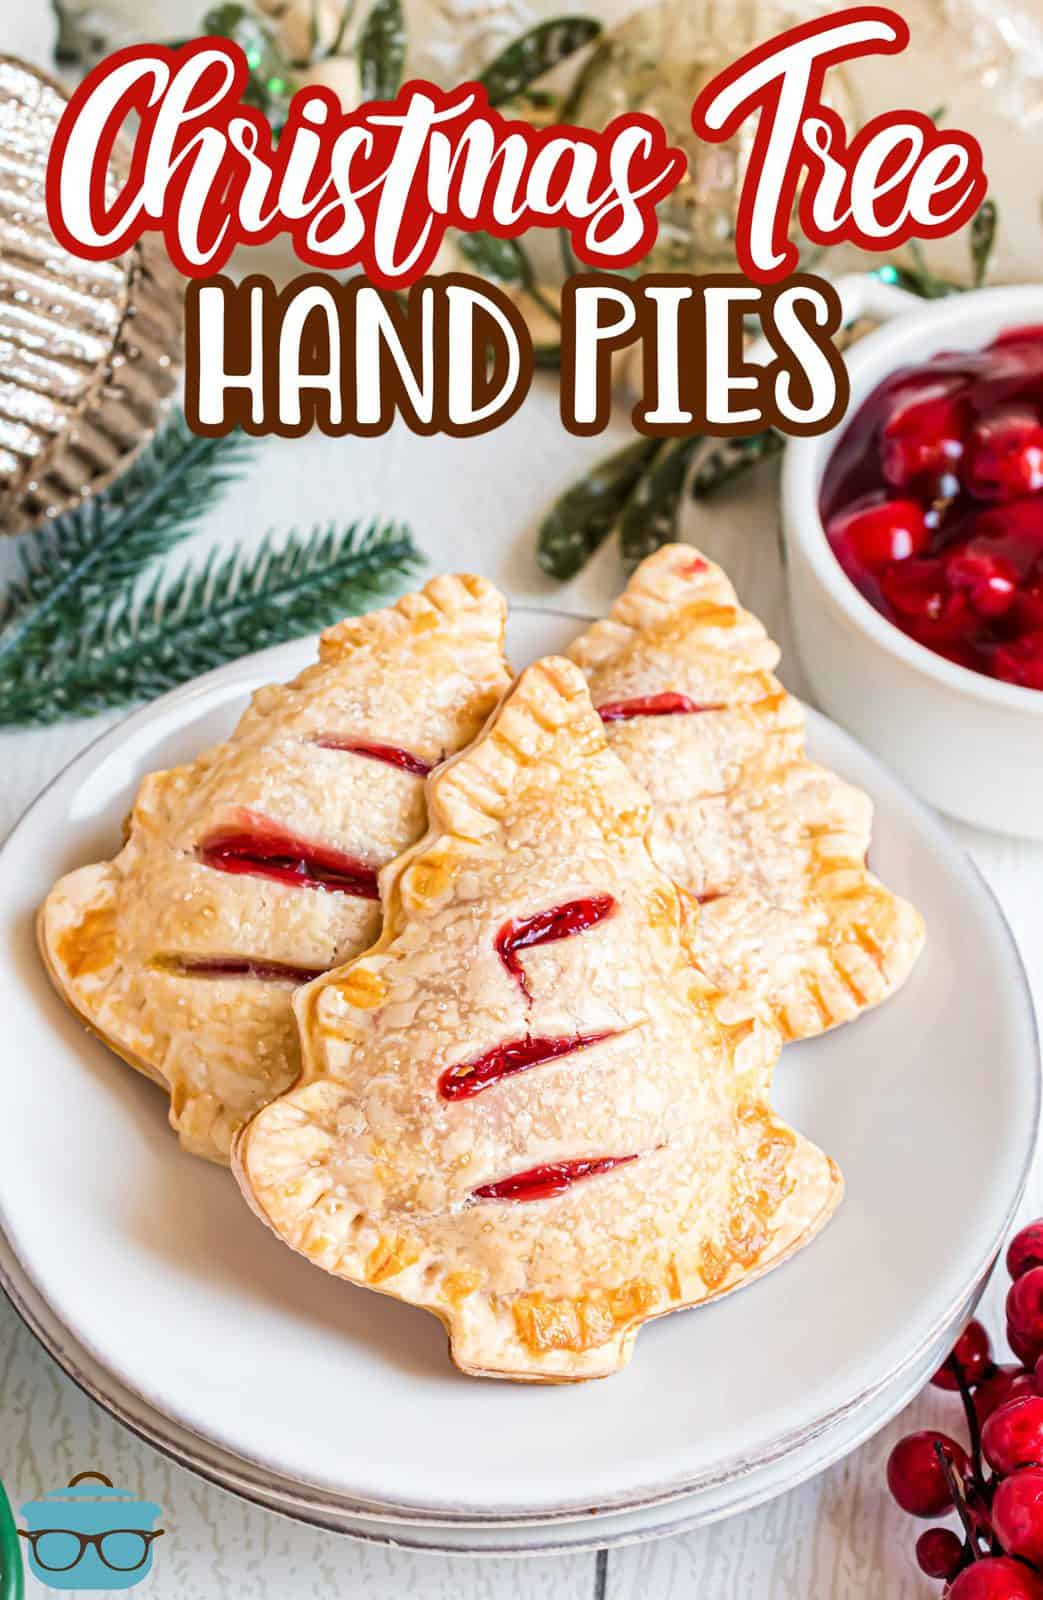
Christmas Tree Hand Pies
An easy holiday treat, these Christmas Tree Hand Pies use minimal ingredients, have a delicious pie filling, and are fun for everyone!
A FUN HOLIDAY TREAT
I love hand pies! I love pie in general, but hand pies are so much quicker and easier to make. These Christmas Tree Hand Pies are a super easy, fun and tasty holiday treat that we love to make and bring to gatherings. It makes a nice large batch too so you could freeze some for later if you want! I love hand held treats because it just makes so much less mess when making and it’s so much easier to serve. So this recipe is great option for the holiday season. If you are a hand pie lover like me, then you have to make this Christmas Tree Hand Pie recipe!
FREQUENTLY ASKED QUESTIONS:
A hand pie is a mini or hand-sized version of a regular-sized pie. The hand version makes it convenient to eat and is the perfect serving size! Hand pies are usually circular all the way around but in this case it is tree-shaped. The filling, sometimes savory and sometimes sweet, is on the inside, and the crust is sealed on all sides. It’s different from a turnover because turnovers are made with a folded piece of dough and are usually made from puff pastry.
Absolutely! We love cherry as it is more holiday colored and themed. You can also use blueberry, apple, peach, strawberry and more.
Two boxes of refrigerated pie crusts will make about 18-20. You will have leftover cherry pie filling.
Using an egg wash helps the crust become a wonderful golden-brown color when baking.
This helps vent the pies so the steam can escape from inside and you don’t have pies that blow out the side of the seams.
No, you do not. We love using it as it adds a pretty finish and a sweet topping that is perfect with each bite. You could even make a quick powdered sugar glaze and drizzle that on top!
These are best eaten the same day they are made. However, you can store them in an airtight container at room temperature for one day. Then move them to the refrigerator for up to 3 days after that. These can also be frozen. Place them on a baking sheet, in a single layer, and put the sheet in the freezer, just until the pies are frozen. This is called flash-freezing. Then, place them in freezer bags for up to 2 months. Thaw in the refrigerator and serve at room temperature or warm up in the microwave or air fryer.
INGREDIENTS NEEDED: (FULL RECIPE AT THE BOTTOM OF THE POST)
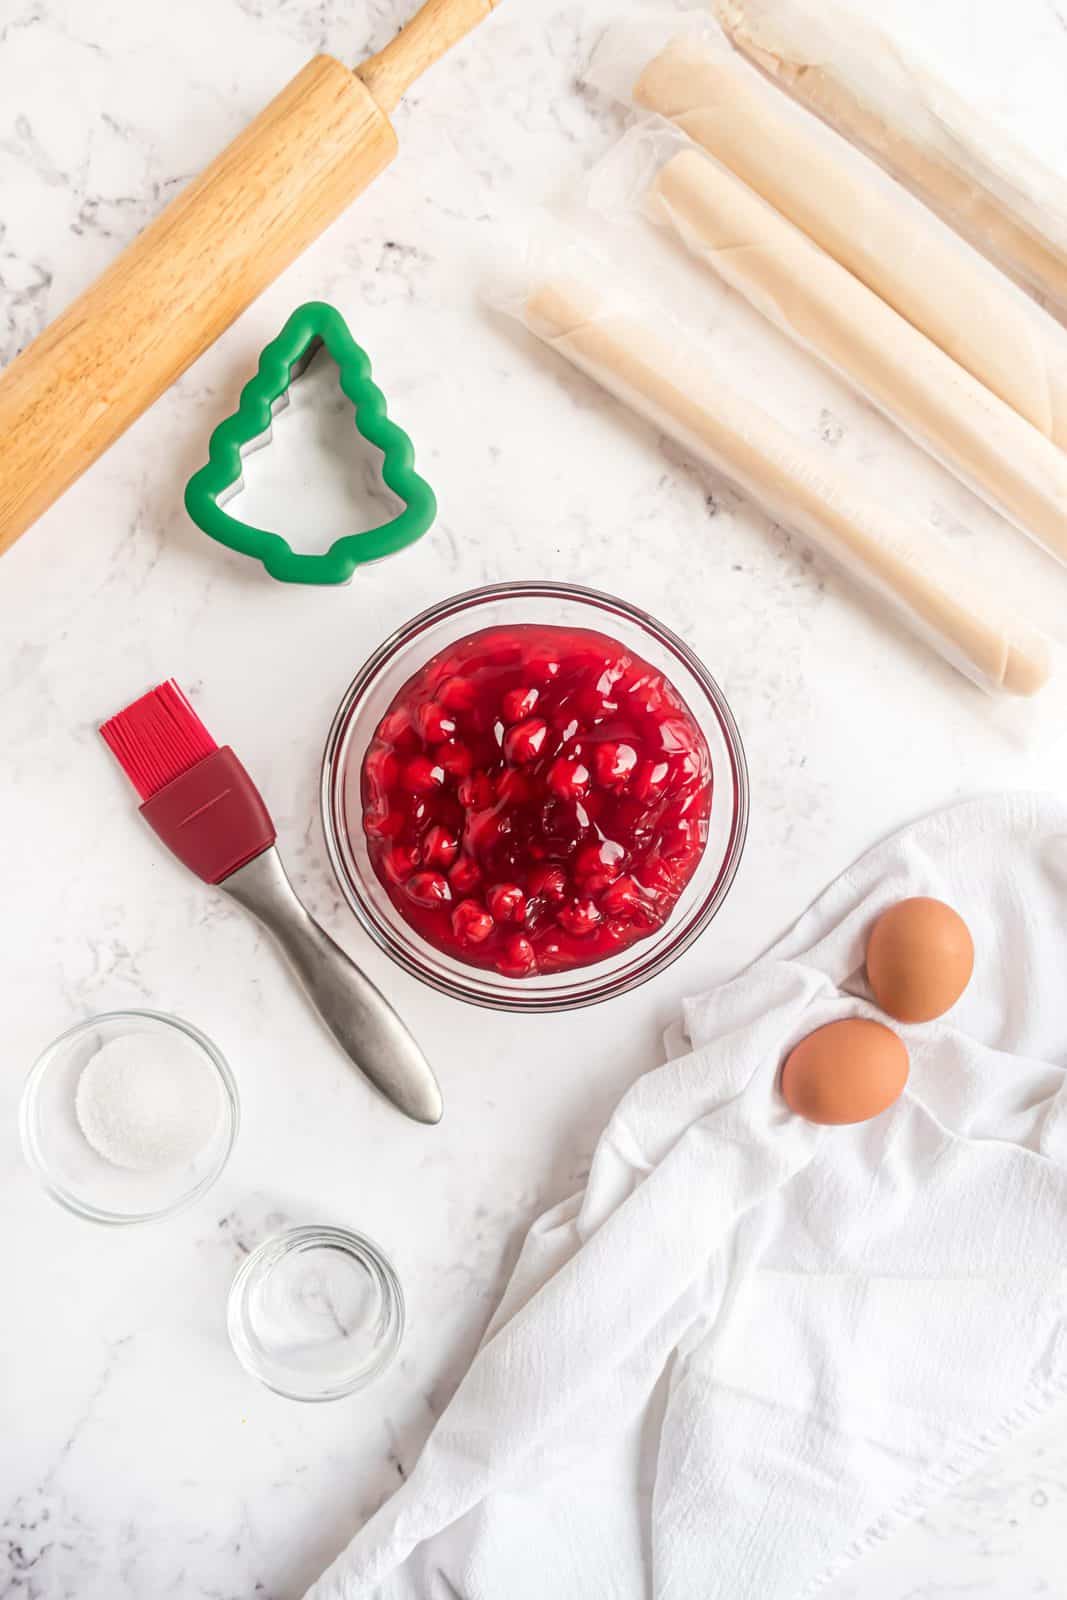
- refrigerated pie crust
- cherry pie filling
- eggs
- water
- coarse sanding sugar (optional)
HOW TO MAKE HAND PIES:
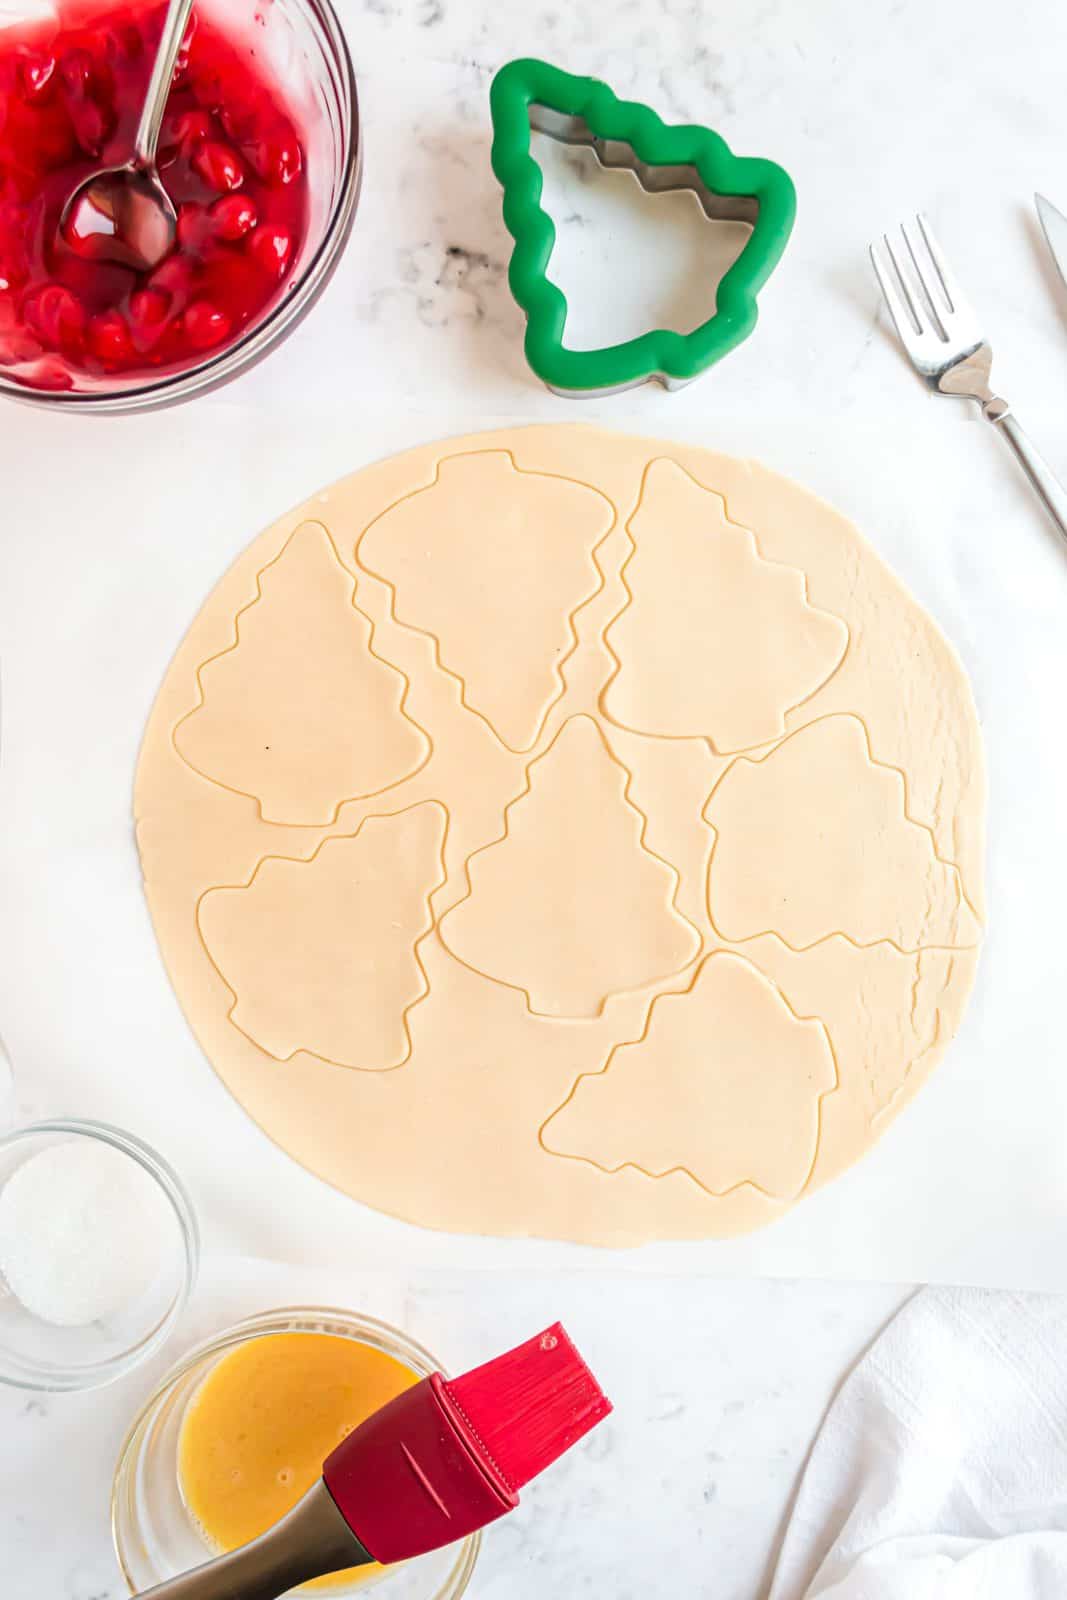
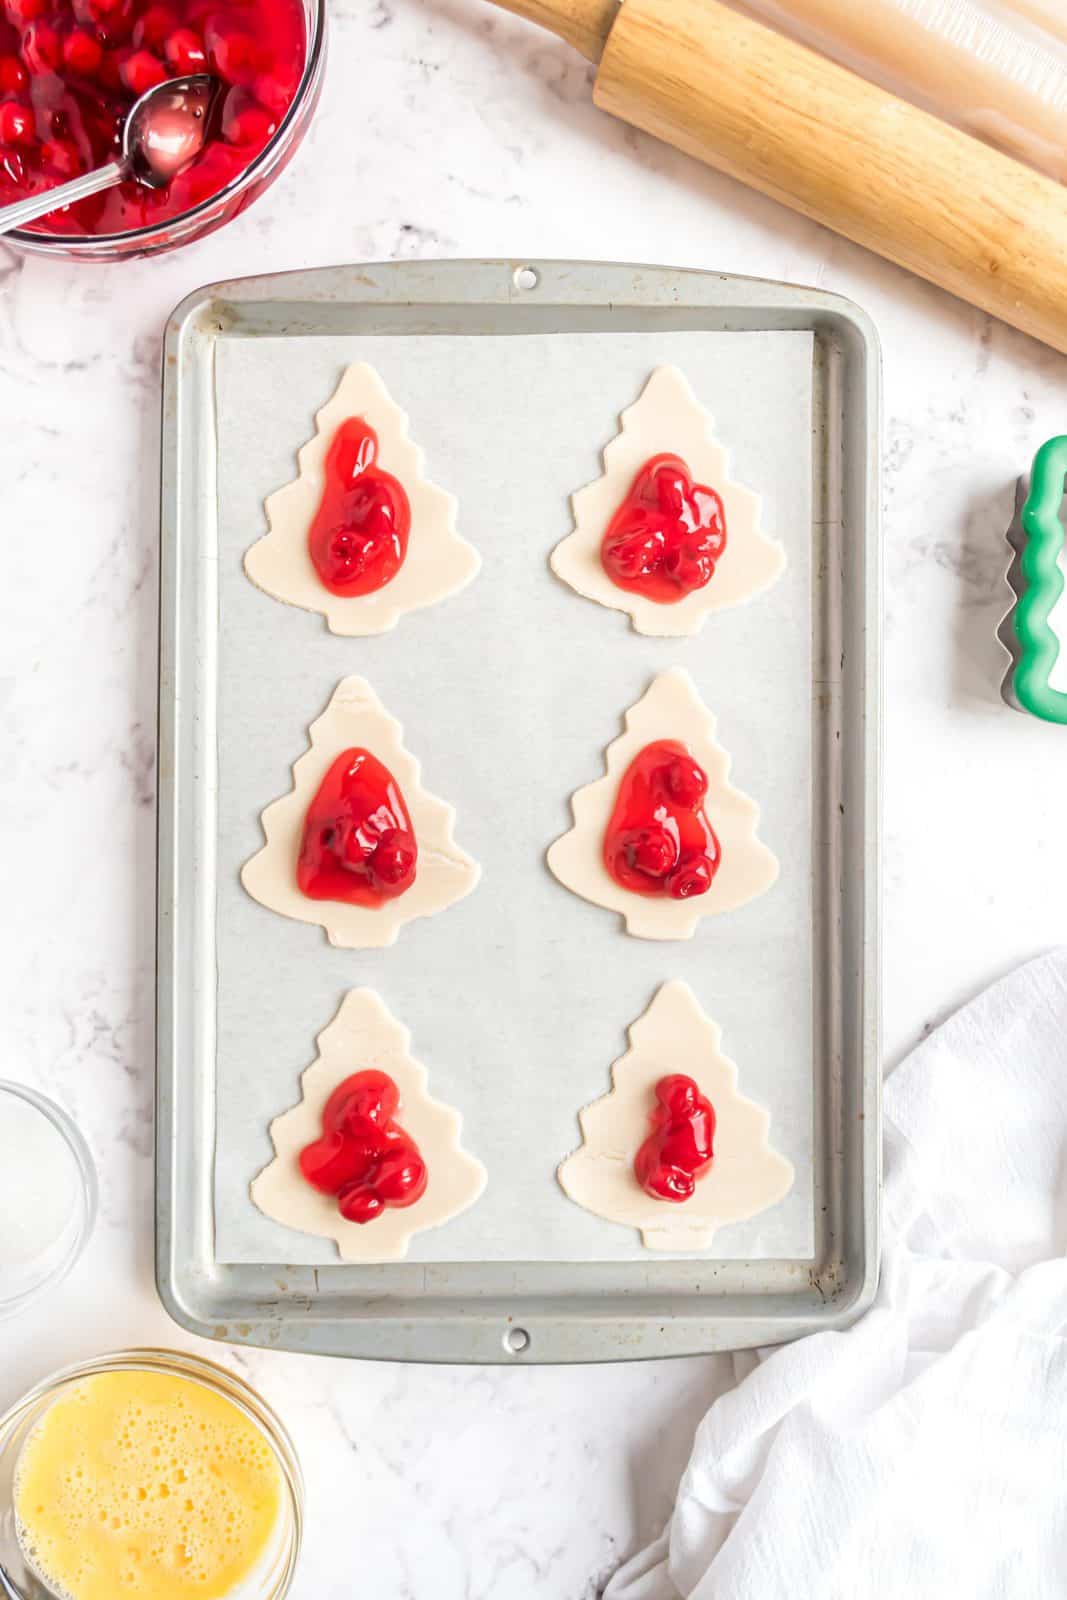
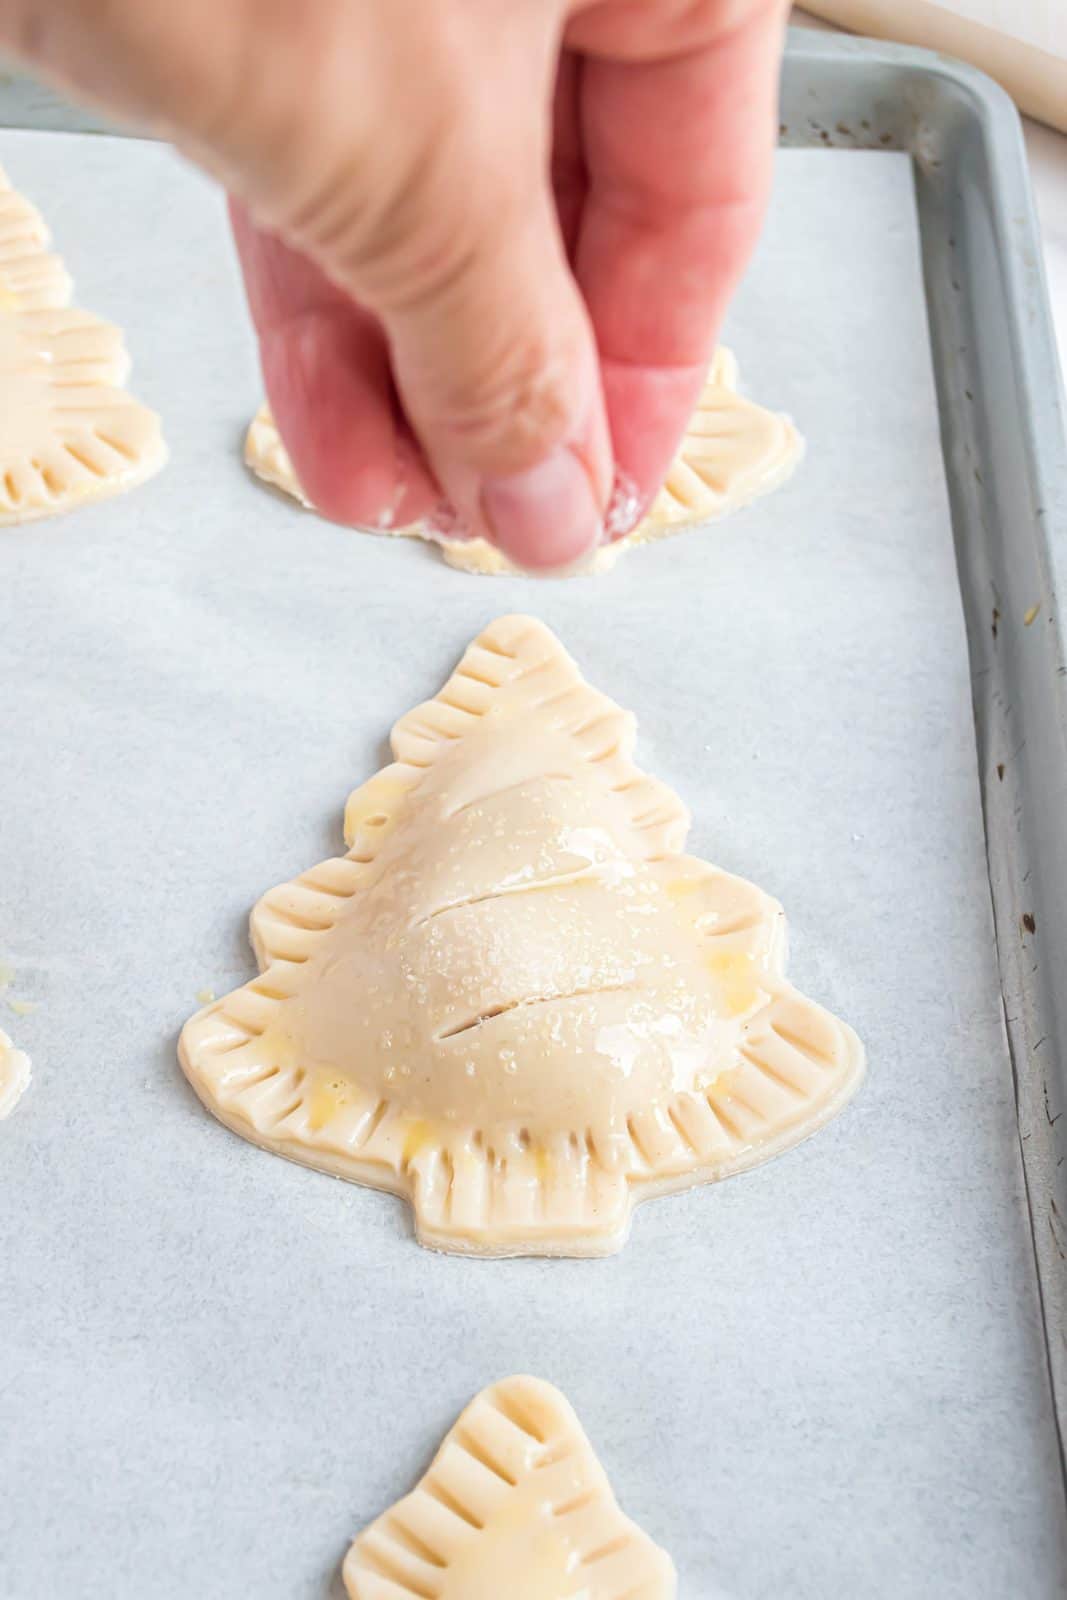
Preheat oven to 350℉. Thaw the ready-made pie crust, according to package directions. Line a large baking sheet with parchment paper. Set aside. In a small bowl, whisk eggs and water together, set aside. Using a rolling pin, roll out one thawed pie crust, ensuring there are no cracks or holes. The crust should be between ¼” and ⅛” thick. Using a holiday tree cookie cutter, cut out 7 trees. Save the excess crust.
Place trees on the parchment lined baking sheet and spoon about 1 – 1 ½ Tablespoons of cherry pie filling into the center of each tree.
Brush the border around the filling with egg wash.
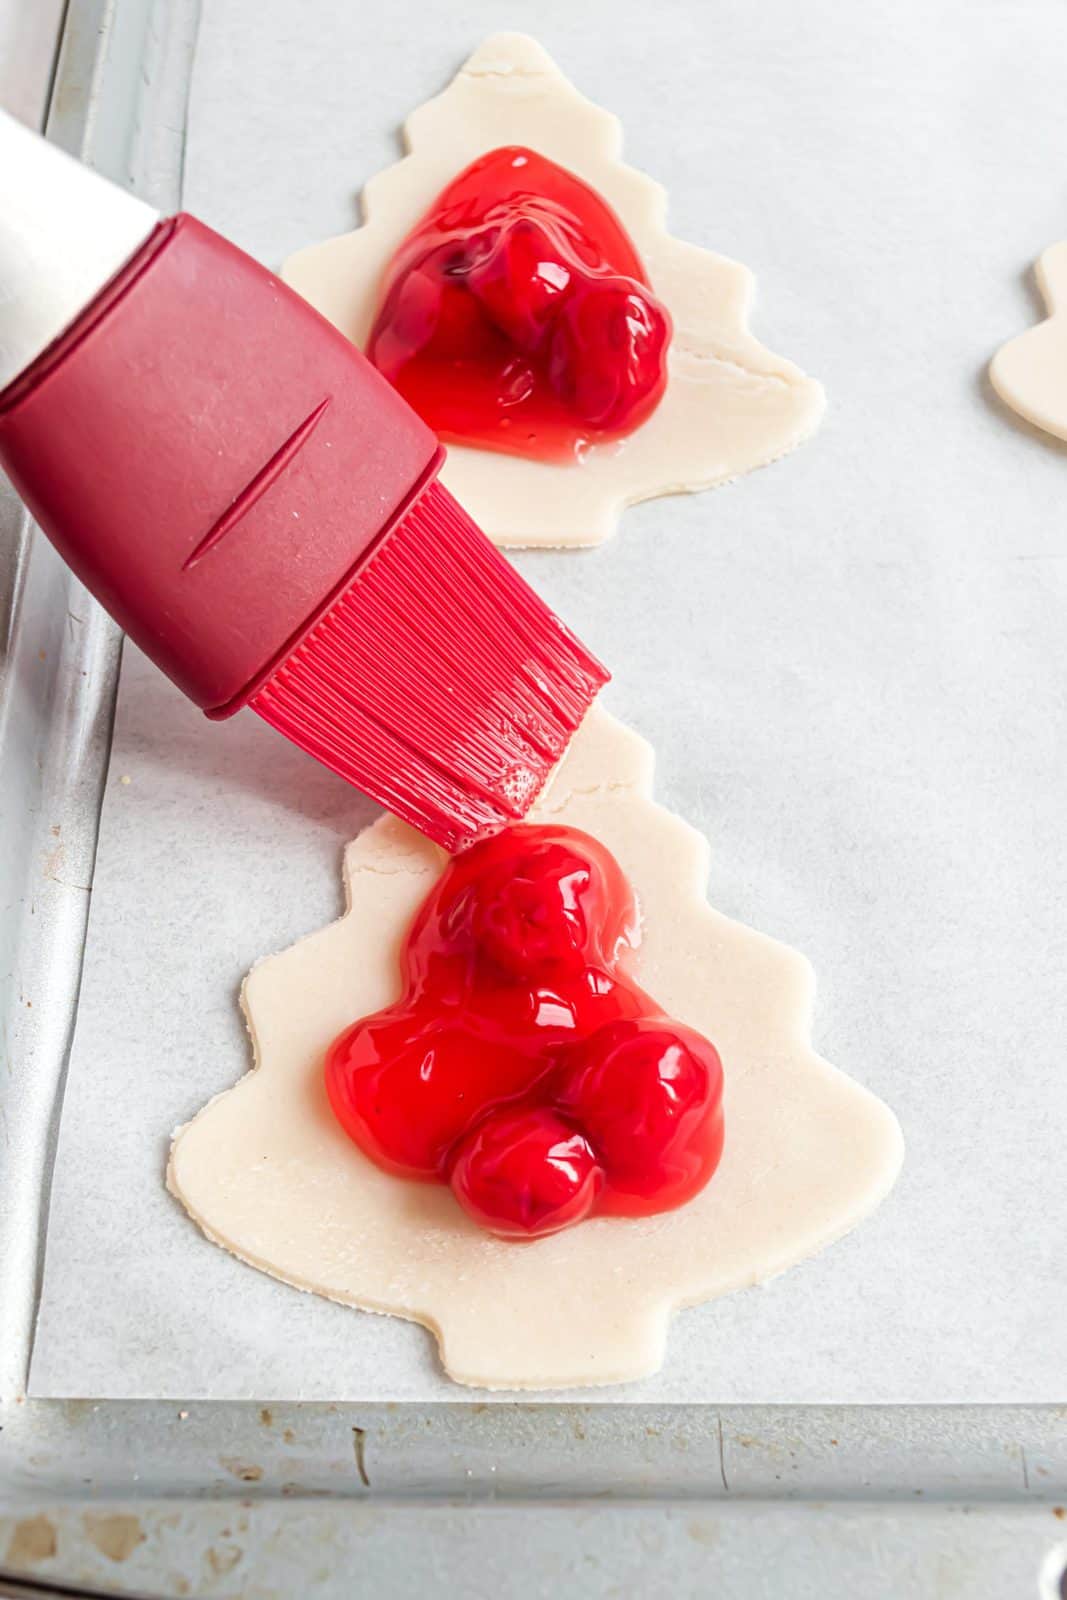
Roll out a second pie crust and cut out 7 more trees. Save the excess crust. Gently place the trees over the top of the filling. Starting at the trunk, lightly press the edges together, making sure not to press down on the filling. Using the tines of a fork, press the seams together, working around the outline of the tree.
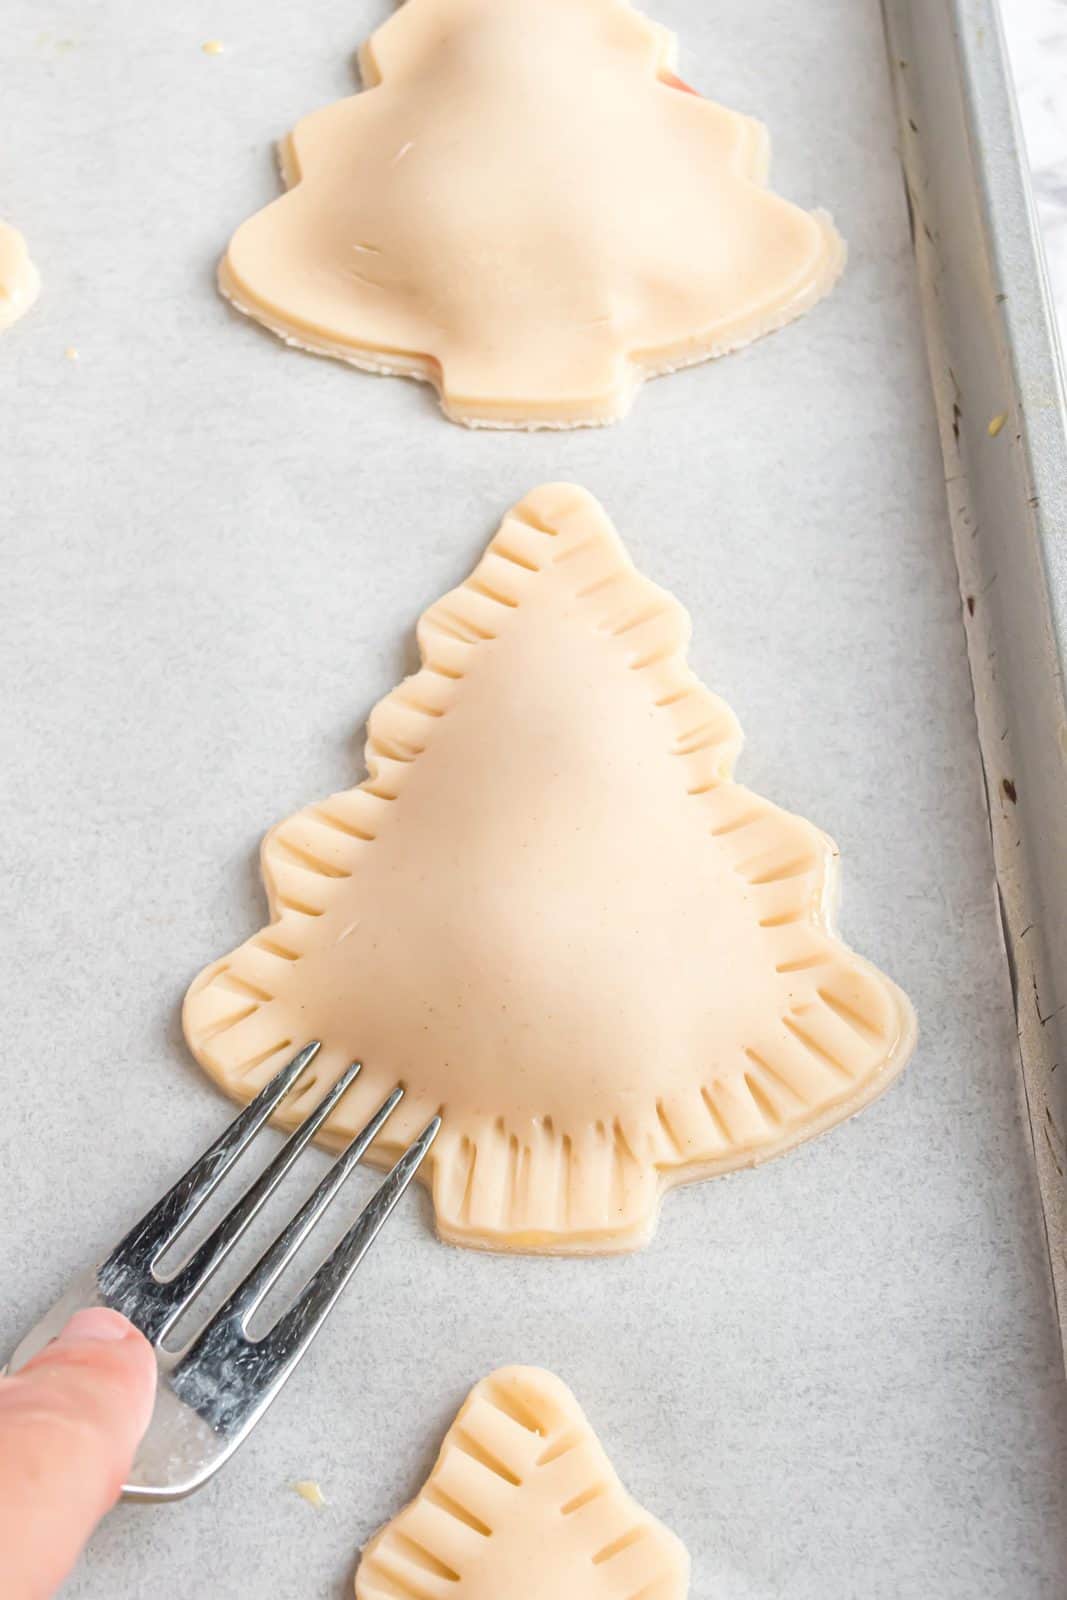
Using a sharp knife, make a few slits in the top crust for venting.
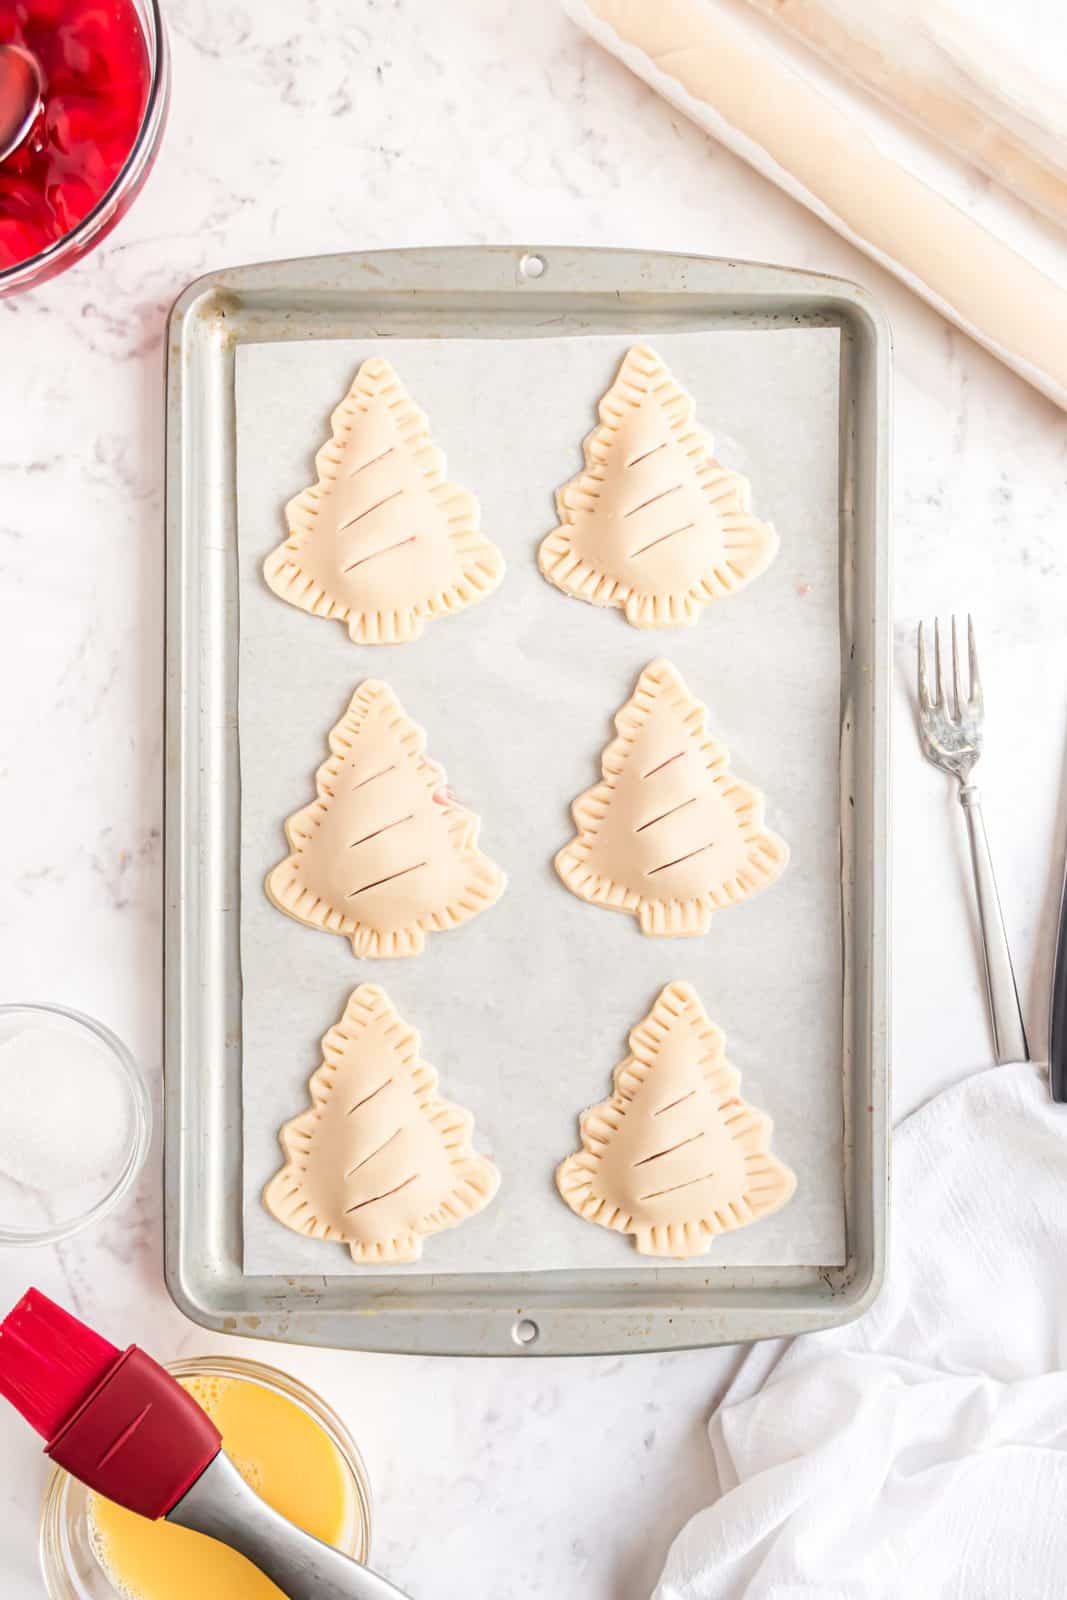
Brush the top crusts with egg wash and sprinkle with coarse sanding sugar, if desired. Repeat the process with the remaining pie crusts. When all the ready-made pie crust has been used, and all that remains is the excess, combine it all and roll it out, the same thickness as the original crusts, to complete the remaining hand pies.
Bake for 20-25 minutes or until golden brown.
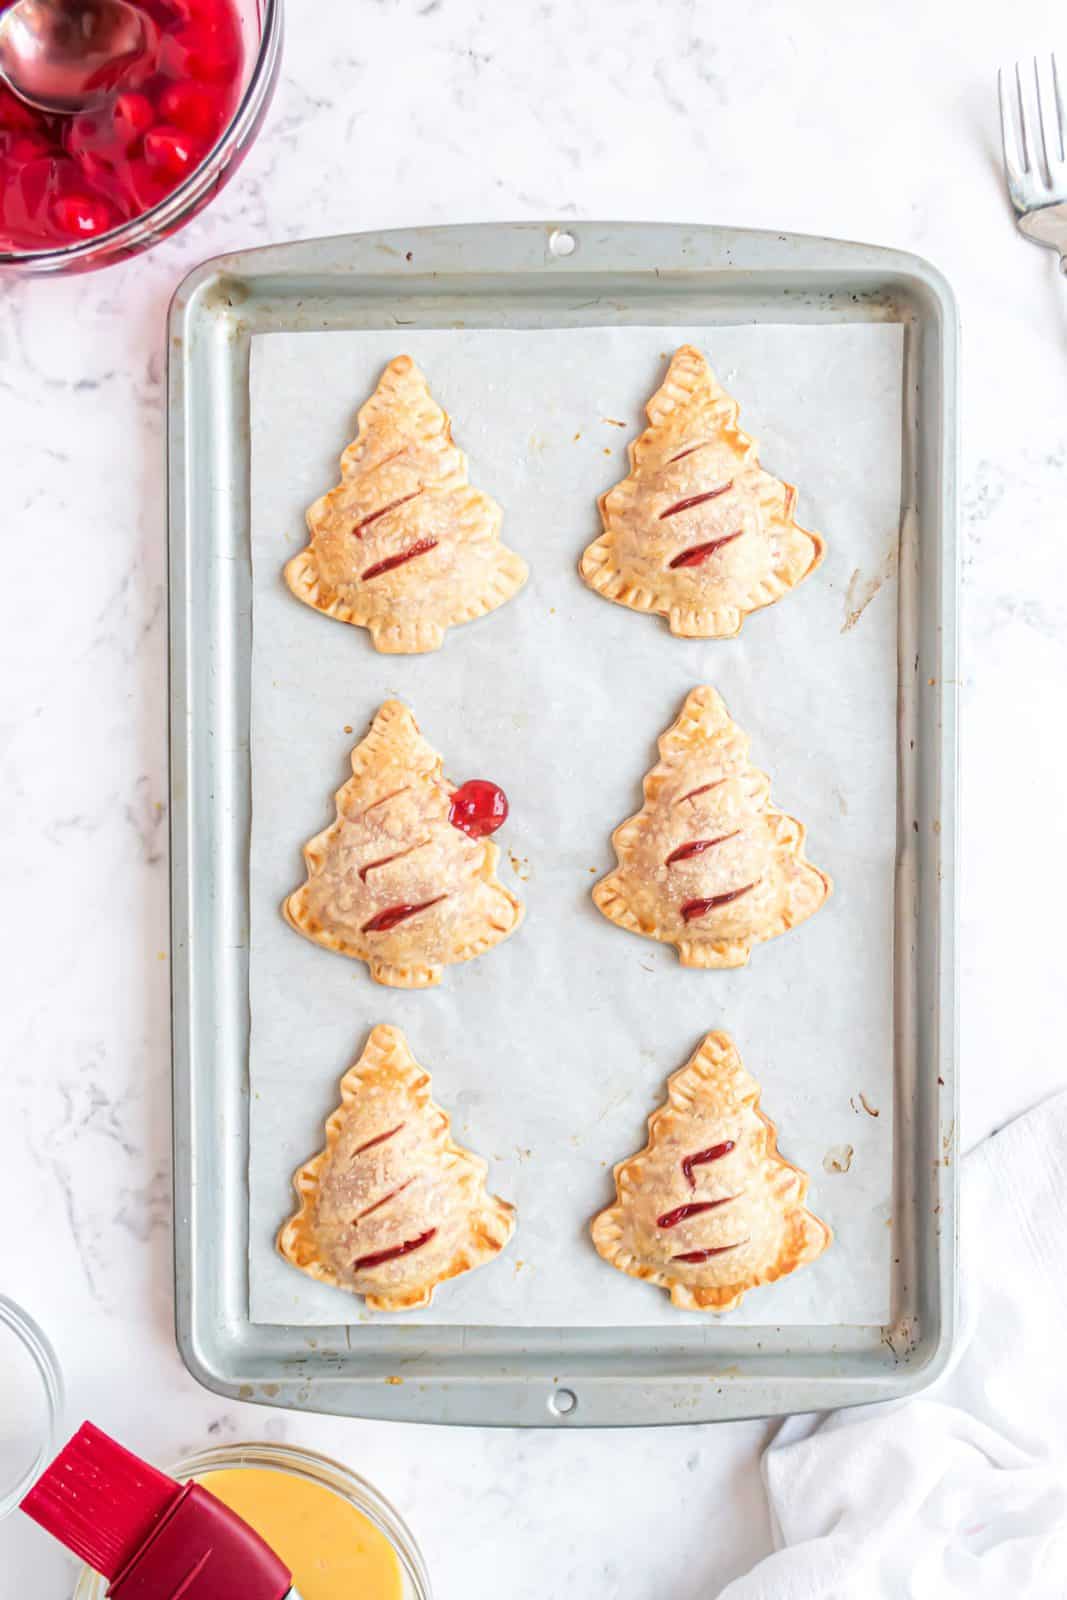
Transfer to a cooling rack. Serve warm or at room temperature.

WANT MORE DELICIOUS RECIPES?

Christmas Tree Hand Pies
Ingredients
- 3 boxes refrigerated pie crust (2 crusts in each box)
- 21 ounce can of cherry pie filling
- 2 large eggs
- 2 Tablespoons water
- Coarse sanding sugar, optional
Instructions
- Thaw the ready-made pie crust, according to package directions. Preheat oven to 350℉.
- Line a large baking sheet with parchment paper. Set aside.
- Using a rolling pin, roll out one thawed pie crust, ensuring there are no cracks or holes. The crust should be between ¼” and ⅛” thick.
- Using a holiday tree cookie cutter, cut out about 6-7 trees (depending on the exact size of your cookie cutter.)
- Place trees on the parchment lined baking sheet and spoon about 1 – 1 ½ Tablespoons of cherry pie filling into the center of each tree.
- In a small bowl, whisk eggs and water together, set aside.
- Brush the border around the filling with prepared egg wash. This is going to help the top crust stick to the bottom crust.
- Roll out a second pie crust and cut out 6-7 more trees. Gently place the trees over the top of the filling. Starting at the trunk, lightly press the edges together, making sure not to press down on the filling.
- Using the tines of a fork, press the seams together, working around the outline of the tree.
- Using a sharp knife, make 3 small diagonal slits in the top crust for venting.
- Brush the top crusts with more of the egg wash and sprinkle with coarse sanding sugar, if desired.
- Bake for 20-25 minutes or until golden brown.
- Transfer to a cooling rack. Serve warm or at room temperature.
- Repeat the above process with the remaining pie crusts. When all the ready-made pie crust has been used, and all that remains is the excess, combine it all and roll it out, the same thickness as the original crusts, to complete the remaining hand pies.
Video

Notes
- You can decrease this recipe if you’d like less pies. You will have a little pie filling leftover. Consider making the whole batch and freezing some for later!
- Use your favorite pie filling. I went with cherry because we felt it was more festive.
- Note: Save the excess pie crust and roll it out again to make a few more tree cutouts.
Nutrition
Nutritional Disclaimer
“The Country Cook” is not a dietician or nutritionist, and any nutritional information shared is an estimate. If calorie count and other nutritional values are important to you, we recommend running the ingredients through whichever online nutritional calculator you prefer. Calories and other nutritional values can vary quite a bit depending on which brands were used.


")


My guys just asked me to add this delightful treat to our annual holiday baking tradition. Thank you, Brandie, for your continued creations.
When I saw your Christmas tree hand pie I was fascinated. Your idea to use cookie cutouts is brilliant!!! I’ve never made anything like this. I really enjoy looking at your recipes.
this was terrific! thank you!
What size tree cutout did you use? Didn’t see any info on size.
Hi Linda, that was about a 4-inch cut out. You don’t have to use exactly that size but any cut out you have of similar size will work!