Southern Cheese Straws
These quick and simple Southern Cheese Straws are a classic, crisp, buttery, and cheese snack or appetizer you can whip up in only 30 minutes. No piping bag needed!
A CLASSIC, CHEESY SNACK
These Southern Cheese Straws are an easy snack or appetizer and they’re full of flavor. The great thing about this recipe is that they’re easier to make than the traditional, classic cheese straws. Traditionally, you make these using a piping bag, but with my recipe, there’s no piping bag needed! Plus, these make a great host/hostess gift to give to friends and family!

FREQUENTLY ASKED QUESTIONS:
They don’t need to be served with anything. They are perfect as-is! But you could serve them with some Pepper Jelly, or add them to your charcuterie boards for a little twist.
If dough feels too soft to roll, chill for 10-15 minutes.
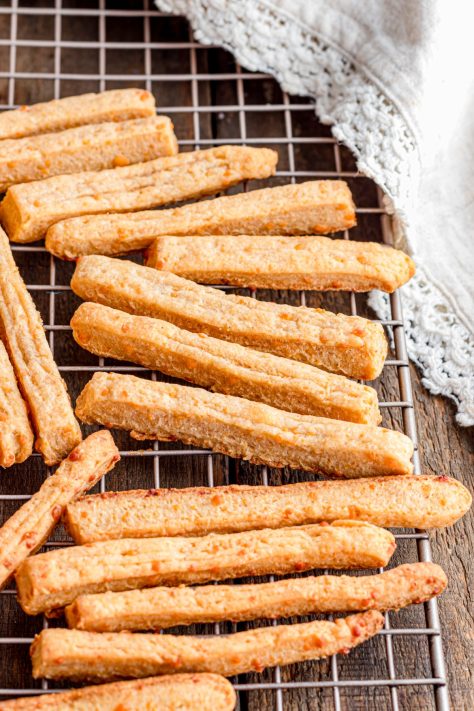
Bake until just golden; over baking them can make them too dark and bitter.
I don’t recommend it with this recipe. I specifically created this recipe to work without a piping bag so it is a thicker dough that you would have trouble getting through a piping bag.
Line tins or jars with parchment or wax paper and cover cheese straws, or package in clear cellophane bags tied with holiday ribbon and a gift tag with storage instructions.
The Cheese Straws that you make should be stored in an airtight container for up to 1 week.

INGREDIENTS NEEDED: (SEE RECIPE CARD BELOW FOR THE FULL RECIPE)
- freshly grated sharp cheddar cheese– Freshly grated cheese works best with these. I am always fine use pre-shredded cheese for most recipes but with this one, the cheese is the star of the show and it really turns out best with freshly shredded.
- unsalted butter– You can use these Tips to Soften Butter Fast if needed. If you use salted butter, just cut back the amount of salt added later to ¼ teaspoon. I don’t think there is much salt in salted butter. Personally, I just use salted butter and add some salt since there is such a small amount actually in the butter. But I know some people are more sensitive to it than I am, so that’s why I suggested cutting it back if you are. You can NOT use margarine in place of butter. This recipe will not turn out properly if you make that mistake.
- all-purpose flour
- smoked paprika– or you could use regular paprika. The smoked flavor just adds a nice touch to the usual cheese straw flavor.
cayenne pepper– this is optional and you can adjust the amount that you use to suit your taste. For spicier straws, increase cayenne to ½ tsp or leave it out altogether.
water – as much needed to form dough. Please use my photos below to get an idea of how the dough should look. This is actually a really forgiving recipe.

HOW TO MAKE SOUTHERN CHEESE STRAWS:
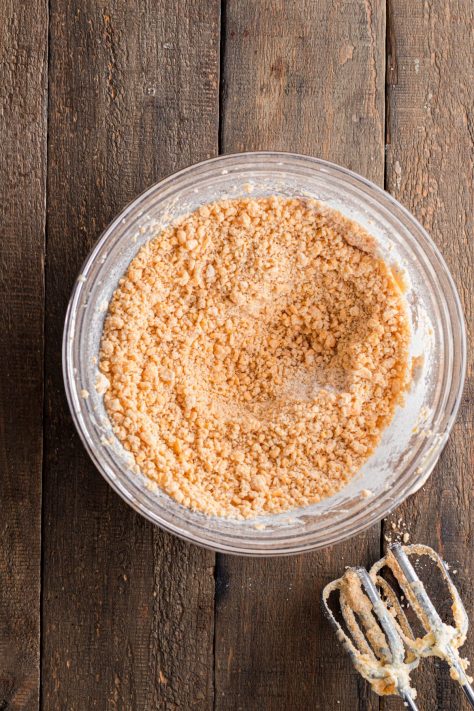
Preheat oven to 350°F . Line 2 baking sheets with parchment paper. In a large bowl, beat together grated cheddar and softened butter with an electric mixer until smooth and well combined.

Add flour, salt, paprika, and cayenne. Mix until crumbly.

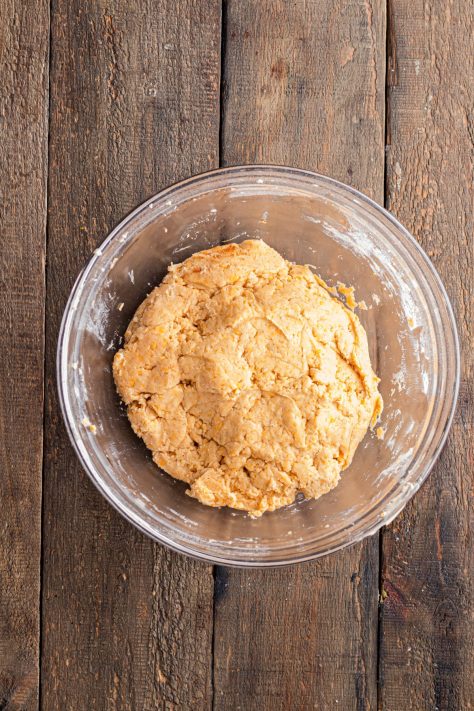
Add water, 1 tablespoon at a time, just until the dough holds together. Dough should be firm but pliable.

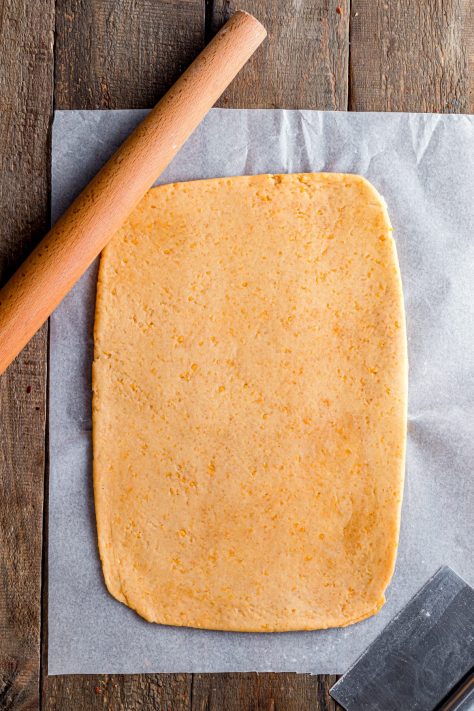
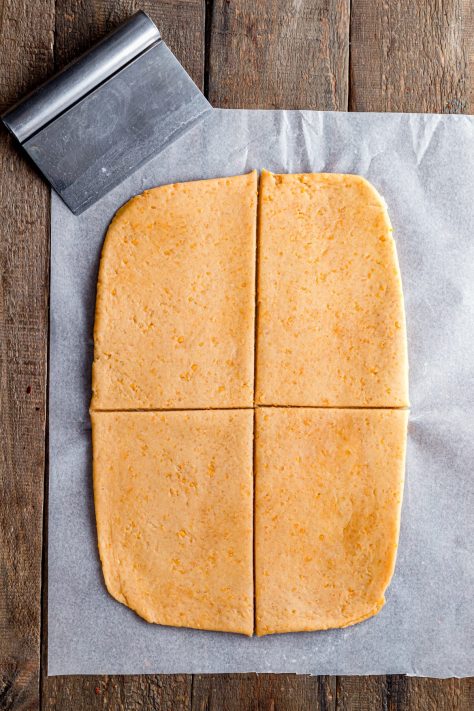
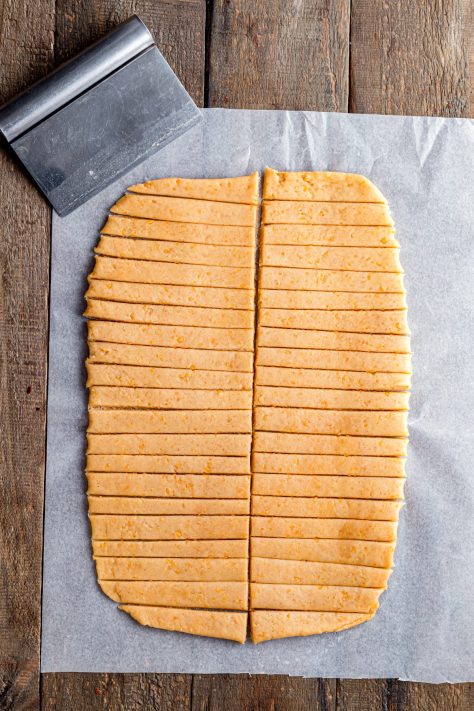
Roll dough into a rectangle about 6×12 inches and ¼-inch thick (traditional Southern style) (traditional Southern style) on a lightly floured surface. Use a bench scraper, sharp knife, or pizza cutter to cut strips about ½-inch wide and 6 inches long.

Cut each strip in half to make 3-inch straws. This should yield about 48 straws (4 dozen) from one batch.

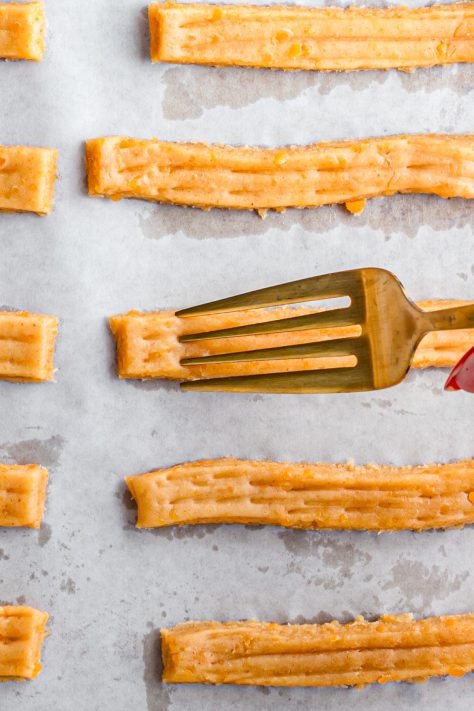
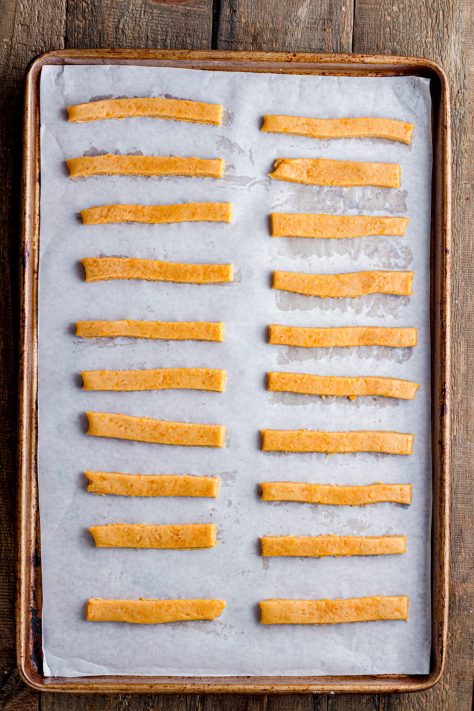
Drag the tines of a fork lightly down each strip to imprint ridges. This not only gives the straws a traditional look but also helps them bake up extra crispy. Transfer cheese straws to the prepared baking sheets, spacing them slightly apart.

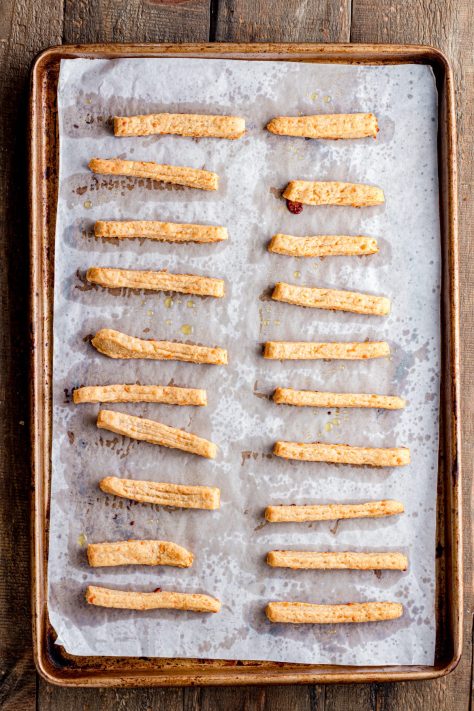
Bake on the middle rack, one sheet at a time, for about 12–14 minutes, until golden at the edges. Cool on a wire rack. Once fully cooled, store in an airtight container for up to 1 week.

CRAVING MORE RECIPES?

Southern Cheese Straws
Ingredients
- 2 cups freshly grated sharp cheddar cheese
- ½ cup (1 stick) unsalted butter, softened
- 1 ½ cups all-purpose flour
- ½ teaspoon salt
- ½ teaspoon smoked paprika (or regular paprika)
- ¼ teaspoon cayenne pepper (optional, adjust to taste)
- 2-3 Tablespoons water (as needed to form dough)
Instructions
- Preheat oven to 350°F. Line 2 baking sheets with parchment paper.
- In a large bowl, beat together 2 cups freshly grated sharp cheddar cheese and ½ cup (1 stick) unsalted butter, softened with an electric mixer until smooth and well combined.NOTE: This is easiest with an electric hand mixer but you can do it by hand. You'll just need a bit of elbow grease.

- Add 1 ½ cups all-purpose flour, ½ teaspoon salt, ½ teaspoon smoked paprika and ¼ teaspoon cayenne pepper (if using). Mix until crumbly.
- Add water, 1 Tablespoon at a time, just until the dough holds together. Dough should be firm but pliable.
- Roll dough into a rectangle about 6×12 inches and ¼-inch thick (traditional Southern style) (traditional Southern style) on a lightly floured surface.
- Use a bench scraper, sharp knife, or pizza cutter to cut strips about ½-inch wide and 6 inches long.
- Cut each strip in half to make 3-inch straws. This should yield about 48 straws (4 dozen) from one batch.
- Drag the tines of a fork lightly down each strip to imprint ridges. This not only gives the straws a traditional look but also helps them bake up extra crispy.
- Transfer cheese straws to the prepared baking sheets, spacing them slightly apart.
- Bake on the middle rack, one sheet at a time, for about 12–14 minutes, until golden at the edges. Cool on a wire rack.
- Once fully cooled, store in an airtight container for up to 1 week.

Notes
- Please refer to my FAQ’s (Frequently Asked Questions) and ingredient list above for other substitutions or for the answers to the most common questions.
Nutrition
Nutritional Disclaimer
“The Country Cook” is not a dietician or nutritionist, and any nutritional information shared is an estimate. If calorie count and other nutritional values are important to you, we recommend running the ingredients through whichever online nutritional calculator you prefer. Calories and other nutritional values can vary quite a bit depending on which brands were used.


Can these be frozen
You should be able to freeze them. They never stick around long enough at my house for me to have tried freezing them 🙂
Can’t wait to eat them
Hope you love them Debbie!