
Pierogi and Kielbasa Casserole

This Pierogi and Kielbasa Casserole is creamy, cheesy comfort food baked into one easy weeknight dinner the whole family will love.
A Simple Dinner Casserole
When you need a filling dinner that feels hearty and homemade without a lot of effort, this Pierogi and Kielbasa Casserole delivers every time. It’s the kind of comforting meal that comes together quickly, bakes up nicely, and is perfect for busy weeknights, potlucks, or feeding a hungry family without spending too much time in the kitchen.

FREQUENTLY ASKED QUESTIONS:
I don’t recommend it. I have another recipe for Crock Pot Pierogi and Kielbasa Casserole and some folks complain that they think the pierogis don’t turn out firm enough and that they thought it can get a little mushy. So, I think it depends on the type of slow cooker you have and how it cooks.
Yes, absolutely. If you’re lucky enough to have homemade pierogi, use them. Just reduce the baking time by about 5 minutes since they’ll be more tender than frozen.
Of course! I have a separate recipe for Pierogi Casserole that uses sauerkraut if you’d like to use that one.
Yes, assemble the casserole up to a day ahead and refrigerate. Add 5-10 minutes to the baking time if starting from cold.
If you like crispier edges, broil the casserole for 2-3 minutes after baking.
Serve with a green salad or steamed veggies. Some folks might enjoy this with some Sauerkraut.
Store leftovers in an airtight container in the refrigerator for up to 4 days. Reheat individual portions in the microwave or warm larger portions in the oven at 350°F until heated through.
Yes. Assemble the casserole without baking, wrap tightly in foil, and freeze for up to 3 months. Bake directly from frozen at 350°F, adding about 15–20 minutes to the cook time.

Ingredients Needed: (See Recipe Card Below For The Full Recipe)
- pierogi: Potato pierogi are classic here, but cheese or potato-cheese varieties also work. No need to thaw pierogi before baking, they cook perfectly from frozen.
- kielbasa: Smoked sausage adds a rich flavor. Turkey or chicken kielbasa can be used for a lighter version. Browning the kielbasa before baking adds depth of flavor and prevents it from tasting greasy.
- half and half: Adds creaminess without being too heavy. Heavy cream will make it even richer, while milk will lighten it and make it more wet.
- cheddar cheese: Sharp cheddar brings the best tangy flavor, but mild cheddar or a cheddar-jack blend works too. Double the shredded cheese or add mozzarella for a gooey topping.
- chicken broth– You can control more of the ingredients used, especially sodium, by using some Homemade Chicken Broth. If you have any salt sensitivities, I recommend low or no sodium options. The chicken broth is basically being used to steam the pierogi. If you don’t have any liquid in there, they won’t cook up properly at all.
- salt, freshly ground black pepper, and fresh parsley – you can season this however you prefer. Feel free to use your favorite seasoning blends like a cajun seasoning or garlic and onion powder.

How to Make Pierogi and Kielbasa Casserole:
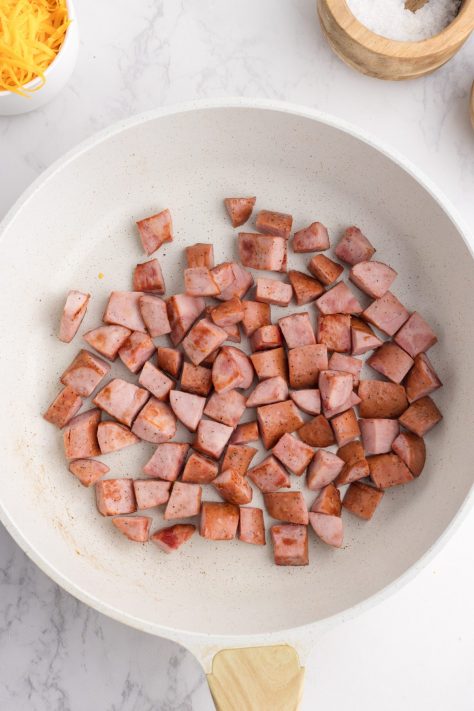
Preheat oven: Set oven to 375°F. Grease a 9×13-inch baking dish with butter or nonstick spray. Cook the kielbasa: Heat a skillet over medium heat and add the diced kielbasa. Cook for 4–5 minutes, stirring occasionally, until lightly browned. Remove from heat and set aside. Prepare the pierogi: Place the frozen pierogi directly into the prepared baking dish in a single layer.

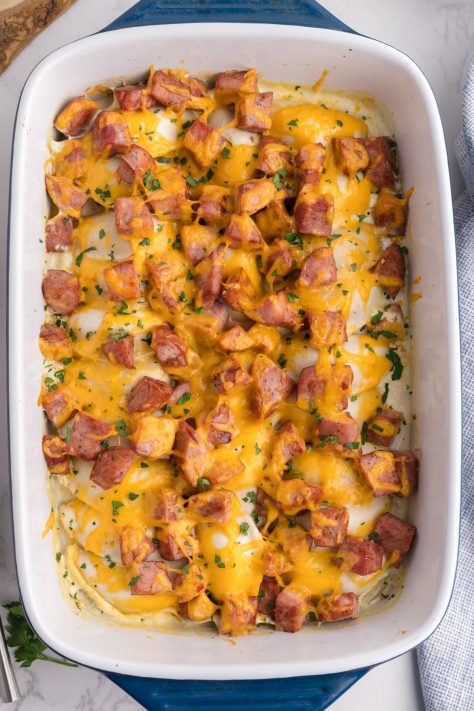
Make the sauce: In a mixing bowl, whisk together the chicken broth, half and half, salt, and black pepper until well combined. Assemble the casserole: Pour the sauce evenly over the pierogi. Top with the browned kielbasa slices, then sprinkle the shredded cheddar cheese on top. Bake: Cover the baking dish with foil and bake for 20 minutes. Remove the foil and bake for an additional 10 minutes, or until the cheese is melted and bubbly.

Garnish and serve: Sprinkle with fresh parsley before serving.

CRAVING MORE RECIPES?

Pierogi and Kielbasa Casserole
Ingredients
- 14 ounce package kielbasa, diced
- 2 (16 ounce) boxes frozen potato pierogi (24 pierogi)
- ¾ cup chicken broth (can use low or no sodium, see notes below)
- ¾ cup half and half (or heavy cream, not milk)
- ½ teaspoon salt (see notes below)
- ½ teaspoon freshly ground black pepper
- 1 cup shredded cheddar cheese (can use more, to taste)
- fresh parsley, chopped (optional, for garnish)
Instructions
- Preheat oven to 375°F. Grease a 9×13-inch baking dish with butter or nonstick spray.
- Heat a skillet over medium heat and add 14 ounce package kielbasa, diced. Cook for 4–5 minutes, stirring occasionally, until lightly browned. Remove from heat and set aside.

- Place 2 (16 ounce) boxes frozen potato pierogi into the prepared baking dish in a single layer. Set aside.
- In a mixing bowl, whisk together ¾ cup chicken broth, ¾ cup half and half, ½ teaspoon salt and ½ teaspoon freshly ground black pepper until well combined.
- Pour the sauce evenly over the pierogi. Top with the browned kielbasa slices, then sprinkle 1 cup shredded cheddar cheese on top.
- Cover the baking dish with foil and bake for 20 minutes. Remove the foil and bake for an additional 10 minutes, or until the cheese is melted and bubbly and pierogi are cooked through.
- Optional: sprinkle with fresh parsley, chopped before serving.


Notes
- Please refer to my FAQ’s (Frequently Asked Questions) and ingredient list above for other substitutions or for the answers to the most common questions.
- The chicken broth is being used to steam the pierogi. It’s not necessarily making a sauce but you need to have a liquid in order for the pierogi to steam and cook up soft and tender so it will stay at the bottom of the pan after cooking. I still spoon up some of that when serving.
- I was trying to keep this recipe as simple as possible for a quick weeknight dinner. You can certainly add more ingredients to this casserole. You can add additional seasonings like onion powder and garlic powder. You could add in drained sauerkraut, steamed broccoli, etc. to fill out the dish more.
Nutrition
Nutritional Disclaimer
“The Country Cook” is not a dietician or nutritionist, and any nutritional information shared is an estimate. If calorie count and other nutritional values are important to you, we recommend running the ingredients through whichever online nutritional calculator you prefer. Calories and other nutritional values can vary quite a bit depending on which brands were used.





Turned out great for me. We enjoyed the flavor and it was a nice, simple comforting meal
just made the pierogi and kielbasa casserole and love it.
Thanks so much Mark! I appreciate you taking the time to come back and comment!
We love all your comfort food recipes.
Very good! My 12 year old son made this for us and we all really enjoyed it. Thanks so much for your well written instructions and step by step photos and the ingredient photos. He was able to do this all by himself with very little supervision because of your excellent guidance. We love your site!! Thank you Brandie!!
Oh goodness, thank you Kennedy!! I love hearing when kids make a recipe!! That really made my day to read and I am so thankful he found it easy to follow along and that all the photos, etc. help!!! Tell him to comment if he ever has questions, I am always happy to help!