
Chicken Cobbler (+Video)
Chicken Cobbler is an easy comfort meal that will definitely go into your regular dinner rotation! With simple ingredients and just a little bit of prep, this dinner is sure to be a family favorite!
Servings 9 servings
Calories 245kcal
Ingredients
For the Cobbler
- 4 Tablespoons salted butter, melted
- rotisserie chicken, meat removed and chopped (about 3-4 cups)
- 12 ounce bag frozen peas and carrots (or mixed vegetables)
- 10.5 ounce can cream of chicken soup with herbs (or regular cream of chicken)
- 2 cups chicken broth
- 1 teaspoon garlic powder
- 1 teaspoon onion powder
- ½ teaspoon pepper
- 11.36 ounce Cheddar Bay Biscuit Mix (reserve seasoning packet for later)
- 2 cups milk (2% or higher)
- ½ cup shredded cheddar cheese
For the Butter Topping
- 2 Tablespoons salted butter, melted
- seasoning packet from box of biscuit mix
Instructions
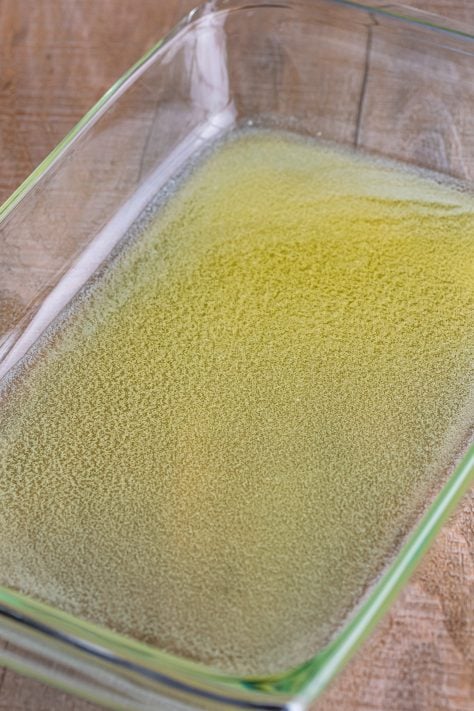
- Preheat the oven to 350° F. In a 9x13-inch baking dish, pour in the melted butter evenly into the bottom. You may need to tilt the baking dish a few ways to get it to spread out.
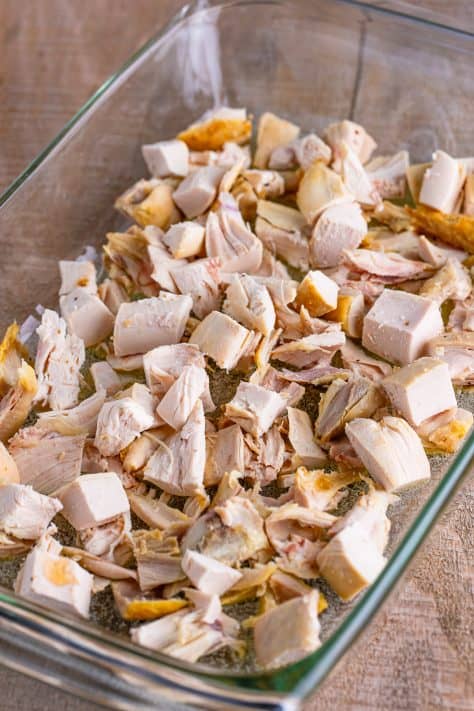
- Layer the chopped chicken evenly on top of the melted butter (do not stir.)
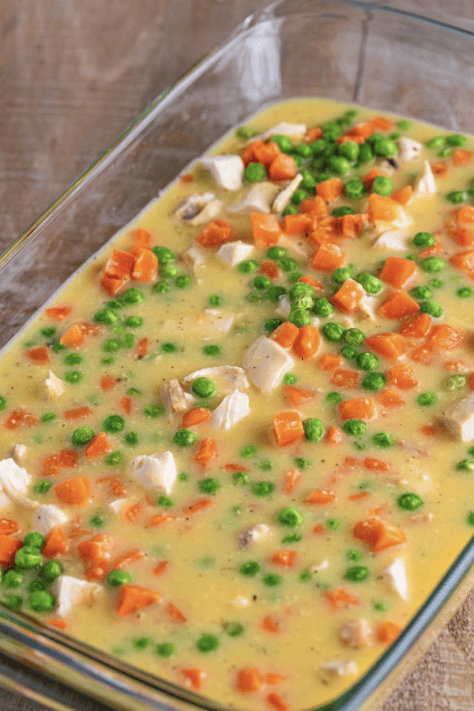
- Then evenly sprinkle the frozen peas and carrots on top of the chicken layer (do not stir).

- In a separate bowl, whisk together cream of chicken soup, chicken broth, garlic powder, onion powder and black pepper.

- Pour this mixture over the chicken and peas and carrot layers (do not stir.) At this point I rinse and dry that same bowl out so I don’t make more dirty dishes and continue with the next step.
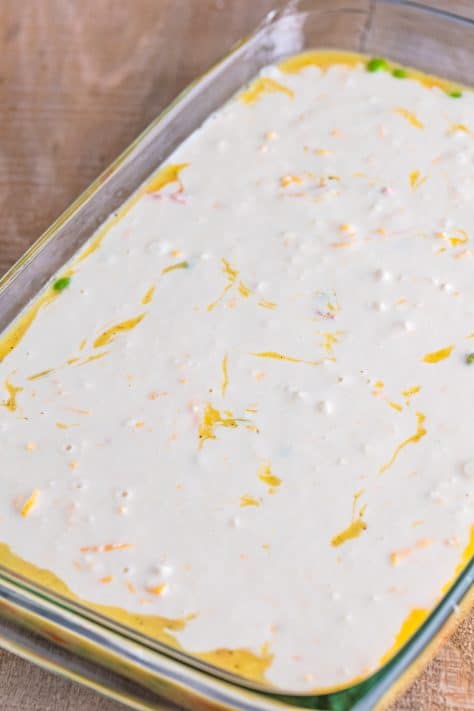
- In that same bowl, stir together the biscuit mix with the milk and shredded cheese until combined well. (Do not add the seasoning packet from the biscuit mix, we’re going to use that for the topping later.)
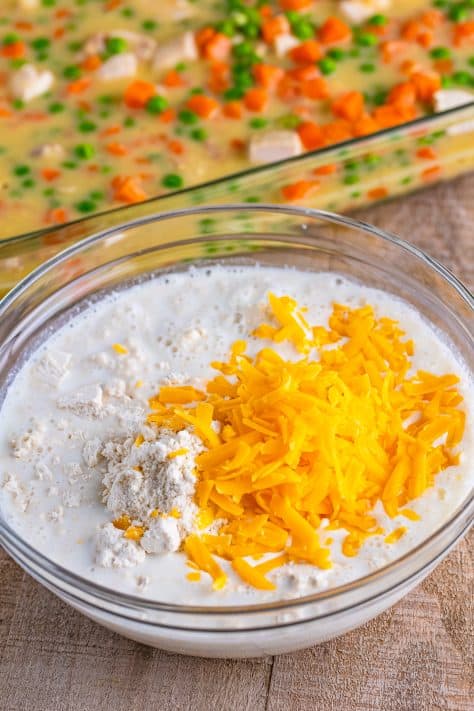
- Pour this biscuit mix layer as evenly possible on top of the other layers in the baking dish (do not stir.)
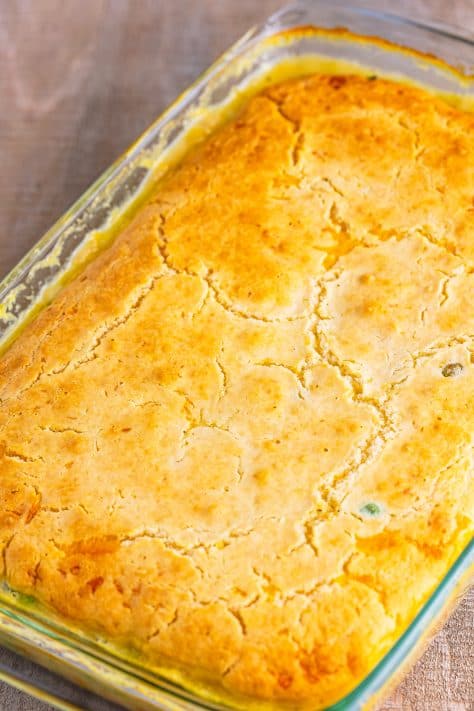
- Bake uncovered for about 50-60 minutes until bubbly and top is golden brown. Note: oven times do vary so it could take longer (or shorter) in your oven. You want the crust to be golden brown. So cook until you get that light golden brown color.
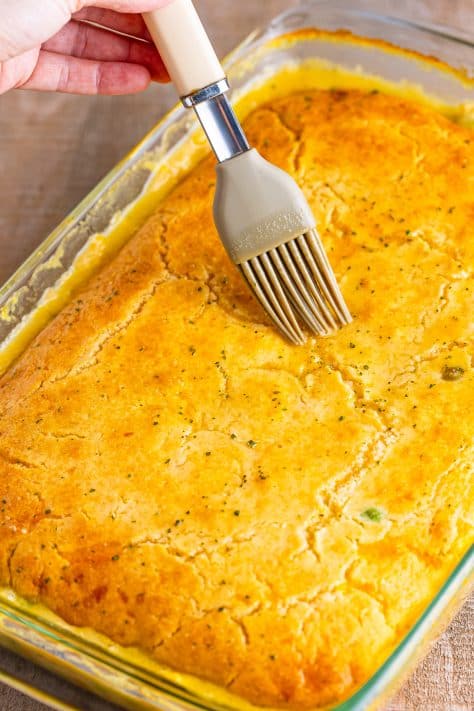
- Remove from the oven and make butter topping. In a small bowl combine melted butter and the contents of the seasoning packet that came with the biscuit mix.

- Brush this evenly over the top of the cobbler. Note: I also sprinkled a little dried parsley on top to give it a bit of color but this is not necessary for flavor.
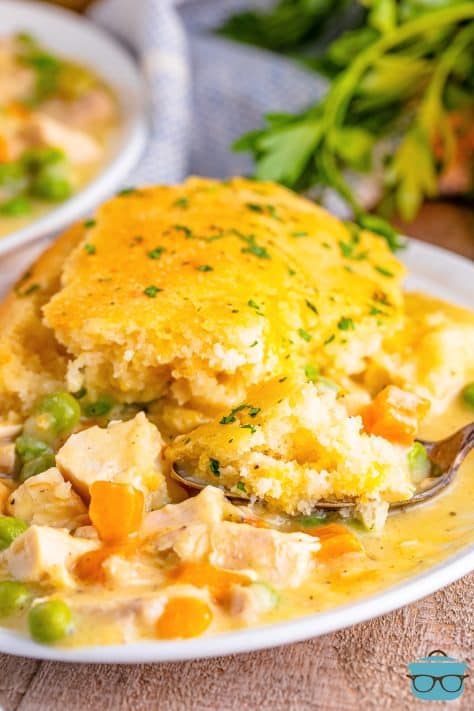
- Allow the cobbler to rest for at least 10 minutes. If you dig into it too soon after removing from the oven, it will be a bit too runny. Allowing it to rest for a few minutes will help to thicken up the filling a bit and will make it easier to serve. Note: this filling is still on the thin side so when you serve it, scoop up a serving then spoon any filling left behind on top.
Video
Notes
- Please refer to my FAQ’s (Frequently Asked Questions) and ingredient list above for other substitutions or for the answers to the most common questions.
- We preferred to chop the chicken rather than shred it. We found we liked the texture of the chopped chicken better. However, if you enjoy shredded chicken, then just shred it with two forks before using.
- I like to serve the individual servings on a plate with higher sides or in a shallow bowl.
- You can use low sodium options if desired.
- Leftovers should be kept in the fridge in an airtight container. Freezing them is possible but the texture of the topping may change. I do not recommend freezing before baking.
Nutrition
Calories: 245kcal | Carbohydrates: 24g | Protein: 6g | Fat: 14g | Sodium: 779mg | Fiber: 2g | Sugar: 5g