Christmas Cut-Out Sugar Cookies (+Video)
This Christmas Cut-Out Sugar Cookies recipe is foolproof! They hold their shape after baking and they also taste amazing! Top with icing!
THE PERFECT CUT-OUT SUGAR COOKIE RECIPE
My family looks forward to making (and eating!) these cut-out sugar cookies every year. We only make them once a year for Christmas so they really are a special cookie for us. We usually take an entire day to make a bunch of cookies and then we all sit down at the table and put icing on them and sprinkles.

CAN SUGAR COOKIES BE FROZEN?
Absolutely! We make a bunch just so we can freeze a few batches so we’ll have some to eat after the holidays (not that they last that long – ha!) If you decorate these with icing, you don’t want to stack them or the cookies will stick to each other. So, do a quick flash freeze. Put them on a nonstick sheet in the freezer in a single layer. Once they are partially frozen, you can them stack them in a freezer safe container or bag.
TIPS FOR MAKING CUT-OUT SUGAR COOKIES:
- Make sure you are using real butter. Not margarine. Margarine has a high oil content and cookies will not set up properly.
- Ensure the butter is at room temperature – not melted. I usually put the butter out on the kitchen counter the night before I am going to bake.
- Check the expiration date on your baking powder. Most baked goods don’t turn out properly because the rising agent (in this case, baking powder) is no longer good.
- Don’t pack the flour when measuring. Just dip the measuring cup into the flour, shake off excess then use the flat side of a butter knife to scoop off the excess off the top. This will ensure that you don’t measure out too much flour which will make cookies dry and dense.

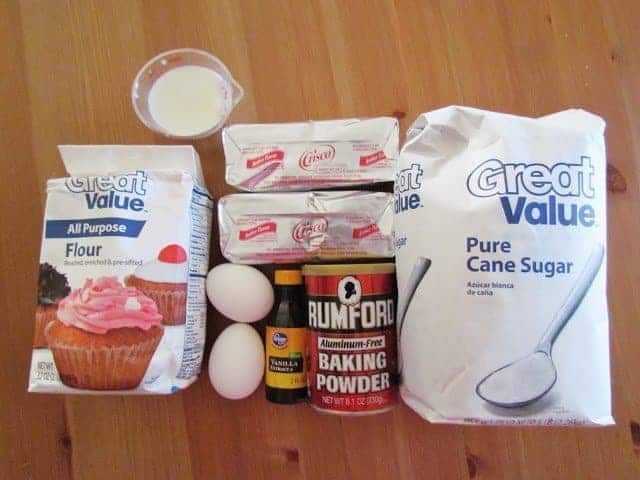
INGREDIENTS NEEDED: (FULL RECIPE AT THE BOTTOM OF THE POST)
- butter shortening (Crisco) or regular butter
- sugar
- vanilla extract
- milk
- eggs
- all-purpose flour
- baking powder
- salt
- softened butter
- powdered sugar
- clear vanilla extract
HOW TO MAKE CUT-OUT SUGAR COOKIES:
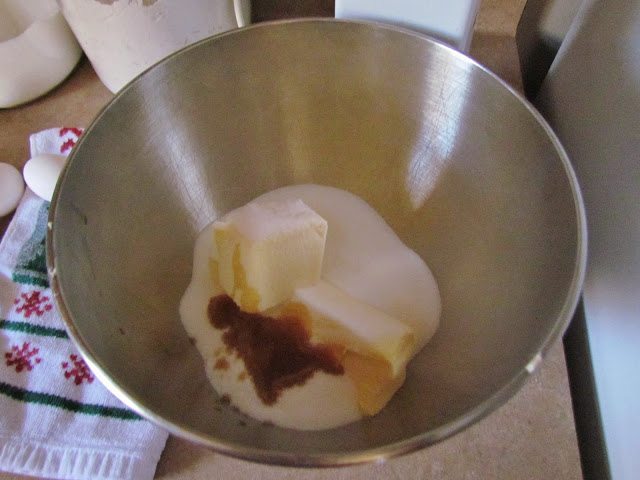
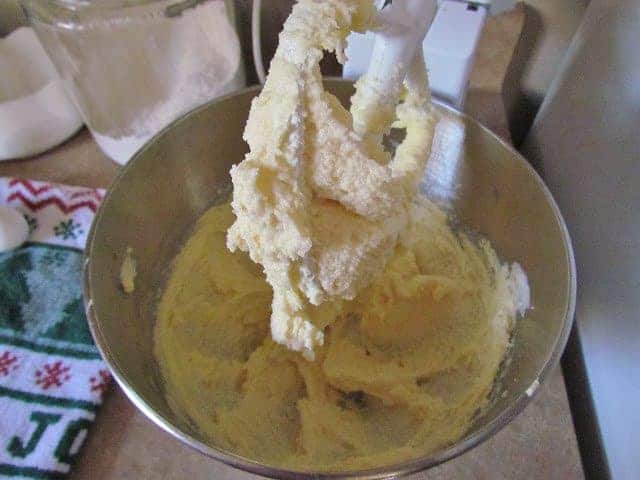
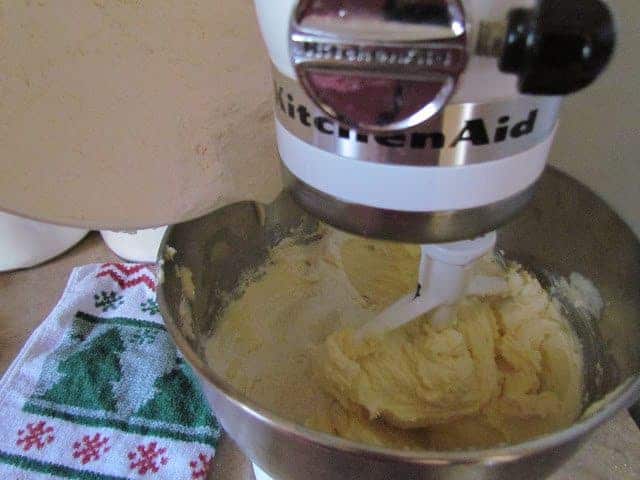
In a large mixing bowl, mix together the shortening, sugar, milk and vanilla.
I have a stand mixer, but if you don’t have one, you’ll want to at least use a handheld electric mixer to mix this. Mix until smooth. Then mix in eggs. Combine well. Note: If you have a stand mixer, you need to remember to occasionally scrape down the sides of the bowl to make sure everything gets incorporated.
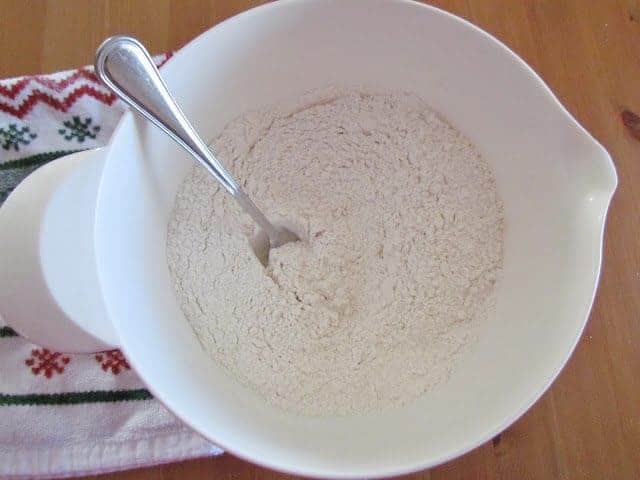
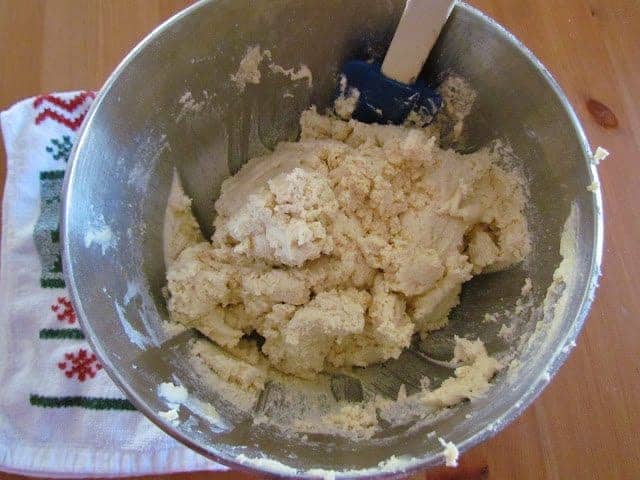
In a separate bowl, combine flour, baking powder and salt. Now, bakers say you should sift the flour and baking powder together. I don’t have a large sifter to do that so what I do is stir it all with a large fork. This will help break up any lumps and also get air into the mixture.
Gently add in flour to your shortening mixture. Adding a little flour at a time. If you dump it all in at once, flour will fly everywhere so small batches at a time until it is all combined.
Scrape down the sides of the bowl.
Then divide dough in half.
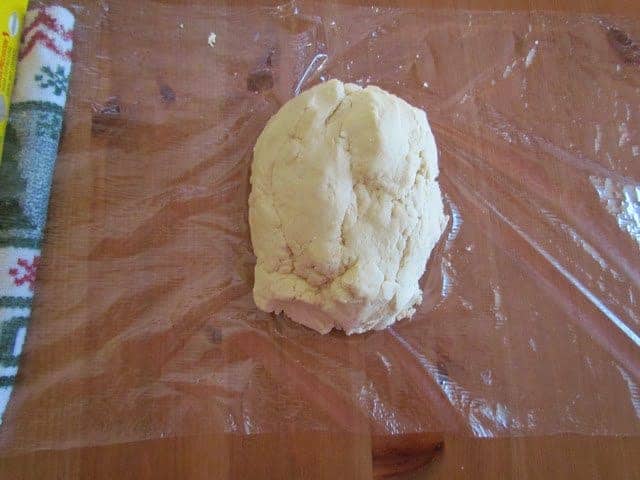
Wrap each dough ball in plastic wrap.
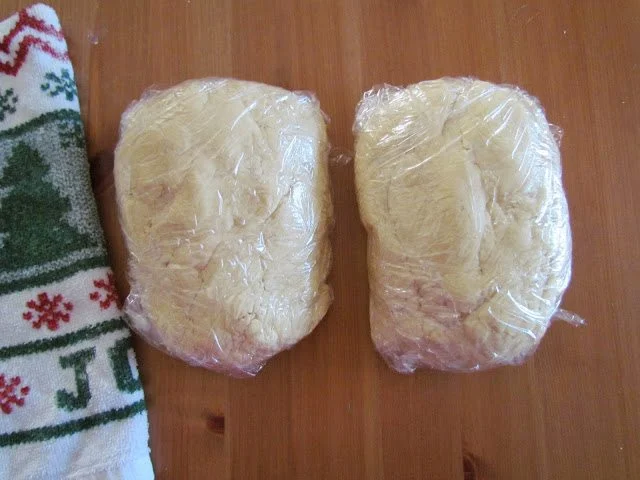
Then pop the dough balls into your fridge and chill for at least an hour.

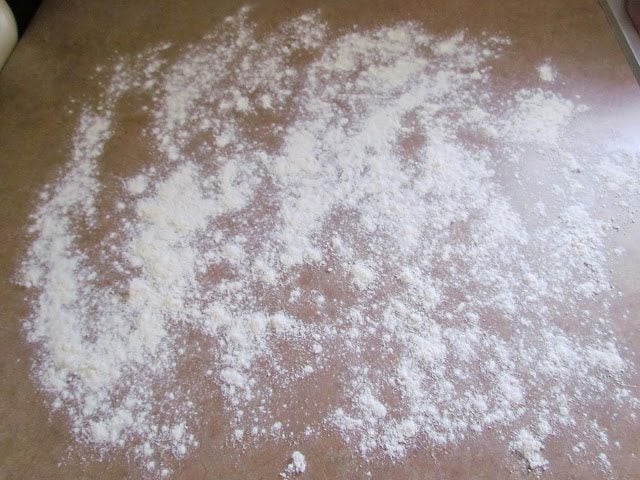
When dough is ready, preheat your oven to 375F degrees. Spray a couple baking sheets with nonstick cooking spray. Then, spread some flour all over your counter.
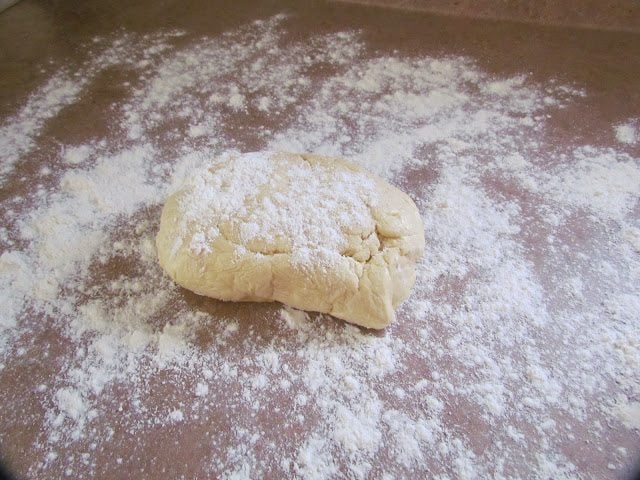
Working with one dough ball at a time (keep the other one in the fridge), put a little flour on the dough itself. And make sure to rub some flour on your rolling pin too.
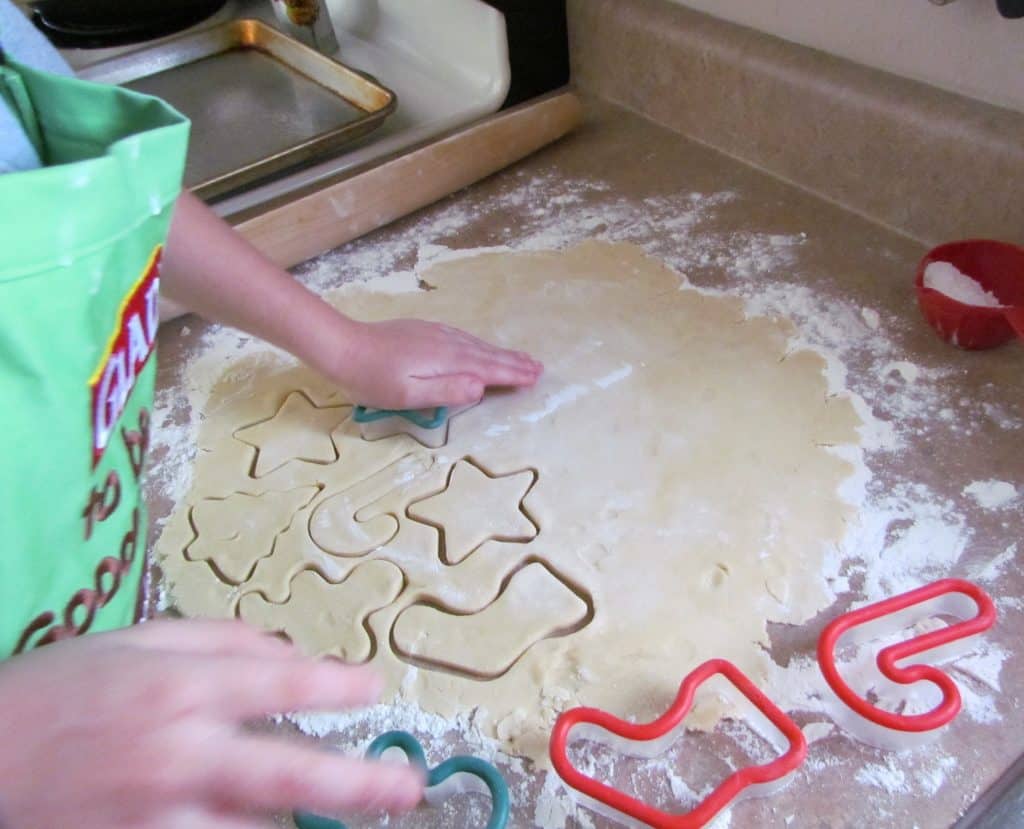
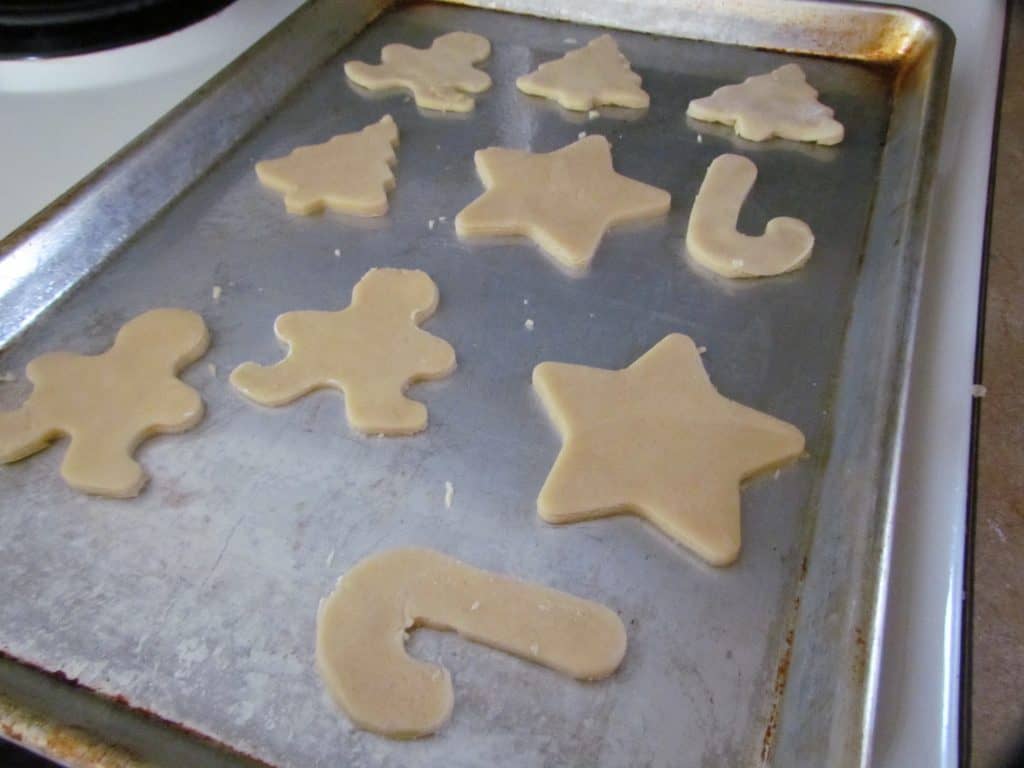
You want the dough to be about 1/4-inch thick. If it’s too thin then you won’t be able to scoop the cookies up without them breaking. Using your favorite cookie cutters, start cutting out shapes. Try to get your cookie shapes as close together as possible to make the most use of your dough. You can take the leftover dough and roll it out again for a second cutting. Generally, after the second cutting, the dough is not really useable for a third cutting. Because by that point, the dough is full of extra flour and it will crumble too easily.
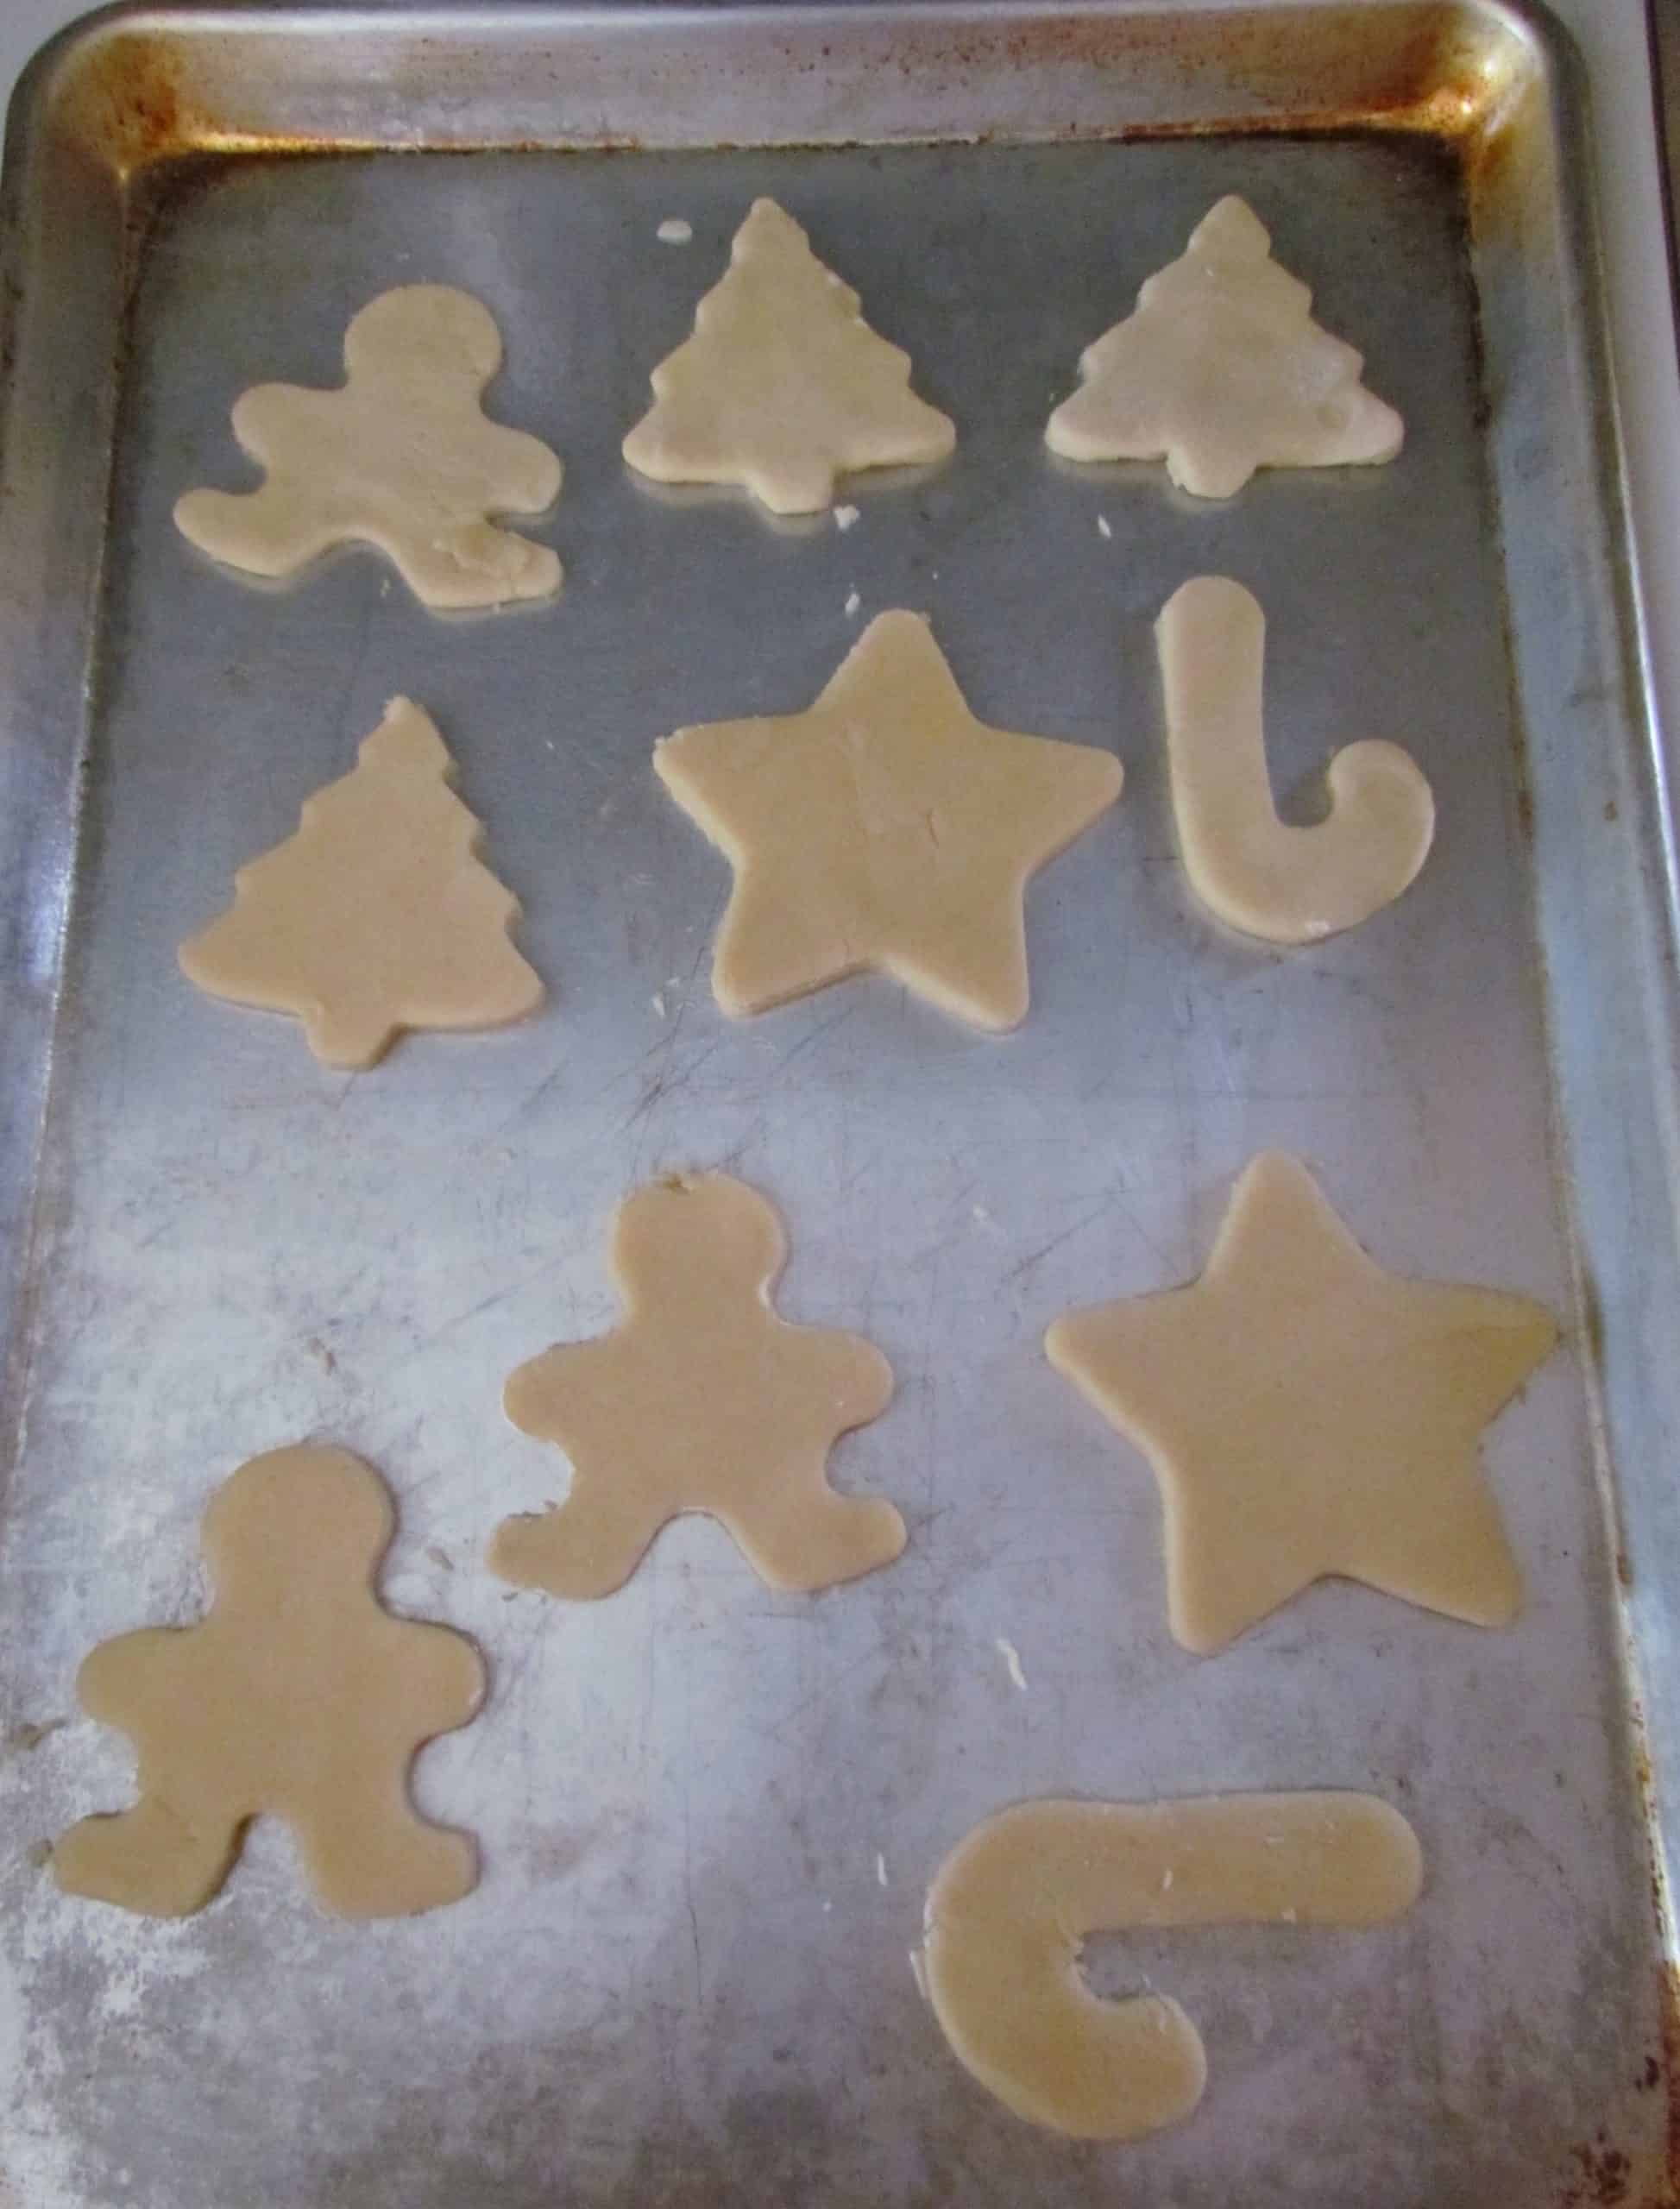
Lay out the cookies on a large cookie sheet that has been sprayed with cooking spray. Be careful scooping the cookies off your counter. It helps if you have a flat spatula to help you lift them up. Spread them out about an inch or two apart on the cookie sheet. These cookies don’t spread much at all while baking. Bake for about 6-8 minutes at 375F degrees.
Note: Bake only one cookie sheet at a time. I know this part seems tedious but if you try to cook more than one cookie sheet at a time in a conventional oven, one sheet won’t bake as evenly as the other. So put your rack in the middle of the oven. Oven times vary but you don’t want the edges too brown. Cookies should be a very light golden tan color. Bake up all your cookies and allow them to cool completely.
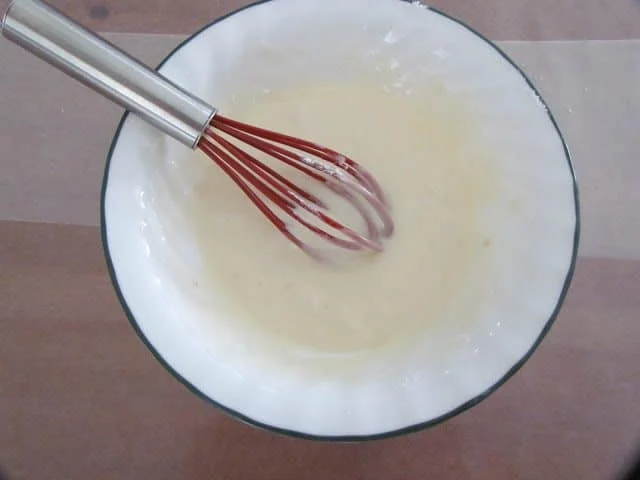
Then start making the icing. Combine softened butter, powdered sugar, milk and clear vanilla extract. I like the clear vanilla extract because it allows you to get a true white color for your frosting (if you are using white).
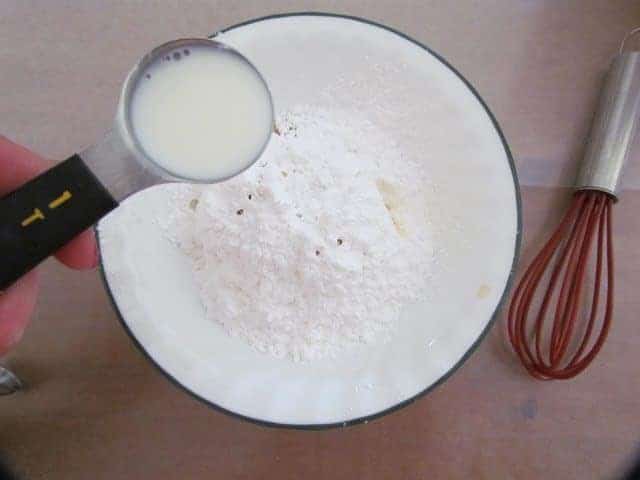
Whisk until smooth. If mixture is too thin, just add in a bit more powdered sugar until you get it to the consistency you like. Then add in any food colors you are using. I quadruple this recipe. I like to have four bowls for four different colors. Now you are ready to decorate.
Gather all your icing, and sprinkles, etc. and have fun. I like to spread wax paper all over my table and spread everything out. It makes clean up a lot easier afterwards. Allow the icing to setup for a couple of hours. Then you should be able to stack them and store in an airtight container.

Merry Christmas and Happy Baking!
CRAVING MORE? GIVE THESE RECIPES A TRY!

Christmas Cut-Out Sugar Cookies (+Video)
Ingredients
For the cookies:
- 1 ⅓ cups butter shortening, like Crisco (or real butter)
- 1 ½ cups sugar
- 4 tablespoons milk
- 1 teaspoon vanilla extract
- 2 large eggs
- 4 cups all-purpose flour
- 3 teaspoons baking powder
- ½ teaspoon salt
For the icing:
- 1 tablespoon softened butter
- 1 cup powdered sugar
- 2 tablespoons milk
- 1 teaspoon clear vanilla extract
- food coloring
Instructions
To make the cookies:
- In a large mixing bowl, mix together the shortening, sugar, milk and vanilla using an electric mixer. Mix until smooth. Then stir in eggs. Combine well.
- In a separate bowl, combine flour, baking powder and salt. Stir well using a fork.
- Gently add in flour to the shortening mixture. Adding a little flour at a time. Mix just until both mixtures are combined.
- Divide dough in half. Wrap each dough half in plastic wrap then put the dough balls into the refrigerator to chill for at least an hour.
- When dough is ready, preheat oven to 375F degrees. Spray a couple baking sheets with nonstick cooking spray or line with parchment paper.
- Spread some flour all over a clean counter.
- Working with one dough ball at a time (keep the other one in the fridge), put a little flour on the dough itself. And make sure to rub some flour on your rolling pin too.
- Start rolling out dough as evenly as possible. You want the dough to be about 1/4-inch thick. If it’s too thin then you won’t be able to scoop the cookies up without them breaking.
- Using your favorite cookie cutters, start cutting out shapes. Try to get your cookie shapes as close together as possible to make the most use of your dough. You can take the leftover dough and roll it out again for a second cutting. Generally, after the second cutting, the dough is not really useable for a third cutting.
- Lay out cookies on prepared baking sheet. Spread cookies out about an inch or two apart on the cookie sheet.
- Bake for about 6-8 minutes at 375F degrees. Allow cookies to cool completely before icing.
To make the icing:
- Combine softened butter, powdered sugar, milk and clear vanilla extract.
- Whisk until smooth. If mixture is too thin, just add in a bit more powdered sugar until you get it to the consistency you like. Then add in any food colors you are using. I quadruple this recipe and use four different colors. Gather all your icing, and sprinkles, etc. and have fun.
- Allow the icing to setup on the cookies for a couple of hours then you should be able to stack them and store in an airtight container.
Video

Notes
- I highly suggest making these with Crisco butter shortening.
- However, if using real butter, ensure the butter is at room temperature – not melted.
- Check the expiration date on your baking powder. Most baked goods don’t turn out properly because the rising agent (in this case, baking powder) is no longer good.
- Don’t pack the flour when measuring. Just dip the measuring cup into the flour, shake off excess then use the flat side of a butter knife to scoop off the excess off the top. This will ensure that you don’t measure out too much flour which will make cookies dry and dense.
Nutrition
Nutritional Disclaimer
“The Country Cook” is not a dietician or nutritionist, and any nutritional information shared is an estimate. If calorie count and other nutritional values are important to you, we recommend running the ingredients through whichever online nutritional calculator you prefer. Calories and other nutritional values can vary quite a bit depending on which brands were used.
Originally published: December 2012
Updated & republished: November 2020


Can I leave the dough in the fridge for 2 days?
hello can i freeze these with royal icing flood on top, if so will the royal icing get soft when taken out of the fridge? thanks, marg
Hi Marg, I honestly don’t see why you couldn’t do that. 🙂
I love this recipe. Cookies are soft and taste awesome.
Yay! Thanks so much Jennifer!
Brandie, these are great, they remind me of lofthouse 🙂
Do you have any tips for getting those tiny lumps out of butter, I have a heck of a time with that. Room temp, I’ve triec beating it with sugar, before adding sugar, with and without adding liquid before beating, etc. The dough moothed out with a lot of mixing, but I had a hard time with the frosting. I melted it some when I realized I couldn’t get the lumps out, and it was a bit runny of course but covered well. I love how shiny your frosting turns out! Am I being a wimp and not whisking it hard enough or not long enough?
Love your recipes 🙂
Thanks!
Brit
Can you place them on parchment paper on the pan?
Would almond milk work as a substitution in the dough and icing?
This is a wonderful rolled cut out cookie dough. I have tried a lot of them and they never turned out correct. I too haven’t made cut out cookies in YEARS because it was always a hassle . Since finding your recipe i will make them more often. Giving them as gifts this year to friends. Thanks again.
Hi Brandie! My daughter and I just prepared the dough. Can it be refrigerated for 20+ hours? I assume that will be okay. Hope so!
Thank you for sharing. I can’t wait to decorate w my littles!
Hi Megan! It will be just fine! 🙂 Merry Christmas!
Thank you! Merry Christmas to you and yours!
Thank you for this recipe. It is the first time since I was a little girl that I successfully produced roll out cookies. I’m sorry I can’t give you a hug since this has made my kids, 19, 15 and 11 so happy.
Merry Christmas!
Your comment brought tears to my eyes! I love that you were able to make them for your babies and they turned out good!
I have always been intimidated by sugar cookies, but these were great! They turned out just slightly cakey, and crisp on the bottom, just how I was hoping. I did cook them a minute or two longer than the recipe states. And use PLENTY of flour on your surface, as the dough can be a little sticky!
Looking forward to trying this recipe and leaving some for Santa. Is the butter or shortening at room temp or cold? Thanks.
Hi Cris! Good question. The shortening is at room temperature. Hope that helps!
I have tried – and failed – on all sugar cookies. I decided to try one last time!! Success!! Thank you for such detailed good instructions. Mine didn’t look quite as ‘professional’ as yours but I’m hopeful after a few tried I can do it. I see the trick in icing them is to not go to the end of the cookie!! Duh!! Thanks so much!
Yahoo!!! Love hearing that SO much Donna! You are so sweet to take the time to let me know! Merry Christmas!
Just wanted to tell you, we just made these with our annual Christmas cookies making and these cookies are so good. Kids loved decorating and they taste amazing. Thank you for the recipe
Oh Theresa – thank you for taking the time to say that! I am honored you would choose this recipe to enjoy with your family!
Do you freeze with or without frosting?
I am 42 years old and grew up with a similar cookie cut-out recipe, and the icing recipe. I have carried on the tradition of making these cookies with my own children and now grand babies. The only big difference is for the cookies instead of using vanilla I use lemon extract. They are always a hit and a fun family traditional recipe.
Hello, and thanks for this GREAT recipe! Just wondering…how long can the dough be refridgerated, and can it be frozen?
What a sweet post! Love this great idea…love seeing all those smiling faces in your cookie exchange, and your little man's as he helped you create some gorgeous cookies. Way to go Brandie!
Love You Brandie! Thanks for inviting me to be a part of this for such a great cause 🙂
And everyone in my household loved your sugar cookies..they didn't even make it to the next day lol.
How fetive, colorful and cute!
Grammy – thank you for catching that. I had it in the ingredient list but didn't mention it in the directions. Sorry for any confusion!
What a great post and a great cause. Amanda
You forgot to add the eggs!
Brooks – thank you so very much! What a wonderfully sweet comment that makes my heart sing!
You rock, Brandie! Not only do you write from the heart, but you cook with love and always give back. And what a handsome sous chef you have too, helping out on those delectable looking cookies. Blessings and good tidings to you & yours my friend.